Showing posts with label dessert. Show all posts

Tuesday, December 13, 2011

Browned Butter Pumpkin Bundt Cake with Spiced Bourbon Pumpkin Glaze


Because everyone else is doing it. That's an acceptable reason to do something, right? All the predictions of what 2012 will bring got me thinking. It always does. I’m always wrong. Let’s move on.

Julie’s Grand Food Trend Predictions of 2012!
[Let’s be honest, this list is grand as in lofty. My lofty notions of what I wish 2012 would bring. One can dream, right?]

  • First off, I just need to say that macarons are not a new trend. They’re an old trend. They are not the new cupcake. Cupcakes are not out. Both are delicious, infinitely adaptable to many flavors, and portable - and thus will remain around until people decide they hate sugar. Cakepops, pies, donuts, and any obscure French pastry may join alongside them, but they will not replace them.
  • Already trendy vegetables will find new ways of staying on peoples' plates. Kale chips and roasted Brussels sprouts are so 2011. They’ve officially been introduced to the masses. Now that the initial shock has passed that these past-maligned veggies are as tasty as they are nutrient-dense, we’re ready for new ways to eat them. Less approachable ways. Like raw! Massaged kale salads and shredded sprouts slaws I’m looking forward to seeing you on a restaurant menu or two! One can dream...
  • Quick pickles. 2011 was the year of savory canning. We discovered we could mass-produce not only blackberry jams and dill pickles, but also our own tomato sauces, and pickles of the non-cucumber variety. And kimchi? That was a craze all its own. While acidic, fermented foods are fabulous in their funkiness, who has time for all that? Tossing crunchy raw veggies with a quick salt/vinegar/sugar solution produces quick and refreshing results to liven up richer dishes.

  • Approachable game. Game meats are nothing new, but I’ve traditionally seen them at nicer restaurants, setting their menu apart by offering something beyond just the same ol’ proteins. I’m all about fine dining on squab leg and venison loin, but I think we’ll see more rabbit burgers and wild boar meatloaf - more casual restaurants using game to reinvent the classics. Because, inextricably, the classics are always boring and need reinvention yet we are unwilling to let them stray too far from our forks.

  • Exotic spices are no longer very exotic. You know smoked paprika has arrived when you can buy it in the big bulk container at Costco. And that’s a great thing because smoked paprika makes a lot of dishes more yummy, and I go through it, well, in Costco quantities! Finding cardamom used to be such a treasure hunt, I would covet the lone jar I was able to locate, only breaking it out for the most appropriate of flavor pairings. Now each spice company not only sells garam masala right alongside the curry powder, but I’m thinking we’ll see ras el hanout and zaatar in the near future as well.
  • Food trucks and craft breweries are reaching critical mass, a girl can only get ripped off eat and drink so much, but they are another trend that’s not going anywhere. I foresee the not as well executed places falling on hard times while the real gems will be just fine. After all, both of these trended so hard in the first place because of crazy internet buzz. People will still buzz about the places that are worth while. And yes, sour beers are the new IPA. Glad I’ve finally started developing a taste for them.
  • I have no idea what the next diet fad will be, but vegan and gluten free have proven to be such a profitable marketing scheme for food companies, I’m sure something will pop up. Perhaps something as simple as sugar-free? Sugar is the latest evil, after all. But I just don’t see that happening. It’s also an addiction. While I might disagree, the world at large would argue that eggs (runny eggs!) are not habit forming. Nor is sourdough bread. Supposedly. If I had my way, the next fad would be “reasonably sweet”. I’m all for sugar, just not in the ridiculous quantities we use currently.


That’s it! My wishlist for 2012. Can we get on this, people? Take to the interwebs! #hashtag things! If we can get runny yolks on rabbit burgers at Applebee’s by September, I’ll learn to brew killer beer at home and give you all a bottle. Promise.


This whole exercise was really just to distract from the fact that I’m posting a recipe with nothing more than this grainy Instagram picture a couple of shoddy pics I shot on my iPhone. The holidays have really thrown me for a loop and come 8pm on a Tuesday night I am decidedly unwilling to break out the fancy camera to get the money shots while I drool all over the floor in anticipation of stuffing my face with the confection in question. Sorry.

The confection in question contains really amazing things that will make you drool everywhere too. Browned butter. It’s very 2011. It makes things buttery (obbbbviously), with a nuttier flavor. You know how I love the nutty flavor. … Please resist the dirty joke I just opened myself up for. We have cake to talk about. Pumpkin cake. Oh yes.  We’re not over the pumpkin yet are we? Good. Because it’s delicious. I know come December 1st, every fiber of my being screams for gingerbread flavored anything. But this cake is very heavy on the spice. Including ginger. Not pepper though. Good in gingerbread, but cardamom is best when it comes to pumpkin. And of course it has bourbon. The smokey flavor goes swimmingly with the browned butter. Bourbon, browned butter, and pumpkin. In a cake. You can forgive the picture now, right?

And let’s not forget the glaze. I love glaze on a bundt cake. The way it oozes over the cake when you first mix it. Watching it harden into a shiny shell, like it’s protecting something precious. Because it is protecting something precious. Unless you mixed up the salt and sugar. Then it's not so precious anymore. Then there's the panic that sets in when it slides right off the cake because you didn’t thicken it enough, as you hurry to scoop it up and re-pour it so you can get adequate glaze coverage. Oh yeah, that’s another reason I didn’t take any beauty shots. Thicken it right, people. You won’t want any paltry coating of this glaze. I used the remaining few tablespoons of the canned pumpkin puree in the glaze to boost the pumpkin oomph. And of course more bourbon. Oomph indeed! With the maple syrup and spices, I wanted to eat just a bowl of glaze. I might have licked a scoop or two off my finger, but you'll never know for sure.

So here’s to pumpkin, a food that will always be trendy. And delicious.  And remember to always brown your butter.


Please resist the dirty joke I just opened myself up for, and instead tell me what you'd like to see hit it big in 2012.


Browned Butter Pumpkin Bundt Cake with Spiced Bourbon Pumpkin Glaze

Cake adapted from Sprinkle Bakes

For the cake:
6 oz. (¾ cup) unsalted butter
8.5 oz. (2 cups) AP flour
1 ½ tsp baking soda
2 tsp ground cinnamon
2 tsp ground ginger
1 tsp ground nutmeg
½ tsp ground cloves
¼ tsp ground cardamom
1 tsp salt
7 oz. (1 cup) granulated sugar
7.5 oz. (1 cup) firmly packed brown sugar
1 ½ cups pumpkin puree
3 large eggs, room temperature
½ cup Greek yogurt, room temperature
3 TB bourbon
1 tsp vanilla extract

For the glaze:
2 cups powdered sugar
1 TB bourbon
1 TB maple syrup
2 TB pumpkin puree
½ tsp cinnamon
½ tsp ground ginger
½ tsp nutmeg (optional)
pinch of fine sea salt
1-2 TB milk, if needed


For the cake:
  1. Preheat oven to 350 degrees. Spray a bundt pan with baking spray.
  2. Melt the butter in a small saucepan over medium heat. Cook until the butter turns a rich, golden brown, swirling or stirring often so it doesn’t burn. Keep a watchful eye. It goes from brown to black very quickly. Pour the browned butter into a small bowl and let it stand until cool but not solidified.
  3. In a medium bowl, whisk the flour, baking soda, cinnamon, ginger, nutmeg, cloves, cardamom, and salt. Set aside.
  4. In a large bowl, whisk together the pumpkin puree, granulated sugar, brown sugar, eggs, Greek yogurt, vanilla, and bourbon until well combined. Whisk in the browned butter until it’s well blended. Stir in the flour mixture and mix until it is just combined.
  5. Pour the batter into the prepared bundt pan and bake for 45-55 minutes, until a toothpick inserted in the middle comes out clean. Allow it to rest for 10 minutes, then remove it from the pan and cool it completely on a cooling rack.

For the glaze:
  1. In a small bowl, whisk together the powdered sugar, bourbon, maple syrup, and pumpkin puree, until the mixture is smooth and there are no lumps. Add the spices and salt and whisk to combine. Add the milk (if needed), a small amount at a time, until the glaze is thin enough to pour and drip, but thick enough to stay mostly on the cake. Glaze too thin will pour right off the cake. If it’s too thin, add more powdered sugar until your desired consistency is reached.
  2. Drizzle the glaze over the completely cooled cake. Give it a few minutes to set up, then slice and enjoy.

Sunday, October 16, 2011

Halloween Trifle


I’m going to drop some embarrassingly honest Julie history on you.

A few years ago I ate out pretty much every meal except breakfast. My gourmet kitchen offerings back then? Something along the lines of 2 cans of chili dumped in a bowl with a package of shredded cheese, sour cream, and a jar of salsa, microwaved until melty and disgusting and enjoyed with a giant bag of blue corn chips. No joke. We called it nachos and boy was it ever delicious. Generally, we were happier to pay someone else to prep our plates, so we’d stop at Rubios or Panera. I’d order something one might consider on the healthy side - by comparison to some of their other offerings - a burrito bowl, or a cup of soup and half sandwich. But let’s be honest, I couldn’t say no to just one fish taco on the side, or a stop at Maggie Moos next door for ice cream.

I never exercised with any regularity. I couldn’t run for 5 minutes, let alone a mile. Even the sensation of my heart rate in the proper cardio zone had me asking my doctor if I had exercise induced asthma. Oh, you mean it’s supposed to feel like I’m gonna keel over and die? Ick! There were bouts of motivation where Husband and I would trek out to the gym for a couple of hours - once or twice a month at our best - and eke out some semblance of a workout. But wouldn’t you know it, I only ever put on pounds. Maybe it’s because we’d always stop at Jamba Juice on the way home from those workouts?

I admit, I was a victim of the Chili’s quesadilla explosion salad - the one that famously caught flack when they started posting the nutritional stats on their website. The “healthy option” many of us were outraged to learn actually had 1200 calories. But let’s not blame Chili's for my dissatisfaction with the scale. The choice of where to eat and what to order was all mine. In the end, my seemingly good habits were bad habits, and my bad habits were downright disgustingly awful habits. No wonder every shopping spree had me wondering why the clothes kept getting smaller and smaller!

So what changed? Looking back, everything. But not all at once. I didn’t wake up one day and say to myself "From this day forward I will change all my habits." Heck no! When did it change? I can’t even pinpoint how long it’s been since I lost that first pound. It was so gradual and non-purposeful. Has it really been almost 3 years?  I started reading a food blog or two. I tried a recipe here and there to pretty good success. I started going for walks, and playing around on that new-fangled Wii Fit. I did things that required a small, doable change. And when I got comfortable with that routine, I did a little more.  Can you believe just being a little more mindful of the choices I made and being a little more realistic about what those choices meant would get noticeable results?  How noticeable?  Well, I lost that first pound.  The hardest pound of my life.

I’ve been seeing a lot of posts by food bloggers I follow talking about their struggles with balancing food obsession and a healthy lifestyle. It really got me thinking about my own weight loss journey, and looking back, my food obsession and weight loss developed hand in hand. Go figure.


Now that I eat salads heavy on vegetables and light on dressing (and no cheese quesadillas on top), I can work in a little dessert without totally undoing my day. Like cookies. And mousse. And curd. All together in a trifle. I had never made a trifle. I would even go so far as to say I didn’t think I was much of a trifle person. But I take it back! Trifles are as awesome as the delicious components that are their makeup.

This trifle came about so very randomly. I got a bag of oranges four CSA shipments in a row. I was overwhelmed with oranges! But I didn’t want to just juice them. I wanted to really use their orange essence in something that would showcase their awesomeness. Because oranges are awesome. Sweet. Acidic. So I decided to make a curd. Despite the unfortunate name, curds are delicious. They’re bright and tart; sweet and creamy. But generally not something to enjoy alone. They’re a great accompaniment. 


Accompany what? Chocolate, of course! I originally considered pudding, but Husband requested chocolate mousse. Good call. So glad I listened. The light as a cloud, bittersweet mousse contrasted so nicely with the heavier, creamier sweet yet tart curd.  And this curd was all about the orange essence.  I didn't just use orange juice, you see.  I reduced it first. So I could get as much orange flavor out of those babies as possible!  And if you have to ask if I boozed it up, do you even know what blog you’re reading? I opted for Grand Marnier in the chocolate mousse to compliment the orange curd, and bourbon in the orange curd because I love the dimension the smokiness adds.

The flavors together were wonderfully indulgent, and the layers of orange and deep brown made me think instantly of Halloween. But I wanted a crunch element for texture, and what’s a Halloween treat without pumpkin? I love pumpkin! It pairs great with chocolate and orange. So I made the crunchiest cookie I could think of: biscotti! Pumpkin biscotti to be exact. It’s crunchy yet slightly crumbly texture was perfect for crumbling in between the chocolate mousse and orange curd layers, or leaving whole and dunking.

Who needs chili reminiscent of dog food in nachos when you can have this?  Definitely a small change for the better.

Any personal Halloween confections being made in your house this year that are strictly for personal, non-treat-or-treater enjoyment? 

  
Halloween Trifle

Makes ~8 individual trifles, depending on your container, or 1 big one

4 cups chocolate mousse (recipe below)
3 cups orange curd (recipe below)
8-10 pumpkin biscotti (recipe below)
  1. In a 4-6 oz. glass container (like a glass mug or jar), spoon in a layer of chocolate mousse, about 2 TB. Add a layer of orange curd, a little shy of 2 TB. If you want the biscotti crumbled directly into the trifle, crumble about ¼ of the cookie over the orange curd. Continue layering until you reach the top of your container, ending with a chocolate mousse layer. 
  2. Repeat for as many containers as you would like to prepare.
  3. Alternatively, if you are doing one big trifle, just follow the same procedure, but increase the quantities until you have an inch or so for each layer (or however you prefer it!). 

Chocolate Mousse

Adapted from David Lebovitz

Makes 6-8 servings

6 ounces bittersweet chocolate, chopped (I used 70%)
6 ounces unsalted butter, cut into small pieces
¼ cup dark-brewed coffee
¼ tsp of sea salt
4 large eggs, separated
⅔ cup, plus 1 TB sugar
2 TB Grand Marnier (or bourbon)
1 TB water
½ tsp vanilla extract
  1. In a bowl set over a pot of gently simmering water, melt together the chocolate, butter, coffee, and salt, stirring frequently. Once smooth, remove it from the heat to cool down.
  2. Fill a large bowl with ice water and set aside.
  3. In another bowl set over the pot of gently simmering water, whisk the egg yolks with the ⅔ cup of sugar, liquor, and water for about 3 minutes until the mixture is light and thick, like runny mayonnaise. Whisk constantly so the yolks don’t curdle. 
  4. Set the bowl with the egg yolk mixture in the bowl of ice water and beat until cool and thick (it will make thick ribbons when you bring your whisk out of the bowl). Then fold the chocolate mixture into the egg yolks. It might look broken at first, but just keep mixing, and it’ll smooth out.
  5. In the bowl of a stand mixer (or by hand if you have the stamina), beat the egg whites with the salt on medium-high speed until frothy. Continue to beat until they start to hold their shape. Whip in the tablespoon of sugar and continue to beat until thick and shiny, but not completely stiff (don’t over-beat!), then add the vanilla and mix on low to combine.
  6. Fold one-third of the beaten egg whites into the chocolate mixture to lighten it, then in two increments, fold in the remainder of the whites just until incorporated, but don’t overdo it or the mousse will lose volume. It’s ok to have a few white streaks.
  7. Transfer the mousse to a serving bowl and refrigerate for at least 4 hours, until firm.

Orange Curd

Adapted from Ina Garten

Makes about 3 cups

4 oranges, at room temperature
¾ - 1 cup freshly squeezed orange juice (from the 4 oranges above)
1 ½ cups sugar
½ cup (1 stick) unsalted butter, at room temperature
4 large eggs, at room temperature
1 large egg yolk, at room temperature
¼ cup bourbon (or Grand Marnier)
⅛ tsp sea salt
  1. In a small saucepan, bring the orange juice to a rapid simmer and reduce until you have ½ cup of liquid. Set aside to cool.
  2. Remove the zest from the oranges with a vegetable peeler or zester, no pith please. Put the zest in the bowl of a food processor. Add the sugar and pulse until the zest is very finely minced and evenly distributed among the sugar. 
  3. Cream the butter in the bowl of an electric mixer fitted with a paddle attachment. Add the sugar/orange zest mixture and beat on medium speed until it is light and fluffy, a few minutes. Add the eggs and egg yolk, one at a time, then add the reduced orange juice, liquor, and salt. Mix until combined.
  4. Place a mesh strainer over a medium bowl and set aside. Pour the mixture into a medium saucepan and cook over low heat stirring constantly for about 10 minutes, until it is thickened enough to coat the back of a spoon (~175 degrees if you have a candy thermometer). Be careful not to overcook, or it will curdle. Remove the mixture from the heat and pour it through the strainer set over the bowl. Refrigerate the curd until fully cooled, a few hours. It will thicken further as it cools.

Pumpkin Biscotti

adapted from Simply Recipes

Makes about fifteen cookies

1 ½ cups of flour
1 cup whole wheat flour
1 cup of sugar
1 tsp baking powder
1 tsp cinnamon
½ tsp nutmeg
¼ tsp ginger
¼ tsp cloves
¼ tsp kosher salt
2 eggs
½ cup of pumpkin purée
1 TB bourbon
1 tsp vanilla extract
  1. Preheat the oven to 350 degrees. In a large bowl, sift together the flour, salt, sugar, baking powder, and spices.
  2. In another bowl, whisk together the eggs, pumpkin purée, bourbon, and vanilla extract. Pour the pumpkin mixture into the flour mixture. Give it a rough stir to incorporate the ingredients.  The dough will be crumbly.
  3. Flour your hands and a clean kitchen surface and lightly knead the dough until it is uniformly mixed. It will be a little on the sticky side. On a baking sheet lined with parchment paper, form the dough into a large log, about 1 inch tall and 15 inches long. Bake for 22-28 minutes, until the center is firm to the touch. 
  4. Reduce the oven temperature to 300 degrees. Let the biscotti cool for 15 minutes and then, using a serrated knife cut into pieces about an inch wide. Lay the cookies flat on the baking sheet and bake for another 15-20 minutes. Let them cool completely.

Sunday, July 10, 2011

Mint Chocolate Chunk Ice Cream


If you can believe it, I was never a big fan of mint. When I was a kid I hated anything with the slightest hint of mint. Believe it. You can see where I’m going with this...

It blows my mind how many foods I didn’t like as a child, considering how much I now profess my undying love for them. Forbidden foods that wouldn’t make it past my picky trap as a kid?

Meat (except the ground up, super processed, exceedingly disgusting kind)
Poultry (absolutely none of it)
Fish (except tuna, canned of course)
Avocado (because my sister didn’t like guacamole and I idolized her)
Eggplant
Polenta
Pine nuts
Caraway seeds
Bok Choy
Mint-flavored anything

Those are the stand-outs. I’m sure given inputs from my family, that list would double. Now? Avocado is my fatty fatty fat fat of choice in any application I can squeeze it into. There’s no animal, bird, and swimming creature I can think of that I wouldn’t try and most likely enjoy (except the taboo ones like dolphin!). I love it all. And life is so much easier when you’re a good eater. I am no longer the soup and salad cheap date my best friend’s mom said I was when I was 14. That’s a lie, I totally am. Good soup and salad is the ultimate. Course, nowadays salads aren’t the cheap date entree they used to be. Don’t even get me started.

Am I totally weird in my taste bud 180? Are there foods you hated as a child, genuinely gave a second chance to as an adult, and to this day cannot stand? Odd psychological circumstances not withstanding. I’m curious only because I can’t relate! I know my sister now crushes on guacamole as hard as I do. Husband never had a food he wouldn’t eat growing up. His parents were lucky.


Even though I now have nothing but love for mint, I wouldn’t say it’s high on my list for devoted enthusiasm. Though let’s face it, when it comes to food, I can still scrounge up a fair amount of enthusiasm even for the very bottom. I’ve come to realize it depends on the execution. While on my tour at the Theo Chocolate Factory, we got to try a rather pathetically small portion of a truffle. Husband chose mint. At first I was disappointed by his selection because I knew he’d want to share and have half of my fig & fennel truffle, and what’s so special about a mint truffle? And this is why I should always listen to Husband. My truffle was only just ok, but that mint? Amazing! It tasted like someone wrapped a square of soft chocolate in a mint leaf. In a good way. No mint extract or anything artificial. When we were trying to narrow down our purchases in the store (we started with one of every item sold in the store, and took things out of the basket from there...), we found a section of chocolate that was, well, basically like the remnants section of a fabric store. It was plastic bags full of the odds and ends of chocolate bars. Not pretty, not packaged, but cheaper and just as delicious. And they happened to be the mint flavor that day. Score!

You can see where I’m going with this.

This ice cream was born of a half-eaten bag of mint chocolate bar bits and 5 leftover egg yolks. Of course it was. It’s a chocolate ice cream base, because Husband doesn’t feel like he’s eaten dessert unless chocolate was overwhelmingly featured in every aspect involved. I don’t know why he even bothers. He should just eat a whole bar of chocolate every night. He’d probably complain it needed more chocolate. This is the guy who claims to love garlic, but aside from eating a straight clove, can never seem to taste it. But just chocolate wasn’t special enough for my special chocolate. I wanted to capture and bring out the mint essence. Without the fake stuff.

Pay no attention to that vanilla extract behind the curtain! Not everyone can afford vanilla beans!

Luckily, making mint chocolate ice cream is just as easy as making chocolate ice cream. There’s just the easy added step of steeping fresh mint leaves in the heavy cream while you warm it up. I actually ran out of time while attempting my ice cream base one evening after work, so my cream and mint actually got it on in the fridge, overnight. If you can swing it, the longer you can let them get to know each other, the mintier you end cream will be. But it really needn’t be a 3 day process. I’m confident a few minutes while it warms is plenty for those minty oils to work their devilish ways.

This ice cream turned out so good. So good. Like the kind of good where you take a minute to marvel that it actually came from your own two hands. I finally get mint chocolate. What all the rage is about. It’s the creamy, bittersweet taste from any good chocolate ice cream, plus this amazingly refreshing, fragrant essence of mint. It’s a natural pairing. Like chipotle and chocolate. I majorly heart that too. Essence.

I might be a bit obsessed with essences lately.

I was concerned the mint chocolate chunks from the leftover bars would get lost and wasted, but it was all for naught. Every bite with a chunk was that much mintier and more delicious. Definitely better than just eating it straight up. Would I make this ice cream with only regular chocolate chunks? Heck yes! The ice cream holds its own in the mint department, for sure. And regular chocolate chunks are still a nice textural contrast. Gotta have some crunch.

Give it a try! I hear it’s national ice cream month or something. Though I’m pretty sure every hot day of summer is national ice cream day, whether it falls in June or August. So says my ice cream maker. 

PS: Can we just not even talk about these pictures?  Ice cream food styling is just beyond me without a real ice cream scoop and cute clear vessel.  Pretty pics just ain't happening.


Mint Chocolate Chunk Ice Cream
Adapted from Annie’s Eats Chocolate Ice Cream Recipe

Makes ~ 1 ½ quarts

Ingredients:
2 cups heavy cream
¼ cup fresh mint leaves
3 TB Dutch-process cocoa powder
5 oz. bittersweet chocolate, finely chopped
1 cup whole milk
¾ cup sugar
Pinch of kosher salt
5 large egg yolks
½ tsp vanilla extract
2 TB bourbon
1 cup good chocolate bar (preferably mint flavored), chopped into chunks

Directions:
  1. Massage the mint leaves in your hands a bit to release the oils, and then combine them with the cream in a medium saucepan over medium-low heat. Let the mixture warm up and infuse for at least 20 minutes. I let it sit overnight for ultimate mint flavor.
  2. Pull out the mint leaves, and wring them out to get every drop of mint flavor in the cream. Increase the heat to medium-high, add the cocoa powder, and whisk until it is fully dissolved. Once the mixture comes up to a bare boil, reduce the heat back to medium-low and let simmer for 30 seconds, whisking constantly. Remove the pan from the heat, mix in the bittersweet chocolate and whisk until it is melted and smooth. Transfer this mixture to a medium mixing bowl, and set a fine mesh strainer over the top.
  3. In the same saucepan, combine the milk, sugar and salt and warm the mixture over medium heat. In a small mixing bowl, whisk together the egg yolks. When the milk mixture is warm (not quite to a boil), temper the eggs by very gradually whisking the milk mixture, a little at a time, into the egg yolks, beating constantly. Return the egg-milk mixture to the saucepan and continue heating over medium heat, stirring constantly and scraping the bottom and sides of the pan with a spatula, until the mixture is thick enough to coat the back of the spatula (or 170-175° F on a thermometer). Remove it from the heat, and pour the mixture through the strainer into the chocolate-cream mixture and stir to blend. Stir in the vanilla extract and bourbon.
  4. Cover with plastic wrap and chill overnight in the refrigerator. Once the mixture is well chilled, freeze in an ice cream maker according to the manufacturer’s instructions. Once churned, add in the mint chocolate pieces. Store in an airtight container and freeze.

Thursday, June 30, 2011

Chocolate Strawberry Ricotta Tart


I had a thought the other day - yep, just the one.  If I could go back in time and talk to my teenage self, what would I say?  We’ve all had this thought, right?  Though you probably have other thoughts to go with it.  High school.  Hormones.  Literal growing pains.  ‘Nuff said.

I would skip the clichéd advice: It gets better.  High school is something to be gotten through, everyone hates it.  All the things that seem epic today will be so small tomorrow.  Because really, we all did get that advice, one way or another, in high school, and it did squat to make it any better.  So nevermind that stuff.  Here’s what I would tell my younger self:

  1. Own it.  Whoever you are, whatever you do, own it.  When people say “be yourself”, they really mean, don’t be embarrassed by whatever “yourself” is.
  2. You are as apathetic as you are passionate.  Don’t feign apathy for the things you are passionate about.  Don’t feign passion for the things you are apathetic about.  People will just have to get over that you love Star Trek: TNG and listen to your parents’ Queen CDs, and you could give a rat’s furry tail about conch shell necklaces or Tupac.
  3. You’re tall.  Buying pants that fit is a pain in the rat’s furry tail, and all the cute boys are self-conscious about it.  Can’t say that ever gets better.  But it does mean you’ll end up with someone tall.  Go ahead and buy some heels.  People will just have to get over it.
  4. Learn to eat!  I don’t mean quantity.  You’ve got that down.  You say you don’t like meat, and a slew of other foods.  In reality you do.  Now it’s your turn to get over it. Open your mind.  And stop picking all the cashews out of the cashew chicken.  The family really hates that.
  5. Get your rat’s furry tail in the kitchen – and not to make grilled cheese or Stouffer’s mac and cheese!  Look, Mom works hard all day and then comes home to a house full of people whining for attention and wanting things, and still has to get dinner on the table in an hour or all the whining steers towards hunger pangs.  You, on the other hand, get home from school to an empty house with, let’s face it, no intention of starting homework so early.  You might not realize how much you enjoy cooking just yet, but for how much Mom would appreciate the salad already made, or a pasta sauce already done up, it’s not really about that.
  6. And finally, read more books and watch less television.  You’ll be so glad you did.

I’ve got you thinking now, haven’t I?  Let’s hear it.  What would you tell your teenage self?


What’s this got to do with ricotta cheese, strawberries, and tarts?  Nothing!  Though I could have been enjoying it in my life a lot sooner, had I listened to myself about number 5.  That will just have to do for a segue.  It’s my blog, and I can be random if I want to!  Now, onto the chocolate graham cracker ricotta strawberry tart!

A chocolate graham cracker ricotta strawberry tart to anyone who can say “chocolate graham cracker ricotta strawberry tart” 10 times, fast.

This creation came about by a need to use up soon-to-go-stale graham crackers (They should sell graham crackers in packs that are exactly enough for a tart or pie crust, so you don’t have to worry about how much you need to grind into crumbs, or whether you have enough left in the box.  I’m totally marketing that idea.  Don’t steal it, k?), ricotta cheese (because in a moment of utter stupidity I wasn’t sure if 32 oz. was enough for a recipe that called for 2 cups, so I bought 15 oz. more), and strawberries from my CSA box.  Because Husband would ultimately be eating it, I decided to incorporate chocolate as well.  Lots of it.  It just made sense.  I considered dotting the tart with fresh strawberries at the end, but a recent failed attempt at strawberry rhubarb pie left me with a need for cooked berry vindication.  Always drain your strawberry juices people!  Also, when you strain them into, say, a small saucepan and simmer them until they cook down into a lusciously sweet syrup, you’ve got the mighty fine makings of something to brush onto this tart at the end.  Yeah, I did that.  I shudder to waste one ounce of strawberry essence!

To break it down, the crust is graham crackers and pecans and cocoa powder.  Pecans because I ran out of graham crackers (which would not have happened, had the product I mentioned existed!), and also because they’re delicious.  Cocoa powder because I wanted the chocolate flavor to really come though, and also because it’s delicious.  I didn’t add sugar.  I thought the sweetness from the rest of the tart and the sugar already in the graham crackers was plenty, but there’s also a lot of cocoa powder in it, so I could see it being too much for some.  I recognize my sweet tooth, while very demanding, is also very susceptible to being overwhelmed.  Husband agreed the level of sweet was spot on, but a tablespoon of sugar could be thrown in without any harm.

The filling is my leftover 15 oz. container of ricotta cheese, the usual sweeteners and stabilizers, and melted chocolate.  Why is ricotta cheese and sugar so good?  I wonder if my sister, who hates the combination of cream cheese and sugar, also hates ricotta and sugar.  They’re totally different flavors, but maybe the dislike stems from disconcertion over mixing savory cheese with enough sugar to transform it to a decidedly dessert setting?  Creamy, salty, and sweet?  It’s a-ok in my book.  You’ll have leftover filling.  A fair amount.  It’s not ideal, but I didn’t want to mess with untested ratios, and it uses a standard 15 oz. container.  Not to mention, what are you going to do with just a little extra ricotta?  Instead you’ll face a bowl of delicious filling with no home besides your stomach as you try to resist just another spoonful while you wait for your tart to bake and your strawberry juices to reduce.  You’re welcome.

My strawberries were tiny, so I didn’t end up using the full 16 oz. package, but I’m confident more regular, American strawberries would yield the perfect amount.  The more strawberries, the better I say!  This tart takes forever to bake.  An hour?  What is in there that takes so long to become un-jiggly?  No idea.  Of course, checking the doneness at 40 minutes, and every 5 minutes thereafter probably extended the baking time a wee bit.  I was so afraid of over-baking!  It actually ended up taking an extra 10 minutes or so. But once it was done, and the syrup was brushed over the top, and it had cooled in the fridge…such good stuff.  The rich chocolate, earthy yet savory cheese filling, and texture from the crust all contrasted nicely.  The strawberries had a lusciously soft bite and sweet flavor, not to mention the syrup essence!  The whipped cream on top isn’t completely, necessary, per se, but I did try it both ways, and the airy, creamy element was a definite plus.  All in all, we both loved it and I wouldn’t change a thing. Oh, did I mention I infused a good amount of Grand Marnier in there? Yeah, I did that. It was tasty.

Except maybe how many spoonfuls of leftover filling I ate.


Have any tasty creations ever spawned out of your kitchen because of an abhorrence for wasted food?  Or a food fail?  Are they all the tastier for it?


Chocolate Strawberry Ricotta Tart

For the crust:
6 oz. graham crackers
2 oz. pecans
8 oz. (1 stick) butter, melted
1 tsp orange zest
¼ cup cocoa powder
2 TB sugar

For the strawberries:
1 lb. strawberries, halved and hulled
¼ cup sugar
2 TB Grand Marnier

For the filling:
15 oz. ricotta cheese (I used part skim), room temperature
½ cup honey
2 large eggs, room temperature
2 TB Grand Marnier
1 tsp orange zest
1 tsp vanilla extract
¼ tsp kosher salt
4 oz. bittersweet chocolate, melted*

  1. Preheat the oven to 350 degrees.
  2. In a food processor, pulse together the graham crackers and pecans until they are small crumbs.  Add the orange zest, cocoa, and sugar and pulse until it’s mixed.  Add the melted butter and process until the crumbs are coated.
  3. Prepare a 9” tart pan with baking spray.  Press the crumbs evenly around the bottom and sides of the tart pan.  Bake the crust for 10 minutes until it is toasted and set.  Let cool.
  4. In a large bowl, stir together the strawberries, sugar, and Grand Marnier.  Let it sit for about 20 minutes, or until the strawberry releases some of its juices.
  5. In the bowl of an electric mixer fitted with a whisk attachment, mix together the ricotta and honey until they are well incorporated.  Add the eggs, one at a time, mixing until they are incorporated.  Add the Grand Marnier, orange zest, vanilla, and salt, and mix to combine.  With the mixer running, slowly pour in the melted chocolate, and mix until everything is well combined.
  6. Pour the filling into the cooled crust.  Top the filling with the strawberry halves, reserving the juices left behind in the bowl.  The strawberries will sink a bit.**  
  7. Bake the tart for about an hour, or until the filling is set and a toothpick inserted in the middle comes out clean.  
  8. While the tart is baking, transfer the reserved strawberry juices to a small saucepan.  Over medium heat, bring the juices to a simmer and cook until it is reduced by about half, about 10 minutes.
  9. Once the tart is out of the oven, either brush or drizzle the strawberry syrup over the top.  Cool completely in the refrigerator for about 2 hours before serving.


*To melt the chocolate, microwave the chopped up chocolate, stirring every 15 seconds until it’s melted.

**If you prefer your strawberries less cooked, and more on the surface of the tart, put the tart in the oven without the strawberries on top.  After about 30 minutes, when the filling has set up a bit, remove the tart from the oven, set the strawberries on top of the filling, and put it back in the oven to cook for the rest of the time.

Friday, March 11, 2011

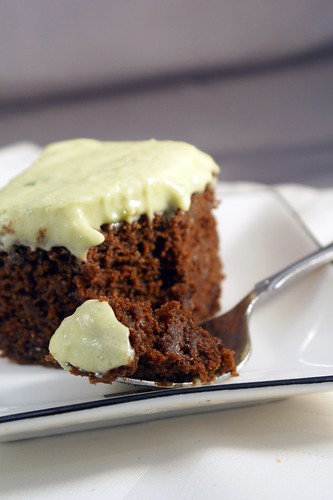
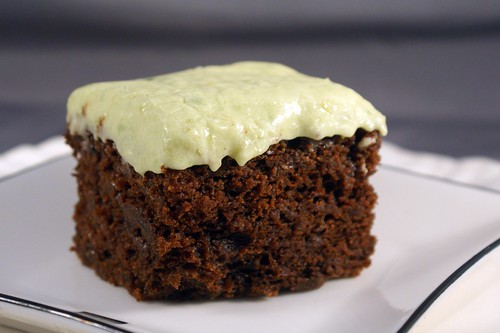
St. Patty's Day Cake


When reflecting back on my greatest culinary successes over the last couple of years, I think the most rewarding ones have been the experiments. The dishes that I went in with a harebrained, what-the-heck attitude, and came out with something to log in the favorites section of my recipe archive (i.e. this blog). It’s more satisfying knowing my creativity didn’t completely lead me astray. Know what I mean? I can still track the evolution of how this cake came to be. It was a quiet Saturday afternoon, and I wanted to bake. What? I had no idea. There were no recipes on the tip of my brain that were jumping out at me to bake them. I hunted around my go-to food blogs, printed some possibilities, and brought them to Husband for final approval. Aren’t husbands handy when you’re feeling indecisive? One of the recipes was a chocolate stout bundt cake with a chocolate glaze. Chocolate + booze + Husband = a must make. I was prepping the ingredients when I had a thought. Here’s the creative process in action, people. Check it out:


Me: Hey Babe, what do you think about baking this as a sheet cake instead of a bundt?

Husband: Umm…

Me: That way I could do a frosting with some Bailey’s instead of the chocolate glaze.

Husband: But I like chocolate…but a Bailey’s frosting sounds good too…Hmm…

Me: Oh! I know!!! I could try doing an avocado buttercream! With Bailey’s! And white chocolate!

Husband: Avocado? In the frosting?

Me: Yeah, it does the same thing as butter. Remember Alton Brown did it on an episode of Good Eats?


And with the mention of AB, as is usually the case, Husband was all confidence and trust. If Alton says it’s good, it’ll be good. Did I ever mention I have that show to thank for my Le Creuset dutch oven? Thanks for Kiwi, AB!

And that’s how this cake was born. A lazy day and a lack of dessert in the house. This was a few weeks ago. I’ve made it a total of three times already. We love it that much. I still have dreams about it.

The cake itself is a great recipe. Obviously, I never got around to trying the original recipe, but if a chocolate stout bundt with chocolate glaze is the order of the day, I’m sure this one would be a big winner. A rich, velvety stout goes with chocolate like bananas and bourbon. I was curious whether the quality of beer would make that much difference in the cake, so I used Guinness my first attempt. An admirable baking beer, to be sure, but I’m a bit of a craft beer snob these days (I do live in the city with the most craft breweries per capita, after all), and it’s an everyday beer, if yaknowhatImean. On a later attempt I used Husband’s all time favorite stout he is completely obsessed with at the moment. It wasn’t exactly a side-by-side comparison, since they were made several weeks apart, but I think the smoother, nuttier flavors of the higher quality stout definitely came through in the cake.

But if you’d like the excuse to bake this cake several times in succession (not that you need an excuse besides that it’s delicious enough to make several times in rapid succession), go ahead and forget I mentioned it. It is March, after all. Stouts are cheap!

My cake had a few extra additions from the original recipe. I wanted to up the St. Patty’s Day theme, so I threw in some whiskey…because why not, right? I also added come instant espresso powder and cayenne pepper, just to elevate the flavors a bit more. Supposedly coffee makes chocolate things taste more chocolaty – works for me! - and I also might have a spice addiction. But that’s another post. Sufficed to say, both those additions are completely optional, but as the cake turned out light as a cloud, moister than pudding, but still with all the flavor of a decadent chocolate cake, I’m going to go ahead and recommend them! The best compliment I can pay this cake is to say it wasn't just a vehicle for the frosting. As much as I loved the frosting, I found myself making sure each bite was the perfect ratio of frosting to cake.

Speaking of frosting. Since you’ve been good enough to read all this way, I should probably tell you a bit about avocado buttercream. It’s not a new concept, by any means, but it’s not exactly run of the mill either, is it? So regular buttercream frosting is really made up of two main components – powdered sugar and fat. That fat is usually butter, though I’ve seen it in combination in shortening too. The fat provides the creamy, melt in your mouth texture, and the powdered sugar provides the sweetness and stability. Everything else tweaks the flavor or texture, and it is pretty much optional. Avocados - poor, misunderstood avocados - are on many people’s naughty list because they are very high in fat. But fat is not fat, people! While shortening is grown in a lab with methods I don’t want to know about, and butter, while amazingly delicious, is made up of saturated animal fats, avocados are high in wonderful, plant-based monounsaturated fats. Now I’m not fooling myself into thinking this cake is good for me, but a healthy diet is as much about the minor choices we make in our day as the major ones, right? And if you don’t buy any of that, how about the fact that this St. Patty’s Day cake has green frosting, and I didn’t use a single drop of food coloring! Point for Mother Nature!

I know you’re wondering, so I will allay your fears posthaste. You can’t taste the avocado. You won’t believe there’s avocado even in it. Seriously. Would it be uncouth of me to say you won’t believe it’s not butter? Really, besides making the overall cake a slight iota healthier, and providing a natural and very appropriate greenish tint, the avocado doesn’t really factor in. You could definitely just replace the avocado with an equal amount of room temperature butter (just make sure you let the chocolate mixture cool first, so you don’t melt your butter). No worries. Hey, since there's no butter, I guess this would technically be an avocadocream frosting?  And a term was coined...

What makes this frosting delicious is a combination of white chocolate, Bailey’s Irish Cream, and a splash of whiskey for good measure. I don’t know what to say about it other than it is a sweet, smooth, ooey gooey frosting. I added the Bailey’s and whiskey to the white chocolate while it was melting because I was going more for flavor than a punch of alcohol. But don’t worry, it’s not shy. It still has creamy and ever so smoky flavor that warms you up from the inside out, and the white chocolate provides a nice counterbalance of sweetness that is more interesting than just straight sugar. A perfect pair to a chocolate stout cake.

Since it's just an unassuming sheet cake, it certainly isn't winning any beauty pageants. But that's part of its charm.  It will fit right in with your corned beef and cabbage.


Have I mentioned I’ve made this cake three times already? I wish I could say I gave most of it away. I gave some of it away. But most of it ended up in my tummy. Ok, mostly in Husband’s tummy. But you didn’t hear it from me.


Got any harebrained kitchen experiment fantabulous success stories of your own?


St. Patty’s Day Cake
aka: chocolate stout cake with white chocolate Irish cream avocadocream frosting

cake adapted from Smitten Kitchen

For the cake:
1 cup stout
1 cup (2 sticks) unsalted butter
⅓ cup whiskey
¾ cup unsweetened cocoa powder
1 TB instant espresso or coffee powder (optional)
2 cups AP flour
1 ½ tsp baking soda
1 tsp kosher salt
¼ tsp cayenne pepper (optional)
2 large eggs, at room temperature
⅔ cup sour cream, at room temperature
1 tsp vanilla

  1. Preheat the oven to 350 degrees and prepare a 9x13” baking dish with nonstick spray. In a medium saucepan over medium heat, bring the stout, butter, and whiskey to a simmer. Add the cocoa powder and instant espresso, if using, and whisk until it is fully incorporated and the mixture is smooth. Remove the pan from the heat and let it cool a bit. 
  2. In a medium bowl, whisk together the flour, baking soda, salt, and cayenne pepper, if using. In the bowl of a stand mixer fitted with a whisk attachment, beat the eggs and sour cream together on medium-low speed until they are well blended. Add the vanilla and blend. Add the stout mixture, making sure it is cool enough that it won’t hurt the eggs, and beat to combine. Add the flour mixture and mix on low speed until it is mostly incorporated, then use a spatula to fold any loose bits of flour into the batter. 
  3.  Pour the batter into the prepared baking dish, smooth it into an even layer, and bake for about 35 minutes, until a toothpick inserted in the middle comes out clean. Let it cool completely in the dish.

For the avocadocream:
1 cup white chocolate chips (or ~6oz. of a white chocolate bar, chopped)
¼ cup Bailey’s Irish Cream
1 TB whiskey
1 cup avocado flesh (~2 medium avocados), well mashed
1-2 TB fresh lemon juice
1 tsp vanilla
pinch of salt
2-3 cups powdered sugar

  1. In a double boiler (or a bowl sitting over a small saucepan of simmering water), melt the white chocolate. Add the Bailey’s and whiskey and stir to combine. Let it cook for a bit if you want the alcohol to burn off a bit, otherwise, remove it from the heat and set it aside to cool. 
  2. In a stand mixer fitted with a paddle attachment, beat the avocado on medium speed for a minute or so, until it’s smooth. Add 1TB of lemon juice, vanilla, and salt, and mix to combine. Add the cooled chocolate mixture, and mix until it is well combined. 
  3. Working ½ cup at a time, with the mixer on low speed, add the powdered sugar until a thickened, gloppy consistency is reached. Important note: the frosting will thicken more as the chocolate cools, so don’t worry if it’s not firming up like you expect. It’s more important to watch the level of sweetness from the sugar. Add the other TB of lemon juice to balance the flavor if desired. 
  4. Once the cake is cooled, spread the frosting over the top in an even layer, and enjoy!

Sunday, January 30, 2011

Chocolate Covered Peanut Butter Bourbon Balls


This week’s soap box ramble will focus on shopping, and is brought to you by the letter $. Because you have to buy your food before you can cook it, right?

Facing a drastically lower income 10 months ago, I was forced to reexamine my food spending. I admit, prior to my layoff, I was spoiled. I shopped primarily at Jimbo’s out of loyalty and hoping my weekly spending would do it’s part toward keeping the only Whole Foods-like store in my area open. I loved their local, organic produce, their fresh, organic meats, their wide array of whole grain dried goods, and their minimally processed packaged food selection. I also shopped for convenience, valuing my time saved by shopping at just one or two stores a week, rather than hunting down the deals at several stores to save a few bucks. When suddenly faced with an excess of time and a deficit of money, old habits went out the window and I took the opportunity to pick up some new smart-shopper skills. I figure I can pass on a few tips I picked up while tightening the belt - not just how I saved a buck, but how I turned that into an opportunity for eating healthier foods. But first I want to preface this list by saying the very first step is to evaluate the value of your time vs. the money you could save with thriftier shopping. Obviously, if you really take the time to research the price of each product and each store to compare, are willing to hit up five or six grocery stores as opposed to just one or two, and basically able to spend hours a week being the thriftiest shopper you could be, you could save what ends up being oodles of money! But if you’re, say, juggling being a mom, working full time, and a flourishing social life, you’re probably less inclined to care if your bath tissue is 10 cents cheaper at the store across town. There’s nothing wrong with either scenario. The right thing for you is the right thing. Either way, here are some things I picked up along my miserly way that I intend to remember, no matter my food budget situation:

  • Learn all of the grocers in your neighborhood, not just the big names, and decide at which stores you are willing to shop - In my neighborhood I have Ralph’s, Vons, Albertsons, Stater Bros, Barons, Jimbo’s, Fresh and Easy, Trader Joe’s, Sprouts, Henry’s, and Costco. That’s too many stores, even for me, so I decided Stater Bros and Barons I was just going to ignore because they don’t offer anything particularly different from the others. Fresh and Easy isn’t actually open yet, so I have yet to evaluate it. Jimbo’s is out of my price range. Costco is a separate beast I’ll get to later. I treat Ralph’s, Vons, and Albertsons as one store (The Megamart, I dub thee). So that leaves Trader Joe’s, Sprouts, and Henry’s as my main stores (Love them!). 
  • Stop throwing away those weekly ad circulars - I used to curse the grocery stores clogging up my mail box with ads. It was such a waste, since I would throw them directly into the recycling, and I often wished for a way to opt out of having them sent. But they have become the highlight of my Monday evening. Pathetic, but true. First I check Sprouts and Henry’s. They often have similar foods on sale, but always slightly different, or one store will be slightly cheaper than the other. So I make a list of which store is carrying sale items I’m interested in. I made the mistake of not making a list in the beginning and often overpaid because I would forget the cheap apples were at Henry’s while shopping at Sprouts. Then I check The Megamart ads and pick out any extra special deals, whether $.77/lb chicken thighs at Vons, or $2 off Peet’s coffee at Ralph’s, whichever store has the deals I’m interested most in, and that’s which one I end up patronizing that week. It sounds like a big time commitment, but I actually peruse the ads while watching tv after dinner. I’m just sitting around anyway, right? 
  • Be flexible with your menu - One of the reasons I never bothered checking the ads before was because I didn't much care what was on sale. I knew what I wanted to make, and I was going to make it, sale or no. Now I plan my weekly menu around the ads. I’ll often turn to Husband and say “Cauliflower, eggplant, and zucchini is on sale. I’m thinking a vegetable lasagna with a side of roasted cauliflower, does that sound tasty?” Or usually it goes more like, “Broccoli is on sale again, and I already did roasted broccoli 3 weeks in a row. I’m thinking I’ll make a white bean, broccoli, cheddar soup to spice things up.” I admit that I totally plan my meals around what produce is on sale. Hey, it works for me! If you were planning to do pulled pork and chicken is on super sale, maybe you could substitute. 
  • Meat is expensive - And by meat I mean meat, poultry, and seafood. Especially seafood. I nice fillet of salmon hasn't been in my budget for a long time. But even when it’s just a couple of pounds of chicken thighs or some cheap ground beef, meat easily ends up making up half of the total cost on the receipt. If environmental and health reasons weren't enough to practice a meat-lite lifestyle, cost definitely is. I’m not suggesting conversion to vegetarianism or replacing your burger patty with a tofurky substitute. You know me better than that! I’m merely suggesting buying less. Eating less. And learning how to incorporate meat as a flavor rather than the main event of the plate. Remember, it’s not the only form of protein out there. 
  • Produce is cheap - I can buy two overflowing bags of produce for under $20. How much would the equal amount of meat set you back? Hundreds? The trick is to buy what’s in season and buy what’s on sale, though that usually means the same thing. When a crop is in season, the stores get an overflow and they sell it cheap to get rid of it before it spoils. So in summer it’s zucchini and berries, in fall it’s squash and apples, in winter it’s cruciferous vegetables (i.e. broccoli and cauliflower), etc. Some produce always costs more - asparagus, winter greens, persimmons, eggplant. Some produce is always reasonably priced - celery, carrots, onions, bananas, potatoes. But even the “expensive stuff” still only sets you back a few bucks. 
  • The bulk bins are your friend - Don’t fear the bulk bins! Sure, you’re forced to come up with your own air-tight packaging when you get it home, but it’s called $.99 tupperware, and it’s your friend. Dried beans, split peas, lentils, rice, quinoa, millet, almonds, pecans, peanuts, etc. These items are great because, aside from the nuts, which tend to be pricier (but worth it because you don’t typically use more than a cup or so at a time at most), they are dirt cheap and amazingly healthy. You can buy a pound of dried black beans for about a buck. That’s the equivalent of I don’t even know how many cans once they’re cooked. A ton! The trade-off is the time you take into account for soaking and cooking the beans (neither activity requires much active participation from you, it’s more a planning issue). Lentils and quinoa are two bulk bin items I’m never without because they are so fantastic in every way. They are high in protein and fiber, give you the satisfaction you get from eating carbs, but are still low in the glycemic index. They are very budget-friendly, cook up in about 20 minutes, and are very versatile for a number of varying applications. Win, win, win! My Megamart, tragically, doesn’t have bulk bins worth acknowledging, so that’s another reason to scope out the alternative markets in your area, if need be. 
  • Packaged foods often make you pay more for less - There’s two main points here. First, the more hands your food passes through before it gets to you, the less fresh it’s going to be, the more stuff they’re going to add to it to keep it a viable product, the more you have to pay to recoup those costs. You’re not only paying more, but you’re also eating all the preservatives and additives they add to the food to keep it shelf-worthy for all those years. Second, all the pretty packaging itself boosts the cost. That little 2 serving box of cous cous or quinoa is probably something you could get in the bulk bin for a fraction of the cost. 
  • Find the ethnic markets - Once every 2-3 months I have a list saved up of all the ingredients I need to stock up on at my local Asian market. It usually has some combination of soy sauce, rice wine, chili oil, sesame oil, seaweed, green tea, and brown rice. I can buy every one of those items at The Megamart, but for several times the cost, and without the option of selection. The soy sauce aisle at the Asian market? Dizzying. I still have it on my to-do list to find an Indian market in the hopes they have a vast and reasonably priced spice section. Sure, it’s a special trip where you’ll only pick up a few items, but that’s why you go just every once in a while. Treat it like a special occasion. 
  • Join Costco - You might say you don’t need a Costco membership, you’re fine without a 5lb jar or mayonnaise. I would agree, but there is a lot more to Costco than that nowadays. When it comes to certain items, pricing at Costco just can’t be beat. A bag of fresh frozen 4oz. mahi mahi fillets for $4.99/lb - pre-portioned, convenient, and actually very delicious! I go through vanilla extract like crazy, so the huge bottle is actually totally worth it, and it’s such a deal. It’s a great place to buy pantry staples - hot sauce, green chiles, tuna, diced tomatoes, tomato paste. Sure, you’ll take awhile to go through them, but it’s canned, it’ll keep. Their prices on dairy and meats is great, though you have to evaluate your consumption needs. I can’t drink 2 gallons of milk before it spoils, so I don’t bother. But I’ll pick up a whole pork loin, portion it into 1-2lb portions when I get it home, and freeze them for easy use later. And if you’re a booze hound like my, their prices on beer, wine, and hard liquor, if you can find what you want, can’t be beat. You might even be able to share your membership. When I joined in college they let Husband (who was then merely Boyfriend) join my account, even though we weren’t related or married, so we were able to split the cost of the membership. One section to stay away from, however, is the produce section. Their prices can be confusing because they post prices by the package, but if you look in the corner of the price tag you’ll see the price per pound, and it’s generally higher than even The Megamart. And since the quality of their produce tends to be more miss than hit for me, why pay more for it? 

I could go on, but I’m sure this glimpse into the inner-workings of my miserly mind is about as much as any person can take in one sitting. Basically, I try to stay on a varied and healthy diet, spending as little as I can. Husband often commends my efforts, saying he wouldn’t even know we’re on such a tight food budget because I keep him so well fed. It’s not without effort, but I consider it well worth it.


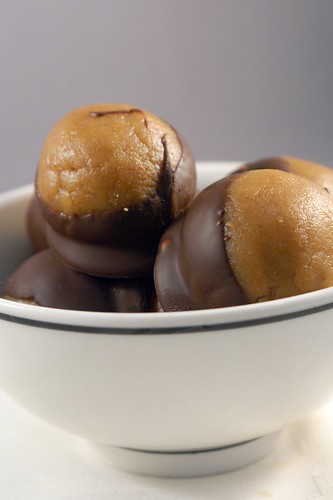
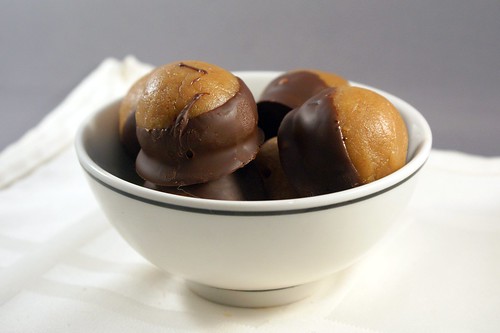
Now that we’ve shopped, let’s eat! These little bundles of joy combine three of my favorite flavors - chocolate, peanut butter, and bourbon. Each flavor really stands outs and brings its own personality to the party. The dark chocolate shell gives you that hit of rich cocoa right off the bat, and the bit of crunch is the perfect contrast to the soft, boozy, peanut buttery goodness in the middle. Oh the middle... I don’t know how to describe it, except to say that I really love the balance of ingredients. The cream cheese and graham crackers make it creamy yet substantive. I love the sweet yet salty compliment from the sugar, salt, and peanut butter. And the bourbon rounds everything out nicely, as bourbon always does. It really tastes like you’re eating a bourbon ball, but the peanut butter by no means plays second fiddle. It’s everything that makes Reese’s Peanut Butter Cups so great, but a thousand times tastier. No joke. The first time I made these was Halloween weekend - the one time of year Husband gets to eat his favorite store-bought candy. He actually jokingly chided me for ruining the moment for him, since compared to these peanut butter balls, the Reese’s just didn’t measure up. Sorry Husband. Next year I will steer clear of making these, so you can enjoy your Reese’s in peace.

Something tells me that’s not going to fly...

These make a great party dessert. Like, say, your Superbowl party next weekend. For instance. You can make them in advance, and they’ll even do better with a night in the fridge, where the flavors can introduce themselves to each other. They are easy to serve, whether plopped onto a plate or heaped in a bowl. They are finger-friendly, no utensils or plates needed, and I guarantee your friends will not be able to eat just one, so I doubt you’ll be dealing with leftovers. Plus, what is a better way to nosh during the second half than with chocolate, peanut butter, and bourbon?

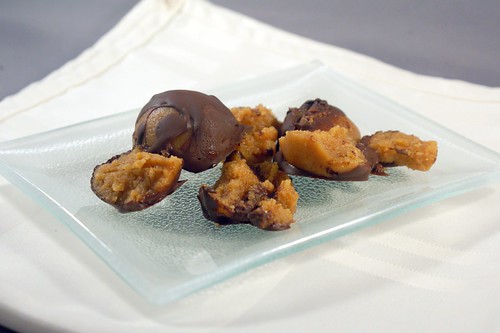
These balls come together wonderfully fast and easy right up until it’s time to coat them in chocolate. I won’t lie, that part was tricky. A total pain in the butt, even. There were casualties. Some balls just weren’t destined to make it through the molten swamp of chocolate to reach their resting place of my tupperware container. Where some balls managed to keep it together, others were made of lesser stuff and fell apart. My heart went out to them. But worry not, it doesn’t mean the balls you will inevitably lose will be ruined. I called those little mishaps “happy accidents” and promptly ate them before Husband could see what a failure I was. The things I eat do for ego’s-sake! It does mean that if you plan on a specific number, you’ll definitely want to make some extra. The first few will be the baker’s treat, and once you get the hang of it, you’ll be fine.

Happy Accident!

Besides my structural issues, I also struggled with what to call these. I couldn’t exactly walk around asking people if they wanted to try my balls, now could I? Chocolate covered pb bourbon balls is what they are. It’s descriptive. But it’s also cumbersome! See how I was too lazy to spell out peanut butter? The recipe I adapted these from were called buckeyes because they are reminiscent of the nuts that grow on the buckeye tree. Since I’m not familiar with buckeyes, and since I think that’s kind of lame, and since these have bourbon, and thus are way better, I think they deserve their own distinction. But they do kind of look like eyes, especially if you aim your skewer right through the center.

Chocolate covered peanut butter bourbon balls, you shall henceforth be known as Bourbon Blinders.

Is that stupid? It’s a little stupid. But don’t hate on my Blinders until you’ve tried one. Because then you won’t care what I call it, as long as you get to eat it. Mwhaha!

Are you planning any fun finger foods for the Superbowl next weekend? Have a better suggestion for what to call my balls? Any thrifty shopping tips my list is lacking? Send it all my way!


PS: I feel comfortable asking you to name my balls, knowing that I have just the edible kind at my disposal. Otherwise, I might be opening myself up for teasing. Thank goodness that’s not the case.

Bourbon Blinders
AKA: Chocolate Covered Peanut Butter Bourbon Balls
Adapted from Smitten Kitchen

makes about 2 dozen

1 oz. cream cheese (I used neufatel or lowfat), at room temperature
¾ cup smooth peanut butter
½ cup graham cracker crumbs
¼ tsp sea salt (or substitute kosher salt)
1 ½ cups powdered sugar
4 TB unsalted butter, melted
3 TB bourbon
1 tsp vanilla
8 oz. dark chocolate, chopped (I used 72% chocolate chips)

  1. In a stand mixer fitted with a paddle attachment, beat the cream cheese and peanut butter until they are well combined. Add the graham crackers and mix until combined. Add the butter, sugar, salt, bourbon, and vanilla and mix on low speed until the sugar is incorporated, then increase the speed to medium and mix until the mixture is uniform. 
  2. Line a sheet pan with parchment paper. Using a tablespoon or a 1TB scoop, shape the dough into balls and place them on the sheet pan, leaving enough space that they are not touching. Make sure you use some pressure to make them as dense as possible to avoid fall-aparts later. Place the sheet pan in the freezer for about 15 minutes so the balls will firm up. 
  3. Melt the chocolate in a double boiler. Using a toothpick or thin skewer (the thinner, the better), spear a ball and dip it in the chocolate, rolling it around so it is well coated, and place it back on the parchment. My method was inserting the toothpick into the side of the ball, dunking it in the chocolate at about a 45 degree angle, and swirling it one rotation, all the way around. The more quickly you work, the less time the ball will have to fall apart in the molten chocolate. 
  4. Repeat with the remaining balls, then chill them in the refrigerator to set up, about 30 minutes.