Showing posts with label vegetarian. Show all posts

Wednesday, February 15, 2012

Crave-ably Healthy Veggie Wrap


Healthy eating (and on the flip side unhealthy eating) seems to ebb and flow. It can be affected by the season, the weather, and especially holidays. December was cookies and prime rib and champagne. January was green smoothies and citrus salads and new gym memberships. Now it’s February and the juice cleanses are over. Wings were consumed. Red velvet is everywhere. Sees is booming with business. We might have overindulged with our sweethearts. I know I did!

I’ve noticed one of the keys to keeping myself in check is watching how extreme I let those ebbs and flows get. I’m too delicate to handle crazy yo-yo’s in my body. And by delicate, I mean panic attacks on the scale, inconsolable by Husband. And by panic attacks and inconsolable, I mean about a half a second of whining while Husband drops the obligatory, well-rehearsed “I’m sorry”, thinly veiling the fact that he’s not really listening to me. (I never blame him. Thankfully, he’s well used to my crazy.) In other words, I prefer to balance mostly healthy eating with regular small indulgences, rather than hard, fast weight loss and weight gain. And really, I think the key is how you approach that mindset. If I were drinking beet juice and bland chicken soup for a week, then I’d be hard-pressed to resist that giant bowl of macaroni and cheese I’d been craving that entire week. Because when you’re eating foods you don’t enjoy, you think about the foods you’re denying yourself that much more, right? I know I do!

A diet shouldn’t feel like diet. In fact, the word diet should denote the foods you have a tendency to stuff into your facehole, rather than being defined by the foods you pointedly do not stuff in your facehole. It’s a small distinction, but one that makes a big difference.  Last week, I told a friend who was lamenting her bland bowl of chicken & vegetable soup (and craving bacon in its place) to nevermind the bacon. If she was going to eat soup, she should make it good soup and then eat the heck out of that soup. Sure, the grass is always greener. Get over it! Instead focus on being happy to eat what you’re eating. Feeling sorry for your dinner is a cop out. Food doesn’t have to be a gazillion grams of fat and tetragillions of calories to be something to savor. If you’re soup is bland, try adding gobs of hot sauce and cry tears of pain triumph when you power through it. Or maybe just a squeeze of lemon juice to brighten it up if masochism isn’t your thing. Say you made a salad of carefully chopped fruits and vegetables, every color of the rainbow represented, and while beautiful to behold, you still feel like a bit of a rabbit chomping grass. Try sprinkling in just a few goodies - crumbled goat cheese, a handful of sliced almonds, toasted pepitas. The added protein will make it more filling too. Or experiment with making your own vinaigrette. They are quick, simple, and with all the fancy oil & vinegar options out there, as varied as your imagination! Your side of steamed brown rice? Try sprinkling on some salty seaweed or add some fresh ginger while it’s cooking to boost the flavor. Adding coconut milk in place of some of the cooking water is my favorite!

Break the cycle of denying and indulging. Instead choose healthy options every day, prepare them with love - not necessarily time, just consideration - and when faced with your result look it straight in the plate and say “I am going to eat the heck out of you and love every minute of it!” Now that’s eating mindfully.


Take this simple veggie wrap. Sure, it looks pretty ho-hum. It sounds pretty ho-hum too. But let’s look closer. I used a whole wheat lavash sold by my favorite local market (I heart you forever, Jimbo’s!). It’s just flour, yeast, salt, and water. Or something like that. It’s soft and airy and slightly chewy with a nutty flavor - totally different from a Mission flour tortilla. I made my own hummus. Only because I like making hummus. But really because I'm cheap and dried chickpeas are cheaper. They also sell pretty awesome hummus pretty much everywhere nowadays. This is the wonderful world we live in. My hummus had roasted garlic and a ton of roasted tahini. I’m a sucker for both. At first I thought about adding cheese, but decided avocado would be better. The creamier texture and richer fat flavors were just right. This level of health food must take flavor and texture punch wherever it can be got! I used baby spinach and sprouts. Not lettuce. I’m not much for the crunch of lettuce in wraps, and it’s too watery. Sprouts taste so wonderfully grassy. Wonderful might not be the word that springs to mind when you think of something tasting “grassy”, but my mind was a pasture-raised bovine in a past life, apparently, because grassy sprouts make me swoon. It’s all about balance, really. Grassy sprouts in the same bite as creamy avocado? Good stuff. I went a little crazy and sliced up some of my favorite local fresh tofu. Plain. Because it gives me something silky to sink my teeth into. Because apparently good quality tofu does have a bit of flavor. And it’s quite tasty.

Substitution potential on this wrap are out of bounds. Tortillas for lavash. Arugula for spinach. Black bean, white bean, or lentil purees instead of traditional hummus - or a flavored hummus. Baked, marinated, or spice-rubbed tofu. Leftover shredded chicken. Canned tuna or salmon. The possibilities are endless.

But wait! I have yet to mention the best part. This wrap would be a sad story indeed without the piece de resistance. The pickled red onions and carrots. The acid. The crunch. The life of this wrap. I used to pass-over recipes that called for pickles. How complicated! Not so. Can you make ramen noodles on the stove? Then you can make pickles. Err, with a few more ingredients, and a bit more chopping (unless you buy pre-cut!). It’s just a matter of time. Stewing time. Not stove time.

So to recap, this simple encasement of bovine-approved greenery, pulverized and fermented legumes, luscious Aztecan fertility fruit, and mouth-puckeringly preserved roots is not food you dream about cheese pizza while eating. O-ho no. Before taking your first bite, behold its glory and say “I am going to eat the heck out of this puppy!” I know I did!

But, you know, with small, slow bites. Mindful eating, people.


Crave-ably Healthy Veggie Wrap

1 whole wheat lavash
1 handful fresh baby spinach leaves (~1/2 cup)
½ cup hummus
¼ avocado, sliced
½ cup sprouts
3 oz. firm tofu, thinly sliced (optional)
1 small handful pickled red onions & carrots (see recipe below)

  1. Lay out the lavash in a hamburger orientation. (As opposed to hot dog, naturally.) Down the center of the lavash lay out a flat layer of spinach leaves. Over the spinach, spread the hummus in an even layer, then top it with the avocado slices. Spread the sprouts along the side of the hummus. Lay the tofu over the top, if using. Top everything with the red onions and carrots. Roll up the wrap and enjoy! 
Note: I don't recommend cutting the wrap in half, and it tends to lead to more spillage than it's worth.

Quick Pickled Onions & Carrots

adapted from Simply Recipes

1 large or 2 small red onions, julienned
3 large carrots, julienned
½ cup red wine vinegar
½ cup white distilled vinegar
½ cup sugar
½ cup water
1 tsp salt
1 bay leaf

  1. In a medium saucepan, heat the vinegars, sugar, water, and salt over medium heat until the salt and sugar has fully dissolved. Remove the pan from the heat and set it aside to cool.
  2. Place the onions, carrots, and bay leaf in a seal-able container and pour over the cooled liquid. The onions and carrots should be fully submerged in the liquid. Cover the container and refrigerate at least 8 hours, and up to a week. The onions and carrots will soak up more pickle flavor and break down in texture the longer they marinate.

Wednesday, May 18, 2011

Grilled Shaved Asparagus Pizza


Pardon the bandwagon jumping, I hear it’s great for toning your butt. I’m going to be yet another food blogger talking about shaved asparagus this week. It’s everywhere! If you’ve tried it, you’ll know why – because it’s awesome! I actually shaved the asparagus in question almost two weeks ago, and was only completely copying inspired by one food blog (a certain Kitchen we’re all completely Smitten with) in particular. My dish turned out great. Figured I’d blog it (which unfortunately rates below painting guest rooms and attending anniversary parties at local breweries on the priority scale). Then boom, come Monday morning, shaved-asparagus-palooza! Dang! But none of that matters. What matters is the utter deliciousness of what I made.

That’s not the only bandwagon I jumped on recently. A few weeks ago Husband and I joined the scores of other bloggers who have made the same big, life-changing decision of late. That’s right...we joined a CSA*! Every other week we’ll be getting a big box of fresh from the local farm organic produce. The “get what you get” nature of a CSA gave me pause when we first considered joining a couple of years ago. Another way my confidence in my cooking has progressed – I don’t need a recipe to follow and an iron-clad shopping list to buy from every week. I’m now comfortable with pulling a head of romanesco cauliflower out of a box, knowing I’ve never cooked with it before. In the end produce is produce. Sure, certain flavors and preparations work better than others, but ultimately, if it’s fresh, it’s going to be delicious. And if I’m ever really stumped, I’ll channel my grandmother and throw it into a pot of broth and add things until it is some kind of delicious soup. I’m glad we waited to join. A few years ago, I might have met the bi-weekly pickup with stress and trepidation of how to consume everything in a delicious way before it expired. Now I wake up excited for “CSA pickup day”! It helps that my love of fresh produce has grown to obsessive proportions.
It’s a good thing Husband doesn’t mind being married to a woman whose idea of evening conversation is naming off the different possibilities for dishes using CSA ingredients…

I’m happy to report my first CSA box experience had very little stumpage. Quite the opposite, in fact. I pulled out a beautiful bushel of asparagus and did a little dance (I hope no one was watching…) because I knew exactly how I wanted to use it. Here’s how it went down:
  1. Husband had requested I make grilled pizza of some kind.
  2. The pizza dough recipe I wanted to try required overnight resting, so there were several balls of pizza dough ready and waiting in the fridge.
  3. I had bought some Iberico cheese on a whim at Trader Joe’s. I wanted to try something Spanish and it had a nice soft, yet sturdy feel to it.
  4. I had just read about a shaved asparagus salad that sounded divine. 

When I saw that asparagus, everything clicked. Husband might like his bbq chicken pizzas, but he was just going to have to go without. Shaved.Asparagus.Salad.Grilled.Pizza. It called to me. “If you grill it, deliciousness will come…”

Did I mention I made garlic-infused olive oil, then used the oil to brush the pizza dough before it went on the grill, and used the resulting garlic confit on top of the pizza, hidden beneath the creamy melted cheese? That happened.

I also put raw asparagus on a pizza that only cooked for about 2 minutes. Not quite raw, but definitely not cooked. It was sweet! Who knew raw asparagus had a mild sweetness to it? After I had shaved each asparagus spear down to a nub with my vegetable peeler, I bit off that last nubby bit before the woody stem. It was so crunchy and succulent, I knew the salad by itself, which I simply tossed with lemon juice and red pepper flakes, would be fantastic.

The farm fresh asparagus made an interesting and discernable difference. All asparagus spears get woody and tough at the bottom of the stem, but this asparagus was so tender that quite a few spears weren’t woody at all. I was able to use all but the tiniest of partial inches off the bottom. And I have been known to sacrifice almost half a stalk out of fear of the woody end.

I was equally pleased with how my pizza dough turned out. Some extra hydration and the overnight resting allowed the whole wheat flour to properly mellow along with it’s already mellow cousin, AP flour. When I went to start shaping it, it practically melted over my fists and stretched beautifully with just the slighted tug. More relaxed gluten I have never seen. I stretched it super thin, so the quick, high heat from the grill would give it a charred, crispy flatbread consistency. The earthy flavors from char and whole wheat went beautifully with the Iberico and Parmesan cheeses.

The Iberico cheese was a new ingredient to me, and I was so happy with it. It was sturdy enough to grate, yet creamy enough to pair nicely with the Parmesan. Sometimes creamy cheeses can be a little bland in pizza applications. Not this one. I wouldn’t say it’s pungent, but it definitely has a mild grassy earthiness that was a perfect complement to the vegetal asparagus. Milder than goat cheese, but stronger than mozzarella. I think I’m in love.

It sure sounds like a lot of steps – making dough, infusing oil, peeling individual asparagus spears, etc. But that’s the great thing about grilled pizza – it comes together really fast! The actual cook time is almost negligible. “Infusing” something sounds like a lot of work, but really you just throw some garlic cloves in some oil over low heat and mostly forget about it for a few minutes (like, say, while you’re prepping the asparagus). And of course, you can always buy pizza dough. Trader Joe’s even has a wheat option! Because if you’re like me, you balk at eating white breads, yet inexplicably have no qualms with using white flour in cakes, pies, muffins, and every other dessert application. Um, moderation?

This pizza has, after just one go, already carved a special place in my mouth stomach heart. It was the perfect way to celebrate the end of this highly unusual rainy season. [At least, it would have been, had the rain not inexplicably come back yesterday.] Dough chewy and blistered, cheeses creamy and walnutty, and a bright, crunchy salad on top to make you feel like you’re eating a real meal. And let’s not forget the occasional bite of sweet, mellow garlic. Oh yes, this was worth every bounce of my happy dance.

Sorry for the pictures, featuring what can only be described as limp pizza. In my rush to get the leftover pizza put away and out of the reach of a certain cohabitating pizza-monster, I may have stacked and smushed the slices into a Tupperware container, forever ruining their structural integrity. Don’t be like me. Just wrap it in foil.


*Did I get ya!? Have you noticed all the bloggers are pregnant right now? Not gonna lie, it’s weirding me out.


Grilled Shaved Asparagus Pizza
adapted from Smitten Kitchen

Makes one 10-12” pizza

1 portion of pizza dough (see recipe below – Note: it’s an overnight process!)
¼ cup olive oil
6 cloves garlic
1 bunch asparagus (~1 lb.)
Juice of ½ lemon (~ 1 TB)
¼ tsp salt
¼ tsp freshly ground black pepper
¼ tsp red pepper flakes
½ cup freshly grated parmesan cheese
½ cup freshly grated Iberico cheese (any soft cheese like mozzarella, goat, or feta will do)

  1. Preheat your grill to medium heat.
  2. In a small saucepan over the lowest heat you can manage on your stove, combine the olive oil and garlic cloves. Let this mixture stew or a good 20 minutes so the flavors can marry. Check on it every few minutes, giving the pan a good swirl, to ensure that the garlic doesn’t brown. We want the flavors to cook out, but not sauté. When it is done to your liking, remove the pan from the heat and set aside to cool.
  3. Once the oil is cooled, fish out the garlic cloves (you’ve made garlic confit!). Either chop them into small pieces, or leave them whole. Those babies are going on the pizza. I opted for chopped for more garlic coverage. 
  4. Using a vegetable peeler, shave the asparagus stalks into beautiful ribbons (or hack into ribbon-like bits, if you’re me). You can use the woody ends as a handle and discard it once you’ve shaved down to the nub. In a medium bowl, combine the asparagus ribbons, lemon juice, salt, pepper, and red pepper flakes. Toss to combine.
  5. On a pizza peel or large cutting board, stretch your pizza dough to your desired shape and thickness. I did most of my dough stretching on my fists, letting gravity do the work. The gluten in the dough was so relaxed, that it pretty much melted over my hands. I also opted for a very thin dough, since the crispy texture you get from the grill goes best with a thin crust.
  6. From here on out, things happen fast, so make sure you have everything prepped and ready to go – tongs, plates, brushes, etc. at the ready.
  7. Brush the shaped dough with the garlic oil. Carefully (it’s going to stretch, it’s ok, it doesn’t have to be pretty) lay the pizza dough with the oiled side down on the grill. While that side cooks, brush the top of the dough with more garlic oil. Using tongs, peak under the dough after about 2 minutes to check doneness. You want some nice char marks, but you don’t want it to burn. When it’s ready, flip the dough over. Working quickly because this is going to cook fast, sprinkle the garlic over the dough. Then sprinkle the parmesan Iberico cheeses. Then top with as much of the asparagus as you think fits nicely without too much heaping (I heaped quite a bit because I’m like that). Close the lid on the grill and let it cook for 2 minutes. Check the pizza to see if the cheese has melted. If it hasn’t, keep cooking it covered until it melts. Once it’s melted and the underside of the dough is nicely charred, remove it from the grill. 
  8. Slice and enjoy!

Note: You can alternatively bake this pizza on a baking stone or sheet pan in a 450 degree oven.

Partial Wheat Pizza Dough
adapted from 101 Cookbooks

Makes 6 portions

2 ½ cups white whole wheat flour
2 cus bread flour
1 tsp instant yeast
1 ¾ tsp kosher salt
¼ cup olive oil
1 ¾ - 2 cups ice cold water
  1. In the bowl of a stand mixer fitted with the paddle attachment, stir together the flours, salt, and yeast on the slowest setting until mixed. Stream in the oil, and then 1 ¾ cups of the cold water. Switch to the dough hook and mix on medium speed. The dough should clear the sides of the bowl but stick to the bottom of the bowl. If it is too dry, add the remaining water, a tablespoon or so at a time until it sticks appropriately. Continue mixing for 5 to 7 minutes, or until the dough is smooth and sticky, and a small piece passes the window pane test (to tell if the gluten has fully developed). The finished dough will be springy, elastic, and sticky, but not just tacky.
  2. Transfer the dough to a floured countertop, and portion into 6 equal pieces (I used a scale because I’m anal like that). Mold each into a ball, creating some nice surface tension (Peter Reinhart and I are all about surface tension). Rub each ball with olive oil and seal into ziplock bags. Refrigerate overnight (or up to a few days). Alternatively, you can freeze the dough balls at this point – just thaw them in the refrigerator when you’re ready to use them.
  3. The next day remove the desired number of dough balls from the refrigerator at least 1 hour before making the pizza (I’d suggest 2 unless it’s a hot day). Leave them in their plastic bags, so they don’t dry out. I like to turn my oven on for literally a minute, then turn it off and put the dough inside. It’s slightly warmer than room temperature, so they wake up nicely.
  4. When you’re ready to shape the dough, on a floured surface, press it gently with your fingers into a round disk. Balance the disk on your fists and gently work the dough apart as evenly as possible. You can also use your hands to stretch it. If the dough is not cooperating, it means the gluten isn’t relaxed enough, and letting it rest for 15-20 minutes should help.
  5. Bake in a 450 degree oven or grill on the barbecue with desired toppings until the crust is crisp and nicely colored.
Note: You can use all AP flour, but you'll want to reduce the water to 1 ¾ cups.

Friday, May 6, 2011

Spicy Apricot Chutney


I love my neighbor, Julie.  Not just because she has my name, but because when we meet a new neighbor, I can introduce us by saying "Wer're Julie."

I love my neighbor, Julie.  Not just because she has the most adorable, doe-eyed Beagle I've ever met, but because said Beagle parks her tush outside my house whenever they walk by because "she remembers where she'e been fed."  Also, I love that she brings the Beagle when she comes over for the occasional dinner party.  Theo likes to have playmates too!

I love my neighbor, Julie.  Not just because she works at Costco, but because this year she gave me her free frozen turkey Costco employees are given for Christmas.

I love my neighbor, Julie.  Not just because she loved the apricot chutney I served when she came over to help me eat that turkey, but because when I asked her this week what type of ice cream I should make she said "Vanilla ice cream...with your apricot chutney!"


Full disclosure, this was way back in February.  Poor Julie has been waiting for this recipe for a long time!  I had a few neighbors, including Julie, over for a (huge - true to Costco!) turkey dinner.  Just two months after Thanksgiving, I was looking to go beyond cranberry sauce and mashed potatoes.  And my Indian-flavored turkey dinner was born!  I'm a total dork, and apparently had trouble thinking too far out of the box, because I still roasted a turkey.  Instead of sage and thyme, I used garam masala, turmeric, and ginger.  Instead of mashed potatoes, I made mashed sweet potatoes with cinnamon and yogurt.  And instead of cranberry sauce, I made apricot chutney!

I was nervous how it would go over.  Indian flavors are a bit more...aggressive.  And this chutney was spicy, sweet, and so tangy it was positively pungent all at the same time!  I was sure a person or two wouldn't be able to handle it.  I was most nervous about Julie.  She who declares raisins aren't food surely wouldn't go for something so decidedly dried-fruity, and...aggressive.

So naturally, she took one bite, parked the serving bowl right next to her plate, and declared it would be staying right there the rest of the dinner.

And if we were nice to her, she might share with the rest of us.


Then she said I needed to blog the recipe.

Except I didn't have a recipe.

It was my first time making a chutney.  Ever.  And I kind of just added ingredients, tasting along the way, until it had just the right balance.  When it came time to write down the recipe, I had a hard time remembering what all I had thrown in, let along the quantities.  Don't you hate it when that happens?

So I made it again.  Darn!

This time I paid careful attention and took copious notes.  Until once again, I tasted the perfect balance of tangy vinegar against the sweet apricots, the savory aromatics, and the spice from the chiles.  The great thing about this chutney is how suitable it is to tinkering.  The proportions of vinegar to sugar to soy sauce can be adjusted to suit your own tastes, but I think this recipe yields pretty dang tasty results!

As reward for my efforts, I had an entire batch of chutney to eat to my hearts desire, and as I found, this chutney is great in all sorts of dishes.  My favorite was a fast and easy grilled cheese (panini style!) with pepperjack cheese.  *drool*

As a topping for all sorts of protein is delicious too.  Here, I opted for some simple grilled mahi mahi filets for a quick weeknight meal. Yum!

I don't know about vanilla ice cream though.  Sounds a bit weird.


Spicy Apricot Chutney

Makes about 2 1/2 cups

1 TB grapeseed oil (or canola or olive oil)
pinch of kosher salt
1/2 medium red onion, minced
1 shallot, minced
2 serrano chiles, minced (remove the seeds and ribs based on your spice preference!)
1 TB garlic, minced
1 TB ginger, minced
10 oz. dried apricots, chopped (~2 cups)
1 cup white wine
2 TB fresh lime juice
1 TB soy sauce
3 TB white wine vinegar
2 TB brown sugar
1/2 tsp ground black pepper
1/4 tsp ground cinnamon

  1. In a medium saucepan over medium heat, sweat the onion and shallot with a pinch of salt in the olive oil until softened, about 3 minutes.  Add the garlic, ginger, and chiles, and cook for another 2 minutes, stirring occasionally.
  2. Add the rest of the ingredients, and bring the mixture to a gentle simmer.  Cook, uncovered, for about 40 minutes, stirring occasionally, until the mixture is softened and reduced.  Once the flavors have simmered together for a few minutes, try the mixture and adjust the flavorings as suits you.
  3. Serve with whatever your heart desires!

Sunday, April 17, 2011

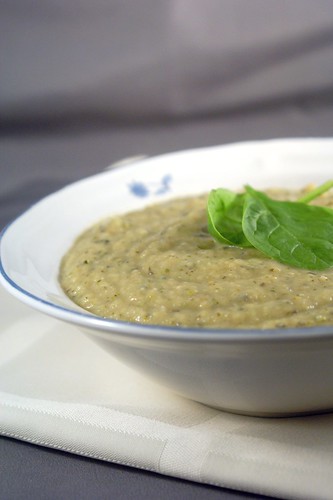
Roasted Garlic Cauliflower Soup


A moment to sit in quiet contemplation and reflection.  What a concept.  Feels like it's been, oh, a month since I've last had the pleasure.  And what do you know?  It's been about that long since my last post.  Spring always seems to be a busy time.  With sunshine and flowers comes holidays, weddings, festivals, parties, and every other fun thing that is supposed to get us through the winter.  Of course, having the means once again to participate the these festivities helps immensely.  I finally found employment, you see.  Ah, the relief of a steady paycheck again.  It took lots of sorting out, getting back into the swing of things.  Not that the work hours was an adjustment,  job hunting was pretty much a full-time gig.  Rather, my life was put on hold for almost a year.  I didn't realize how much until I was employed again.  I can now attend family functions and spring festivals.  I can go to the mall when my belt is hanging together by a thread, or I need shoes fit for a nice evening out.  I can have nice evenings out!  Free time didn't come from my lack of 9 to 5 commitment so much as my self-imposed house arrest weekend after weekend, because let's face it, being social costs money!  I've been reconnecting with some good people who were very over due for some Julie time, getting the household in order, and mostly just running around like a crazy person.  Trying to fit a square day into a round schedule.  Oh, the joys of rejoining society!  For reals, it's great to have my life back.  Unfortunately, things aren't yet sorted enough that I can promise a weekly blog update like I've so enjoyed in the past.  But I'm still in the kitchen, cooking and baking away.  Still writing down my recipes, celebrating my successes and failures.   


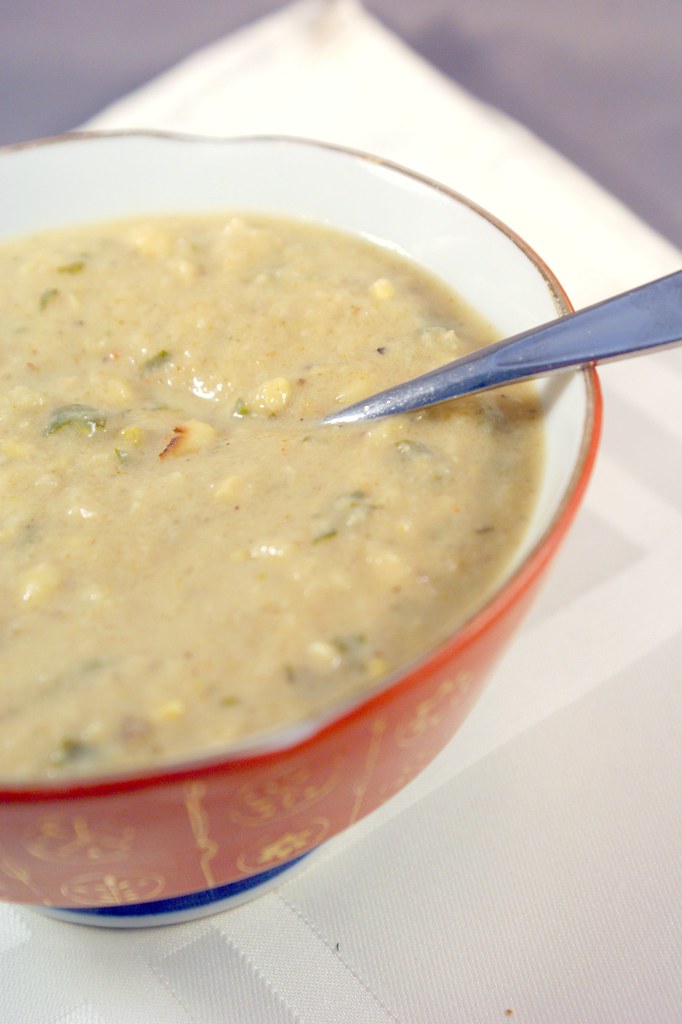
This recipe is from a few weeks ago, when the weather was darn right cold and a thick, creamy soup with big bold flavors was needed for comfort.  But of course you know I don't do real big creamy soups.  That's why this soup is so great - it's thick and silky, but still light.  It has a rich, sweet flavor, but you won't feel gross after eating it.  That's just how I roll.  Plus, wait till you get a load of the twist!

This soup is all about the garlic.  6 heads, in fact.  Roasted until they are all mild sweetness, their spicy pungency a victim of the wondrous sugar caramelization process.  It started off a typical Julie soup.  I threw in the usual aromatics, herbs, and spices.  I used cauliflower to lend a sweet and slightly vege-floral flavor (yaknowadimean?) and silky texture.  And of course what's soup without wine and stock?  But I wasn't quite satisfied.   As I said, I was craving comfort - that stick to your ribs kind of soup - but I didn't want it to actually stick to my ribs.  Substance, I craved.  I rummaged in the pantry and pulled out some cashews.  Then I threw them in the food processor...and turned it on.  After making enough racket to send my dog fleeing from the room, the nuts finally resigned to their fate and melted to my will...for nut butter.  Cashew nut butter.  I stirred it into the soup, and all was right in the world.  There was substance, there was sweetness, and there was oh so much lovely roasted garlic.

Husband is really not a soup person.  Especially pureed soups.  Give him a bowl of stew or chili and he's happy, but puree up some vegetables and he doesn't exactly shoot off fireworks.  But he loved this soup.  He ate bowls and bowls of it until it was all gone and we were both sad.  I should make it again.  Or at least go eat dinner.  But I'll be back, hopefully very soon!


In the mood for a more seasonally-appropriate soup?  You can re-acquaint yourself with my very first post.  Mushrooms and asparagus, such a magical combination.


 Roasted Garlic Cauliflower Soup

1 head cauliflower, roughly chopped
6 heads garlic, roasted
1 medium onion, chopped
2 shallots, chopped (~1/4 cup)
4-5 stalks celery, chopped (~1 cup)
1 TB olive oil
½ tsp freshly ground black pepper
½ tsp dried thyme
¼ tsp celery salt
pinch of cayenne pepper
1 cup dry white wine
1 cup whole cashews
5-6 cups chicken stock
fresh chives, chopped finely, for garnish
  1. Chop the top off each head of garlic and drizzle with olive oil. Wrap them in foil and roast in a 400 degree oven for about an hour, or until softened. Let cool.
  2. In a food processor, grind the cashews until a uniformly-pureed cashew butter forms. It will take a few minutes. Set aside.
  3. In a dutch oven over medium heat, saute the onion, shallots, and celery in the olive oil until softened, about 5 minutes. Add the black pepper, thyme, celery salt, and cayenne pepper, and cook for 1 minute, until fragrant.
  4. Add the wine to deglaze the pan, scrapping up any browned bits. Simmer the mixture for a few minutes, until the wine has reduced by about half. Add the cashew butter and stir until it is incorporated and the mixture is smooth. Add the chicken stock and cauliflower, bring the mixture back to a simmer and cook at a gentle simmer for about 30 minutes, or until the cauliflower is tender and soft.
  5. Remove the soup from the heat and add the roasted garlic, squeezing out each clove like a tube of toothpaste. Using an immersion blender, puree the soup. Garnish with the chives.


Edit for SoupaPalooza 2012: Come join SoupaPalooza at TidyMom and Dine and Dish sponsored by KitchenAid, Red Star Yeast and Le Creuset

Monday, February 21, 2011

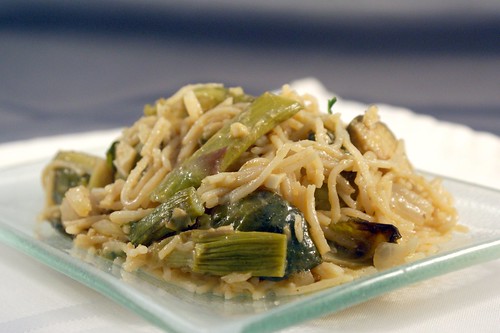
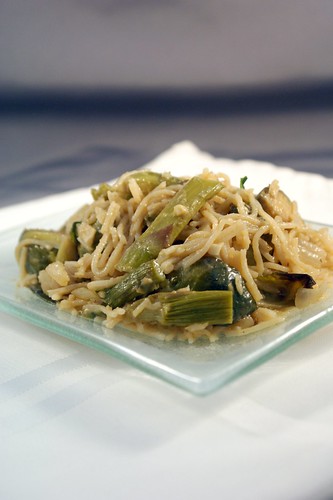
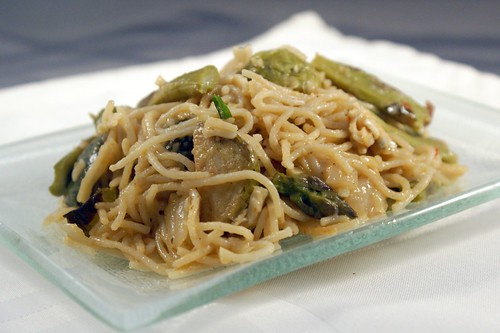
Pasta with Roasted Spring Vegetables in Cambozola Sauce


Let’s start with the giveaway winner. Congratulations...

...drum-rolling...


 ...Kelly! You win the CSN Stores gift certificate! Congratulations! And who says the person who enters 5 minutes after you post it won’t win? Not I. I’ll be sending your email address to my contact with the company. Stay tuned!


When I researched the best ways to start an exercise plan - what was now all those moons ago - one thing I always saw mentioned was goal setting. Most “professionals” agree that it is important to set both long term and short term goals, the idea being to motivate yourself early with small accomplishments, and to keep the motivation going for the long term. By accomplishing your smaller short term goals, you’ll build up enough muscle, endurance, discipline, etc. to complete your long term goals. Makes sense. And for some people, like Husband, it’s invaluable advice. Results can be slow to show on the scale or on our bodies, but when you have a cold, hard accomplishment under your belt, that can be just the thing to keep you going. Me? I make goals, sure. But I never took much time to structure them or really give much thought to them. I was so overweight that the scale provided me with all the motivation I needed pretty early on. I guess that’s one advantage to to being obese vs. just overweight? Heh.

I’ve been thinking more about goals lately, and I’ve come to realize it’s kind of like the approach you take when applying to colleges. When deciding where to apply you have the schools you’ll probably get into, and probably end up going to. Those are the realistic schools that are “the middle”. But what if by some catastrophe, you don’t get into any of those middle schools? The probability is low, sure, but you don’t want to be caught with no acceptances. Catastrophe indeed! So you apply to a “safe” school or two - schools you know for sure you’ll get into and wouldn’t be completely miserable attending. Even better is when your safe school has rolling admissions. Having that acceptance under your belt does wonders for your confidence when applying to the better schools. And then, of course, you have to apply to a few schools - the ivy leagues - that you don’t seriously think you’ll get into, and never really considered attending, but figured it’d be fun to try on the off chance that by some miracle of paperwork error, they let you in.

What does any of that have to do with goal setting? Bear with me. As I’m writing this, I’ve just come from a local wine-maker’s house. Ever had a pot luck luncheon with a wine-maker? Let’s just say my glass was never allowed to go empty. Let’s also say it was very good wine, and it seemed to evaporate from my glass as soon as wine was poured in.

I expect I’ll be getting an email from my editor sister tomorrow with a few dozen corrections and even more questions of clarification of what the heck I’m talking about.

But I do have a point! And it’s that goal setting should be like applying to college. Shoot for the stars, hope to get there, but at the same time be practical and expect for something a bit closer to earth. When I first started running, I couldn’t even run a mile. So that was my first goal. Run a mile. Did that. Then my goal was to run a mile under 14 minutes. Then 12. Then run 2 miles. Then 3. When I first started out, my long term goal was to be able to run a 5K (aka: 3.1 miles). It sounded so far, but I was confident I could reach it with a little work. And I was right! My next long term goal was a 10K (aka: 6.2 miles). I started getting my runs to 3.5 miles, then 4, etc., etc.. The thought of running over 6 miles sounded crazy, and I wasn’t sure I’d ever get there, but I figured I’d try. And with a little more work, I did it! I just kept pushing back my goals, and eventually meeting them - both short term and long. They were like getting into my safe schools right away and my middle schools eventually. All the while I was secretly shooting for the stars.

I was at the gym once - gosh, maybe almost a year ago now. A neighbor who had seen me running around the area and being a regular at the gym asked me if I was training for a marathon. I scoffed. A marathon!? At that point I wasn’t yet able to run a 10K let alone several 10Ks. I still don’t think I’ll ever be crazy enough to run a full marathon (aka: 26.2 miles). Just can’t imagine doing that to my poor, poor body. But. In just a few weeks, I’ll be running my very first race. A half marathon, no less! Aka: 13.1 miles. I’ve never actually run that far before, but I’m confident I can finish. That confidence actually blows my mind. This time last year I was scoffing at the very idea of running a half marathon, and now I’m actually going to do it. I feel like I just go into Stanford!


I’m a little embarrassed to admit this, but I am far too sauced to think of a not-so-witty segue into this dish. Besides mentioning that the recipe is basically a sauce. So there’s that. Not my best work, I know.

A Facebook friend of mine has been mentioning her current obsession with paninis, and especially her complete obsession with cambozola cheese on these paninis. Always one willing to talk food, I commented on her status, asking what was this cambozola cheese and why was it so special? And then proceeded to Google the stuff, since I’m impatient and a dork. And let’s just say it went downhill from there. Cambozola cheese is described as a blue brie, and that’s exactly how I would describe it too. It’s a triple cream cheese, so it’s rich and creamy like brie, but it’s also made from the blue mold of other blue cheeses, so it does have what I like to call, a bit of stinkiness to it. Who doesn’t like a beautiful marriage of a creamy, stinky cheese?

On a happy, splurging shopping fest last week I picked up a wedge of the cambozola, along with some Brussels sprouts and asparagus. I thought a good cheese with two of my favorite vegetables would be a good way to celebrate my finally landing a job. No biggie. I start tomorrow. I’m breezy.

Who knows what possesses me to cook the things that I cook, but I thought the cheese would go beautifully in a pasta sauce. The creaminess added a wonderful, velvety texture, and the stinkiness added a beautiful dimension to the dish. I could definitely taste it, but it sat in the background and sang me a light tune. Husband came home and tried this pasta, and he of the not very sensitive taste buds concurred. He loved how the flavor came through, and he’s not even big into the stinky cheeses. Another thing I appreciated was that while this sauce is completely heavy on flavor, as you can see from the pictures, it’s not very saucy. There is no puddle of creamy liquid that’s dripped off the pasta to rest at the bottom of the plate. All the sauce is stuck firmly to the food, as it should be. In that sense, it doesn’t feel like a heavily sauced dish. But the flavor is so present, you don’t miss it. By all means, if you like a looser sauce, go ahead and add some cream or milk or chicken broth. Whatever your heart desires. My heart desired this sauce as is, and so did my taste buds.

Think you don’t like Brussels sprouts and asparagus? Ever tried roasting it? Brussels sprouts can be bitter, but roasting them for a long time under high heat with some balsamic vinegar brings out their hidden sugars and really makes them something special. I would highly recommend giving it a try. But if you’re not into it, any vegetable will do. You could throw in some artichoke hearts and peas, or broccoli would be delicious. I used whole wheat pasta, an angel hair.  You could use a regular fusilli.  That’s the great thing about cooking - just tweak it till you love it!


Pasta with Roasted Vegetables in Cambozola Sauce

Makes ~6-8 servings

½ lb. whole wheat pasta (I used angel hair)
1 ½ lb. Brussels sprouts, trimmed and quartered
½ lb. asparagus, trimmed
3 TB olive oil, divided
2 TB balsamic vinegar
2 pinches of salt
1 medium yellow onion, chopped
1 small shallot, chopped
5-6 cloves of garlic, minced
2 TB butter
2 TB flour
2 cups dry white wine
½ tsp crushed red pepper flakes
½ tsp ground black pepper
6 oz. cambozola cheese
¼ cup freshly grated parmesan cheese
1 TB fresh lemon juice (about half a lemon)
¼ cup fresh parsley, minced

  1. Preheat the oven to 400 degrees. In a roasting pan, toss the Brussels sprouts and asparagus with 2 TB of olive oil, the balsamic vinegar, and a pinch of salt. Roast the vegetable mixture in the oven for 25-30 minutes, until they are soft and have a nice golden brown color, tossing every about 10 minutes to ensure they brown evenly.
  2. Now would be a good time to get a large pot of water boiling for your pasta. The sauce only takes about 15 minutes, not counting the prep for the mise en place, so might want to wait until the vegetables have a good head start in the oven before starting.
  3. In a large sauté pan over medium heat, sauté the onion and shallot in the remaining 1 TB of olive oil and pinch of salt until they are softened, about 5 minutes. Add the garlic and cook for another minute. Add the black pepper and red pepper flakes, stir, and cook for one more minute.
  4. Now would be a good time to drop your pasta, if you haven’t done it yet.
  5. Clear a space in the pan and add the butter. When it has started to melt down, add the flour and mix them together to form a paste. Let the paste cook for a minute or two to get rid of the raw flour taste. Add the wine and bring the mixture to a simmer. Let the mixture cook until it has thickened and the wine has reduced by about half, about 3 minutes.
  6. Turn the heat down to low and add the cheeses, stirring until they are fully melted and incorporated into the sauce. Stir in the lemon juice, parsley, and roasted asparagus and Brussels sprouts. Stir in the cooked pasta drained straight from the pot, you can use a little of the starchy pasta water if you want to thin out the sauce at all.

Friday, January 14, 2011

Roasted Vegetable Winter Soup


Last post I promised a healthy soup to help shed those extra pounds we tend to get as a result of all that sticky toffee pudding, gingerbread, and eggnog around the holidays, and I am quite the deliverer, if I do say so myself. And I do!

I gullibly keep recording shows on the Food Network promising healthy and light meals, excited that it’s finally the time of year when those celebrity chefs might just be cooking something I’d like to try. Then they pull out the lite mayo or top a plain, grilled chicken breast with cheese and pepperoni and call it pizza (and healthy pizza no less!), and I stop and delete the episode. Healthy does not mean diet! Diet food is flavorless, rubbery chicken with microwaved broccoli. Diet food is a punishment to teach yourself not to be such a pig the next holiday season. Diet food is stupid. Healthy eating is about thinking outside the deep fryer box and finding ways to prepare fresh foods in flavorful ways that make us want to eat them. It’s about shifting your habits to eat a different way. Instead of trying to take an unhealthy dish and removing everything that makes it taste good, just eat something that’s healthy to begin with. No brainer, right?

I learned early in my healthy eating transition that I like to eat. Actually, I love to eat. Sure, I’ve lessened my portions, but I used to eat on par with Husband and his roommates in college. I am not a 6’2” male, but I sure liked to eat like one. I still eat plenty because I knew for this to work, I had to let myself eat. Then I found vegetables. They’re such wonderful things. So full of flavor and texture and every good thing. There’s a reason that Weight Watchers puts vegetables at zero points, and that would be how totally nutrient rich are for being so low in calories. As Rachel Ray likes to say - if you eat healthy, you can eat more. A sentiment I always identified with. Just remember that eating too much stretches your stomach, which is a recipe for disaster later. Eat until you’re satisfied, not waddling. Be reasonable. 

One way I like to fill up my tummy without filling up my calorie bank is soup. Broth-based soups feel substantial because of their high water content, but still add a great amount of flavor. Toss in a healthy dose of vegetables and some form of lean protein and/or whole grains, and you’ve got yourself a meal you can sink a spoon into.


I love soup. I have always loved soup. It’s a love affair that started with my grandmother. She made a mean soup, and growing up a picky eater, I was always happy to go to her house knowing there would be a large pot of soup that had been sitting on the stove slow cooking all day and brimming with vegetables, barley, lentils, and meat (though I ate around that part). Her theory was that I just didn’t like to chew. I think I just like the infinite blend of flavors and the comforting feeling it brings. Warm liquids bring me joy. I love my sludgy coffee in the morning, my steamy afternoon tea, and a silky bowl of soup for dinner. I had a friend in college who didn’t like warm liquids of any kind. We no longer keep in touch.

I’m actually surprised I haven’t posted twenty soup recipes by now, but I guess they’re usually so flung together that I don’t really have a recipe prepared, or sometimes they’re so simple I would feel silly posting it.

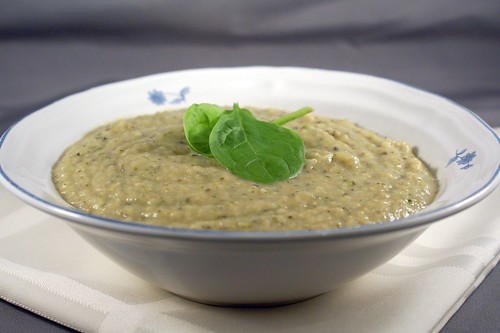
If you couldn't tell already, I might be a little obsessed with vegetables. I never feel like I eat enough of them, even though probably 75% of my diet is vegetables (if we don’t count breakfast because I eat zero for breakfast, and if we’re counting breakfast the percentage drops to like 45% because even if I ate nothing but vegetables for lunch and dinner, the most it could be is 66%, so let’s just not count it, m’kay?). I have this little trick with soups. It helps me with portion control and it’s a good way to get a few more leafy greens in my diet. Because I’m seriously lacking in that department, right? I’m talking about spinach. I line my soup bowl with a good helping of fresh baby spinach leaves (I always have some on hand from Trader Joe’s, they have those handy resealable bags), more if it’s a veggie-lite soup, less if it’s veggie-heavy. Then I add the soup until my piggy eyes see it reach the rim of the bowl. This is where it helps with the portion control. The fresh spinach takes up a lot of room in the bowl, so even though I can’t stop myself from filling the bowl, it’s not really full. Of soup anyway. Aw, what a trickster I am! After a few minutes in the microwave the soup is hot and the spinach is wilted, and magically (good ol’ water evaporation!) the level of soup in the bowl is no longer threatening to spill over the sides. It’s ok to be a piggy if you recognize it and trick yourself from letting it impede your health, right? Right. Plus, spinach is delicious and is always a yummy addition to whatever soup I’m enjoying, such as this roasted vegetable soup I made recently.

I am a master of the segue.
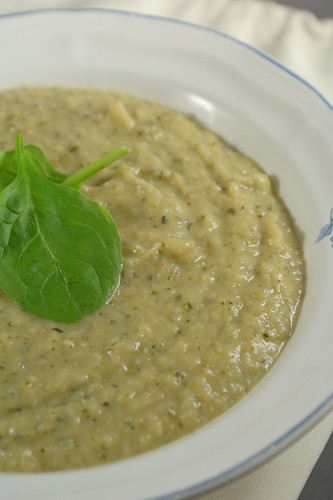
This soup was just a happy accident, brought together - like the plot of many a good novel - by a random string of circumstances. Zucchini and eggplant were on sale (seriously, how crazy has the zucchini crop been this year?). I had fresh thyme leftover from my Thanksgiving splurge. I happened to be drinking white wine that night. I wanted the soup creamier without using cream. But here’s the kicker - I was freezing my booty off and I wanted an excuse to turn on the oven. I may be too poor (err, cheap) to heat my house properly, but it encouraged me to roast my veggies before throwing them into the soup, and man did it make this one of the better soups I’ve ever made. 

Husband gobbled it all up in record time, and he's not even a soup person!  We no longer keep in touch.  

Roasting the vegetables caramelized the sugars, making the soup sweeter, richer, and more complex. Love it! And apparently eggplant pureed in soup is like liquid silk, it adds a lovely texture. Who knew?  The evaporated milk thickened the soup beautifully without all that pesky fat. I just need to be mindful that it’s concentrated milk, so 1 cup of evaporated milk is still a hefty amount of calories compared to a cup of milk. But a little goes a long way, so it's all good. Definitely a trick I'm going to remember.  Oh, and did I mention this soup is pretty darn quick? Definitely doable for a weeknight meal. Only about 30 minutes of total cook time, and since I used the broiler setting on the oven, I didn’t even have to wait forever for it to heat up. Win!

So to sum up the awesomeness of this soup, let’s count the ways:
  1. Healthy - fresh vegetables, stock, and lowfat milk 
  2. Fast - 45 minutes tops, depending on how long it takes you to chop
  3. Easy - mostly just chop, dump, or stir
  4. Delicious - eggplant = silky 
  5. Comforting - it’s cold everywhere right now 
  6. Why are you still reading this? Go make this soup! 

What healthy foods are you cooking up to stay warm?  Will you be bringing home your own bag of spinach from Trader Joe's?


Roasted Vegetable Winter Soup 

4 medium zucchini, roughly chopped
2 small eggplant, roughly chopped
2 medium onions, roughly sliced
5-6 cloves of garlic, minced
1 TB fresh thyme, minced
2 cups dry white wine
1 cup chicken broth (or vegetable broth)
1 12oz. can evaporated milk (I used 2%)
2 TB white wine vinegar
olive oil
salt and pepper

  1. Turn the oven on to broil (500 degrees). In a large roasting pan, toss the zucchini, eggplant, and onions with about 2 TB of olive oil, a pinch of salt, and a pinch of pepper. Roast the vegetables until they are soft and nicely browned, tossing every 5-7 minutes so they cook evenly. This will take about 20 minutes total. 
  2. When the vegetables are out of the oven heat 2 TB of olive oil in a dutch oven or soup pot over medium heat. Add the garlic and cook for a minute or two until it is softened and fragrant. Add the thyme and cook for another minute. Add the wine and bring the mixture to a simmer. Cook until it is reduced by half, then add the chicken broth and roasted vegetables. Bring the mixture back to a boil and simmer for about 10 minutes, until everything is softened and incorporated. 
  3. Turn off the heat and let the soup cool down a bit. Once cooled, puree with an immersion blender (or regular blender or food processor). Add the evaporated milk, as much as you prefer. I added the whole can for optimal creaminess, but a few tablespoons would have been plenty. Then add vinegar, and salt and pepper to taste.


Edit for SoupaPalooza 2012: Come join SoupaPalooza at TidyMom and Dine and Dish sponsored by KitchenAid, Red Star Yeast and Le Creuset

Tuesday, November 16, 2010

Lightened Up Green Bean Casserole


It will come as a surprise to no one when I tell you that I am a big fan of Thanksgiving. Besides being a holiday whose sole purpose is the celebrate food (let’s face it, that whole giving thanks concept is just an excuse to stuff our faces...and I’m okay with that), it’s one of only two holidays where my whole family generally congregates together - the other being our Passover seder, which I consider Thanksgiving for Jews (plus singing!). I love family congregation! Which is why I also never miss a wedding, graduation, or other fun family party.

Due to my current reduced circumstances, Husband and I decided to forgo travel this year and just stay at home. Thankfully our families are awesome - his parents (and their canine companion), my parents, and my sister, her husband and my nephew are all coming to town to celebrate with us. Yay! Also due to my reduced circumstances, I have a lot of alone time on my hands, and I spend a lot of it thinking about food. Okay, most of it.  As a result I’m not just excited for Turkey Day, I am Thanksgivingsessed! I had the menu all planned out a month ago. Actually, more like two. I have since also created an Excel spreadsheet that details ingredient totals, my shopping list, a to-do list for the week, and a full schedule for the day before and the day of. I may be crazy, but the first step is admitting you have a problem right? Anyway, I’m also playing it smart. I’m planning to tackle most of the cooking myself, so I have to make sure I have my game plan all worked out. How else would I have realized that while I'm baking two pies, I only have one pie plate?  No worries, the problem is already solved.  I do get flustered cooking on a schedule, but with everything planned to a T, how could anything go wrong? Yes, I know I just ensured that everything will go wrong. But between all the guests, there will be more than enough cooks in the kitchen to sort things out. I’m breezy!

Besides being in need of a fun project, our families have been so awesome and supportive this year, we’d really like to treat them a nice dinner. It’s the least we could do. So we’re going all out! A 16lb heritage turkey, free-range and organic of course, brined and roasted, and with all the fixins around the table: gravy, cranberry applesauce, grilled mashed potatoes, sourdough apple pecan stuffing (technically dressing since Husband is squeamish about bird germs), beets with a balsamic reduction, hashed Brussels sprouts, sweet potato rolls, and - as I mentioned - two kinds of pie for dessert. Apple and buttermilk pumpkin pie, with vanilla ice cream on the side. I’m sure I’ll be posting all about it after next week. Of course, a lot of those recipes aren’t mine (some are!), so I’ll post links at the bottom of this post in case someone is in need of ideas.  I can vouch for them all except the stuffing, though I'm sure it'll be delicious. And if those don't entice, I may have developed my own Thanksgiving side last weekend. Read on!

This isn't my first time hosting my family for Thanksgiving, but it is the first time since my big transformation. I wanted to keep all the familiar flavors, but put the Julie spin on them, so last weekend I tried out some recipes - roasted one of those cheap $5 turkeys from Vons and made gravy from pan drippings for the first time (killed it!). I also used it as an excuse to make some dishes that didn’t quite fit into my Thanksgiving menu.


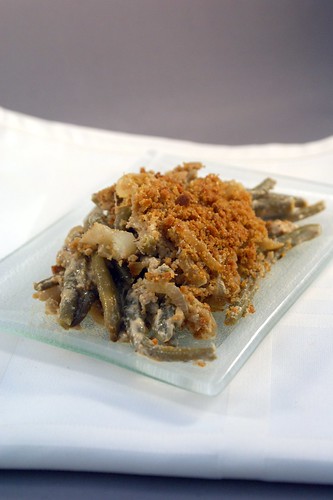
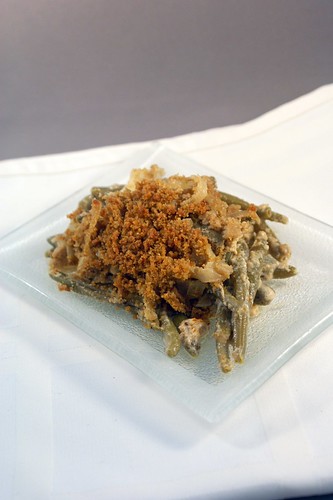
See, I had been toying with the idea of green bean casserole. Thanksgiving + Food Network = lots of mention of green bean casserole. I was thinking of the one traditionally made with condensed cream of mushroom soup and crispy fried onions on top. That dish doesn’t so much scream yummy deliciousness to me, more like heavy, preservative-induced stomachache. But the flavors of the casserole still appeal. Plump green beans in a creamy sauce with earthy mushrooms and fragrant herbs, topped with sweet onions and just a little crispy crunch for texture. Sounds good, right? Well I set about seeing if I could lighten the dish up and make it into something presentable. I don’t know if I accomplished presentable, but it sure was tasty. 

I started with frozen green beans - haricot verts from Trader Joe’s, actually. Then I created the mushroom cream sauce using evaporated milk. I hadn’t used evaporated milk before, and the stuff is just great. It’s just milk with some of the water evaporated out, so it’s already nice and thickened, but much lighter than using cream. I caramelized onions, since that’s my favorite way to eat them. But caramelized onions are soft and buttery, not crispy crunchy. No problem. After the onions caramelized, I added a little butter to the pan with some bread crumbs, and tossed everything together. I topped the green beans coated in the mushroom cream sauce with the onions and bread crumbs, and after it baked up, it came together juuuuust right. Plump green beans, creamy mushroom sauce, and sweet onions with a crunch. Mission accomplished!  Panko bread crumbs would probably  be even crunchier and better (I buy whole wheat panko), but I had some whole wheat bread to use up, so use whatever is easier for you.  Next time I might experiment with throwing some walnuts in as well, though I would probably catch flack from Husband, since he's really not a walnut fan.  It's terrible, I know.

I'm always fascinated by other families and their own traditions.  What are you doing for Thanksgiving?  Pot luck or solo hosting?  What's in the menu?  And finally, how delicious is Thanksgiving food?  Right?!


Green Bean Casserole

Makes about 18 servings

2 16oz bags of frozen green beans, thawed (or fresh and blanched)
16oz cremini mushrooms, sliced
1 12oz can evaporated milk
1 medium shallot, minced
5-6 garlic cloves, minced
2 tsp paprika
1 tsp ground black pepper
1/4 tsp cayenne pepper
1 TB dried thyme
1/2 tsp dried sage
1/2 tsp celery seeds (optional)
1 cup white wine
2 TB flour
4 TB unsalted butter, divided
2 medium onions, quartered and sliced
1 tsp white wine vinegar
1/2 to 3/4 cup whole wheat bread crumbs (~3 slices of bread) or panko bread crumbs
2TB olive oil
kosher salt to taste

  1. Preheat the oven to 375 degrees. You’ll also need a 9x13” baking dish. 
  2. In a medium skillet, heat 1TB olive oil over medium heat. Add the onions and a pinch of salt. Sweat the onions until their water is released, stirring often to prevent browning. Turn the heat down to medium-low and cook, stirring occasionally, until the onions turn golden brown and caramelize, about 45 minutes. 
  3. Meanwhile, in a large saute pan, heat 1TB olive oil over medium heat. Add the shallot and cook until soft, about 3 minutes. Add the garlic and cook for 1 minute. Add the mushrooms and a pinch of kosher salt, and cook until the mushrooms have given up their water and softened, about 7 minutes. Add the paprika, pepper, cayenne, thyme, sage, and celery seeds, mix everything together and cook for 1 minute. 
  4. Clear a space in the pan and add 2TB of butter. Once it melts, mix in the flour, and let the mixture cook for a minute or two to remove any raw flour flavor. Increase the heat to medium-high and add the wine to deglaze the pan, scraping up all the browned bits. Simmer the mixture until about half the wine has cooked out. Add the evaporated milk and stir to combine everything. Let the mixture simmer for about 3 minutes, until it has thickened a bit. 
  5. Turn off the heat and stir in the green beans, tossing until they are well coated in the mushroom mixture. Pour the green beans into your baking dish and set aside. 
  6. Once the onions have caramelized, add the white wine vinegar and toss to coat. Melt the remaining 2TB of butter, and when it has melted, add the bread crumbs and toss until the bread crumbs are well-coated with butter and evenly mixed with the onions. Spoon the bread crumb and onion mixture over the green beans in an even layer. Bake the casserole for about 45 minutes, or until the topping is a crunchy golden brown. 

Links for Thanksgiving dishes:
Cranberry applesauce
Sourdough apple pecan stuffing
Sweet potato rolls
Hashed Brussels sprouts

Tuesday, November 2, 2010

Chipotle Maple Grilled Tempeh Tacos


I have a new love. It’s a bit controversial. I kept it quiet at first because people wouldn’t understand. See, me and tempeh? Yeah, we’re kind of a thing.

All joking aside, I am totally loving tempeh at the moment, and it is controversial...at least in my household. I’ve always counted my blessings that Husband likes everything when it comes to food. Everything. There are preparations he doesn’t prefer, but I’ve never come across an ingredient he just doesn't like. He’ll even do tofu if it’s prepared well. But he doesn’t like tempeh. I’ve done a few different cooking methods, vastly different flavor combos, and he hasn't liked any of them. He just won’t eat it. Tragic, right?!

I have a feeling that’s a common problem with tempeh. You either love it or...not so much. While not the case with Husband, I wonder how much of that not-liking is linked to ignorance of what tempeh is. It is not textured vegetable protein. It is not tofu. It is a soy-based vegetarian protein alternative, but you know what? So is edamame. Tempeh is made from soybeans that are fermented into a cake, and the tempeh I am familiar with also has other whole grains added, I believe for textural and flavor purposes - anything from millet, to brown rice, to barley. Yes, it’s true. This is total crunchy granola hippie food. But hippie food has been in forever now, so let’s give peace a chance, k? Anyway, when was the last time you heard about a tempeh recall due to contaminated soybeans?

Tempeh is also crazy kinds of good for you. It’s really high in protein and fiber, which fill you right up, but with much less calories and fat. Win win. It’s also made from fermented soybeans. There’s a lot of controversy out there right now about soy and whether it is ultimately beneficial or harmful to our health. Every study says something different, depending on which industry is behind the funding, but I recently read an article that was very interesting. It separated fermented soy products from non-fermented soy products, saying they most likely affect the body differently. Fermented soy products like tamari, miso, and tempeh are good for you and have all sorts of lovely health benefits having to do, I believe, with the bacteria used to ferment the products. Non-fermented soy products, like tofu and soy milk are actually the leftovers from fermented soy products - the result of an effort to avoid waste - and are supposedly more questionable upon regular consumption. I have no idea if it’s true, but it’s interesting, no?

And most importantly, tempeh is delicious! It has a lot more flavor and texture than tofu - like if a block of tofu and a veggie burger had a love child.  It has a nutty, meaty flavor, and a firm, chewy texture. Chewy like whole grains, not chewy like octopus, just to be clear. I've noticed that each brand of tempeh is a little different. I prefer the Trader Joe’s brand. It has millet and brown rice, and a nice mild flavor that takes on sauces very well. I’ve also seen other brands at Jimbo’s, Sprouts, and Henry's.  They're probably about the same, but I can't say for sure, since I've never tried them.  When it comes to prep, you can treat tempeh just like extra extra firm tofu.  Cut it into slices or cubes, or cut it in half and treat it like a veggie burger.  Marinate some flavor in before, or dunk it in sauce later.

Not helping its image, tempeh is generally sold with the questionable-looking fake meat products like tofurkey and fakin’ bacon. To make matter worse, I’ve actually seen tempeh that has been pre-seasoned to taste like various meat products. Bleck! Make sure what you’re picking up is just regular unflavored tempeh.


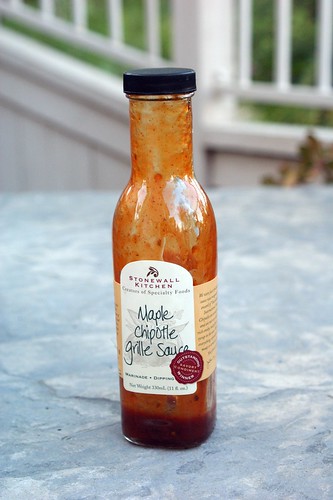
Tempeh is a very versatile food. I’ve seared it, drizzled orange-maple sauce, I’ve sauteed it in spicy peanut sauce, and now I’ve grilled it in chipotle maple sauce. It all works...deliciously! I used one of the famous Stonewall Kitchen sauces to add in flavor this time. Since it was a chipotle maple grille sauce, I figured grilling would be the appropriate cooking method. And, man oh man, is grilled tempeh delicious. That smoky charred flavor was totally addictive. I kept eating pieces off the grill, and these yummy tacos almost didn’t happen!

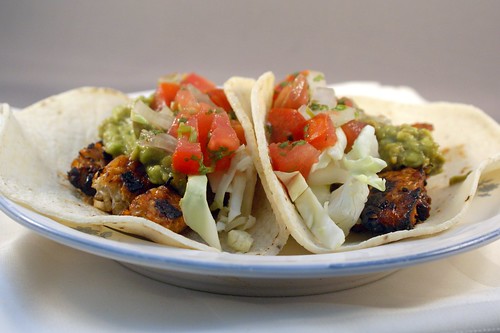
Speaking of yummy tacos, these tacos were...um...yummy! The fixin’s are, of course, optional and up to you, but I like my tacos with cabbage, guacamole, and some fresh pico de gallo. The sauce was a good compliment and the flavor came through really well.  It was sweet, though not cloying, and I actually did get a bit of heat from the chipotle.  I would definitely use this sauce again, I think it may even have been my fav.  With the fresh vegetables and acid from the lime, it ended up being even more delicious than the bits I ate off the grill.  I'm so glad I restrained myself.  Oh, and those tortillas?  Got them at Sprouts.  They contain 4 ingredients: masa, lime, salt, and water.  No icky preservatives or crazy additives.  I love 'em.

I hope whatever preparation you choose to employ, you will give tempeh a chance. It’s entirely possible you won’t like it, as Husband doesn't.  But on the other hand, you may discover a new food that is not only very tasty, but also seriously good for you and economical to boot! Have you ever tried tempeh? On which side do you fall?

Chipotle Maple Grilled Tempeh Tacos

Makes about 8-10 tacos

2 8oz packages of tempeh, cut into 1/2” strips
1 cup Stonewall Kitchen Maple Chipotle Grille Sauce
5-6 large tomatoes, chopped
1 medium yellow onion, finely chopped
1/2 cup cilantro, finely chopped
1-2 limes
1/2 head green cabbage, finely shredded
2 ripe avocados
salt and pepper to taste
corn tortillas
  1. In a bowl or tupperware, combine the tempeh and grille sauce, making sure the tempeh is well-covered. Cover the container and let it marinate for at least an hour. When you are ready to grill, let the tempeh come to room temperature. 
  2. Preheat your grill to medium-high heat and lube it up with some oil. Add the tempeh in an even layer, and let it cook undisturbed for 3-5 minutes, until it gets some good grill marks. Flip all the pieces over and grill for another 3-5 minutes. Brush some of the leftover marinade sauce on the cooked sides, and flip the pieces over again. Grill for a minute or two to caramelize the sauce a bit. Brush more sauce on the upturned side, and flip one last time to cook for, that’s right, one more minute. Remove the tempeh from the grill and let it cool down while you prepare the rest of your taco components. 
  3. To make the pico de gallo, mix the tomato, onion, and cilantro in a small bowl. Sprinkle with a pinch of kosher salt and pepper. Squeeze the juice from a lime over the mixture (if it’s a very juicy lime, you might want to start with just half), and stir to combine everything. Taste the salsa, and adjust the seasoning.  To make the guacamole, scoop the avocado flesh into a bowl, and add the juice from half a lime and a pinch of kosher salt and pepper. Mash the mixture and adjust the seasoning to taste. 
  4. To build the tacos, place a big pinch of cabbage on a tortilla. Add about 3 slices of tempeh, and top with guacamole, pico de gallo, and a healthy squeeze of lime juice. Enjoy!

Friday, October 1, 2010

Vidalia Onion Fig Broccoli Slaw


We have a winner, folks. I’m very happy to report the winner of the CSN Stores giveaway is none other than......drum roll please.......

Geri!

Congrats, Geri! No one deserves it more. A more committed and caring doggy mama you will never meet. Of course, it was still all chance. See?


A big thanks to everyone who participated!

Well no surprise here, you all are ready for fall. Fragrant pumpkin breads, hearty squash soups, slow oven-braised meats, and the like. I've just got a few more end of summer recipes to share with you first. How lame am I? Torturing you with such deliciousness, it’s unconscionable, I know. But you know what? Sure, we’re all in a big rush to eat the fruits of fall, but San Diego is just not ready to let summer go. While enduring triple-freaking-digit temperatures this week, I was glad to have a nice cooling slaw in the fridge. Right next to my even coolingier beer. Naturally. So you East Coasters who are dealing with torrential downpours and beautiful foliage, well, you’ll just have to wait.


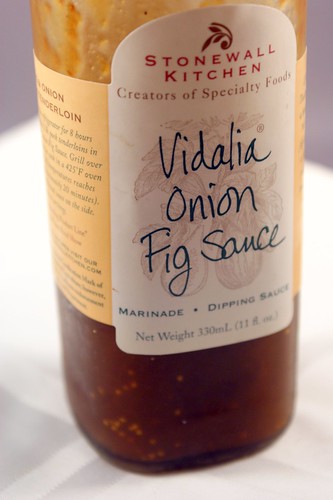
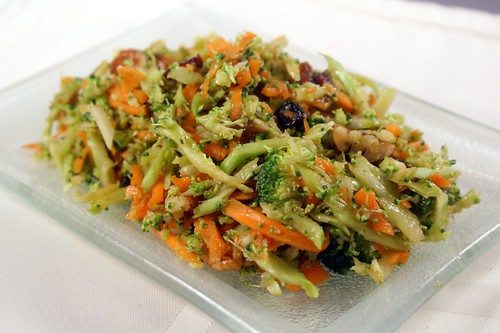
This broccoli slaw is pretty straight forward. It was actually one of those happy accidents. You know, when you buy broccoli at the store because it’s on sale and you love it in just about everything, and when you go to make something with it, you just kind of throw something together, whatever sounds good? Yeah, one of those happy accidents. I had some of that lovely vidalia onion fig sauce leftover from my awesomely delicious glazed pork, and turned it into a vinaigrette for the slaw. Good and gussied up with dried cranberries and toasted pecans, this slaw turned out better than anything I imagined when I first brought home that broccoli from the store. Don’t you love it when that happens?

I’m sure it will come as a shock to no one who reads this blog with regularity that I usually opt for a vinegar/oil-based dressing for slaws rather than drowning them in gobs of the devil’s condiment. Who needs fat when you've got flavor?  And this one had some great flavor. The fig sauce really came through when mixed with the oil, vinegar, and lemon juice to make a nice, cohesive dressing. The sauce added all the complexity needed.  No garlic, shallots, or any other finicky vegetable cutting or obscure spice procurement necessary! I’m very dressing-shy and will under-dress a salad or slaw to a fault, so feel free to double the recipe if you think you need more. Just remember you can’t remove it once you add it! Alternately, my slaws tend to be quite large in volume, so you could also cut that recipe in half very easily too. But then you won’t have as many leftovers.  And trust me, you're going to want leftovers.


Vidalia Onion Fig Broccoli Slaw

Makes about 6 cups, or about 12 servings

1 1/2 lbs broccoli
5 medium carrots
1 cup dried cranberries
1 cup toasted pecans, chopped

For the dressing:
2 TB fresh lemon juice (about 1 lemon)
2 TB sherry vinegar (or white wine vinegar)
pinch of salt
pinch of ground black pepper
1/4 cup Stonewall Kitchens Vidalia Onion Fig Sauce
1/2 cup olive oil

  1. Using a food processor fitted with the grater blade, shred the broccoli and carrots. [If you don’t have a food processor (you poor thing!), a box grater will work, though is a bit more labor intensive.] Combine the shredded broccoli and carrots with the cranberries and pecans in a large bowl.
  2. In a small bowl, combine the lemon juice, vinegar, salt, pepper, vidalia onion fig sauce, and olive oil. Whisk vigorously until the ingredients are emulsified (i.e. the oil and vinegar are combined into a cohesive liquid). Pour the dressing over the slaw and toss until everything is well-coated.

Wednesday, September 15, 2010

Grilled Corn Pesto


I have been remiss. I totally forgot all about this recipe until I was rifling through my “food pictures” folder and saw this right next to my grilled corn chowder folder - it’s alphabetized, ya know. Oh snap! How could I have forgotten such deliciousness? I was unconscionable of me, really. But the remedy is easy - sharing the recipe with you! Right now. Forthwith.

And by forthwith, I mean after I’m done talking my head off about it. Terse I am not, people.

I made this a few weeks ago when corn was on super sale at the store. Actually, I thought it was a super sale at the time, but I found out my naivety the next week when I was all corned out and it was even cheaper. The same thing happened to me last week with peaches. Don’t you hate that? Anyway, I had come across a pasta dish in the course of my interweb travels that was topped with a fresh corn pesto, which used corn instead of the more traditional greenery of basil or spinach. Intrigued, and laden with several ears of corn, I decided to do my own spin.

First off, I grilled the corn. Of course I did. Remember when I said that I’ll never cook corn another way? Ok, I don’t think I ever actually put it in those terms, but I figured the sweet, caramelized flavors of grilled corn would add a great flavor to the pesto. I was right - it was amazing. I’m too modest, I know. Other than the corn, this is a pretty traditional pesto. Or at least, traditional for me. I don’t usually have pine nuts in the pantry, so I like to use almonds. The silky, mellow nut flavor from the almonds went really well with the corn. All ground up, it’s like velvet. That’s a taste, right? I had a handful of basil thanks to an awesome friend who had sent me home with some from her garden the day before, so I threw it in. Along with the parsley, it did a great job of brightening the sauce with some needed herbaciousness, but the lesser amount kept it as a complimentary background flavor. The corn was the star of this pesto. It was creamy, sweet, and tasted distinctly of summer. Definitely a winner!

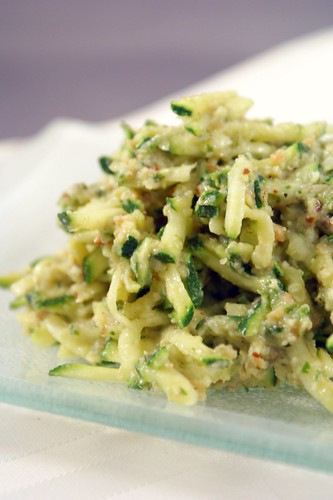
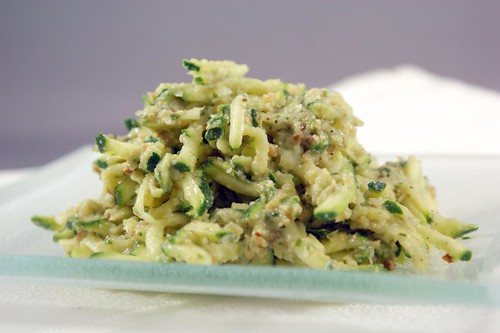
I know pasta is the traditional means of delivering sauces, like pesto, to your mouth. But corn is a very starchy vegetable*, and, well I admit it, I am totally neurotic about eating too many carbs. It has absolutely nothing to do with any kind of moronic low-carb diet. I just know my body, and super starchy meals result in a very unhappy Julie, hungry with low blood-sugar. It’s pretty much the worst thing ever because I love carbs. It’s pretty much all I ate for the first, um, 27 years of my life...or so. Sometimes feeling your best means sacrificing your wants for your needs. Also? I needed a vegetable for this particular meal. So I shredded up some zucchini (using my handy-dandy Cuisinart food processor with the shredding blade. (I’ve been using that shredding blade all summer to make all kinds of slaws. Yum! (I’m not trying to plug Cuisinart, but last week a friend asked what food processor I use, so I figured I’d share. (She’s getting married. Congrats! (I think all people getting married should register for a food processor. You might not use it right off that bat, but one day you’ll need it, and the love affair will begin...)))))**, and tossed it with the pesto to make a delightful side. Somewhere Husband is laughing at my use of the word “side,” saying that, in terms of proportions, vegetables are always my main. And he’s right, but nevermind that. I think the punch of flavor from the pesto and the fresh, crisp texture from the zucchini was a great combination, but of course, there are a million ways to have fun with how you eat this. Grilled corn pesto pizza? That’s a salivating idea, indeed! Want to go a healthier route, but not tickled by the idea of zucchini? Try roasted spaghetti squash. You’ll still get that fresh bite (even though it’s fully cooked, spaghetti squash, amazingly, still manages to maintain a crispness to it), but with a bit of a milder flavor. You could also serve it directly over some meat.  Since you're grilling anyway, maybe a few slices of grilled steak?  Heck, I went ahead and ate a few spoonfuls right out of the bowl. So, you know, that’s always an option too.

However you choose to eat this pesto, I highly recommend you make it. It’s sweet, it’s silky, and it tastes like summer.  In hindsight, I wish I had captured a shot of the sauce by itself.  But after spending hours thinking about the recipe, buying the ingredients, and putting it all together, I just wanted to eat it.  Can you blame me?

How would you serve this? I’m always looking for ideas.


*You know that Manwich commercial where the kid is dressed up like a Manwich for a school play and some kid in a corn costume chides her, saying she’s supposed to be a vegetable? I always yell at that kid that I don’t count him as a vegetable either. And really, that commercial is just a bunch of BS. When a food company tells you their product “counts” as a serving of something healthy, don’t buy it.
**You counted my parentheses to make sure I closed them all off, didn’t you? Admit it.


Grilled Corn Pesto

makes about 3 cups

4 ears of grilled corn (see instructions below)
1 cup Parmesan cheese, shredded
1/2 cup almonds, toasted
3 cloves garlic
juice of 1 lemon (about 2 TB)
1/4 cup parsley, chopped
1/2 cup basil, chopped
salt and pepper to taste
1/4 cup of olive oil, or more for desired taste and consistency

Blend all the ingredients in a food processor, minus the olive oil. When the ingredients are well blended, with the food processor running, stream in the olive oil until a thinned out sauce forms. Add enough olive oil until your desired consistency is reached. Serve over pasta, meat, or shredded vegetables.

Note: You can toast almonds in the oven at 350 degrees for a few minutes or in a dry pan over low heat. Just until you can smell their oils releasing. I use my toaster oven. It’s fastest. 


Grilled Corn (cut and pasted from this post)
  1. Over medium heat, place the corn (in their husks!) on the grill, directly over the flames. Turn the corn every 2-3 minutes, when the husks begin to blacken. The silk or ends of the husks might catch fire as they dry out. I think this adds an amazing smoky flavor to the corn, but if you’re scared (chicken!), just make sure to trim those bits off before you put them on the grill. [Practice proper safety! Always use long tongs when handling the corn, and keep your digits away from the flame.] 
  2. When the husks are good and charred and the kernels are mostly cooked, remove the corn from the grill and place it in a pan or bowl you have standing by until it cools down a bit. Carefully peel back and remove the husks, watching out for any trapped hot steam. Place the naked ears (teehee!) back on the grill and turn every 1-2 minutes, or until as many kernels as possible have browned and caramelized. Brown = sweet flavor! 
  3. Remove the corn from the grill, and when it is cool enough to handle, cut the kernels from the cob. Scrape the back of your knife along the cob to really get all the creamy corn bits out of there.

Monday, August 16, 2010

In Which I Say Naked A Lot


Recipe below: Grilled Corn Chowder

Well, fellow eaters, I am still on my exercise kick, so skip down past the next picture if you don’t want to read my latest soliloquy because either way, you are going to want to hear about this soup. The problem with discussing exercise is keeping it short, as there’s just so much to say! But I’ll attempt to rein myself in by keeping to one very specific topic. Equipment.

In my opinion there is only one piece of exercise equipment you absolutely need - a heart monitor. Whether you do swimming, running, walking, biking, cardio kick-boxing, or even weight lifting, the point of exercise is to get your heart rate up. That’s how you increase your fitness level. A higher heart rate means your heart is working harder to pump that blood through your system, making it stronger, and burning oodles of calories in the process. Monitoring my heart rate means I can ensure I am not over-doing or under-doing my workout (and it is so easy to do both!).

The way it works is a heart monitor comes with 2 pieces - a transmitter and a receiver. As I’ve seen them, the transmitter is a band that goes around your chest, just under the she-boob or he-boob, as the case may be (or as close to your heart as possible). It has these nifty sensors that can measure your heart rate pretty darn accurately when placed against your skin. The receiver is a wrist watch that displays your heart rate, and depending on the product you get, generally has a ton of other features. Mine has settings for my age, height, weight, and target heart rate, and uses this information in conjunction with my heart rate to display how many calories I’ve burned. And obviously, most can double as a real watch as well.

What should your target heart rate be? If you take a look at the cardio equipment at the gym, some machines will display a small graph with a descending line, comparing heart rate with age. That’s the really high level answer. The most basic formula is to subtract your age from the number 220 to give you your maximum heart rate. So as I’m 28, my maximum heart rate is 192. That means if I let my heart rate get that high, I am a moron who probably will seriously hurt myself. But don’t worry; I would probably pass out before it got that high anyway. Your target heart rate is all about the percentage of your maximum heart rate. And the percent you choose is based on how hard of a workout you’re looking for. 50-60% is a good place for beginners, and people looking for serious cardio health generally shoot for 70% or higher. I found this article to be a good, short summary of this information, and that website can be a great resource for more fitness information. Though it can be a bit intimidating, since it’s geared more to serious athletes that make me look like a lazy bum.

I’ve become so dependent on my heart monitor, I feel absolutely naked working out without it! But you might decide they’re not for you, and that’s okay too. There are other, far less accurate, but perfectly acceptable methods to give you an idea of how hard your heart is working. There’s the conversation method for one (or “talk test”). Do you ever come across a pair of women who are briskly walking and carrying on a full conversation? They are most likely not exercising in the aerobic zone. When your heart rate is in the aerobic zone, generally you can carry on light conversation, so short answers, not full sentences, and not easily. If your heart rate is too high, it’s uncomfortable to say more than one word before taking a breath. And, again, if you can carry on a full conversation without any trouble, your heart rate isn’t high enough.  And of course, that's not to say that going for a light walk with some pals isn't a perfectly acceptable form of exercise.  Something is always better than nothing.  But don't go eat a big burger and fries for dinner right after, thinking you've "earned it."  Be reasonable!  Another method is the perceived effort test, which I don't fully understand.  Basically, you figure, on a scale from 1-10 (or whatever scale you want), if 1 is no exertion and 10 is I'm gonna die if I don't stop, how hard do you perceive your current effort to be?  I think it sounds weird and subjective, but hey, it's all about what works for you.

If you’re interested in reading more than you ever wanted to know about how heart rates are calculated, check out this article. That website is another great resource for people looking to learn more about fitness and general health.

I’ll wrap it up by quickly mentioning that heart rate monitors completely vary both in price and features. You can get fancy ones that compile data from all your workouts that you can upload to your computer and make big nerdy graphs with, or you can get basic ones that do little more than display your current heart rate and the time. Unfortunately, even the basic monitors are on the pricey side. While the higher end models will easily cost you hundreds of dollars, there are several good options out there in the $60-$100 range. So they’re doable. I use my heart monitor every time I exercise, so I’ve definitely gotten my money’s worth! The one I use is a few years old now, but it’s pretty similar to this model from Polar.

Have you ever used a heart monitor and did you find it useful? Do you tend to over-work or under-work your love organ when you work out?

I meant your heart, what were you thinking of?


My greatest blog supporter sent me a message yesterday with a link to this article and mentioned it would be a good idea to make reference to some of the health benefits of the delicious, whole foods I’m always yapping on about. What a concept! You’ve probably seen the term “superfood” listed in hundreds of health articles. It’s quite the buzzword at the moment. But it’s a good buzzword! Eating a diet rich in whole foods instead of processed foods means you’re not just eating less calories and cutting out things your body doesn’t need, like preservatives, it also means you’re getting all the vitamins, minerals, and other compounds found in whole foods that are destroyed during processing. The general idea I would take from this list is that it’s important to eat a healthy variety of nuts, beans, lean proteins, and as many colorful fruits and vegetables as you can stomach. Hit up all the food groups, and don’t forget that herbs and spices come from Mother Earth too! Your well-harnessed radicals will thank you.

I will say it was a very timely message, since allllll the way at the bottom of that list is corn. And corn just so happens to be what I’m touting today! It apparently protects against UV damage. As someone as pale as a ghost and susceptible to sunburns faster than Husband can inhale a blueberry muffin, the antioxidants found in corn are for me! 

[And thank you, friend, for providing me a somewhat more graceful segue into today's recipe.  Trying to get from heart monitors to corn was really throwing me for a loop!]

So, it’s corn season! A fact that in past years wouldn’t have excited me in the least. I was just never a corn person. Then one day on a hot July afternoon, Husband grilled some corn, and it’s been a love affair I’ve been relishing ever since. Amazing how that grill, to borrow a phrase, makes my skirt fly up, it’nd it?

Now I’m sure most people have had grilled corn. Go to any place they’re grilling meat, and you’ll see naked ears thrown down and slathered in a ton of butter. That’s not the grilled corn I’m talking about. Oh-ho no. This grilled corn is fat-free. No joke! See, I leave the husks on. When I buy corn at the store I always see a gaggle of people standing around the corn bin, husking their corn and shoving the naked ears into plastic bags. It’s tragic! Corn deserves some dignity, people! By grilling the corn in the husk, the husk dries out over the open flame and gives off this amazing corn aroma that infuses into the kernel. Also, the corn can fully cook without burning because it cooks most of the way through in the husk, where the open flame can’t get it. Then I remove the husks and let the naked corn do its delicious caramelization thing, and voila! Perfectly cooked, sweet corn, plumped and browned kernels, and all with a totally punched up flavor.

You’ll never husk your corn at the store again. Admit it.

Since this amazing discovery - which I hate to admit is, once again, all Husband’s own genius. Darn him. - I have been grilling corn left and right. Grilled corn and edamame miso salad. Grilled corn pesto (this one is in the posting queue as well...*droooool*). And this here grilled corn chowder. I had been ogling corn chowders all summer, and with all the ingredients needed conveniently located in my kitchen, how could I say no?

This chowder was silky. It was sweet, it was spicy enough to make it interesting without making it hot, and it was creamy without being heavy. In a summer chowder it is imperative to be creamy but not heavy. Not only are soups leaden with cream, cheese, and butter generally pretty unhealthy, but they are just about the most unappetizing thing to eat on a hot summer day. So here’s my trick for getting a silky texture in a pureed soup sans dairy - roasted cauliflower. It lends a delicate sweetness that blends seamlessly with any soup, and has a thick, creamy texture that can rival cream without weighing it down. It is my secret weapon! That said, this recipe does actually have a small about of cream and milk. Quite honestly, I added them because I had tiny amounts of each in the fridge and just wanted somewhere to dump them before they spoiled. I think I would keep the milk in, but next time I would nix the cream. It was seriously not needed, and even a little too heavy for my taste. I left them in the recipe, though, because I know most people probably like creamier soups than I do. I’ve been off heavy foods for so long, I’m just uber-sensitive. Heck, you could even add more. Isn’t cooking to your liking, after all, what makes home cooking great?

I’ll also add that I used sherry in this recipe over white wine only because I was too lazy to go open a new bottle of wine when I had an open bottle of sherry sitting right next to me on the counter. All decisions are not taste inspired. I admit it openly! I also added the celery salt because I had just bought it on super clearance at the store and I wanted to try it. Yep, I’ll just air all my dirty laundry here today. But really, I think they both worked in the recipe. If you don’t have celery salt and an open bottle of white wine...well I think you know what to do. As for the rest of the herbs and spices that made this soup what it is...I used the Julie method - pull out the spice drawer in the pantry and just grab what sounds good! They did exactly what I wanted them to, which is add a complexity to the dish without overpowering the star - the corn. So many chowders just rely on the fat from the cream and the sugar from the corn to provide all the flavor. That’s boring! Punching up flavor without adding calories is what good healthy cooking is all about. 

The best thing about this soup was, of course, the corn!  And it was everywhere in this soup because I used every bit of it!  Once I had removed the cooked kernels from the cob, I simmered the empty cobs in the broth.  That's right, no weak corn flavor here!  This way I was able to keep the corn kernels whole and still get the rest of the soup infused with corn flavor.  This soup was sweet but not sugary, rich but not heavy, and rustic but not unsophisticated.  Definitely a permanent addition to my summer soup repertoire!  Take this recipe and make it your own.  Just make sure you grill the corn, you won't regret it!


Grilled Corn Chowder

makes about 8 servings

4 ears of corn (in their husks!)
2 TB olive oil, divided
1 tsp salt, divided
1 large onion, chopped
2 medium shallots, finely chopped
5 cloves garlic, minced
2 jalapenos, seeded and minced
1 large russet potato, diced
1 small head cauliflower, roughly chopped
1/2 tsp ground black pepper
1 1/2 tsp sweet paprika
1 tsp ground coriander
1/2 tsp celery salt (optional)
1/4 tsp cayenne (or more to taste)
2 tsp dried oregano
1 tsp dried tarragon
1/2 tsp cumin
2 cups dry sherry (or white wine)
4-5 cups chicken broth
1/4 cup heavy cream (optional)
1/2 cup whole milk
1/2 cup cilantro, finely chopped

To grill the corn:
  1. Over medium heat, place the corn (in their husks!) on the grill, directly over the heat. Turn the corn every 2-3 minutes, when the husks begin to blacken. The silk or ends of the husks might catch fire as they dry out. I think this adds an amazing smoky flavor to the corn, but if you’re scared (chicken!), just make sure to trim those bits off before you put them on the grill. [Practice proper safety! Always use long tongs when handling the corn, and keep your digits away from the flame.] 
  2. When the husks are good and charred and the kernels are mostly cooked, remove the corn from the grill and place it in a pan or bowl you have standing by until it cools down a bit. Carefully peel back and remove the husks, watching out for any trapped hot steam. Place the naked ears (teehee!) back on the grill and turn every 1-2 minutes, or until as many kernels as possible have browned and caramelized. Brown = sweet flavor! 
  3. Remove the corn from the grill, and when it is cool enough to handle, cut the kernels from the cob. Scrape the back of your knife along the cob to really get all the creamy corn bits out of there. Set the kernels aside, and reserve the empty cobs as well (don’t throw them away!). 
To make the soup:
  1. In a dutch oven or soup pot over medium heat, sauté the onion and shallots in 1 TB of olive oil and 1 tsp of salt until they are soft and starting to brown, about 10 minutes. Add the garlic and jalapeno and cook another 3 minutes, until softened. Add the potato and cook until starting to soften, about 5 minutes. Add the remaining tsp of the salt, pepper, paprika, coriander, celery salt, cayenne, oregano, tarragon, and cumin, stir to coat the vegetables, and let it cook for about a minute, until the spices release their fragrant oils. 
  2. Increase the heat to high and deglaze the pot with the sherry, making sure to scrape up any flavor bits from the bottom. Bring the sherry to a simmer and let it reduce by half, about 1 cup of liquid. Add the chicken broth, and when it has come to a boil add the reserved empty corn ears. Reduce the heat to low, cover the pot and simmer for at least 30 minutes. The longer you let it simmer, the more flavor the soup will have. I would shoot for an hour if you have the time.
  3. While the soup is simmering, preheat the oven to 425 degrees. Spread the chopped cauliflower in a single layer in a roasting pan, and toss with the remaining TB of olive oil. Roast in the oven for about 20-25 minutes, or until the cauliflower is soft and starting to brown around the edges.  Check on it about 10 minutes in and give it a good stir so it browns evenly.
  4. When the soup is simmered to your satisfaction, remove the pot from the heat and let it cool down a little. Remove and discard the ears of corn, and stir in the roasted cauliflower. When it is cool enough, puree the soup using an immersion blender, blender, or food processor. 
  5. Place the soup back over medium-low heat. Add the reserved corn kernels, cream, and milk. Bring the soup to a bare simmer and let it cook for 10 minutes or so, just to let all the flavors come together. 
  6. Stir in the chopped cilantro at the very end and serve.