Wednesday, September 1, 2010

Blueberry Rhubarb Pie


I apologize for my lack of posting last week.  Took the husband and furkid up to Reno for a visit with the family and I was just having far too much fun to talk to you.  The highlight?  There was 'smores making by the firepit in my parents' backyard on a gorgeous, crystal clear night.  There was getting smashed together on cocktails and wine and then stumbling around the neighborhood, attempting to take my dog for a walk.  But the real highlight was definitely getting to hang with my 10 month old nephew, who is the perfect package of happy, hilarious, and adorable.  The kid has what my sister calls "his badass face" for goodness sakes!  It's badass.

Another highlight was a second go at Husband's Ultimate Birthday Cake.  You may recall I made this for Husband's birthday a few months ago with much success.  Too much success!  Husband had been bugging me to make it for him ever since, and this trip finally seemed like a good time to do it.  Something about having 4 other people in the house to help eat it quickly was certainly appealing.  This was actually the first time I've followed one of my own recipes.  Sure, I've written stuff down as I go, jotted down quick instructions to myself, or modified and adapted other people's recipes, but hearing my own voice come through as I followed this recipe step by step was kind of surreal.  And kind of awesome!  I kept thinking, "I know exactly what I mean!" 

And having made this cake twice now, I can safely boast that it is awesome!!!  Seriously.  Not to toot my own horn or anything, but both my sister and my dad declared their disdain of the chocolate/raspberry flavor combination before trying this cake.  [*GASP!*  Blasphemy!  Chocolate and raspberry are the ultimate!  ULTIMATE!  Ok, only my dad expressed disdain.  My sister merely said she had never tried a chocolate raspberry dessert to her liking before.  My sister - always the diplomat.]  After they each tried a piece, however, it was a whole other matter.  There was lots of raving.  And not polite raving.  Adamant, genuine, "I'm a believer!!!" raving.  They both said the flavors were perfectly balanced - not too sweet, not too tart.  And my mom, who was of the opinion that no cake could be worth that much effort, decided that this cake was worth that much effort, as long as someone else was making it.  Anyone know the onomatopoeia for a head inflating?  *Wooshooop!*  Because that's what's happening right now.  I just love cooking for my family.  Part of the reason I'm so neurotic about feeding other people is that I get so worried that they hate my food but they're too polite to say so, so I just tend to assume no one liked anything and I was just this crazy food-pusher they couldn't get away from.  But family is different.  You can tell when they're lying. Mwhahaha!

And one more highlight - my discovery of pumpkin seed oil!  Have you ever heard of it?  Apparently it's common in Europe, and there's a European market in Reno where my mom can buy it.  I'm, of course, kicking myself for not getting to that market to get my own bottle because it is some seriously nommy stuff.  For dinner one night my mom grilled some veggies simply tossed with a little olive and pumpkin seed oils, then threw it all together with some brown rice and shrimp.  I figured it would be tasty, but the pumpkin seed oil hit this meal out of the park.  It was that secret ingredient that made all the flavors come together perfectly. Yum!   Mom, if you are reading this, please bring me a bottle next time you visit! 
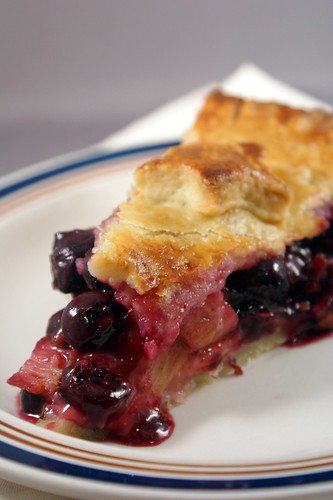
But enough about cake and plant oils.  I'm here to talk about pie.  I've been sitting on this recipe far longer than I wanted to.  It's still blueberry season, right?  Well I highly suggest you run out and buy every last clamshell of blueberries you can find because this pie is worth it.  I know, rhubarb usually goes with strawberries, in fact strawberry rhubarb is Husband's favorite pie, but one bite of this baby had him saying "Strawberry who?" No joke.

Pie crust.  Let's hash it out and get it out of the way.  Tender vs. flaky.  Shortening vs. butter.  Everyone has their own pie crusts tastes.  Some people like all of one or another, some people have different ratios of both.  I have by no means baked pie crusts extensively enough to give a definitive opinion on the matter, but I will say that of the crusts I've made so far, I am in the all butter camp.  First, shortening doesn't taste like anything.  People use it because it makes for a flakier crust.  But here's the thing.  I find butter crusts plenty flaky, and I actually prefer the more tender texture all butter crusts have.  Not to mention their amazingly buttery flavor.  You just have to incorporate the butter the right way, and maybe have a trick or two up your sleeve.  Like booze!  Have you heard of using vodka in pie dough?  It's wet enough to bring the dough together, but it doesn't gum up the flour like water does.  But vodka has no flavor, so I decided to try Goldshlager instead.  I thought the cinnamon liqueur might infuse a little extra flavor into the dough.  While it succeeded in keeping my dough light, I didn't get a lot of cinnamon flavor, so next time I might just stick with vodka.  I'm on a budget, after all, and they unfortunately don't sell Goldschlager at Costco.  The most important thing with a good pie dough is making sure everything is cold.  I actually stuck the butter in the freezer until it was just frozen, which worked perfectly.  I like to work the dough with my hands, but that always warms the butter too much.  This way the frozen butter actually needed the heat from my finger tips to become workable. 

To the novices out there who are completely intimidated at the thought of making pie: you can totally do this.  Pie crust can be a pain, and if you want it perfect, you do have to be somewhat of an artist, but I maintain that anyone can make a decent pie crust.  It'll probably be flawed, sure, but it'll be tasty, and isn't a tasty pie the real goal?  Start off by reading Deb's tips for the logistics of proper pie construction at Smitten Kitchen.  I always thought the hardest part was rolling it out.  I remember my mom's many failed attempts to get her pie crusts from the mat to the pie plate in one piece.  Turns out the secret is just lots of flour, and lots of turning.  Easy!

Now the filling.  I'm swooning just thinking about it.  I actually set out just to make a plain blueberry pie, but when I had all the berries in the bowl, I knew it was lacking in volume.  I had by chance bought some frozen rhubarb at Sprouts a few weeks ago because I was curious (also, it was on sale - impulse buy!). I had never seen frozen rhubarb before, and neither had the cashier who rang me up.  She asked if it was good, and I told her I'd have to let her know.  I figured, what the hell, and threw it in with the rest of the filling.  I guess it was fate because this is easily the best pie I've ever made - including strawberry rhubarb!  It was just the right balance of sweetness from the blueberries and that touch of sour tartness from the rhubarb.  I love the sweetness of blueberries, but find a little acid to break up their flavor really brings them up a notch. And the deeper sweet flavor of the brandy brought everything together perfectly.  But the real secret was the tapioca starch.  All purpose flour is normally used in pies to help thicken the filling, but tapioca starch does a much better job of making a glutenous mixture.  Got that trick from Alton Brown.  I buy tapioca starch at the Asian market, but I'm sure it can be found at other specialty markets.  If you don't have any, just use regular AP flour.

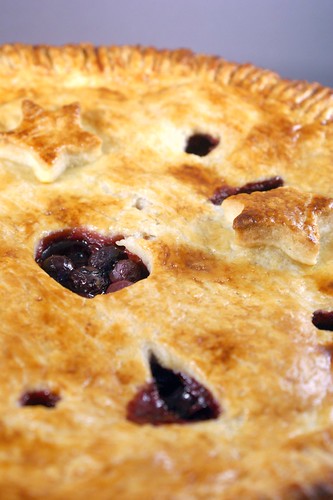
It may be an ugly pie, but it was darn delicious.  When Husband and I were ready for dessert all conversation would cease while consumption was happening. Unless it was one of us chiming in to say how good the pie tasted.  But usually it just came out as approving grunts and groans.
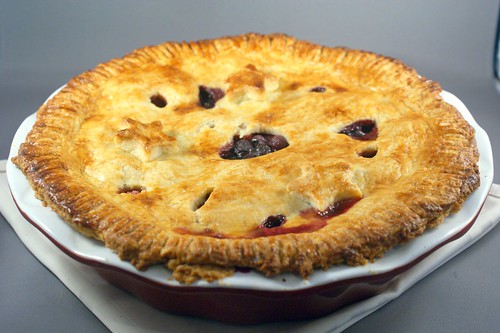
  
Blueberry Rhubarb Pie

crust adapted from Smitten Kitchen
filling adapted from Joy the Baker

For the crust (both top and bottom):

2 1/2 cups flour
1 tablespoon sugar
1 teaspoon salt
1 cup (2 sticks) unsalted butter
2 TB ice cold water
Goldshlager (or vodka)
For the filling:

18oz fresh blueberries
12oz bag frozen rhubarb, thawed (or about 2 cups fresh rhubarb, chopped)
1 cup sugar
1/2 cup tapioca starch (or substitute AP flour)
zest of half a lemon (about 1/2 tsp)
1 tsp lemon juice
1 tsp cinnamon
pinch of kosher salt
3 TB brandy
1 egg
1 TB milk
To make the dough:
  1. Cut the butter into small pieces and break them apart. [I like to cut the stick lengthwise, turn it 90 degrees, and then cut it lengthwise again, so I have 4 long sticks. Then I cut regular tablespoon-size pats, so I end up with a bunch of 1/4 TB pieces.] Put the well-separated pieces into a bowl and place it in the freezer for about 30-40 minutes, or until they are just barely frozen through.
  2. In a medium bowl, mix together the flour, sugar, and salt. Add the frozen butter and gently work it into the flour with your fingertips. Since it’s frozen, you’ll have to kind of smush it out. Use your finger muscles! The butter will be incorporated enough when you have small pea-sized bits of butter left.
  3. Add the very, very cold water and stir it into the mixture. This shouldn’t be enough moisture to bring the dough together, so add the Goldshlager 1 TB at a time until the dough will just form into a ball. Divide the dough evenly into two balls. Wrap each ball tightly in plastic wrap and squish it into the shape of a round disc, like a giant hockey puck.
  4. Chill the dough in the refrigerator for at least 2 hours, but overnight is okay too.
To make the pie:

  1. In a bowl, combine the blueberries, rhubarb, sugar, tapioca starch, lemon zest, lemon juice, cinnamon, salt, and brandy. Mix until everything is incorporated and the fruit is well coated. Set aside.
  2. Remove one hockey puck of dough from the refrigerator. On a very well floured surface, roll out the dough evenly until it is big enough to cover your pie plate, plus a 1/2 inch or so. This is best achieved by constantly turning and flipping your dough so it doesn’t stick to your surface. Don’t be afraid to add too much flour, you can’t. Transferring to the pie plate can be tricky. I like to fold the dough in half, and then in half again, and then transfer the quarter wedge to the plate and carefully unfold it. But use whatever method you like.
  3. Gently press the dough into the plate and trim off any dough overhanging more than a 1/2 inch over the plate. Using the excess bits to fill any holes or imperfections you have. Remember, you won’t see the bottom crust, but you’ll taste any spots where there’s missing dough. Pour the blueberry mixture over the bottom crust and set aside.
  4. Remove the second hockey puck of dough from the refrigerator, and roll it out the same way you did the first one. When it is big enough to cover the pie with at least a 1/2 inch overhang, figure out what’s going to be the center. You need to make vents in the top crust for the steam to escape. I cut a hole about the size of a shot glass in the very center, but it can be anywhere. You’ll want at least one. I also cut a few smaller holes around the edges. When the dough is properly ventilated, carefully cover the pie, and again trim any excess. Tuck the two crusts under so it is flush with the plate. Using your fingers or a fork, crimp all the way around the edge of the pie so it’s sealed. Cut a few more vents in the crust. Put the pie in the refrigerator to chill for about 20 minutes.
  5. While the pie chills, preheat your oven to 425 degrees and move the rack to the lower third of your oven. If you’re worried about filling bubbling over and making a mess you can put a cookie sheet under the rack to catch any drippings.
  6. Beat the egg and milk together and brush evenly over the top of the chilled pie, making sure none of it pools.When the oven is ready, bake for 30 minutes, then knock the heat down to 375 degrees and bake for another 30 minutes. If the pie starts to get too brown before it is finished baking, cover it loosely with foil (I did this about 45 minutes in). The pie is finished baking when the crust is golden brown and the filling is thick and bubbling.
  7. Let the pie sit and fully cool before cutting into it to give the filling time to come together, at least 4 hours.  Don't jump the gun, you'll regret it!

Monday, August 16, 2010

In Which I Say Naked A Lot


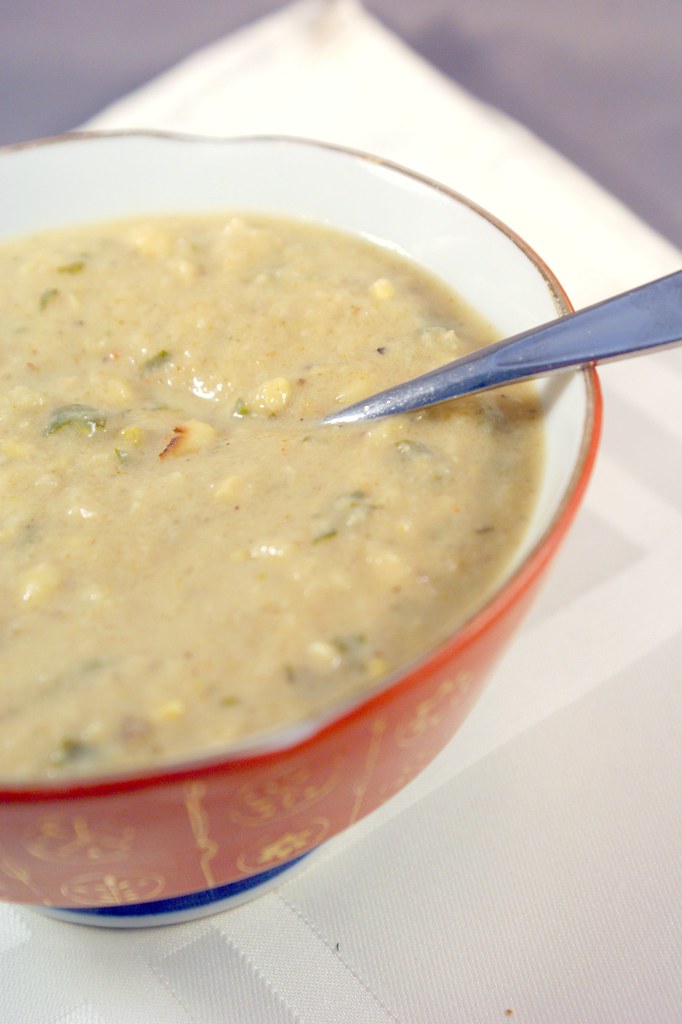
Recipe below: Grilled Corn Chowder

Well, fellow eaters, I am still on my exercise kick, so skip down past the next picture if you don’t want to read my latest soliloquy because either way, you are going to want to hear about this soup. The problem with discussing exercise is keeping it short, as there’s just so much to say! But I’ll attempt to rein myself in by keeping to one very specific topic. Equipment.

In my opinion there is only one piece of exercise equipment you absolutely need - a heart monitor. Whether you do swimming, running, walking, biking, cardio kick-boxing, or even weight lifting, the point of exercise is to get your heart rate up. That’s how you increase your fitness level. A higher heart rate means your heart is working harder to pump that blood through your system, making it stronger, and burning oodles of calories in the process. Monitoring my heart rate means I can ensure I am not over-doing or under-doing my workout (and it is so easy to do both!).

The way it works is a heart monitor comes with 2 pieces - a transmitter and a receiver. As I’ve seen them, the transmitter is a band that goes around your chest, just under the she-boob or he-boob, as the case may be (or as close to your heart as possible). It has these nifty sensors that can measure your heart rate pretty darn accurately when placed against your skin. The receiver is a wrist watch that displays your heart rate, and depending on the product you get, generally has a ton of other features. Mine has settings for my age, height, weight, and target heart rate, and uses this information in conjunction with my heart rate to display how many calories I’ve burned. And obviously, most can double as a real watch as well.

What should your target heart rate be? If you take a look at the cardio equipment at the gym, some machines will display a small graph with a descending line, comparing heart rate with age. That’s the really high level answer. The most basic formula is to subtract your age from the number 220 to give you your maximum heart rate. So as I’m 28, my maximum heart rate is 192. That means if I let my heart rate get that high, I am a moron who probably will seriously hurt myself. But don’t worry; I would probably pass out before it got that high anyway. Your target heart rate is all about the percentage of your maximum heart rate. And the percent you choose is based on how hard of a workout you’re looking for. 50-60% is a good place for beginners, and people looking for serious cardio health generally shoot for 70% or higher. I found this article to be a good, short summary of this information, and that website can be a great resource for more fitness information. Though it can be a bit intimidating, since it’s geared more to serious athletes that make me look like a lazy bum.

I’ve become so dependent on my heart monitor, I feel absolutely naked working out without it! But you might decide they’re not for you, and that’s okay too. There are other, far less accurate, but perfectly acceptable methods to give you an idea of how hard your heart is working. There’s the conversation method for one (or “talk test”). Do you ever come across a pair of women who are briskly walking and carrying on a full conversation? They are most likely not exercising in the aerobic zone. When your heart rate is in the aerobic zone, generally you can carry on light conversation, so short answers, not full sentences, and not easily. If your heart rate is too high, it’s uncomfortable to say more than one word before taking a breath. And, again, if you can carry on a full conversation without any trouble, your heart rate isn’t high enough.  And of course, that's not to say that going for a light walk with some pals isn't a perfectly acceptable form of exercise.  Something is always better than nothing.  But don't go eat a big burger and fries for dinner right after, thinking you've "earned it."  Be reasonable!  Another method is the perceived effort test, which I don't fully understand.  Basically, you figure, on a scale from 1-10 (or whatever scale you want), if 1 is no exertion and 10 is I'm gonna die if I don't stop, how hard do you perceive your current effort to be?  I think it sounds weird and subjective, but hey, it's all about what works for you.

If you’re interested in reading more than you ever wanted to know about how heart rates are calculated, check out this article. That website is another great resource for people looking to learn more about fitness and general health.

I’ll wrap it up by quickly mentioning that heart rate monitors completely vary both in price and features. You can get fancy ones that compile data from all your workouts that you can upload to your computer and make big nerdy graphs with, or you can get basic ones that do little more than display your current heart rate and the time. Unfortunately, even the basic monitors are on the pricey side. While the higher end models will easily cost you hundreds of dollars, there are several good options out there in the $60-$100 range. So they’re doable. I use my heart monitor every time I exercise, so I’ve definitely gotten my money’s worth! The one I use is a few years old now, but it’s pretty similar to this model from Polar.

Have you ever used a heart monitor and did you find it useful? Do you tend to over-work or under-work your love organ when you work out?

I meant your heart, what were you thinking of?


My greatest blog supporter sent me a message yesterday with a link to this article and mentioned it would be a good idea to make reference to some of the health benefits of the delicious, whole foods I’m always yapping on about. What a concept! You’ve probably seen the term “superfood” listed in hundreds of health articles. It’s quite the buzzword at the moment. But it’s a good buzzword! Eating a diet rich in whole foods instead of processed foods means you’re not just eating less calories and cutting out things your body doesn’t need, like preservatives, it also means you’re getting all the vitamins, minerals, and other compounds found in whole foods that are destroyed during processing. The general idea I would take from this list is that it’s important to eat a healthy variety of nuts, beans, lean proteins, and as many colorful fruits and vegetables as you can stomach. Hit up all the food groups, and don’t forget that herbs and spices come from Mother Earth too! Your well-harnessed radicals will thank you.

I will say it was a very timely message, since allllll the way at the bottom of that list is corn. And corn just so happens to be what I’m touting today! It apparently protects against UV damage. As someone as pale as a ghost and susceptible to sunburns faster than Husband can inhale a blueberry muffin, the antioxidants found in corn are for me! 

[And thank you, friend, for providing me a somewhat more graceful segue into today's recipe.  Trying to get from heart monitors to corn was really throwing me for a loop!]

So, it’s corn season! A fact that in past years wouldn’t have excited me in the least. I was just never a corn person. Then one day on a hot July afternoon, Husband grilled some corn, and it’s been a love affair I’ve been relishing ever since. Amazing how that grill, to borrow a phrase, makes my skirt fly up, it’nd it?

Now I’m sure most people have had grilled corn. Go to any place they’re grilling meat, and you’ll see naked ears thrown down and slathered in a ton of butter. That’s not the grilled corn I’m talking about. Oh-ho no. This grilled corn is fat-free. No joke! See, I leave the husks on. When I buy corn at the store I always see a gaggle of people standing around the corn bin, husking their corn and shoving the naked ears into plastic bags. It’s tragic! Corn deserves some dignity, people! By grilling the corn in the husk, the husk dries out over the open flame and gives off this amazing corn aroma that infuses into the kernel. Also, the corn can fully cook without burning because it cooks most of the way through in the husk, where the open flame can’t get it. Then I remove the husks and let the naked corn do its delicious caramelization thing, and voila! Perfectly cooked, sweet corn, plumped and browned kernels, and all with a totally punched up flavor.

You’ll never husk your corn at the store again. Admit it.

Since this amazing discovery - which I hate to admit is, once again, all Husband’s own genius. Darn him. - I have been grilling corn left and right. Grilled corn and edamame miso salad. Grilled corn pesto (this one is in the posting queue as well...*droooool*). And this here grilled corn chowder. I had been ogling corn chowders all summer, and with all the ingredients needed conveniently located in my kitchen, how could I say no?

This chowder was silky. It was sweet, it was spicy enough to make it interesting without making it hot, and it was creamy without being heavy. In a summer chowder it is imperative to be creamy but not heavy. Not only are soups leaden with cream, cheese, and butter generally pretty unhealthy, but they are just about the most unappetizing thing to eat on a hot summer day. So here’s my trick for getting a silky texture in a pureed soup sans dairy - roasted cauliflower. It lends a delicate sweetness that blends seamlessly with any soup, and has a thick, creamy texture that can rival cream without weighing it down. It is my secret weapon! That said, this recipe does actually have a small about of cream and milk. Quite honestly, I added them because I had tiny amounts of each in the fridge and just wanted somewhere to dump them before they spoiled. I think I would keep the milk in, but next time I would nix the cream. It was seriously not needed, and even a little too heavy for my taste. I left them in the recipe, though, because I know most people probably like creamier soups than I do. I’ve been off heavy foods for so long, I’m just uber-sensitive. Heck, you could even add more. Isn’t cooking to your liking, after all, what makes home cooking great?

I’ll also add that I used sherry in this recipe over white wine only because I was too lazy to go open a new bottle of wine when I had an open bottle of sherry sitting right next to me on the counter. All decisions are not taste inspired. I admit it openly! I also added the celery salt because I had just bought it on super clearance at the store and I wanted to try it. Yep, I’ll just air all my dirty laundry here today. But really, I think they both worked in the recipe. If you don’t have celery salt and an open bottle of white wine...well I think you know what to do. As for the rest of the herbs and spices that made this soup what it is...I used the Julie method - pull out the spice drawer in the pantry and just grab what sounds good! They did exactly what I wanted them to, which is add a complexity to the dish without overpowering the star - the corn. So many chowders just rely on the fat from the cream and the sugar from the corn to provide all the flavor. That’s boring! Punching up flavor without adding calories is what good healthy cooking is all about. 

The best thing about this soup was, of course, the corn!  And it was everywhere in this soup because I used every bit of it!  Once I had removed the cooked kernels from the cob, I simmered the empty cobs in the broth.  That's right, no weak corn flavor here!  This way I was able to keep the corn kernels whole and still get the rest of the soup infused with corn flavor.  This soup was sweet but not sugary, rich but not heavy, and rustic but not unsophisticated.  Definitely a permanent addition to my summer soup repertoire!  Take this recipe and make it your own.  Just make sure you grill the corn, you won't regret it!


Grilled Corn Chowder

makes about 8 servings

4 ears of corn (in their husks!)
2 TB olive oil, divided
1 tsp salt, divided
1 large onion, chopped
2 medium shallots, finely chopped
5 cloves garlic, minced
2 jalapenos, seeded and minced
1 large russet potato, diced
1 small head cauliflower, roughly chopped
1/2 tsp ground black pepper
1 1/2 tsp sweet paprika
1 tsp ground coriander
1/2 tsp celery salt (optional)
1/4 tsp cayenne (or more to taste)
2 tsp dried oregano
1 tsp dried tarragon
1/2 tsp cumin
2 cups dry sherry (or white wine)
4-5 cups chicken broth
1/4 cup heavy cream (optional)
1/2 cup whole milk
1/2 cup cilantro, finely chopped

To grill the corn:
  1. Over medium heat, place the corn (in their husks!) on the grill, directly over the heat. Turn the corn every 2-3 minutes, when the husks begin to blacken. The silk or ends of the husks might catch fire as they dry out. I think this adds an amazing smoky flavor to the corn, but if you’re scared (chicken!), just make sure to trim those bits off before you put them on the grill. [Practice proper safety! Always use long tongs when handling the corn, and keep your digits away from the flame.] 
  2. When the husks are good and charred and the kernels are mostly cooked, remove the corn from the grill and place it in a pan or bowl you have standing by until it cools down a bit. Carefully peel back and remove the husks, watching out for any trapped hot steam. Place the naked ears (teehee!) back on the grill and turn every 1-2 minutes, or until as many kernels as possible have browned and caramelized. Brown = sweet flavor! 
  3. Remove the corn from the grill, and when it is cool enough to handle, cut the kernels from the cob. Scrape the back of your knife along the cob to really get all the creamy corn bits out of there. Set the kernels aside, and reserve the empty cobs as well (don’t throw them away!). 
To make the soup:
  1. In a dutch oven or soup pot over medium heat, sauté the onion and shallots in 1 TB of olive oil and 1 tsp of salt until they are soft and starting to brown, about 10 minutes. Add the garlic and jalapeno and cook another 3 minutes, until softened. Add the potato and cook until starting to soften, about 5 minutes. Add the remaining tsp of the salt, pepper, paprika, coriander, celery salt, cayenne, oregano, tarragon, and cumin, stir to coat the vegetables, and let it cook for about a minute, until the spices release their fragrant oils. 
  2. Increase the heat to high and deglaze the pot with the sherry, making sure to scrape up any flavor bits from the bottom. Bring the sherry to a simmer and let it reduce by half, about 1 cup of liquid. Add the chicken broth, and when it has come to a boil add the reserved empty corn ears. Reduce the heat to low, cover the pot and simmer for at least 30 minutes. The longer you let it simmer, the more flavor the soup will have. I would shoot for an hour if you have the time.
  3. While the soup is simmering, preheat the oven to 425 degrees. Spread the chopped cauliflower in a single layer in a roasting pan, and toss with the remaining TB of olive oil. Roast in the oven for about 20-25 minutes, or until the cauliflower is soft and starting to brown around the edges.  Check on it about 10 minutes in and give it a good stir so it browns evenly.
  4. When the soup is simmered to your satisfaction, remove the pot from the heat and let it cool down a little. Remove and discard the ears of corn, and stir in the roasted cauliflower. When it is cool enough, puree the soup using an immersion blender, blender, or food processor. 
  5. Place the soup back over medium-low heat. Add the reserved corn kernels, cream, and milk. Bring the soup to a bare simmer and let it cook for 10 minutes or so, just to let all the flavors come together. 
  6. Stir in the chopped cilantro at the very end and serve. 

Wednesday, August 11, 2010

Spiced Up Frozen Treat, and a Winner!

Recipe below: Cardamom Peach Buttermilk Sherbet

Let’s get right to it, shall we?  We have a winner!  Congratulations lmurley2000, you are the lucky winner of a $40 gift certificate, courtesy of CSN Stores!  A big thanks to everyone who entered!  It was fun and informative for me to read what recipes have connected most with you.


Sad you didn’t win?  Don’t be!  I've got something to cheer you up.  Erm. Well actually, this will only cheer you up if you own an ice cream maker...or if you know someone who has one you can steal borrow....or if you live in San Diego and don't mind stopping by my house.  Otherwise, you're totally out of luck.  Bummer!  And also, if you've got the funds, buy one!  You will not be sorry.  Trust me.  My freezer hasn't been without some form of frozen treat since I got mine.

If you are the lucky owner of your very own shiny ice cream maker (or have the means to acquire one), do I ever have a treat for you - in the form of sherbet!


*crickets*

What?  Sherbet doesn’t get your heart pumping?  Right.  Because you haven’t had this sherbet.  One bite, and I guarantee the mere mention of this frozen treat will set your heart aflutter from now on.  And what the heck is sherbet anyway?  And what’s the difference between the names of all those mixtures you churn in an ice cream maker and enjoy frozen?  Well, being far too lazy to look it up speaking from my rear end vast culinary knowledge, I can tell you that ice cream is cream based (and if you consider frozen custard also ice cream (which I do (because who responds “I do! I do!” to the question “Who wants frozen custard?!” (but frozen custard is by far the superior product, calories aside (can you still read this? (let’s see if I can properly unparenthesize myself here…)))))yaaaay), frozen yogurt is yogurt based, sherbet is milk based, and sorbet is the kind of “everything else” category but that I most associate with juice. Do I have that right?

So, if you were able to navigate that bit of mental fun, you know that sherbet is just a milk based ice cream like dessert.  I know. That’s not titillating you yet.  But this doesn’t just use any old milk…it uses buttermilk.  Squeee! 


Squee…? Really?  Still nothing?  Ok, maybe I’m alone in my complete obsession with all  things buttermilk – it’s tangy in a good way and tenderizes like nobodies business – but trust me, it definitely brings something special to the sherbet party. 

Originally this started out as just a good ol’ peach buttermilk sherbet.  With peaches at their absolute peak right now in San Diego, this recipe practically jumped off the screen at me.  I had the mixture fully processed and ready for its chill when I had an idea.  The flavor was good of course – you can’t go wrong with peaches and buttermilk – but it could use a little kicking up.  I need spice in my life wherever I can get it!  And there’s a certain spice that I’ve found pairs beautifully with peaches – cardamom

Yes, cardamom.  That scary spice I was touting when I made zucchini bread.  I said then that having this spice in your pantry would pay off, and here’s where!  If you’ve never tried peaches and cardamom together, I would highly recommend you make it your life’s mission.  Starting now.  Peaches have this light and delicate flavor that is almost floral, and cardamom has the amazing ability to really stand out as an identifiable flavor without overpowering the more delicate flavors of, say, a peach!  Move over cookies and milk, get a room peanut butter and jelly, peaches and cardamom are here!

So now when I say cardamom peach buttermilk sherbet, does that beeping heart rate monitoring machine thingy they use in tv hospital dramas start beeping a little faster?  Phew!  Finally!  Because let me tell you, this sherbet is awesome.  It's super creamy and the flavor is out of this world.  The buttermilk adds a nice compliment to the peach, again, without overpowering its delicate flavor, and adds a little complexity that keeps it from being boring.  I added a little cinnamon with the cardamom because I thought it rounded out the flavor nicely and didn't make the cardamom so much of a shock to the palette.  And since this uses milk instead of cream, you get the bonus of a healthier dessert!  Adding a little alcohol helps keep the texture soft and creamy because it doesn't freeze (at freezer temps anyway).  I chose a spot of rum because that's what got my taste buds dancing at the time, but you could always swap it out for a tablespoon or two of vodka for the same effect without the flavor. 

So did I do it?  Did I cheer you up?


Cardamom Peach Buttermilk Sherbet
Adapted from Martha Stewart

Makes about 1 quart

4 large ripe peaches, pitted and cut to bite-sized pieces
1/2 cup sugar
1/4 cup honey
2 TB light corn syrup
3 TB fresh lemon juice
1/2 tsp vanilla extract
1/2 tsp kosher salt
1 tsp ground cardamom
1 tsp ground cinnamon
1 1/2 cups buttermilk
1/2 cup whole milk
1/4 cup light rum

  1. In a saucepan over medium heat, bring the peaches, sugar, and honey to a gentle simmer. Turn the heat down to low, cover and cook until peaches are soft, about 20 minutes. Remove the saucepan from heat and let cool 10 minutes. Once cooled, puree the peach mixture in a food processor.  You can strain the mixture at this point through a fine mesh strainer if you would like, but I wanted the solids.
  2. Transfer the peach mixture to a medium bowl and whisk in the corn syrup, lemon juice, vanilla, salt, cardamom, and cinnamon.  Add the buttermilk, milk, and rum. Cover, and refrigerate for about 4 hours (or until it is chilled under 40 degrees).
  3. Slowly pour the sherbet mixture into your ice cream maker and churn until thickened and delicious.  Transfer to an airtight container and store in your freezer.
Note: Make sure to chill the mixture to the proper temperature, or it won't churn up nice and creamy, but will instead freeze up icy.  Just be patient!  I actually over-churned this (as in, it churned too long and then melted back to a liquid) on my first attempt and I had to refreeze my ice cream bowl and try the whole thing again the next day!  Good thing it was worth the wait!

Friday, August 6, 2010

A Goofball, a Gift, and a Giveaway!


Recipe below: Wasabi Ginger Soy Pulled Pork Ribs

If you read food blogs with any regularity, you’ve probably heard of CSN stores. They’re kind of like another popular online shopping website (you know, the one that started as a bookseller?) in that they sell everything...dinnerware, cookware, appliances, even fitness equipment! And one of their genius methods of marketing is sponsoring blog giveaways...can you guess where I’m going with this?

Welcome to Bananas for Bourbon’s very first giveaway! One lucky winner will be awarded a one-time-use $40 gift certificate, good at any of CSN’s 200+ online stores. Lucky ducky! I’ve entered many a giveaway for one of these puppies, but was never fortunate enough to win. So good luck!

To enter: leave a comment on this post telling me your favorite Bananas for Bourbon recipe so far. Make sure you provide an email address if there isn’t one linked to your profile.

For additional entries, do one or all of the following, then come back and leave a separate comment for each, letting me know the deed is done.
  1. Become a fan of (“Like”) Bananas for Bourbon on Facebook, and if you already are, just say so! 
  2. Subscribe to my blog via an RSS feed (just click that “Follow” button in the toolbar on the right), and if you already do, just say so! 
  3. Post a link to this giveaway on your blog, and let me know about it. 
The rules: open to US and Canada residents only, as that is where CSN store's products ship. The giveaway closes on Tuesday, August 10th at 11:59pm PST. The winner will be selected by a random number generator and announced (and contacted!) sometime on Wednesday.


I was actually glad to have the opportunity to facilitate this giveaway because I feel like I won my own giveaway this week. Imagine my surprise when, completely out of the blue, I received a package on my doorstep containing this:


OMG! Whatever could be the cause of this wonderfulness? I'm not worthy!  Thankfully, there was a helpful note. Turns out my most awesome friend and former college roommate could relate to my predicament of being low on funds while trying to expand my culinary horizons, and she instructed me to consider it an investment in my future food blogging adventures. I almost cried, I was so happy. If there is one thing this unemployment experience has taught me, it’s that people can be truly beautiful during times of discord.  I'm not worthy!  I am definitely taking this seriously, and plan to post a recipe (eventually!) for each and every time shown.  If you can't read the labels, there are 4 sauces (honey barbecue, wasabi ginger, vidalia onion fig, and maple chipotle garlic) and 4 pestos (sun-dried tomato, basil, black olive, and artichoke).  

Now let's take a minute to drool and make noises...

Ok, back.  I've seen some Stonewall Kitchen products around a few random spots, like in winery shops and that kind of thing, and I have always drooled quite a bit over the vidalia onion fig sauce.  I can't wait to try that one, and I already have something in mind...  If any of these goodies sound especially delicious to you, leave me a comment with what you would would make!

I’m far from an expert when it comes to cuts of meat, seeing as how I’m still fairly new to eating meat, so I had to put on my thinking cap when I saw pork shoulder country style ribs on super sale at the store. They were large chunks of meat on the bone, obviously not like a baby back. Since pork shoulder meat always does so well in the slow cooker, I figured I would try braising them in the wasabi ginger sauce. Bones = flavor, after all!  I ended up cooking them low and slow in the oven with just a portion of the sauce along with some soy sauce and other delicious flavorings. Then when the pork was falling off the bone and delicious, I shredded it up and tossed it with the rest of the wasabi ginger sauce.  And since the sauce was a gift and the pork was on sale, it cost me less than $10.  Take that, Melissa D'Arabian!  Except not, because the sauce was a gift and the pork was on sale...  But whatever!

How good was this pork? Well, Husband came home and had an entire bowl for dinner. Then he got up and attempted to refill the bowl for a second helping. I had to beat him away with a stick words of reason in a very scolding tone! If that’s any indication. The pork was tender and succulent, and since it cooked on the bone, it had the rich pork flavor. Yum! I was glad I waited until after the pork was cooked to toss it with the sauce, or I think it would have gotten lost during the braise. The sauce itself is pretty sweet.  There are like 3 different kinds of sugar (sugar, brown sugar, and honey) listed in, I think, the first 5 or 6 ingredients, and it's not at all spicy, like I would expect something with wasabi in the name to be, but that said, it's a tasty sauce!  And I am, admittedly, very sensitive to sweet things since I've been weaned from processed foods and the like.  The application for the sauce, in my most humble opinion, was right on!  If you felt a little acid was necessary, you could always throw in a splash if lime juice or vinegar, but I think it was balanced enough as it was.

Overall, I would call this dish a success! Next time I see those ribs on sale, they’re getting snatched up quick! Next time I want to try adding a little wasabi powder or Sriracha hot sauce to the braising liquid, just to infuse a little heat while it cooks.

The only problem with this recipe is that it results in this:


Goodbye wasabi ginger sauce!  I hardly knew you!  And yet, you will fill my belly with deliciousness for days to come!


So thanks, friend! Thanks for so fantastically cheering me up.  I needed it. Thanks for believing in my cooking and food blogging. I'm touched.  And thanks for being a good person and a great friend. You are inspiring. I hope my first recipe didn't disappoint!


Wasabi Ginger Soy Pulled Pork Ribs

Makes about 8 servings

~4 pounds pork shoulder country style ribs
1 TB ginger, minced
5-6 cloves garlic, minced
1/4 cup soy sauce
2 TB mirin
1 TB rice wine vinegar
1 11 fl.oz bottle Stonewall Kitchen Wasabi Ginger Sauce, divided
8oz button mushrooms, sliced (optional)
  1. Preheat your oven to 275 degrees. 
  2. Place the ribs in an even layer in a dutch oven or other covered oven-safe vessel. Add the ginger, garlic, soy sauce, mirin, rice wine vinegar, and 1/4 cup of the wasabi ginger sauce, then toss until the ribs are coasted. Add the mushrooms, if using. 
  3. Cover and cook for 4-5 hours, or until the pork is tender and falling off the bone. 
  4. Transfer the mushrooms and pork to a bowl, leaving the bones behind, and shred it with a fork. Toss it with the remaining wasabi ginger sauce, and serve. 

Serving suggestions: over a bed of wilted spinach or steamed bok choy, in lettuce cups, beside an Asian slaw, in soft tortillas topped with cabbage, as a slider, or whatever tickles your fancy! 


What are you still doing here?  Go make pulled pork!  Oh, right. You want to know where the goofball mentioned in the post title comes in, eh?  Well, how about this guy:


What can I say?  I'm a sucker for alliteration and things in threes. 

Wednesday, August 4, 2010

Life is Liiiiike a Batch of Cupcakes


Recipe below: Strawberry Margarita Surprise Cupcakes

A healthy diet is all about balance. I’m a firm believer in working all the things you love into your life. Let’s be realistic. If you deny yourself something you truly love, how long are you going to be able to do it? And how happy are you going to be? And if you’re unhappy, what’s the point? Better to just figure out a way to work it in and be done with it. We’re not looking for temporary crash dieting here!

If we lived in a perfect world and could eat whatever we wanted with no repercussions, what foods would you ecstatically chow down on that you wouldn’t in this cruel, real world we live in? Me? It’s dessert! Ok technically, that’s not so much a food as a course, but how can you narrow down dessert? It’s one thing to justify high calorie foods that are also high in nutrients, but as much as I love them, desserts tend to be empty calories of processed flour and sugar. But I don’t care! I love to bake, and I love sweets after dinner. So I just find a way to work it in.

A friend asked me, after I told her about these cupcakes I’m about to drone on and on about, how I’m able to eat such things and stay so skinny. I told her I exercise a lot. And I do. But don’t just dismiss it! Getting fit really does just boil down to calories in and calories out. That’s boring, I know, but it’s true. Does that mean you have to meticulously count each calorie you eat and painstakingly track each calorie you burn everyday? Heck no! I mean, you can...but, ick! It’s all about finding what works for you. What’s really important is having a general understanding of what’s going in, and what’s coming out burning off. Some people like keeping a food journal. As much as I love documenting what I eat (via this here bloggy blog), I hate keeping a food journal. Go figure! There are websites to track and calculate exact calories in your meals, but that’s another post. The main idea is to have an idea of how many calories you’re consuming each day. I’m just talking in the general sense, here. Like, you ate a 1/2lb hamburger topped with a hot link and a side of fries vs. you ate a salad with grilled chicken on top.  But all that is another post because today I want to talk about exercise.

Anyone still here? Oh, I think I see someone in the back! You’ll be so glad you stayed.

A lot of us, including myself until very recently, have forgotten how important it is to move around! With everything at our fingertips, we’re lifeless blobs! Convenience is on its way to being a sin, and I’ve already embraced gluttony, so it’s off the table because I think we're only allowed one. Of course, one woman’s sin is another woman’s motivation! See, I love to eat. I don’t just love food (and oh do I ever love food...), I love the act of eating. I chew ridiculous amounts of gum between meals, just to keep my mouth busy...

[insert dirty joke here]

And since I love to eat ever so much, if I want to keep my trim figure up, I’ve got to run, run, run! The hardest part about starting an exercise routine is that starting part. The key here is routine, as in something you do more than once, regularly even! It's easy to try something once or twice, but really sticking with a regular exercise program is by far the hardest part about getting in shape, I think. The good news is, once you commit and keep it up, it becomes a part of your life, and thus, it becomes easier.  There is a light at the end of the tunnel!  It doesn't matter what you do, as long as you’re moving around. Though it does make sense to pick an activity you actually enjoy. Now don’t cop out on me people! I will maintain that anyone can find some activity they can do regularly they don’t completely hate. If you belong to a gym you never go to, chances are the gym maybe isn’t your thing. Try saving some money and finding other modes of movement! I didn’t know until I tried that I actually just preferred walking (and eventually running) around my neighborhood. Have a Wii? Try one of the many fitness games they have (and email me if you want some reviews). Try hiking somewhere scenic in your area, or a lake or forest or the beach! There’s always sports like tennis, basketball, or soccer, but since they require a friend, it’s best to find a lone activity for the everyday. The point is, move around, and do it several times a week. You don’t have to devote hours and hours to every workout. My motto is something is better than nothing. I know everybody’s daily lives are hectic and...well...packed!  It’s hard to imagine working more into your day, but trust me, it's all about baby steps. Once you work in 10 minutes, before you know it, you’ll find yourself extending it to 15. That’s how I started and look at me now! I learned to make exercising a priority in my routine and just...worked it in!  A little bit at a time.

And just one more quick rant: don't cop out on yourself!  Don't be one of those people that tries exercising once, doesn't see results, and then gives up.  It takes time, and you know it.  Don't be one of those people that chooses an activity that doesn't raise their heart rate above what it would take to get off the couch and go to the bathroom.  Exercising burns calories because your heart rate is raised.  Higher heart rate = more calories burned.  And this isn't really wrong, I just think it's silly: don't drive the two blocks to the gym (a ten minute walk, tops), and then walk on a treadmill once you get there!  There are a thousand and one excuses to not work out, and all they do is help you justify skipping something you aren't excited to do.  In the end, it's just a cop out.  Save the excuses.  You're in charge of yourself, and it's far better to just be honest with yourself.  If you don't want to exercise, then don't!  But no cake for you!


Ok, enough about exercise. Let’s talk dessert! I know they’re disgustingly trendy right now, but I’m kind of into cupcakes lately. They’re just so pleasantly pre-proportioned! And cake is so fluffy and sweet! And frosting! I love frosting. I could eat it by the spoonful. And when I say "could", I of course mean I totally have.  When I fill a pastry bag with frosting, I’m tempted to just squeeze it right into my gullet. Just tempted, haven't actually done that one...yet.  And by pastry bag, I mean a ziplock with the bottom corner cut off.  We're fancy at Chez Julie.

And now that my latest deep, dark secrets are out in the open, let’s talk about these cupcakes! They were awesome! The cake was light and fluffy, moist and delicious. It’s the buttermilk. Buttermilk does magical things with baked goods. And full of fruit! You’ll notice from the picture below that my strawberries sank to the bottom, which doesn’t so much matter to the overall flavor, but doesn’t make for such a pretty pic. It’s all about presentation! But fear not, I have a trick! By tossing the strawberries with a little flour, the theory is they stay properly suspended. I had to guess at how much flour to use, since obviously I'm coming up with it after the fact, so more flour might be necessary.  I've heard about this trick many times in the past, but I've never tried it, so you'll be like my guinea pigs!  Naw, it'll work.  If you're worried, you could always puree the strawberries first and just fold them into the batter, but I liked the burst of fresh berry goodness.

Mere cupcakes with frosting are not enough to fully excite me. Oh no. Not anymore.  I need to fill them. Because really, these are margarita cupcakes. Sure, there’s lime in the cupcakes, and lime in the frosting, but it’s just a hint. My cupcakes need that sour bite!  My lime needs to shine! By filling the center with lime curd, it gives the cupcakes a bright burst of citrus flavor. Delicious flavor! I love filling cupcakes. It’s a great way to sneak in another layer of flavor, and you never see it coming!  It's a surprise inside every cupcake.  They should change the saying to "Life is liiiiike a batch of cupcakes..."  See, those crazy post titles explain themselves eventually.

And who doesn’t love lime curd? Ok, probably plenty of people...but they don't exist to me.  Ever made your own citrus curd? It sounds intimidating, doesn't it? It’s actually super easy to make, as long as you keep one thing in mind: don’t leave the stove! It’s easy, but it’s also kind of a pain, unless you want scrambled eggs. But it’s only for a little while, and it only requires you to stir. Buck up and push through!

[Full disclosure: tequila doesn't come through very strong in baked goods.  In future batches, I'm still going to use it, and I still liked it in there.  Just don't expect a punch in the face like you can get with a stronger alcohol, like bourbon.  And if you're really in need of booze with only a little tequila left in the pantry, maybe just leave it out and drink a shot instead.]

This was my first time attempting swiss meringue buttercream, and not only was it a resounding success, it made a believer out of me. It’s light as a cloud and oh so delicate! The strawberry jam adds a refreshing flavor, and it’s nice and light to go with the texture. And delicate.  Just note these cupcakes don’t keep quite as well as a regular buttercream because the meringue hardens a bit in the fridge. But they still stay tasty!  And delicate!  And light!  It's like the strawberry frosting flavor is delivered to your mouth and you just have no idea how it got there.

These cupcakes really came together beautifully. The overall lightness of textures went really great with the more delicate and bright flavors of the fruit. Since it won’t weigh you down, it’s a great sweet treat on a hot summer day! This is a cupcake I will always make room for in my daily calorie bank!


Strawberry Margarita Surprise Cupcakes
(aka: strawberry lime tequila cupcakes with lime curd filling and a strawberry lime tequila swiss meringue buttercream...got that?)
cupcakes adapted from Annie’s Eats
buttercream adapted from Martha Stewart

Makes about 18 cupcakes

For the cupcakes:
2 1/2 cups cake flour
1 tsp baking soda
generous 1/4 tsp kosher salt
1/2 cup (1 stick) unsalted butter, room temperature
1 1/2 cups sugar
2 eggs, room temperature
1/3 cup buttermilk
1/4 cup canola oil
1 tsp vanilla extract
3 TB tequila
1 TB lime zest
2 cups fresh strawberries, chopped into bite-sized pieces
1/4 cup AP flour

  1. Preheat your oven to 350 degrees and line the muffin tins with paper cupcake liners.
  2. In a stand mixer, cream the butter and sugar until pale and fluffy. Add the eggs, one at a time until incorporated, then add the buttermilk, oil, vanilla, and tequila and mix until fully combined.
  3. Sift the cake flour, baking soda, and salt together and stir into the batter until just combined.
  4. In a separate bowl, toss the strawberries with the AP flour and lime zest. Add more flour if it’s not enough to coat the whole batch. Gently fold the strawberries into the batter.
  5. Fill the cupcake liners with the batter, leaving about a 1/2 inch from the top. Bake for 18-20 minutes, or until a cake tester (i.e. toothpick) comes out clean. Cool completely.


For the lime curd:
3 large egg yolks
1/4 cup sugar
1/4 cup fresh lime juice
4 TB unsalted butter, melted

In a small saucepan whisk together the egg yolks, sugar, lime juice, and butter and cook over moderately low heat. Taste the mixture (if you’re comfortable with the raw egg, which I know many people smarter than I are not) and add more sugar if it’s not sweet enough (I don't like it too sweet). Stir constantly until the mixture is thick enough to coat the back of a spoon, about 5 to 7 minutes (that means when you run your finger along the coating on the back of the spoon, it should leave a line rather than running back together). Be sure not to let it boil or sit long enough to curdle. Strain curd through a fine mesh strainer and set aside to cool.

For the buttercream:
1 pound fresh strawberries, finely chopped
1 cup sugar, divided
1/4 cup tequila
1/4 tsp salt
1 TB lime juice
1 tsp lime zest
2 large egg whites
3/4 cup (1 1/2 sticks) unsalted butter, room temperature, cut into pieces
1/2 tsp vanilla extract

(makes about 2 cups)


  1. Set a small pot over medium heat. Add the strawberries, 1/2 cup of sugar, tequila, salt, lime juice, and lime zest and simmer gently until a thickened syrup forms, about 15 minutes. Set aside to cool completely.  Once cooled, you can either puree the mixture or leave it in chunks.  I left mine chunky.
  2. Set a bowl over a pot of gently simmering water. Add the egg whites and the remaining 1/2 cup of sugar and whisk constantly over the heat until the sugar is fully dissolved and the mixture is warm when you stick your finger in it (about 160 degrees).
  3. Pour the egg mixture into the bowl of a stand mixer and using the whisk attachment, beat on high speed until stiff peaks form (not too dry though). Test this by removing the whisk attachment, swirling it around the mixture, and pulling it straight up and turning it rightside-up to face you. If they are properly whipped up, a small droopy peak should stick up on the very tip of the whisk.
  4. Switch to the paddle attachment on the stand mixer, and beat the butter into the egg mixture on a medium-low speed, a few tablespoons at a time. Make sure the butter is fully incorporated before adding the next batch. If mixture separates after all the butter is mixed in, beat at a medium-high speed for a few minutes until it comes back together. Add the vanilla, beating it at medium-low speed, then turn the speed all the way down to low and mix for a couple of minutes to remove any extra air.
  5. Gently fold in the strawberry jam mixture with a rubber spatula and stir until the buttercream is smooth.

Note: Feel free to use store-bought strawberry jam instead of basically making your own, and just cook it on the stove with the other ingredients for a few minutes until it comes together.

To assemble the cupcakes:

  1. Using a pairing knife inserted at an angle, cut out a small cone-shaped chunk, about a 1 inch circle from the top of each cupcake. Fill the hole with the lime curd, about 1 teaspoon worth. You can either replace the chunk you removed, or eat it! leave it off.
  2. Fill a pastry bag (or ziplock with the bottom corner cut off) with the frosting and go to town on your cupcakes. Or, you know, just use a spatula.

Wednesday, July 21, 2010

And Everything Nice


Recipe Below: Cinnamon Spice Zucchini Bread

It’s zucchini season! Zucchini abounds! Those lucky enough to be growing their own are overwhelmed with hoards of gourds (Ha! I rhymed!), and those not so lucky (like me, *sigh*) can get theirs on the cheap at the farmer’s market and grocery store. Win!

Do I even need to tell you where I’m going with this?

Zucchini bread of course! How can you not make zucchini bread when faced with it? I happened upon 3 such gourds of summer heaven, grown fresh from a local farm, recently, and it was never a question in my mind what to do with them. I got them at the farm, actually. What can I say? Having a Corgi gets you connected. Especially when the woman who owns the farm has 2 Corgis herself, and often invites a dozen other Corgis over to romp around her grounds.

You know what’s great about zucchini bread? You know, besides the fact that you get to essentially make a dessert, get away with calling it breakfast, and tell yourself it’s healthy because there’s a modicum of vegetable in it? It’s like a blank canvas. Well really, that’s what’s so great about quick breads in general.

What’s a quick bread?


Time out! Pull up an uncomfortable desk with gum stuck to the bottom. School is in session.

Ahem. Quick breads, for those not hip to the lingo, are breads that use leaveners like baking soda and baking powder instead of yeast. Without yeast you don’t have to worry about things like kneading, rising, and gluten development. You just apply heat to the mixture and they puff right up. Quick! Also, obviously, they have a completely different texture and flavor than yeast breads. Besides loaves like zucchini, banana, and pumpkin breads, other examples of quick breads include muffins, pancakes, biscuits, and waffles.

*briiiiiiiiiing*

That’s all for today class!


Quick breads are like blank canvases because they take on a variety of flavors and ingredients well. They can be breakfast or dessert, sweet or savory, decadent or healthy! You can easily elevate them with the addition of fruit, nuts, chocolate, and my personal favorite, booze! Which brings me to this zucchini bread. I happen to love this zucchini bread. This is my go-to recipe. But as the above spiel points out, you can modify it any which way to make it your own. So let’s talk a little about what I put into mine, and ways you could possibly make it yours...


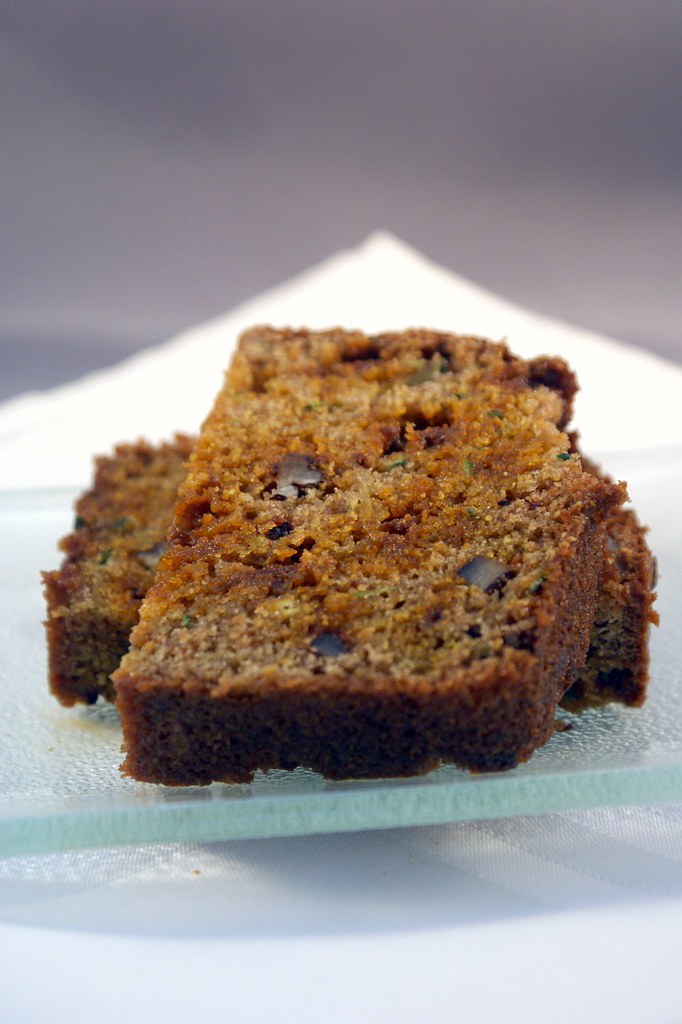
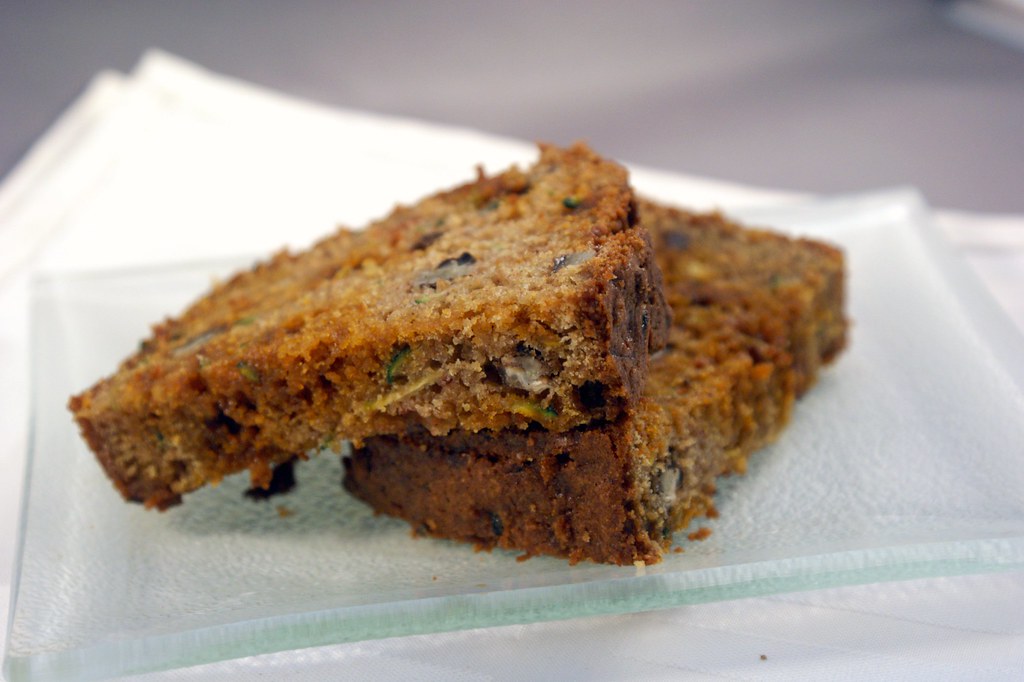
I think zucchini is the best place to start. First off, you don’t even have to use zucchini. Any summer squash will do. Heck, swap it for carrots if you want! Some people would peel the skins off first, but I left them on. That’s where all the nutrients are, and by now you know how I am about throwing out the healthy parts! They softened right along with the flesh, so it definitely wasn’t a textural issue. Plus, they added cool green flecks to the bread!

Did you know that a great way to lighten up quick breads is to replace some of the oil with a mashed fruit or vegetable? Of course you did! Banana and pumpkin are excellent choices, but applesauce works great when you have another fruit or vegetable you want to be the star. It adds fluff without taking over the flavor. I use it in muffins all the time, so I try to always have a small jar on hand. I like the ones advertised as “naturally sweetened”, which just means no added sugar. If you have one with sugar, you might want to lessen the sugar in the recipe a bit.  [Edit: A reader with far bigger brain mass than I pointed out that naturally sweetened really just means they added fruit juice concentrates and other essentially-sugar-like products, and you're better off buying an applesauce that actually says no sugar added.  I agree 100%!  If you can find it, use it.  I could not, but that just means I have to look harder.  Apparently Motts sells a version.] 

I used only whole wheat pastry flour. It’s whole wheat flour that is ground finer than regular whole wheat flour, so the texture stays a bit lighter. I don’t see it sold at the big chain grocery stores, but any health food store (like Whole Foods) should have it, and in San Diego, places like Henry’s and Sprouts and Jimbo’s sell it. I love having it on hand, so I would recommend the purchase, but I definitely understand picking and choosing flours to stock your pantry with. AP flour, whole wheat flour, white whole wheat flour, bread flour, self rising flour, cake flour... Who has room for all that?! Not me. I stick to 4...okay, 5. AP, white whole wheat, whole wheat pastry, bread, and cake. And sometimes regular whole wheat (i.e. red whole wheat).

Hi, my name is Julie, and I have a problem with flour. 

Also, I need a bigger pantry!

If your sponsor is telling you to be strong and resist yet another bag of flour, or you just aren’t interested in a special trip to the store, you can, as always, use all purpose flour instead. It’s all purpose! But if you have some form of whole wheat flour, I would suggest half and half. It really adds a nice density to the bread that goes great with the spices. If I gave you some speech about the whole grains sopping up the booze for a boozier flavor, would you believe me? Ok fine, but it does add fiber and protein! So there!

Did I mention booze? Of course! What’s a quick bread without booze? Besides, you know, kid friendly. Heh. Bourbon, naturally. Bourbon goes awesome in quick breads. It imparts a deep, smokey flavor that goes great with nuts and spices. Oh the spices! Cinnamon, cloves, ginger, and nutmeg...oh my! But the spice of all spices. The spice that makes this bread “the recipe” for me is the cardamom. Ever baked with cardamom? It’s magic. Almost floral. And potent! A little goes a long way, so be careful. It’s that ingredient that will make people go, “What is that hint of deliciousness I am tasting?” It can be a bit tricky to find, but I managed to find some at one of the big grocery chains. You just have to train your eyes away from the generic brand and over to the expensive ones right beside them. I know, I usually don’t bother either. But it might just be there! If you don’t have it, just leave it out. It’ll still be great. And if you’re going for a simpler palate, you could always nix everything but the cinnamon.

Nuts are always optional, but I like the texture contrast from their crunch, and the flavor they add. I prefer walnuts, but Husband isn’t a fan, so I use pecans instead.

If you’re wondering what those cinnamon-colored splotches are on my bread, that would be cinnamon chips! You know, like chocolate chips, but cinnamon. Again, they’re sold in all the big chain markets, right in the baking section along with the toffee chips or peanut butter chips. It was my first time baking with them, so it was a bit of an experiment. I didn’t expect them to melt, but since they’re essentially just flavored sugar, it does make sense.

Why do I love this zucchini bread so?  First off, it's moist!  Dense but moist, as good bread should be, thanks to the applesauce and zucchini.  The bourbon and pecans give a wonderful deep flavor, while the orange zest and spices make everything party together in your mouth.  And it's healthy.  What?  It is!  It's 100% whole wheat, it has vegetables, fruit, and nuts for protein.  And that tiny bit of oil wouldn't hurt a fly!  We just won't talk about the sugar.  Husband was so convinced by my argument that he went ahead and ate it for breakfast.

What do you put in your zucchini bread?


Cinnamon Spice Zucchini Bread
adapted pretty heavily from Serious Eats

Makes 1 loaf+

3 eggs
1/4 cup vegetable oil
1/2 cup applesauce (preferably “naturally sweetened”)
1 cup sugar
1/2 cup brown sugar
1 tsp vanilla
1 tsp orange zest
2-3 TB bourbon
2 cups zucchini, shredded (about 3 small zucchini)
2 1/2 cups whole wheat pastry flour
2 tsp baking soda
1 tsp baking powder
1 tsp salt
1 tsp ground cinnamon
1/4 tsp ground cloves
1/4 tsp ground cardamom
pinch of ground ginger
pinch of fresh ground nutmeg
1/2 cup chopped pecans or walnuts (optional)
1/2 cup cinnamon chips (optional)

  1. Preheat your oven to 350 degrees and coat a 9x5 loaf pan with butter spray. 
  2. In a stand mixer, beat the eggs, oil, and sugars until light and thick, a few minutes.  Add the applesauce, orange zest, vanilla, and bourbon and beat until combined.
  3. Place the shredded zucchini in a kitchen towel (or a stack of paper towels), and gently squeeze out any excess moisture. Stir the squash into the wet mixture. 
  4. In another bowl, sift together the flour, baking soda, baking powder, salt, and spices. Fold the dry ingredients into the wet ingredients, and mix until just barely combined. Don’t overmix! Gently fold in the pecans and cinnamon chips if using. 
  5. Pour the batter into the prepared loaf pan. Bake for 60-75 minutes, until a cake tester (i.e. toothpick!) comes out clean. It’s a good idea to rotate the pan halfway through. 
  6. When it’s cool enough to handle, turn the bread out onto a cooling rack to cool completely, at least 30 minutes. 

Note: I ended up with a bit of extra batter, so I filled about 2 muffin cups with the extra, and pulled them out after about 30-40 minutes. They’re great for testing for poison while your bread is cooling. 

Tuesday, July 13, 2010

The Bright Side of Car Troubles

Recipe below: Somewhat Authentic Thai Green Curry

Speaking of bright sides, my life is such a comedy of errors at the moment, that I’m constantly focusing on the positives to keep sane. I’d rather laugh at my misfortunes than cry over them any day...and laugh I have! Small talk with my neighbors usually begins with their inquiring after any new disasters that have sprung up since last they saw me, and I can usually deliver on a good story to make us both chuckle. Usually centering around my car, lately. Batteries, tires, radiators. I’ve dealt with it all!

Sure, a leaking radiator isn’t exactly roll on the ground hilarious, but what about when I add that the extended warranty on the car just so happened to expire about a month before said leakage? Yes, that really happened.  Of course it did! 7 years and never a problem that the warranty would cover. But 7 years and 1 month? Well...you see what I mean. Ridiculous!

I also answer to Murphy.


What does all this complaining have to do with anything? Well that brings me to the particular bright side of my constant car troubles. The Asian Market! It’s right down the street from the dealership, and since that neighborhood is about 15 miles away from my house, it’s not very convenient to go regularly. So when Husband and I have to make the trek for some mechanical misfortune or other, we secretly look forward to the stop at 99 Ranch right after. Did I mention they have pork bao the size of my head? And the best darned red bean paste sesame balls, my personal favorite! We always stop at the bakery first to stock up before making the long trek up and down the many aisles.

Sure, most of the ingredients we save up to buy at the Asian market we could easily get in any well-stocked grocery store. But they cost twice as much, and the selection sucks! Did you know there are brands of soy sauce and rice wine vinegar that aren't Kikkoman? I know! Blew my mind when I first found out too.

Then again, there are ingredients that are essential to authentic Asian cuisine that for whatever reason haven’t made it into any of the 10 or so grocery stores in my area. Disappointing, isn’t it? It’s where I buy my miso paste, rice flour, red bean paste, and oodles and oodles of seaweed! I love the seaweed sprinkles that are tossed with toasted sesame seeds. It’s a great topping for rice, popcorn, or any dish that needs a little salty pizazz. Husband loves the sheets of the hot and spicy seaweed so much he buys them 8 containers at a time! It’s really a healthy snack, nicely filling without containing any substantial calories, and a wee bit of protein. Yum!

Don't eat that keffir lime leaf!

But what I really get excited about when I go there are the fixings for Thai food! Sure, a lot of stores now carry lemongrass, but what about keffir lime leaves and Thai basil? My favorite Thai restaurant would never offer my favorite dishes without them! And since I usually only frequent the store when the heavens decide to break my car (more often than I’d like!), I always take advantage of at least a couple of specialty ingredients I can’t buy anywhere closer. If you haven’t already guessed, I’m talking about curry!

I love curry. I used to talk food constantly with a former manager, and she would always marvel at my love of sauce. I love food drenched in a rich and flavorful sauce. Who doesn’t? It makes everything taste fantastic! And curries are the epitome of big flavors: warm, spicy, earthy, and herbaceous. They taste so complicated, but like so many dishes, curries are totally doable! Yes, I mean doable for you!  You know what the trick is? Finding a good quality curry paste. I’d like to make my own at some point, but if you don’t want to go through all the trouble, 99 Ranch has an excellent selection of tasty curry pastes, and your local Asian market probably does too! I went for green. It’s spicy from lots of chile peppers! Husband and I like spicy! You could just mix the curry paste with coconut milk for the sauce base, it would be deliciously simple. But I wanted to brighten the dish with some fresh ingredients already in the paste to make the flavor a bit more definitive and lively.

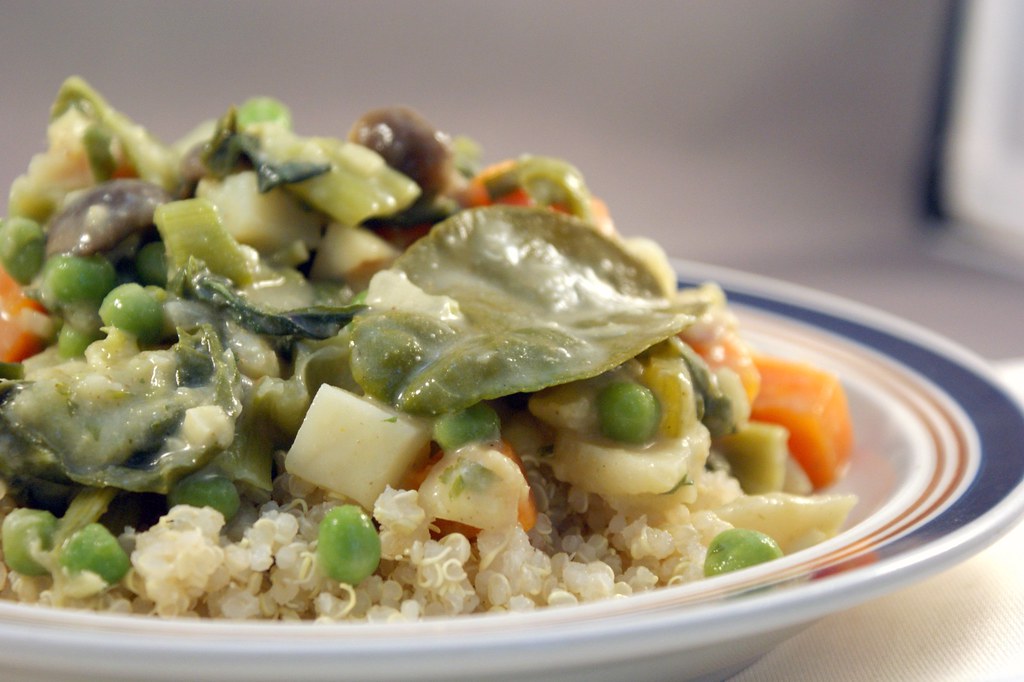
Now I’m the first to admit that this curry is anything but authentic. Or rather, I was going for authentic curry flavors, but I threw in some other totally inauthentic veggies along with it because they’re delicious and it’s my curry, so I’ll cook what I want to! I opted for classics like onion, carrots, baby bok choy, and mushrooms, but that just wasn’t substantial enough for me. I wanted more! So I also threw in celery and frozen peas because I love greenery, water chestnuts for their lovely crunch, and some red potatoes for texture. Yum!

As far as the sauce goes, garlic, ginger, and lemongrass are the holy trinity of deliciousness. Lemongrass is an ingredient I haven’t experimented with extensively, but I love the sunny, grassy flavor. When preparing the fibrous stock for consumption, just cut off most of the the top and the nub at the bottom and remove the first few layers until you’re left with a tender bit a few inches long. It doesn't look like much, but it goes a long way.  Make sure you mince it up nice and tiny so you get the flavor without any chewy bits. Keffir lime leaves, like lemongrass, are wonderfully aromatic. I treat them like bay leaves and throw them in with the simmering sauce for flavor, but remember not to eat them! I’ve substituted regular Italian basil for Thai basil before, and it certainly works in a pinch, but Thai basil is such a better compliment to the dish. Trust me. Nothing beats the intoxicating aroma of Thai basil.  And with no booze in this recipe, we need our kicks somehow, right? And then there’s the fish sauce. You’re not afraid of fish sauce, are you? I used it think it was nasty, but it turns out it was just an inferior product I had purchased. Good fish sauce is delicious! Not by itself, of course, but just a little bit added to the dish adds a salty, deep flavor (umami!) without being fishy in the slightest! The trick is just to show a little restraint. Don’t skip the fish sauce, trust me!  I opted not to get the Thai peppers.  I could only buy them about 20 at a time, and yikes!  That's a lot of heat!  Also, that's kind of the point of the curry paste.  All the heat are already in there!

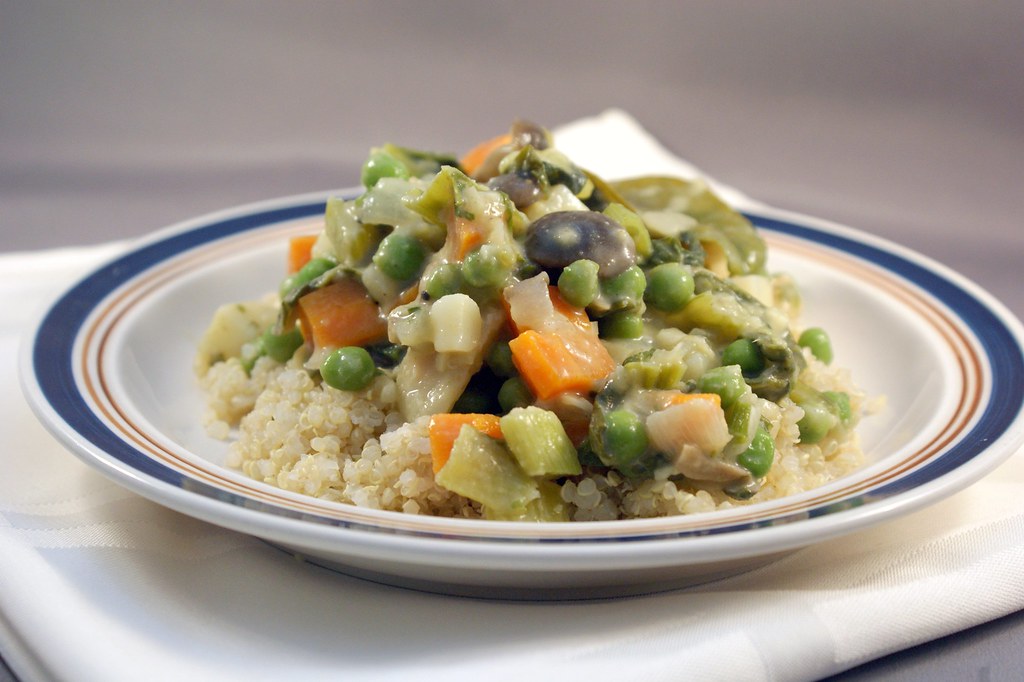
This dish was awesome. Better than I expected. I love it when that happens! The flavors all came together so amazingly well, and the spicy kick was just right, so they weren’t masked. I usually go for brown jasmine rice, but this time I served the curry over quinoa. It’s a vegetarian dish, so I wanted the complete protein quinoa gives. Not to mention it cooks twice as fast. It’s seriously the best grain ever!

Now, with any luck I'll go many, many moons without being in the neighborhood of the Asian market again!


An aside: I tried to talk a little bit about the more exotic ingredients in this dish, but I didn't want to get all educational on you if you already know what the heck I'm talking about.  If you want to know more, feel free to email me or leave me a comment!


Somewhat Authentic Thai Green Curry

Makes about 8 servings

1 large onion, chopped
2 large carrots, chopped
2 stalks celery, chopped
2 medium red potatoes, cubed
6 bunches of baby bok choy, chopped
8oz beech mushrooms
4 cloves garlic, minced
1 inch nob of ginger, minced (about 1 TB)
1 stalk lemongrass, tough outer leaves removed and discarded and the tender core minced
1 tsp coriander
1/2 tsp white pepper*
approximately 2 TB green curry paste (more or less to taste)
1 can coconut milk (I used light)
1 tsp fish sauce
5-6 keffir lime leaves**
1/2 cup Thai basil leaves
1 package frozen peas
1 can water chestnuts, chopped
4 stalks green onion, sliced into rounds
1/4 cup cilantro, chopped
  1. In a large saute pan or wok over medium heat, sweat the onions, carrots, celery, and potatoes until they give off their water and begin to soften, about 5-7 minutes. Add the baby bok choy and mushrooms, and cook for another 5 minutes. Finally, add the garlic, ginger, and lemongrass, stir to incorporate, and cook another 2 minutes or so. Everything should be smelling amazing!
  2. Stir in the coriander and white pepper, and let it cook for a minute, then add the curry paste, and let it cook for another minute. [Note: If you are concerned about the level of spice, add just 1 TB to begin with (or less!), and incorporate the rest after you add the coconut milk in step 3.]
  3. Add the coconut milk (be sure to shake the can before you open it!), fish sauce, and lime leaves. Now is the time to adjust the seasonings if it’s needed. Bring the mixture to a light boil, then turn the heat down and simmer for 10-15 minutes, until the potatoes are soft and the curry is thick and fragrant.
  4. Stir in the Thai basil, frozen peas, water chestnuts, and green onion, and cook for just a minute or two, until warmed. 
  5. Sprinkle with the cilantro and serve over brown jasmine rice or my choice, quinoa!
*I don't think I've mentioned white pepper before.  It's basically just like black pepper, but milder and it blends in more, color-wise, to a dish.  It's totally optional, or you could use a few pinches of black pepper.  I just like pepper!  I bought the white pepper at Ranch 99, but I've seen it in regular grocery stores too.

**There's not a perfect substitute for keffir lime leaves, but if you're going for a less fussy curry, a splash of lime juice at the end will help give it that brightness it needs.  Just go easy, you don't want it too acidic.

Tuesday, July 6, 2010

A Feature, A Feast, And Some Ice Cold Fruit


Recipe below: Tropical Summer Sorbet

Look out, people. I’m going to get all personal on you here. Talk about feelings and issues. Deep ones even. Just skip over it if you’re of a squeamish constitution, I completely understand.

When going through tough times, it’s so important to focus on the positives. Like, sure, I’m looking like a total porker after stuffing my face at my 4th of July feast...and again on the 5th...and then again today. I can’t stay away from the leftovers! But on the bright side, my boobs look awesome! Very full and vollllllluptuous. See? Bright side. 

Some aspects of life have been a total downer the last few months. I’m unemployed. Things in my house and cars keep breaking and requiring tons of money to fix, so now I’m poor. And I’ve recently deduced that apparently because I worked the first 5 years out of college in one profession, it’s impossible to move to any other. Because I would just leave the new position as soon as something better came along. Because people never do that within their own profession. People in college and younger beware this little fact.

But, the positives abound! The likes of the Pioneer Woman and her fabulous underlings have recognized my recipes on her Tasty Kitchen food community home page three times now! That’s three more times than I ever expected. And what’s more. So much more! Is that I've made it. My blog has made it. What is “making it”, and how do I know that I’ve done it? Well a certain co-habitating biped of the gentlemanly persuasion has been reading regularly. This individual does not read blogs, could care less about the random ramblings of his fellows, even those of his life companion. But he reads this modest one. Hi Husband!

Can I just run this food blog full time? That would be my first choice. I would get a fancy Apple laptop with the latest Photoshop software. I would get a top end digital camera and take lessons on how to actually use it. I would cook and bake in the kitchen all day long, concocting boozy creations and share them with you! Man, wouldn't that be nice?  Cross your fingers I win the lottery one of these days!


Oh, right. The small matter of the leftovers I mentioned. It was my second annual 4th of July barbecue feast! We had a few friends and one very adorable Beagle over to help us consume what can only be described as a smorgasbord. It’s all Husband’s fault, you see. I couldn’t decide between serving hot dogs, hamburgers, and BBQ pulled chicken, and he adamantly insisted that we have all three.

“How about all three?” He said.

Do you see what I have to put up with?!

And with all that meat, I couldn't serve just one salad. One measly side. Oh no. I had to do appetizers, grilled vegetables, a slaw, grilled mashed potatoes, a pie, and of course, bake my own buns. I was in the kitchen all weekend. It was awesome. And all Husband’s fault.

I think my guests were a bit overwhelmed by the variety of food available. I hope they don’t think I make that much food every time I have people over. Except that I kind of do. I have a problem. But I’m determined! I will have a few guests over sometime in the future, and I will cook a simple meal. One protein, one side, one veg. And one appetizer, and one dessert. And maybe some homemade bread. See? Totally not overboard. Right.


Well if you ate as much as I did to celebrate our Nation’s Independence, you’re probably in the mood for something a bit...simple and light. I’ve got you covered! This tropical fruit sorbet! It’s sweet. It’s delicate. It’s the perfect treat for a sunny Summer day. And best of all, it’s boozy! The hefty helping of rum not only adds an awesome tropical punch, but it lowers the freezing temperature of the sorbet, so it stays nice and scoop-able!  Heck, it’s even sugar free.  It's so delicious that it could just be a bright side to your own trying day.


Tropical Summer Sorbet

6 kiwis, skin removed and cut into pieces
1 mango, skin removed and cut into pieces
1/2 cup rum (I used light)
1/4 cup agave syrup (or more to taste)

  1. Combine all ingredients in a blender or food processor until liquefied. You may need more agave syrup, depending on the sweetness of your fruit. Chill mixture for at least 30 minutes. Add to an ice cream maker and churn according to the manufacturer's instructions. Move sorbet to a freezer-safe container and freeze for a few hours to harden.
Note: If you don’t have agave syrup, you can always substitute simple syrup instead.

Friday, July 2, 2010

Meal Fiesta Caliente!


Recipes below: Fiesta Black Beans, Chipotle Lime Pulled Chicken, Caliente Yogurt Sauce, and Watermelon Lime Margaritas


Let me just start this post off by saying that not only do you get recipes for a whole flipping meal in this post, you get a drink too!  Take that Guy Fieri and Guy's Big Bite!  So it may be a doozy of a post, but this is like 4 posts in one.  You're welcome!


Beans get a bum rap. They’re always an afterthought, an easy side. They’re baked with a pound of sugar, or fried with a pound of lard. They rarely have any real flavor imparted. Fat and sugar are not flavors. They are nutrients that Mitochondrial Eve and Lucy evolved to salivate over because it meant the food they were eating was a good source of calories. Not so much a problem for homo-folk nowadays. But real flavors are just as easy, and way more delicious! And it’s really too bad because beans are so versatile and healthy! They are full of fiber and protein, which fills your tummy up, and they take on all kinds of seasonings in all kinds of dishes. Really, what’s not to like?  

Oh right...they are the magical fruit.  Eh, get over it.  Take some Beano if you're worried.

I’m curious how other people build their meals. Me? It usually starts with one ingredient I feel like eating. In this case, I was craving black beans. Then I thought I wanted to do a play on refried beans because I wanted a creamier consistency. That got me thinking about Mexican flavors, and the meal just took form from there! I ended up with black beans, slow-cooked pulled chicken, and steamed broccoli, all flavored with chipotle chiles, lime, and tequila. Yum!

Limes are a fantastic way to bring Mexican-flavored food to life. They’re bright and acidic and a beautiful compliment to chiles. Chipotles in adobo sauce are deep and smokey, which I absolutely love, but regular jalapenos would have been good too. And of course, being me, I threw in some tequila because it’s an obvious pairing and delicious!

I steamed the broccoli, which I tossed with the caliente yogurt sauce, because I was just in the mood, but in hindsight, I think roasting the broccoli would have been even more delicious, and taken the sauce a little better. Also, even better would be just a simple slaw with cabbage and carrot. But really, anything that tickles your fancy would work. Also, a great vegetarian option would be to nix the chicken (duh) and toss some cooked brown rice in with the beans.  Oh, that sounds good! I'll be trying that next time!  You do know that rice and beans make a complete protein, thus serving as a suitable replacement for meat, right?  I'm sure all the vegetarians out there do, but all you looking to jump on the meat-light bandwagon (good for you!), take note.


With the 4th of July coming up this weekend, any of these dishes could be a great addition to your celebratory fare! I’m super excited to be hosting a barbecue with just a few friends, mostly neighbors, and their pups! I have to admit, I have kind of a problem when it comes to hosting. Besides my neurotic anxieties, I mean. I always make too much food! I just want to feed people all sorts of delicious foods, and it of course ends up being way more than anyone can possibly eat. But that’s ok. I figure Husband and I just won’t have to worry about meals for the next decade or so. Or Theo and his friends would be more than willing to help us out, I'm sure.

I’ll be serving some roasted red pepper and garlic hummus, and some spinach artichoke dip to start. Then, since we couldn’t decide between proteins, we’ll have hot dogs, hamburgers, and BBQ pulled chicken sandwiches (we are insane, I am fully aware). Yum! On the side, simple grilled veggies, a mango, corn, and jicama salad, and a curry coleslaw. And my grilled mashed potatoes are going to make a second appearance! This time I’m making a sauce with this blue and jack cheese blend they sell at Sprouts. It’s milder than blue cheese by itself, and I think will be delicious with the potatoes! And for dessert I’m trying out Alton Brown’s apple pie featuring apple brandy! I’ve been waiting to try this recipe for months!

What are you doing to celebrate the second runner up for biggest grilling holiday our Independence Day?  What's for dinner?


Fiesta Black Beans

makes about 8 servings for a side or 6 servings for a main

2 TB butter
1/2 medium onion, finely chopped
5 cloves garlic, minced
1 tsp salt
1 tsp ground coriander
1 tsp smoked paprika
1/2 tsp cumin
2 tsp chile powder* (ancho or chipotle)
1/4 tsp cayenne pepper
2 cans black beans (I’m approximating because I used dried beans, it may have been a little more)
1 7oz can diced green chiles
3 chipotle chiles in adobo sauce, deseeded and minced
1 TB adobo sauce
1/4 cup tequila
2 limes, juiced
8oz frozen corn, thawed
3-4 stalks green onion, sliced

*I highly recommend against buying just generic chili powder. First off, it’s awful, and second, you’re not looking to make the dish taste like chili, but chile. Most stores sell ancho or chipotle versions that are pretty good. I made my own!
  1. In a pot over medium heat, melt the butter, and sweat the onions and garlic until soft.
  2. Add the salt, coriander, paprika, cumin, chile powder, and cayenne pepper, and cook for a minute, until your kitchen starts to smell amazing (i.e. the spices release their oils).
  3. Add the black beans, green chiles, chipotle chiles, adobo sauce, and tequila, and cook until soft and incorporated, about 5 minutes. At this point I took out a potato masher and loosely mashed the mixture, but that’s optional.
  4. Add the lime juice, corn, and green onions, and stir to combine. Remove the mixture from the heat and serve.


Chipotle Lime Pulled Chicken

1 whole boiler chicken
1 jar of your favorite chipotle salsa (I'm partial to Trader Joe's)
6 cloves garlic, whole
1 lime, juiced
1/3 cup tequila
8 oz frozen corn, thawed
  1. In a slow cooker, place the chicken in the bottom of the pot. Pour half the jar of salsa over the chicken, then sprinkle in the garlic cloves. Cook on high for 6-7 hours, until it is falling apart and delicious.
  2. About 3 hours into the cook time, flip the chicken over for even cooking, and add the rest of the salsa, tequila, and lime juice.
  3. When the chicken is done, fish out the carcass and bones, shred it up, and stir in the corn. Make sure you get all the bones! Some are very small and easily detach from the carcass, and these can be a big time chocking hazard!


Caliente Yogurt Sauce

Makes a little over 1/2 cup

1/2 cup Greek-style yogurt (I used 2%, but any will do)
2 chipotle chiles in adobo sauce, deseeded and minced (2 was pretty darn spicy, so start with 1 if you're scared)
1 TB adobo sauce
2 cloves garlic
3 stalks green onion, roughly chopped
1/2 tsp chile powder
1 lime, juiced
salt and pepper to taste
  1. Combine all ingredients in the bowl of a food processor and mix until incorporated. Adjust seasoning to taste.
Serving suggestion: Toss with roasted broccoli or shredded cabbage.


Did I mention I chased this delicious meal with a cocktail? Indeed I did! A watermelon and lime margarita, to be exact. Just pretend that picture below is in a margarita glass rimmed with salt, m-kay? Went perfectly with my Mexican fare! Just the limeade would be a refreshing treat anyone could enjoy on a hot Summer day.

Watermelon Limeade

5lb watermelon, chopped into chunks
3-4 limes, juiced
1/4 cup agave nectar or simple syrup, or more to taste
pinch of salt
  1. In a food processor (or blender if you have a descent one), mix watermelon until it’s a liquid. You’ll probably have to do it in batches to avoid the juices spilling out. Pour it through a mesh strainer to remove any pulp. 
  2. Add the lime juice, agave or syrup, and salt, and stir to combine.  Add more sweetener as needed, it'll depend on how sweet your watermelon is.  
To make this an adult beverage, blend with ice and tequila and serve in a margarita glass, or for a margarita on the rocks, pour a shot of tequila and the limeade over ice cubes.