Showing posts with label berries. Show all posts

Thursday, June 30, 2011

Chocolate Strawberry Ricotta Tart


I had a thought the other day - yep, just the one.  If I could go back in time and talk to my teenage self, what would I say?  We’ve all had this thought, right?  Though you probably have other thoughts to go with it.  High school.  Hormones.  Literal growing pains.  ‘Nuff said.

I would skip the clichéd advice: It gets better.  High school is something to be gotten through, everyone hates it.  All the things that seem epic today will be so small tomorrow.  Because really, we all did get that advice, one way or another, in high school, and it did squat to make it any better.  So nevermind that stuff.  Here’s what I would tell my younger self:

  1. Own it.  Whoever you are, whatever you do, own it.  When people say “be yourself”, they really mean, don’t be embarrassed by whatever “yourself” is.
  2. You are as apathetic as you are passionate.  Don’t feign apathy for the things you are passionate about.  Don’t feign passion for the things you are apathetic about.  People will just have to get over that you love Star Trek: TNG and listen to your parents’ Queen CDs, and you could give a rat’s furry tail about conch shell necklaces or Tupac.
  3. You’re tall.  Buying pants that fit is a pain in the rat’s furry tail, and all the cute boys are self-conscious about it.  Can’t say that ever gets better.  But it does mean you’ll end up with someone tall.  Go ahead and buy some heels.  People will just have to get over it.
  4. Learn to eat!  I don’t mean quantity.  You’ve got that down.  You say you don’t like meat, and a slew of other foods.  In reality you do.  Now it’s your turn to get over it. Open your mind.  And stop picking all the cashews out of the cashew chicken.  The family really hates that.
  5. Get your rat’s furry tail in the kitchen – and not to make grilled cheese or Stouffer’s mac and cheese!  Look, Mom works hard all day and then comes home to a house full of people whining for attention and wanting things, and still has to get dinner on the table in an hour or all the whining steers towards hunger pangs.  You, on the other hand, get home from school to an empty house with, let’s face it, no intention of starting homework so early.  You might not realize how much you enjoy cooking just yet, but for how much Mom would appreciate the salad already made, or a pasta sauce already done up, it’s not really about that.
  6. And finally, read more books and watch less television.  You’ll be so glad you did.

I’ve got you thinking now, haven’t I?  Let’s hear it.  What would you tell your teenage self?


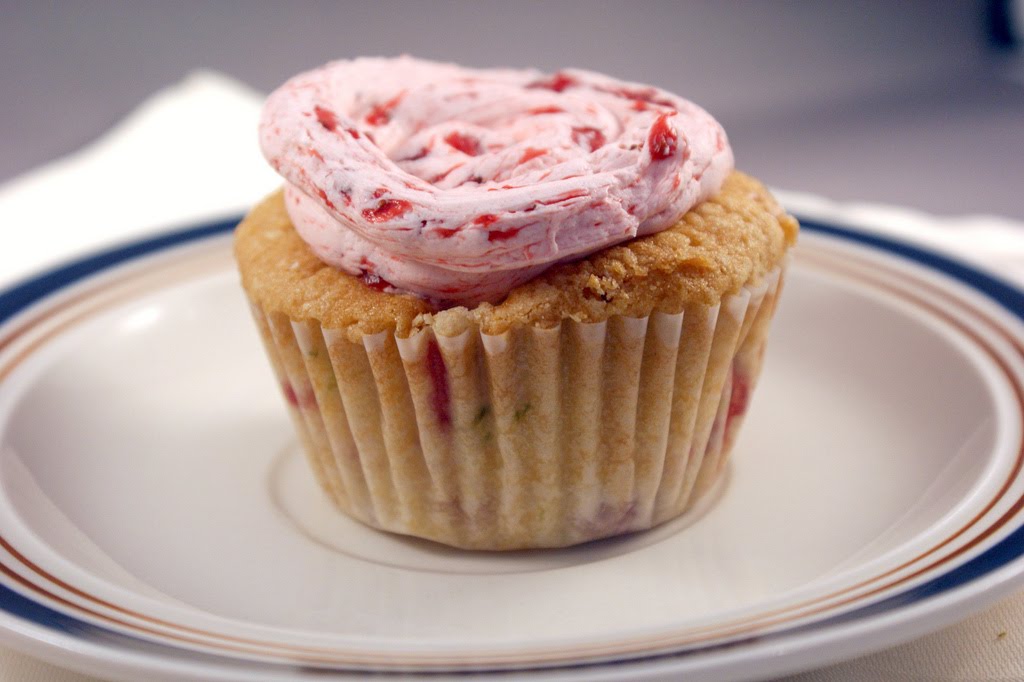
What’s this got to do with ricotta cheese, strawberries, and tarts?  Nothing!  Though I could have been enjoying it in my life a lot sooner, had I listened to myself about number 5.  That will just have to do for a segue.  It’s my blog, and I can be random if I want to!  Now, onto the chocolate graham cracker ricotta strawberry tart!

A chocolate graham cracker ricotta strawberry tart to anyone who can say “chocolate graham cracker ricotta strawberry tart” 10 times, fast.

This creation came about by a need to use up soon-to-go-stale graham crackers (They should sell graham crackers in packs that are exactly enough for a tart or pie crust, so you don’t have to worry about how much you need to grind into crumbs, or whether you have enough left in the box.  I’m totally marketing that idea.  Don’t steal it, k?), ricotta cheese (because in a moment of utter stupidity I wasn’t sure if 32 oz. was enough for a recipe that called for 2 cups, so I bought 15 oz. more), and strawberries from my CSA box.  Because Husband would ultimately be eating it, I decided to incorporate chocolate as well.  Lots of it.  It just made sense.  I considered dotting the tart with fresh strawberries at the end, but a recent failed attempt at strawberry rhubarb pie left me with a need for cooked berry vindication.  Always drain your strawberry juices people!  Also, when you strain them into, say, a small saucepan and simmer them until they cook down into a lusciously sweet syrup, you’ve got the mighty fine makings of something to brush onto this tart at the end.  Yeah, I did that.  I shudder to waste one ounce of strawberry essence!

To break it down, the crust is graham crackers and pecans and cocoa powder.  Pecans because I ran out of graham crackers (which would not have happened, had the product I mentioned existed!), and also because they’re delicious.  Cocoa powder because I wanted the chocolate flavor to really come though, and also because it’s delicious.  I didn’t add sugar.  I thought the sweetness from the rest of the tart and the sugar already in the graham crackers was plenty, but there’s also a lot of cocoa powder in it, so I could see it being too much for some.  I recognize my sweet tooth, while very demanding, is also very susceptible to being overwhelmed.  Husband agreed the level of sweet was spot on, but a tablespoon of sugar could be thrown in without any harm.

The filling is my leftover 15 oz. container of ricotta cheese, the usual sweeteners and stabilizers, and melted chocolate.  Why is ricotta cheese and sugar so good?  I wonder if my sister, who hates the combination of cream cheese and sugar, also hates ricotta and sugar.  They’re totally different flavors, but maybe the dislike stems from disconcertion over mixing savory cheese with enough sugar to transform it to a decidedly dessert setting?  Creamy, salty, and sweet?  It’s a-ok in my book.  You’ll have leftover filling.  A fair amount.  It’s not ideal, but I didn’t want to mess with untested ratios, and it uses a standard 15 oz. container.  Not to mention, what are you going to do with just a little extra ricotta?  Instead you’ll face a bowl of delicious filling with no home besides your stomach as you try to resist just another spoonful while you wait for your tart to bake and your strawberry juices to reduce.  You’re welcome.

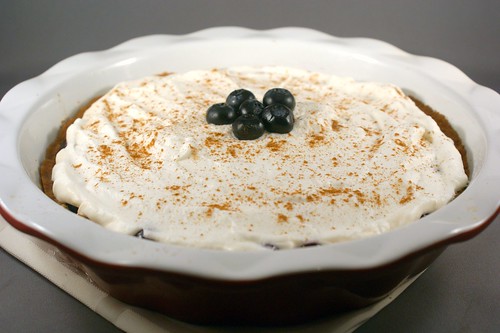
My strawberries were tiny, so I didn’t end up using the full 16 oz. package, but I’m confident more regular, American strawberries would yield the perfect amount.  The more strawberries, the better I say!  This tart takes forever to bake.  An hour?  What is in there that takes so long to become un-jiggly?  No idea.  Of course, checking the doneness at 40 minutes, and every 5 minutes thereafter probably extended the baking time a wee bit.  I was so afraid of over-baking!  It actually ended up taking an extra 10 minutes or so. But once it was done, and the syrup was brushed over the top, and it had cooled in the fridge…such good stuff.  The rich chocolate, earthy yet savory cheese filling, and texture from the crust all contrasted nicely.  The strawberries had a lusciously soft bite and sweet flavor, not to mention the syrup essence!  The whipped cream on top isn’t completely, necessary, per se, but I did try it both ways, and the airy, creamy element was a definite plus.  All in all, we both loved it and I wouldn’t change a thing. Oh, did I mention I infused a good amount of Grand Marnier in there? Yeah, I did that. It was tasty.

Except maybe how many spoonfuls of leftover filling I ate.


Have any tasty creations ever spawned out of your kitchen because of an abhorrence for wasted food?  Or a food fail?  Are they all the tastier for it?


Chocolate Strawberry Ricotta Tart

For the crust:
6 oz. graham crackers
2 oz. pecans
8 oz. (1 stick) butter, melted
1 tsp orange zest
¼ cup cocoa powder
2 TB sugar

For the strawberries:
1 lb. strawberries, halved and hulled
¼ cup sugar
2 TB Grand Marnier

For the filling:
15 oz. ricotta cheese (I used part skim), room temperature
½ cup honey
2 large eggs, room temperature
2 TB Grand Marnier
1 tsp orange zest
1 tsp vanilla extract
¼ tsp kosher salt
4 oz. bittersweet chocolate, melted*

  1. Preheat the oven to 350 degrees.
  2. In a food processor, pulse together the graham crackers and pecans until they are small crumbs.  Add the orange zest, cocoa, and sugar and pulse until it’s mixed.  Add the melted butter and process until the crumbs are coated.
  3. Prepare a 9” tart pan with baking spray.  Press the crumbs evenly around the bottom and sides of the tart pan.  Bake the crust for 10 minutes until it is toasted and set.  Let cool.
  4. In a large bowl, stir together the strawberries, sugar, and Grand Marnier.  Let it sit for about 20 minutes, or until the strawberry releases some of its juices.
  5. In the bowl of an electric mixer fitted with a whisk attachment, mix together the ricotta and honey until they are well incorporated.  Add the eggs, one at a time, mixing until they are incorporated.  Add the Grand Marnier, orange zest, vanilla, and salt, and mix to combine.  With the mixer running, slowly pour in the melted chocolate, and mix until everything is well combined.
  6. Pour the filling into the cooled crust.  Top the filling with the strawberry halves, reserving the juices left behind in the bowl.  The strawberries will sink a bit.**  
  7. Bake the tart for about an hour, or until the filling is set and a toothpick inserted in the middle comes out clean.  
  8. While the tart is baking, transfer the reserved strawberry juices to a small saucepan.  Over medium heat, bring the juices to a simmer and cook until it is reduced by about half, about 10 minutes.
  9. Once the tart is out of the oven, either brush or drizzle the strawberry syrup over the top.  Cool completely in the refrigerator for about 2 hours before serving.


*To melt the chocolate, microwave the chopped up chocolate, stirring every 15 seconds until it’s melted.

**If you prefer your strawberries less cooked, and more on the surface of the tart, put the tart in the oven without the strawberries on top.  After about 30 minutes, when the filling has set up a bit, remove the tart from the oven, set the strawberries on top of the filling, and put it back in the oven to cook for the rest of the time.

Tuesday, September 7, 2010

Cinnamon Spiked Blueberry Icebox Pie


Remember when I said you should buy up every clamshell of blueberries you can still find at the store? Well that’s partly because I have another blueberry pie up my sleeve. What a minx I am! But this pie couldn’t be more different than my previous azure berry exploit. That blueberry pie was a traditional pie. The kind of pie that comes to mind at the mention of pie. The kind with a tender, buttery crust and a warm, ooey gooey center. The kind that bakes forever in the oven and then cools mercilessly on the counter all afternoon. This blueberry pie is not that kind of pie. This is an icebox pie. Totally different! Ever had an icebox pie? I hadn’t until I made this one. I think I may need a do-over of the last 28 years, just so I can work this pie into my childhood food memories. When I was 5 - barbecue beef (it was my favorite kind of chicken!) and icebox pie. When I was 10 - blueberry pancakes and icebox pie (sounds like quite a combo to me!). When I was 16 - macaroni salad and icebox pie.  Annual Mother's Day picnic - Everett and Jones BBQ and icebox pie (*drool!*).

But what is it?

It’s a chilled pie (a correlation I'm sure you made on your own) with a graham cracker crust, a thick fruit jam filling, and a whipped cream topping. It’s a pie for those hot summer days when you don’t want your oven on for an hour. It’s a pie for when you’re craving something sweet and creamy, yet light and cool. It’s a pie for you, right now. Promise.

It all started a few weeks ago. I had an odd craving for graham crackers - odd because I don’t really ever eat graham crackers. Apart from this pie, the cheesecake squares, and the ‘smores in Reno, I haven’t eaten a graham cracker since I was maybe 14. No joke. (I used to think they ruined the 'smore.  The idiocy of youth, right?)  So when I saw graham crackers on sale that very week, I picked up a box. Why not, right? Then, the very next week, a giant 18oz container of blueberries was on sale for $2! Why,those little buggers hopped into my cart of their own accord. They know a good home when they see one. So there I was, craving graham crackers and mulling over blueberry recipes, and it just clicked. I searched around my Google reader for recipes, landed on a strawberry icebox pie I could modify for my own devilish purposes, and the rest, as they say, is history.


Now, let me tell you about this icebox pie. Because you know I gave it the Julie touch. I spiked it of course! I just love the combination of cinnamon and blueberry, so I gave the Goldschlager a second try, and I think it came through much more prominently this time. I used it in the crust and the whipped cream topping, and the cinnamon liqueur flavor that added that hint of something extra I looking for was definitely present. The blueberry jam filling for the pie also turned out great. I let half the blueberries break down into a syrup, and I left out the other half until the very end so they would stay intact. That way it felt like you were still eating a blueberry pie and not a blueberry syrup pie. I wanted some identifiable berry. And I needn’t mention yet again how well brandy goes with berries in baked goods. If you’ve tried it, you know. I kept the sugar in this recipe pretty low because I prefer to let the flavor of the fruit come through, and there’s enough sweetness that comes from the graham crackers (especially sugar-leaden store-bought ones), but you could always add more if you've got a sweet tooth.

Overall, this pie was amazingly good, satisfying my craving and then some! Don't you love it when you make something on a whim and it turns out far better than you expected? It makes it all that much more satisfying, I think.  The crust has that sweet, kind of comforting taste you get from graham crackers, the filling is really just a jam, but a jam you might eat straight out of the jar because it’s so tasty. It's light and summery, yet with the cinnamon and graham cracker crust, almost homey and comforting.  (As good desserts should be. Or maybe I’m just comforted by weird things...)  The whipped cream topping just turns everything to silk in your mouth, brings it all together. It's definitely the star, and I’m not even a whipped cream kind of person.  I think doctoring it up made all the difference. I also really like the proportions of the three components in this recipe. The crust to filling to topping ratio is right on.

Yes, the pie is good.  But really, it's dangerously good. I couldn’t stop eating it! I kid you not, I ate a third of this pie in one night. In my defense, it is a bit of a vertically challenged dessert.  But it's also a baked good of mass waistline destruction, people! Make at your own risk!

But really, make it.  It's yummy.

Cinnamon Spiked Blueberry Icebox Pie

adapted heavily from Shutterbean

For the crust:
10 graham crackers (standard 2 1/2 by 5 inches)
2 TB sugar
1 tsp cinnamon
5 TB melted unsalted butter
2 TB Goldschlager

For the filling:
18oz fresh blueberries
1/4 cup sugar (or more to taste)
1/2 cup fresh squeezed orange juice (about 1 1/2 oranges)
3 TB cornstarch
1 tsp cinnamon
1/4 tsp kosher salt
1/2 tsp vanilla
1/4 cup brandy

For the topping:
1/2 cup heavy whipping cream
2 TB powdered sugar
1 TB Goldshlager
1/2 tsp vanilla
pinch of cinnamon

  1. Preheat the oven to 350 degrees. 
  2. In a food processor, pulse the graham crackers, cinnamon, and sugar together until they are reduced to fine crumbs. With the machine running, stream in the melted butter and Goldschlager and process until the crumbs are moistened. 
  3. Press the crumb mixture into a 9” pie plate in an even layer. Bake the crust for 12-14 minutes until it is golden brown and when you poke it with your finger, it feels like a crust, rather than moistened crumbs. Let the crust cool completely. 
  4. In a medium saucepan over medium heat, combine the sugar and half of the blueberries, and bring the mixture to a simmer. Let the berries cook until they have started to break down and form a thickened syrup, about 5-10 minutes. 
  5. In a small bowl, whisk together the orange juice, cornstarch, cinnamon, salt, vanilla, and brandy until the cornstarch is fully incorporated. Stir this slurry into the blueberry mixture, and continue to simmer for a few more minutes, until it has thickened to the consistency of a jam. Stir in the rest of the blueberries, reserving a small handful for garnishing the top of the pie. Remove the blueberry mixture from the heat and let it cool for a few minutes. 
  6. Pour the blueberry mixture into the cooled pie crust and refrigerate for at least 4 hours. 
  7. To finish the pie, pour the heavy whipping cream into the bowl of a stand mixer set with the whisk attachment and beat on high until soft peaks form. Add the powdered sugar, Goldschlager, and vanilla, and continue to beat on high until soft peaks form again. Be careful not to overbeat! 
  8. Spread the whipped cream evenly over the chilled pie and sprinkle with cinnamon and the reserved blueberries. 

Wednesday, September 1, 2010

Blueberry Rhubarb Pie


I apologize for my lack of posting last week.  Took the husband and furkid up to Reno for a visit with the family and I was just having far too much fun to talk to you.  The highlight?  There was 'smores making by the firepit in my parents' backyard on a gorgeous, crystal clear night.  There was getting smashed together on cocktails and wine and then stumbling around the neighborhood, attempting to take my dog for a walk.  But the real highlight was definitely getting to hang with my 10 month old nephew, who is the perfect package of happy, hilarious, and adorable.  The kid has what my sister calls "his badass face" for goodness sakes!  It's badass.

Another highlight was a second go at Husband's Ultimate Birthday Cake.  You may recall I made this for Husband's birthday a few months ago with much success.  Too much success!  Husband had been bugging me to make it for him ever since, and this trip finally seemed like a good time to do it.  Something about having 4 other people in the house to help eat it quickly was certainly appealing.  This was actually the first time I've followed one of my own recipes.  Sure, I've written stuff down as I go, jotted down quick instructions to myself, or modified and adapted other people's recipes, but hearing my own voice come through as I followed this recipe step by step was kind of surreal.  And kind of awesome!  I kept thinking, "I know exactly what I mean!" 

And having made this cake twice now, I can safely boast that it is awesome!!!  Seriously.  Not to toot my own horn or anything, but both my sister and my dad declared their disdain of the chocolate/raspberry flavor combination before trying this cake.  [*GASP!*  Blasphemy!  Chocolate and raspberry are the ultimate!  ULTIMATE!  Ok, only my dad expressed disdain.  My sister merely said she had never tried a chocolate raspberry dessert to her liking before.  My sister - always the diplomat.]  After they each tried a piece, however, it was a whole other matter.  There was lots of raving.  And not polite raving.  Adamant, genuine, "I'm a believer!!!" raving.  They both said the flavors were perfectly balanced - not too sweet, not too tart.  And my mom, who was of the opinion that no cake could be worth that much effort, decided that this cake was worth that much effort, as long as someone else was making it.  Anyone know the onomatopoeia for a head inflating?  *Wooshooop!*  Because that's what's happening right now.  I just love cooking for my family.  Part of the reason I'm so neurotic about feeding other people is that I get so worried that they hate my food but they're too polite to say so, so I just tend to assume no one liked anything and I was just this crazy food-pusher they couldn't get away from.  But family is different.  You can tell when they're lying. Mwhahaha!

And one more highlight - my discovery of pumpkin seed oil!  Have you ever heard of it?  Apparently it's common in Europe, and there's a European market in Reno where my mom can buy it.  I'm, of course, kicking myself for not getting to that market to get my own bottle because it is some seriously nommy stuff.  For dinner one night my mom grilled some veggies simply tossed with a little olive and pumpkin seed oils, then threw it all together with some brown rice and shrimp.  I figured it would be tasty, but the pumpkin seed oil hit this meal out of the park.  It was that secret ingredient that made all the flavors come together perfectly. Yum!   Mom, if you are reading this, please bring me a bottle next time you visit! 

But enough about cake and plant oils.  I'm here to talk about pie.  I've been sitting on this recipe far longer than I wanted to.  It's still blueberry season, right?  Well I highly suggest you run out and buy every last clamshell of blueberries you can find because this pie is worth it.  I know, rhubarb usually goes with strawberries, in fact strawberry rhubarb is Husband's favorite pie, but one bite of this baby had him saying "Strawberry who?" No joke.

Pie crust.  Let's hash it out and get it out of the way.  Tender vs. flaky.  Shortening vs. butter.  Everyone has their own pie crusts tastes.  Some people like all of one or another, some people have different ratios of both.  I have by no means baked pie crusts extensively enough to give a definitive opinion on the matter, but I will say that of the crusts I've made so far, I am in the all butter camp.  First, shortening doesn't taste like anything.  People use it because it makes for a flakier crust.  But here's the thing.  I find butter crusts plenty flaky, and I actually prefer the more tender texture all butter crusts have.  Not to mention their amazingly buttery flavor.  You just have to incorporate the butter the right way, and maybe have a trick or two up your sleeve.  Like booze!  Have you heard of using vodka in pie dough?  It's wet enough to bring the dough together, but it doesn't gum up the flour like water does.  But vodka has no flavor, so I decided to try Goldshlager instead.  I thought the cinnamon liqueur might infuse a little extra flavor into the dough.  While it succeeded in keeping my dough light, I didn't get a lot of cinnamon flavor, so next time I might just stick with vodka.  I'm on a budget, after all, and they unfortunately don't sell Goldschlager at Costco.  The most important thing with a good pie dough is making sure everything is cold.  I actually stuck the butter in the freezer until it was just frozen, which worked perfectly.  I like to work the dough with my hands, but that always warms the butter too much.  This way the frozen butter actually needed the heat from my finger tips to become workable. 

To the novices out there who are completely intimidated at the thought of making pie: you can totally do this.  Pie crust can be a pain, and if you want it perfect, you do have to be somewhat of an artist, but I maintain that anyone can make a decent pie crust.  It'll probably be flawed, sure, but it'll be tasty, and isn't a tasty pie the real goal?  Start off by reading Deb's tips for the logistics of proper pie construction at Smitten Kitchen.  I always thought the hardest part was rolling it out.  I remember my mom's many failed attempts to get her pie crusts from the mat to the pie plate in one piece.  Turns out the secret is just lots of flour, and lots of turning.  Easy!

Now the filling.  I'm swooning just thinking about it.  I actually set out just to make a plain blueberry pie, but when I had all the berries in the bowl, I knew it was lacking in volume.  I had by chance bought some frozen rhubarb at Sprouts a few weeks ago because I was curious (also, it was on sale - impulse buy!). I had never seen frozen rhubarb before, and neither had the cashier who rang me up.  She asked if it was good, and I told her I'd have to let her know.  I figured, what the hell, and threw it in with the rest of the filling.  I guess it was fate because this is easily the best pie I've ever made - including strawberry rhubarb!  It was just the right balance of sweetness from the blueberries and that touch of sour tartness from the rhubarb.  I love the sweetness of blueberries, but find a little acid to break up their flavor really brings them up a notch. And the deeper sweet flavor of the brandy brought everything together perfectly.  But the real secret was the tapioca starch.  All purpose flour is normally used in pies to help thicken the filling, but tapioca starch does a much better job of making a glutenous mixture.  Got that trick from Alton Brown.  I buy tapioca starch at the Asian market, but I'm sure it can be found at other specialty markets.  If you don't have any, just use regular AP flour.

It may be an ugly pie, but it was darn delicious.  When Husband and I were ready for dessert all conversation would cease while consumption was happening. Unless it was one of us chiming in to say how good the pie tasted.  But usually it just came out as approving grunts and groans.

  
Blueberry Rhubarb Pie

crust adapted from Smitten Kitchen
filling adapted from Joy the Baker

For the crust (both top and bottom):

2 1/2 cups flour
1 tablespoon sugar
1 teaspoon salt
1 cup (2 sticks) unsalted butter
2 TB ice cold water
Goldshlager (or vodka)
For the filling:

18oz fresh blueberries
12oz bag frozen rhubarb, thawed (or about 2 cups fresh rhubarb, chopped)
1 cup sugar
1/2 cup tapioca starch (or substitute AP flour)
zest of half a lemon (about 1/2 tsp)
1 tsp lemon juice
1 tsp cinnamon
pinch of kosher salt
3 TB brandy
1 egg
1 TB milk
To make the dough:
  1. Cut the butter into small pieces and break them apart. [I like to cut the stick lengthwise, turn it 90 degrees, and then cut it lengthwise again, so I have 4 long sticks. Then I cut regular tablespoon-size pats, so I end up with a bunch of 1/4 TB pieces.] Put the well-separated pieces into a bowl and place it in the freezer for about 30-40 minutes, or until they are just barely frozen through.
  2. In a medium bowl, mix together the flour, sugar, and salt. Add the frozen butter and gently work it into the flour with your fingertips. Since it’s frozen, you’ll have to kind of smush it out. Use your finger muscles! The butter will be incorporated enough when you have small pea-sized bits of butter left.
  3. Add the very, very cold water and stir it into the mixture. This shouldn’t be enough moisture to bring the dough together, so add the Goldshlager 1 TB at a time until the dough will just form into a ball. Divide the dough evenly into two balls. Wrap each ball tightly in plastic wrap and squish it into the shape of a round disc, like a giant hockey puck.
  4. Chill the dough in the refrigerator for at least 2 hours, but overnight is okay too.
To make the pie:

  1. In a bowl, combine the blueberries, rhubarb, sugar, tapioca starch, lemon zest, lemon juice, cinnamon, salt, and brandy. Mix until everything is incorporated and the fruit is well coated. Set aside.
  2. Remove one hockey puck of dough from the refrigerator. On a very well floured surface, roll out the dough evenly until it is big enough to cover your pie plate, plus a 1/2 inch or so. This is best achieved by constantly turning and flipping your dough so it doesn’t stick to your surface. Don’t be afraid to add too much flour, you can’t. Transferring to the pie plate can be tricky. I like to fold the dough in half, and then in half again, and then transfer the quarter wedge to the plate and carefully unfold it. But use whatever method you like.
  3. Gently press the dough into the plate and trim off any dough overhanging more than a 1/2 inch over the plate. Using the excess bits to fill any holes or imperfections you have. Remember, you won’t see the bottom crust, but you’ll taste any spots where there’s missing dough. Pour the blueberry mixture over the bottom crust and set aside.
  4. Remove the second hockey puck of dough from the refrigerator, and roll it out the same way you did the first one. When it is big enough to cover the pie with at least a 1/2 inch overhang, figure out what’s going to be the center. You need to make vents in the top crust for the steam to escape. I cut a hole about the size of a shot glass in the very center, but it can be anywhere. You’ll want at least one. I also cut a few smaller holes around the edges. When the dough is properly ventilated, carefully cover the pie, and again trim any excess. Tuck the two crusts under so it is flush with the plate. Using your fingers or a fork, crimp all the way around the edge of the pie so it’s sealed. Cut a few more vents in the crust. Put the pie in the refrigerator to chill for about 20 minutes.
  5. While the pie chills, preheat your oven to 425 degrees and move the rack to the lower third of your oven. If you’re worried about filling bubbling over and making a mess you can put a cookie sheet under the rack to catch any drippings.
  6. Beat the egg and milk together and brush evenly over the top of the chilled pie, making sure none of it pools.When the oven is ready, bake for 30 minutes, then knock the heat down to 375 degrees and bake for another 30 minutes. If the pie starts to get too brown before it is finished baking, cover it loosely with foil (I did this about 45 minutes in). The pie is finished baking when the crust is golden brown and the filling is thick and bubbling.
  7. Let the pie sit and fully cool before cutting into it to give the filling time to come together, at least 4 hours.  Don't jump the gun, you'll regret it!

Wednesday, August 4, 2010

Life is Liiiiike a Batch of Cupcakes


Recipe below: Strawberry Margarita Surprise Cupcakes

A healthy diet is all about balance. I’m a firm believer in working all the things you love into your life. Let’s be realistic. If you deny yourself something you truly love, how long are you going to be able to do it? And how happy are you going to be? And if you’re unhappy, what’s the point? Better to just figure out a way to work it in and be done with it. We’re not looking for temporary crash dieting here!

If we lived in a perfect world and could eat whatever we wanted with no repercussions, what foods would you ecstatically chow down on that you wouldn’t in this cruel, real world we live in? Me? It’s dessert! Ok technically, that’s not so much a food as a course, but how can you narrow down dessert? It’s one thing to justify high calorie foods that are also high in nutrients, but as much as I love them, desserts tend to be empty calories of processed flour and sugar. But I don’t care! I love to bake, and I love sweets after dinner. So I just find a way to work it in.

A friend asked me, after I told her about these cupcakes I’m about to drone on and on about, how I’m able to eat such things and stay so skinny. I told her I exercise a lot. And I do. But don’t just dismiss it! Getting fit really does just boil down to calories in and calories out. That’s boring, I know, but it’s true. Does that mean you have to meticulously count each calorie you eat and painstakingly track each calorie you burn everyday? Heck no! I mean, you can...but, ick! It’s all about finding what works for you. What’s really important is having a general understanding of what’s going in, and what’s coming out burning off. Some people like keeping a food journal. As much as I love documenting what I eat (via this here bloggy blog), I hate keeping a food journal. Go figure! There are websites to track and calculate exact calories in your meals, but that’s another post. The main idea is to have an idea of how many calories you’re consuming each day. I’m just talking in the general sense, here. Like, you ate a 1/2lb hamburger topped with a hot link and a side of fries vs. you ate a salad with grilled chicken on top.  But all that is another post because today I want to talk about exercise.

Anyone still here? Oh, I think I see someone in the back! You’ll be so glad you stayed.

A lot of us, including myself until very recently, have forgotten how important it is to move around! With everything at our fingertips, we’re lifeless blobs! Convenience is on its way to being a sin, and I’ve already embraced gluttony, so it’s off the table because I think we're only allowed one. Of course, one woman’s sin is another woman’s motivation! See, I love to eat. I don’t just love food (and oh do I ever love food...), I love the act of eating. I chew ridiculous amounts of gum between meals, just to keep my mouth busy...

[insert dirty joke here]

And since I love to eat ever so much, if I want to keep my trim figure up, I’ve got to run, run, run! The hardest part about starting an exercise routine is that starting part. The key here is routine, as in something you do more than once, regularly even! It's easy to try something once or twice, but really sticking with a regular exercise program is by far the hardest part about getting in shape, I think. The good news is, once you commit and keep it up, it becomes a part of your life, and thus, it becomes easier.  There is a light at the end of the tunnel!  It doesn't matter what you do, as long as you’re moving around. Though it does make sense to pick an activity you actually enjoy. Now don’t cop out on me people! I will maintain that anyone can find some activity they can do regularly they don’t completely hate. If you belong to a gym you never go to, chances are the gym maybe isn’t your thing. Try saving some money and finding other modes of movement! I didn’t know until I tried that I actually just preferred walking (and eventually running) around my neighborhood. Have a Wii? Try one of the many fitness games they have (and email me if you want some reviews). Try hiking somewhere scenic in your area, or a lake or forest or the beach! There’s always sports like tennis, basketball, or soccer, but since they require a friend, it’s best to find a lone activity for the everyday. The point is, move around, and do it several times a week. You don’t have to devote hours and hours to every workout. My motto is something is better than nothing. I know everybody’s daily lives are hectic and...well...packed!  It’s hard to imagine working more into your day, but trust me, it's all about baby steps. Once you work in 10 minutes, before you know it, you’ll find yourself extending it to 15. That’s how I started and look at me now! I learned to make exercising a priority in my routine and just...worked it in!  A little bit at a time.

And just one more quick rant: don't cop out on yourself!  Don't be one of those people that tries exercising once, doesn't see results, and then gives up.  It takes time, and you know it.  Don't be one of those people that chooses an activity that doesn't raise their heart rate above what it would take to get off the couch and go to the bathroom.  Exercising burns calories because your heart rate is raised.  Higher heart rate = more calories burned.  And this isn't really wrong, I just think it's silly: don't drive the two blocks to the gym (a ten minute walk, tops), and then walk on a treadmill once you get there!  There are a thousand and one excuses to not work out, and all they do is help you justify skipping something you aren't excited to do.  In the end, it's just a cop out.  Save the excuses.  You're in charge of yourself, and it's far better to just be honest with yourself.  If you don't want to exercise, then don't!  But no cake for you!


Ok, enough about exercise. Let’s talk dessert! I know they’re disgustingly trendy right now, but I’m kind of into cupcakes lately. They’re just so pleasantly pre-proportioned! And cake is so fluffy and sweet! And frosting! I love frosting. I could eat it by the spoonful. And when I say "could", I of course mean I totally have.  When I fill a pastry bag with frosting, I’m tempted to just squeeze it right into my gullet. Just tempted, haven't actually done that one...yet.  And by pastry bag, I mean a ziplock with the bottom corner cut off.  We're fancy at Chez Julie.

And now that my latest deep, dark secrets are out in the open, let’s talk about these cupcakes! They were awesome! The cake was light and fluffy, moist and delicious. It’s the buttermilk. Buttermilk does magical things with baked goods. And full of fruit! You’ll notice from the picture below that my strawberries sank to the bottom, which doesn’t so much matter to the overall flavor, but doesn’t make for such a pretty pic. It’s all about presentation! But fear not, I have a trick! By tossing the strawberries with a little flour, the theory is they stay properly suspended. I had to guess at how much flour to use, since obviously I'm coming up with it after the fact, so more flour might be necessary.  I've heard about this trick many times in the past, but I've never tried it, so you'll be like my guinea pigs!  Naw, it'll work.  If you're worried, you could always puree the strawberries first and just fold them into the batter, but I liked the burst of fresh berry goodness.

Mere cupcakes with frosting are not enough to fully excite me. Oh no. Not anymore.  I need to fill them. Because really, these are margarita cupcakes. Sure, there’s lime in the cupcakes, and lime in the frosting, but it’s just a hint. My cupcakes need that sour bite!  My lime needs to shine! By filling the center with lime curd, it gives the cupcakes a bright burst of citrus flavor. Delicious flavor! I love filling cupcakes. It’s a great way to sneak in another layer of flavor, and you never see it coming!  It's a surprise inside every cupcake.  They should change the saying to "Life is liiiiike a batch of cupcakes..."  See, those crazy post titles explain themselves eventually.

And who doesn’t love lime curd? Ok, probably plenty of people...but they don't exist to me.  Ever made your own citrus curd? It sounds intimidating, doesn't it? It’s actually super easy to make, as long as you keep one thing in mind: don’t leave the stove! It’s easy, but it’s also kind of a pain, unless you want scrambled eggs. But it’s only for a little while, and it only requires you to stir. Buck up and push through!

[Full disclosure: tequila doesn't come through very strong in baked goods.  In future batches, I'm still going to use it, and I still liked it in there.  Just don't expect a punch in the face like you can get with a stronger alcohol, like bourbon.  And if you're really in need of booze with only a little tequila left in the pantry, maybe just leave it out and drink a shot instead.]

This was my first time attempting swiss meringue buttercream, and not only was it a resounding success, it made a believer out of me. It’s light as a cloud and oh so delicate! The strawberry jam adds a refreshing flavor, and it’s nice and light to go with the texture. And delicate.  Just note these cupcakes don’t keep quite as well as a regular buttercream because the meringue hardens a bit in the fridge. But they still stay tasty!  And delicate!  And light!  It's like the strawberry frosting flavor is delivered to your mouth and you just have no idea how it got there.

These cupcakes really came together beautifully. The overall lightness of textures went really great with the more delicate and bright flavors of the fruit. Since it won’t weigh you down, it’s a great sweet treat on a hot summer day! This is a cupcake I will always make room for in my daily calorie bank!


Strawberry Margarita Surprise Cupcakes
(aka: strawberry lime tequila cupcakes with lime curd filling and a strawberry lime tequila swiss meringue buttercream...got that?)
cupcakes adapted from Annie’s Eats
buttercream adapted from Martha Stewart

Makes about 18 cupcakes

For the cupcakes:
2 1/2 cups cake flour
1 tsp baking soda
generous 1/4 tsp kosher salt
1/2 cup (1 stick) unsalted butter, room temperature
1 1/2 cups sugar
2 eggs, room temperature
1/3 cup buttermilk
1/4 cup canola oil
1 tsp vanilla extract
3 TB tequila
1 TB lime zest
2 cups fresh strawberries, chopped into bite-sized pieces
1/4 cup AP flour

  1. Preheat your oven to 350 degrees and line the muffin tins with paper cupcake liners.
  2. In a stand mixer, cream the butter and sugar until pale and fluffy. Add the eggs, one at a time until incorporated, then add the buttermilk, oil, vanilla, and tequila and mix until fully combined.
  3. Sift the cake flour, baking soda, and salt together and stir into the batter until just combined.
  4. In a separate bowl, toss the strawberries with the AP flour and lime zest. Add more flour if it’s not enough to coat the whole batch. Gently fold the strawberries into the batter.
  5. Fill the cupcake liners with the batter, leaving about a 1/2 inch from the top. Bake for 18-20 minutes, or until a cake tester (i.e. toothpick) comes out clean. Cool completely.


For the lime curd:
3 large egg yolks
1/4 cup sugar
1/4 cup fresh lime juice
4 TB unsalted butter, melted

In a small saucepan whisk together the egg yolks, sugar, lime juice, and butter and cook over moderately low heat. Taste the mixture (if you’re comfortable with the raw egg, which I know many people smarter than I are not) and add more sugar if it’s not sweet enough (I don't like it too sweet). Stir constantly until the mixture is thick enough to coat the back of a spoon, about 5 to 7 minutes (that means when you run your finger along the coating on the back of the spoon, it should leave a line rather than running back together). Be sure not to let it boil or sit long enough to curdle. Strain curd through a fine mesh strainer and set aside to cool.

For the buttercream:
1 pound fresh strawberries, finely chopped
1 cup sugar, divided
1/4 cup tequila
1/4 tsp salt
1 TB lime juice
1 tsp lime zest
2 large egg whites
3/4 cup (1 1/2 sticks) unsalted butter, room temperature, cut into pieces
1/2 tsp vanilla extract

(makes about 2 cups)


  1. Set a small pot over medium heat. Add the strawberries, 1/2 cup of sugar, tequila, salt, lime juice, and lime zest and simmer gently until a thickened syrup forms, about 15 minutes. Set aside to cool completely.  Once cooled, you can either puree the mixture or leave it in chunks.  I left mine chunky.
  2. Set a bowl over a pot of gently simmering water. Add the egg whites and the remaining 1/2 cup of sugar and whisk constantly over the heat until the sugar is fully dissolved and the mixture is warm when you stick your finger in it (about 160 degrees).
  3. Pour the egg mixture into the bowl of a stand mixer and using the whisk attachment, beat on high speed until stiff peaks form (not too dry though). Test this by removing the whisk attachment, swirling it around the mixture, and pulling it straight up and turning it rightside-up to face you. If they are properly whipped up, a small droopy peak should stick up on the very tip of the whisk.
  4. Switch to the paddle attachment on the stand mixer, and beat the butter into the egg mixture on a medium-low speed, a few tablespoons at a time. Make sure the butter is fully incorporated before adding the next batch. If mixture separates after all the butter is mixed in, beat at a medium-high speed for a few minutes until it comes back together. Add the vanilla, beating it at medium-low speed, then turn the speed all the way down to low and mix for a couple of minutes to remove any extra air.
  5. Gently fold in the strawberry jam mixture with a rubber spatula and stir until the buttercream is smooth.

Note: Feel free to use store-bought strawberry jam instead of basically making your own, and just cook it on the stove with the other ingredients for a few minutes until it comes together.

To assemble the cupcakes:

  1. Using a pairing knife inserted at an angle, cut out a small cone-shaped chunk, about a 1 inch circle from the top of each cupcake. Fill the hole with the lime curd, about 1 teaspoon worth. You can either replace the chunk you removed, or eat it! leave it off.
  2. Fill a pastry bag (or ziplock with the bottom corner cut off) with the frosting and go to town on your cupcakes. Or, you know, just use a spatula.

Friday, June 4, 2010

Invoking Memories

Recipe: Berry Crisp

The best compliment I've ever received from someone who ate my food was an old co-worker who said that my Christmas rugelach reminded her of the ones her aunts used to make when she was a kid.  She said the best food is the food that invokes memories, and it is so true!  Vegetable and barley soup reminds me of my grandmother.  She always had a pot of it simmering on the stove when I went to her house.  Rice sprinkled with seaweed will always remind me of my freshman year in college, when Husband and I practically lived off the stuff (he had a handy little rice cooker in his dorm room).  And blackberries...well there will always be a special place in my heart for blackberries.

Growing up, there was an abundance of blackberry bushes all around my neighborhood.  Right across the street was the best spot for picking.  Come summer we would pick tubs and tubs of blackberries and bake tarts, pies, and cobblers galore!  I remember my neighbor's adorably cuddly Samoyed, rather ironically named Killer, helping himself to the berries of our labor if we weren't careful.  I remember baking with my mom in the kitchen, my sister and I fighting over who got to eat the leftover pie dough.  And unfortunately, I remember the year a fire burned down a sizable portion the area due to a brush fire, after which the city passed super strict laws about the distance of brush growing near peoples' houses.  They came and cut away all those wonderfully blackberry bushes, and our summer blackberry baking became nothing but an occasional occurrence. It was sad. Those poor blackberry bushes would never have dreamed of catching fire and burning our neighbor's house down!

To this day blackberries are my favorite berry.  A good, ripe blackberry has such a deep, sweet flavor.  It has the brightness of a berry, but something more too.  They're just more complex than a blueberry and strawberry in a way I can't describe. You just can't beat it.  So when they were on sale for cheap a few weeks ago, naturally, I stocked up!

I was tempted to do a cobbler, always my mom's go-to dessert.  They're delicious and easy, what's not to like?  But I was really in the mood for a little texture, and something with oats.  Oats are just the best in desserts, aren't they?  Once I decided on doing a crisp, I hunted around for a recipe, and ended up kind of mushing a bunch of ideas into one.  After the muffins, I didn't really have enough blackberries to go for a mono-fruit dessert, so instead I opted for an ensemble.

I had some delicious pears, a few strawberries, and to get the volume of fruit I wanted, I threw in a few frozen blueberries I had left over.  The great thing about crisps is that you can use whatever you want.  You could do one entirely with blackberries, or mix it up with some apples or stone fruit.  Whatever floats your boat, which is extremely useful when there's something different on sale at the store every week at this time of year.

I did end up making this boozy by throwing in some brandy.  When it first came out of the oven and I burned my mouth I was so impatient to try it, I could taste the brandy and it was delicious.  But when I ate some the next day the flavor had dissipated and I couldn't really taste it anymore.  I like booze to play a part in the background of my baked goods, but if it's not even detectable, then you're just wasting perfectly good alcohol..  Blasphemy!  Next time I would just leaving it out all together.  Blasphemy!  Damned if I do, damned if I don't.  It really just comes down to what fruit you're using.  If I had used only blackberries, the brandy probably would have come through a bit better.  If I was using apples, some apple brandy would have been awesome.  Grand Marnier and peaches. Bourbon and apricots.  Chambord and raspberries...

I'll stop before my drool over the keyboard rends finishing this post impossible, but the point is, finding ways to better booze this recipe is as limitless as deciding what fruit to use.  And that's what makes it fun!  Crisps are right there with cobblers when it comes to simplicity.  This is definitely one you could make with your kids, and start your own food memory tradition.

You may notice there's a bit of ice cream in these pictures.  I think ice cream and crisps go together like booze and berries. But it's a trick!  That's no ice cream.  It's a frozen banana.  Have you heard of this trick? Take a frozen banana (because you're freezer is overflowing with overripe bananas you're constantly stashing away like mine is, right?), and put it in the food processor.  At first it'll look a bit iffy, but after a minute or two, the banana breaks down enough that it gets this irresistibly creamy texture that is very reminiscent of ice cream (or frozen yogurt may be a bit more appropriate).  Seriously, that is 100% banana!  It's an easy, healthy dessert!  If you want to really spice it up, throw a spoonful of peanut butter in the food processor with the banana and top it with some chocolate chips. Heaven!  Ok, I admit it. I wanted a scoop of ice cream for the picture, and with my lack of an ice cream maker, I used the frozen banana trick.  But that's all changed now because I am now the proud owner of an ice cream maker!  Yay!  But that's another post.

So what's one of your favorite food memories?


Boozy Berry Crisp
loosely adapted from Parade

makes about 8 servings

For the berries:
6 cups berries (or other fruit of your choice, cut into bite size pieces)
1/4 cup sugar
1/4 cup all purpose flour
1 tsp lemon juice
a pinch of cinnamon
1/4 cup booze of choice (completely optional, choose wisely)

For the crisp:
1 cup oats
1/2 cup all purpose flour
2/3 cup brown sugar
1 tsp cinnamon
1/4 tsp ground ginger
1/4 tsp nutmeg
1/4 tsp salt
7 TB butter, cubed and chilled

  1. Preheat the oven to 350 degrees and prepare a 9" pie plate (or similar-sized vessel) with baking spray.
  2. Combine all the ingredients for the berries in a bowl and set aside.  [If you want to save on dishes to wash, you can just mix this directly into the pie plate.]
  3. In a medium bowl, combine all the ingredients for the crisp except the butter. Stir to combine, then cut in the butter with a pastry blender, a fork, or even your fingers, until it comes together into small crumbles.
  4. Pour the berry mixture into the pie plate, then sprinkle the crisp mixture over the top.  Bake for 1 hour, or until the crisp is a golden brown and the berries underneath have make a bubbling, thick syrup of deliciousness.  Let cool for 15 minutes.  Trust me on this one, it's hot.  You might want to place the pie plate on a baking sheet in case the fruit bubbles over, creating a total mess in your oven.  I decided to be a daredevil and wing it, and I came out unscathed.  Or rather, my oven did.