Showing posts with label liqueur. Show all posts

Sunday, October 16, 2011

Halloween Trifle


I’m going to drop some embarrassingly honest Julie history on you.

A few years ago I ate out pretty much every meal except breakfast. My gourmet kitchen offerings back then? Something along the lines of 2 cans of chili dumped in a bowl with a package of shredded cheese, sour cream, and a jar of salsa, microwaved until melty and disgusting and enjoyed with a giant bag of blue corn chips. No joke. We called it nachos and boy was it ever delicious. Generally, we were happier to pay someone else to prep our plates, so we’d stop at Rubios or Panera. I’d order something one might consider on the healthy side - by comparison to some of their other offerings - a burrito bowl, or a cup of soup and half sandwich. But let’s be honest, I couldn’t say no to just one fish taco on the side, or a stop at Maggie Moos next door for ice cream.

I never exercised with any regularity. I couldn’t run for 5 minutes, let alone a mile. Even the sensation of my heart rate in the proper cardio zone had me asking my doctor if I had exercise induced asthma. Oh, you mean it’s supposed to feel like I’m gonna keel over and die? Ick! There were bouts of motivation where Husband and I would trek out to the gym for a couple of hours - once or twice a month at our best - and eke out some semblance of a workout. But wouldn’t you know it, I only ever put on pounds. Maybe it’s because we’d always stop at Jamba Juice on the way home from those workouts?

I admit, I was a victim of the Chili’s quesadilla explosion salad - the one that famously caught flack when they started posting the nutritional stats on their website. The “healthy option” many of us were outraged to learn actually had 1200 calories. But let’s not blame Chili's for my dissatisfaction with the scale. The choice of where to eat and what to order was all mine. In the end, my seemingly good habits were bad habits, and my bad habits were downright disgustingly awful habits. No wonder every shopping spree had me wondering why the clothes kept getting smaller and smaller!

So what changed? Looking back, everything. But not all at once. I didn’t wake up one day and say to myself "From this day forward I will change all my habits." Heck no! When did it change? I can’t even pinpoint how long it’s been since I lost that first pound. It was so gradual and non-purposeful. Has it really been almost 3 years?  I started reading a food blog or two. I tried a recipe here and there to pretty good success. I started going for walks, and playing around on that new-fangled Wii Fit. I did things that required a small, doable change. And when I got comfortable with that routine, I did a little more.  Can you believe just being a little more mindful of the choices I made and being a little more realistic about what those choices meant would get noticeable results?  How noticeable?  Well, I lost that first pound.  The hardest pound of my life.

I’ve been seeing a lot of posts by food bloggers I follow talking about their struggles with balancing food obsession and a healthy lifestyle. It really got me thinking about my own weight loss journey, and looking back, my food obsession and weight loss developed hand in hand. Go figure.


Now that I eat salads heavy on vegetables and light on dressing (and no cheese quesadillas on top), I can work in a little dessert without totally undoing my day. Like cookies. And mousse. And curd. All together in a trifle. I had never made a trifle. I would even go so far as to say I didn’t think I was much of a trifle person. But I take it back! Trifles are as awesome as the delicious components that are their makeup.

This trifle came about so very randomly. I got a bag of oranges four CSA shipments in a row. I was overwhelmed with oranges! But I didn’t want to just juice them. I wanted to really use their orange essence in something that would showcase their awesomeness. Because oranges are awesome. Sweet. Acidic. So I decided to make a curd. Despite the unfortunate name, curds are delicious. They’re bright and tart; sweet and creamy. But generally not something to enjoy alone. They’re a great accompaniment. 


Accompany what? Chocolate, of course! I originally considered pudding, but Husband requested chocolate mousse. Good call. So glad I listened. The light as a cloud, bittersweet mousse contrasted so nicely with the heavier, creamier sweet yet tart curd.  And this curd was all about the orange essence.  I didn't just use orange juice, you see.  I reduced it first. So I could get as much orange flavor out of those babies as possible!  And if you have to ask if I boozed it up, do you even know what blog you’re reading? I opted for Grand Marnier in the chocolate mousse to compliment the orange curd, and bourbon in the orange curd because I love the dimension the smokiness adds.

The flavors together were wonderfully indulgent, and the layers of orange and deep brown made me think instantly of Halloween. But I wanted a crunch element for texture, and what’s a Halloween treat without pumpkin? I love pumpkin! It pairs great with chocolate and orange. So I made the crunchiest cookie I could think of: biscotti! Pumpkin biscotti to be exact. It’s crunchy yet slightly crumbly texture was perfect for crumbling in between the chocolate mousse and orange curd layers, or leaving whole and dunking.

Who needs chili reminiscent of dog food in nachos when you can have this?  Definitely a small change for the better.

Any personal Halloween confections being made in your house this year that are strictly for personal, non-treat-or-treater enjoyment? 

  
Halloween Trifle

Makes ~8 individual trifles, depending on your container, or 1 big one

4 cups chocolate mousse (recipe below)
3 cups orange curd (recipe below)
8-10 pumpkin biscotti (recipe below)
  1. In a 4-6 oz. glass container (like a glass mug or jar), spoon in a layer of chocolate mousse, about 2 TB. Add a layer of orange curd, a little shy of 2 TB. If you want the biscotti crumbled directly into the trifle, crumble about ¼ of the cookie over the orange curd. Continue layering until you reach the top of your container, ending with a chocolate mousse layer. 
  2. Repeat for as many containers as you would like to prepare.
  3. Alternatively, if you are doing one big trifle, just follow the same procedure, but increase the quantities until you have an inch or so for each layer (or however you prefer it!). 

Chocolate Mousse

Adapted from David Lebovitz

Makes 6-8 servings

6 ounces bittersweet chocolate, chopped (I used 70%)
6 ounces unsalted butter, cut into small pieces
¼ cup dark-brewed coffee
¼ tsp of sea salt
4 large eggs, separated
⅔ cup, plus 1 TB sugar
2 TB Grand Marnier (or bourbon)
1 TB water
½ tsp vanilla extract
  1. In a bowl set over a pot of gently simmering water, melt together the chocolate, butter, coffee, and salt, stirring frequently. Once smooth, remove it from the heat to cool down.
  2. Fill a large bowl with ice water and set aside.
  3. In another bowl set over the pot of gently simmering water, whisk the egg yolks with the ⅔ cup of sugar, liquor, and water for about 3 minutes until the mixture is light and thick, like runny mayonnaise. Whisk constantly so the yolks don’t curdle. 
  4. Set the bowl with the egg yolk mixture in the bowl of ice water and beat until cool and thick (it will make thick ribbons when you bring your whisk out of the bowl). Then fold the chocolate mixture into the egg yolks. It might look broken at first, but just keep mixing, and it’ll smooth out.
  5. In the bowl of a stand mixer (or by hand if you have the stamina), beat the egg whites with the salt on medium-high speed until frothy. Continue to beat until they start to hold their shape. Whip in the tablespoon of sugar and continue to beat until thick and shiny, but not completely stiff (don’t over-beat!), then add the vanilla and mix on low to combine.
  6. Fold one-third of the beaten egg whites into the chocolate mixture to lighten it, then in two increments, fold in the remainder of the whites just until incorporated, but don’t overdo it or the mousse will lose volume. It’s ok to have a few white streaks.
  7. Transfer the mousse to a serving bowl and refrigerate for at least 4 hours, until firm.

Orange Curd

Adapted from Ina Garten

Makes about 3 cups

4 oranges, at room temperature
¾ - 1 cup freshly squeezed orange juice (from the 4 oranges above)
1 ½ cups sugar
½ cup (1 stick) unsalted butter, at room temperature
4 large eggs, at room temperature
1 large egg yolk, at room temperature
¼ cup bourbon (or Grand Marnier)
⅛ tsp sea salt
  1. In a small saucepan, bring the orange juice to a rapid simmer and reduce until you have ½ cup of liquid. Set aside to cool.
  2. Remove the zest from the oranges with a vegetable peeler or zester, no pith please. Put the zest in the bowl of a food processor. Add the sugar and pulse until the zest is very finely minced and evenly distributed among the sugar. 
  3. Cream the butter in the bowl of an electric mixer fitted with a paddle attachment. Add the sugar/orange zest mixture and beat on medium speed until it is light and fluffy, a few minutes. Add the eggs and egg yolk, one at a time, then add the reduced orange juice, liquor, and salt. Mix until combined.
  4. Place a mesh strainer over a medium bowl and set aside. Pour the mixture into a medium saucepan and cook over low heat stirring constantly for about 10 minutes, until it is thickened enough to coat the back of a spoon (~175 degrees if you have a candy thermometer). Be careful not to overcook, or it will curdle. Remove the mixture from the heat and pour it through the strainer set over the bowl. Refrigerate the curd until fully cooled, a few hours. It will thicken further as it cools.

Pumpkin Biscotti

adapted from Simply Recipes

Makes about fifteen cookies

1 ½ cups of flour
1 cup whole wheat flour
1 cup of sugar
1 tsp baking powder
1 tsp cinnamon
½ tsp nutmeg
¼ tsp ginger
¼ tsp cloves
¼ tsp kosher salt
2 eggs
½ cup of pumpkin purée
1 TB bourbon
1 tsp vanilla extract
  1. Preheat the oven to 350 degrees. In a large bowl, sift together the flour, salt, sugar, baking powder, and spices.
  2. In another bowl, whisk together the eggs, pumpkin purée, bourbon, and vanilla extract. Pour the pumpkin mixture into the flour mixture. Give it a rough stir to incorporate the ingredients.  The dough will be crumbly.
  3. Flour your hands and a clean kitchen surface and lightly knead the dough until it is uniformly mixed. It will be a little on the sticky side. On a baking sheet lined with parchment paper, form the dough into a large log, about 1 inch tall and 15 inches long. Bake for 22-28 minutes, until the center is firm to the touch. 
  4. Reduce the oven temperature to 300 degrees. Let the biscotti cool for 15 minutes and then, using a serrated knife cut into pieces about an inch wide. Lay the cookies flat on the baking sheet and bake for another 15-20 minutes. Let them cool completely.

Thursday, June 30, 2011

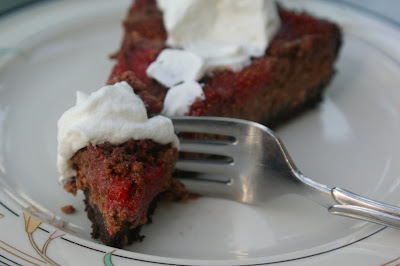
Chocolate Strawberry Ricotta Tart


I had a thought the other day - yep, just the one.  If I could go back in time and talk to my teenage self, what would I say?  We’ve all had this thought, right?  Though you probably have other thoughts to go with it.  High school.  Hormones.  Literal growing pains.  ‘Nuff said.

I would skip the clichéd advice: It gets better.  High school is something to be gotten through, everyone hates it.  All the things that seem epic today will be so small tomorrow.  Because really, we all did get that advice, one way or another, in high school, and it did squat to make it any better.  So nevermind that stuff.  Here’s what I would tell my younger self:

  1. Own it.  Whoever you are, whatever you do, own it.  When people say “be yourself”, they really mean, don’t be embarrassed by whatever “yourself” is.
  2. You are as apathetic as you are passionate.  Don’t feign apathy for the things you are passionate about.  Don’t feign passion for the things you are apathetic about.  People will just have to get over that you love Star Trek: TNG and listen to your parents’ Queen CDs, and you could give a rat’s furry tail about conch shell necklaces or Tupac.
  3. You’re tall.  Buying pants that fit is a pain in the rat’s furry tail, and all the cute boys are self-conscious about it.  Can’t say that ever gets better.  But it does mean you’ll end up with someone tall.  Go ahead and buy some heels.  People will just have to get over it.
  4. Learn to eat!  I don’t mean quantity.  You’ve got that down.  You say you don’t like meat, and a slew of other foods.  In reality you do.  Now it’s your turn to get over it. Open your mind.  And stop picking all the cashews out of the cashew chicken.  The family really hates that.
  5. Get your rat’s furry tail in the kitchen – and not to make grilled cheese or Stouffer’s mac and cheese!  Look, Mom works hard all day and then comes home to a house full of people whining for attention and wanting things, and still has to get dinner on the table in an hour or all the whining steers towards hunger pangs.  You, on the other hand, get home from school to an empty house with, let’s face it, no intention of starting homework so early.  You might not realize how much you enjoy cooking just yet, but for how much Mom would appreciate the salad already made, or a pasta sauce already done up, it’s not really about that.
  6. And finally, read more books and watch less television.  You’ll be so glad you did.

I’ve got you thinking now, haven’t I?  Let’s hear it.  What would you tell your teenage self?


What’s this got to do with ricotta cheese, strawberries, and tarts?  Nothing!  Though I could have been enjoying it in my life a lot sooner, had I listened to myself about number 5.  That will just have to do for a segue.  It’s my blog, and I can be random if I want to!  Now, onto the chocolate graham cracker ricotta strawberry tart!

A chocolate graham cracker ricotta strawberry tart to anyone who can say “chocolate graham cracker ricotta strawberry tart” 10 times, fast.

This creation came about by a need to use up soon-to-go-stale graham crackers (They should sell graham crackers in packs that are exactly enough for a tart or pie crust, so you don’t have to worry about how much you need to grind into crumbs, or whether you have enough left in the box.  I’m totally marketing that idea.  Don’t steal it, k?), ricotta cheese (because in a moment of utter stupidity I wasn’t sure if 32 oz. was enough for a recipe that called for 2 cups, so I bought 15 oz. more), and strawberries from my CSA box.  Because Husband would ultimately be eating it, I decided to incorporate chocolate as well.  Lots of it.  It just made sense.  I considered dotting the tart with fresh strawberries at the end, but a recent failed attempt at strawberry rhubarb pie left me with a need for cooked berry vindication.  Always drain your strawberry juices people!  Also, when you strain them into, say, a small saucepan and simmer them until they cook down into a lusciously sweet syrup, you’ve got the mighty fine makings of something to brush onto this tart at the end.  Yeah, I did that.  I shudder to waste one ounce of strawberry essence!

To break it down, the crust is graham crackers and pecans and cocoa powder.  Pecans because I ran out of graham crackers (which would not have happened, had the product I mentioned existed!), and also because they’re delicious.  Cocoa powder because I wanted the chocolate flavor to really come though, and also because it’s delicious.  I didn’t add sugar.  I thought the sweetness from the rest of the tart and the sugar already in the graham crackers was plenty, but there’s also a lot of cocoa powder in it, so I could see it being too much for some.  I recognize my sweet tooth, while very demanding, is also very susceptible to being overwhelmed.  Husband agreed the level of sweet was spot on, but a tablespoon of sugar could be thrown in without any harm.

The filling is my leftover 15 oz. container of ricotta cheese, the usual sweeteners and stabilizers, and melted chocolate.  Why is ricotta cheese and sugar so good?  I wonder if my sister, who hates the combination of cream cheese and sugar, also hates ricotta and sugar.  They’re totally different flavors, but maybe the dislike stems from disconcertion over mixing savory cheese with enough sugar to transform it to a decidedly dessert setting?  Creamy, salty, and sweet?  It’s a-ok in my book.  You’ll have leftover filling.  A fair amount.  It’s not ideal, but I didn’t want to mess with untested ratios, and it uses a standard 15 oz. container.  Not to mention, what are you going to do with just a little extra ricotta?  Instead you’ll face a bowl of delicious filling with no home besides your stomach as you try to resist just another spoonful while you wait for your tart to bake and your strawberry juices to reduce.  You’re welcome.

My strawberries were tiny, so I didn’t end up using the full 16 oz. package, but I’m confident more regular, American strawberries would yield the perfect amount.  The more strawberries, the better I say!  This tart takes forever to bake.  An hour?  What is in there that takes so long to become un-jiggly?  No idea.  Of course, checking the doneness at 40 minutes, and every 5 minutes thereafter probably extended the baking time a wee bit.  I was so afraid of over-baking!  It actually ended up taking an extra 10 minutes or so. But once it was done, and the syrup was brushed over the top, and it had cooled in the fridge…such good stuff.  The rich chocolate, earthy yet savory cheese filling, and texture from the crust all contrasted nicely.  The strawberries had a lusciously soft bite and sweet flavor, not to mention the syrup essence!  The whipped cream on top isn’t completely, necessary, per se, but I did try it both ways, and the airy, creamy element was a definite plus.  All in all, we both loved it and I wouldn’t change a thing. Oh, did I mention I infused a good amount of Grand Marnier in there? Yeah, I did that. It was tasty.

Except maybe how many spoonfuls of leftover filling I ate.


Have any tasty creations ever spawned out of your kitchen because of an abhorrence for wasted food?  Or a food fail?  Are they all the tastier for it?


Chocolate Strawberry Ricotta Tart

For the crust:
6 oz. graham crackers
2 oz. pecans
8 oz. (1 stick) butter, melted
1 tsp orange zest
¼ cup cocoa powder
2 TB sugar

For the strawberries:
1 lb. strawberries, halved and hulled
¼ cup sugar
2 TB Grand Marnier

For the filling:
15 oz. ricotta cheese (I used part skim), room temperature
½ cup honey
2 large eggs, room temperature
2 TB Grand Marnier
1 tsp orange zest
1 tsp vanilla extract
¼ tsp kosher salt
4 oz. bittersweet chocolate, melted*

  1. Preheat the oven to 350 degrees.
  2. In a food processor, pulse together the graham crackers and pecans until they are small crumbs.  Add the orange zest, cocoa, and sugar and pulse until it’s mixed.  Add the melted butter and process until the crumbs are coated.
  3. Prepare a 9” tart pan with baking spray.  Press the crumbs evenly around the bottom and sides of the tart pan.  Bake the crust for 10 minutes until it is toasted and set.  Let cool.
  4. In a large bowl, stir together the strawberries, sugar, and Grand Marnier.  Let it sit for about 20 minutes, or until the strawberry releases some of its juices.
  5. In the bowl of an electric mixer fitted with a whisk attachment, mix together the ricotta and honey until they are well incorporated.  Add the eggs, one at a time, mixing until they are incorporated.  Add the Grand Marnier, orange zest, vanilla, and salt, and mix to combine.  With the mixer running, slowly pour in the melted chocolate, and mix until everything is well combined.
  6. Pour the filling into the cooled crust.  Top the filling with the strawberry halves, reserving the juices left behind in the bowl.  The strawberries will sink a bit.**  
  7. Bake the tart for about an hour, or until the filling is set and a toothpick inserted in the middle comes out clean.  
  8. While the tart is baking, transfer the reserved strawberry juices to a small saucepan.  Over medium heat, bring the juices to a simmer and cook until it is reduced by about half, about 10 minutes.
  9. Once the tart is out of the oven, either brush or drizzle the strawberry syrup over the top.  Cool completely in the refrigerator for about 2 hours before serving.


*To melt the chocolate, microwave the chopped up chocolate, stirring every 15 seconds until it’s melted.

**If you prefer your strawberries less cooked, and more on the surface of the tart, put the tart in the oven without the strawberries on top.  After about 30 minutes, when the filling has set up a bit, remove the tart from the oven, set the strawberries on top of the filling, and put it back in the oven to cook for the rest of the time.

Friday, March 11, 2011

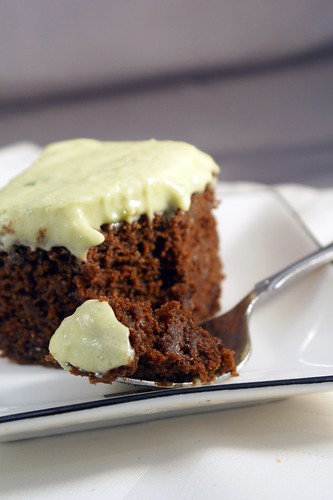
St. Patty's Day Cake


When reflecting back on my greatest culinary successes over the last couple of years, I think the most rewarding ones have been the experiments. The dishes that I went in with a harebrained, what-the-heck attitude, and came out with something to log in the favorites section of my recipe archive (i.e. this blog). It’s more satisfying knowing my creativity didn’t completely lead me astray. Know what I mean? I can still track the evolution of how this cake came to be. It was a quiet Saturday afternoon, and I wanted to bake. What? I had no idea. There were no recipes on the tip of my brain that were jumping out at me to bake them. I hunted around my go-to food blogs, printed some possibilities, and brought them to Husband for final approval. Aren’t husbands handy when you’re feeling indecisive? One of the recipes was a chocolate stout bundt cake with a chocolate glaze. Chocolate + booze + Husband = a must make. I was prepping the ingredients when I had a thought. Here’s the creative process in action, people. Check it out:


Me: Hey Babe, what do you think about baking this as a sheet cake instead of a bundt?

Husband: Umm…

Me: That way I could do a frosting with some Bailey’s instead of the chocolate glaze.

Husband: But I like chocolate…but a Bailey’s frosting sounds good too…Hmm…

Me: Oh! I know!!! I could try doing an avocado buttercream! With Bailey’s! And white chocolate!

Husband: Avocado? In the frosting?

Me: Yeah, it does the same thing as butter. Remember Alton Brown did it on an episode of Good Eats?


And with the mention of AB, as is usually the case, Husband was all confidence and trust. If Alton says it’s good, it’ll be good. Did I ever mention I have that show to thank for my Le Creuset dutch oven? Thanks for Kiwi, AB!

And that’s how this cake was born. A lazy day and a lack of dessert in the house. This was a few weeks ago. I’ve made it a total of three times already. We love it that much. I still have dreams about it.

The cake itself is a great recipe. Obviously, I never got around to trying the original recipe, but if a chocolate stout bundt with chocolate glaze is the order of the day, I’m sure this one would be a big winner. A rich, velvety stout goes with chocolate like bananas and bourbon. I was curious whether the quality of beer would make that much difference in the cake, so I used Guinness my first attempt. An admirable baking beer, to be sure, but I’m a bit of a craft beer snob these days (I do live in the city with the most craft breweries per capita, after all), and it’s an everyday beer, if yaknowhatImean. On a later attempt I used Husband’s all time favorite stout he is completely obsessed with at the moment. It wasn’t exactly a side-by-side comparison, since they were made several weeks apart, but I think the smoother, nuttier flavors of the higher quality stout definitely came through in the cake.

But if you’d like the excuse to bake this cake several times in succession (not that you need an excuse besides that it’s delicious enough to make several times in rapid succession), go ahead and forget I mentioned it. It is March, after all. Stouts are cheap!

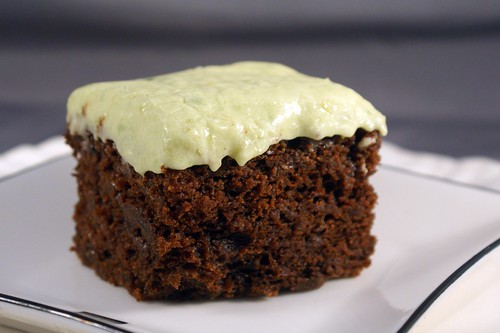
My cake had a few extra additions from the original recipe. I wanted to up the St. Patty’s Day theme, so I threw in some whiskey…because why not, right? I also added come instant espresso powder and cayenne pepper, just to elevate the flavors a bit more. Supposedly coffee makes chocolate things taste more chocolaty – works for me! - and I also might have a spice addiction. But that’s another post. Sufficed to say, both those additions are completely optional, but as the cake turned out light as a cloud, moister than pudding, but still with all the flavor of a decadent chocolate cake, I’m going to go ahead and recommend them! The best compliment I can pay this cake is to say it wasn't just a vehicle for the frosting. As much as I loved the frosting, I found myself making sure each bite was the perfect ratio of frosting to cake.

Speaking of frosting. Since you’ve been good enough to read all this way, I should probably tell you a bit about avocado buttercream. It’s not a new concept, by any means, but it’s not exactly run of the mill either, is it? So regular buttercream frosting is really made up of two main components – powdered sugar and fat. That fat is usually butter, though I’ve seen it in combination in shortening too. The fat provides the creamy, melt in your mouth texture, and the powdered sugar provides the sweetness and stability. Everything else tweaks the flavor or texture, and it is pretty much optional. Avocados - poor, misunderstood avocados - are on many people’s naughty list because they are very high in fat. But fat is not fat, people! While shortening is grown in a lab with methods I don’t want to know about, and butter, while amazingly delicious, is made up of saturated animal fats, avocados are high in wonderful, plant-based monounsaturated fats. Now I’m not fooling myself into thinking this cake is good for me, but a healthy diet is as much about the minor choices we make in our day as the major ones, right? And if you don’t buy any of that, how about the fact that this St. Patty’s Day cake has green frosting, and I didn’t use a single drop of food coloring! Point for Mother Nature!

I know you’re wondering, so I will allay your fears posthaste. You can’t taste the avocado. You won’t believe there’s avocado even in it. Seriously. Would it be uncouth of me to say you won’t believe it’s not butter? Really, besides making the overall cake a slight iota healthier, and providing a natural and very appropriate greenish tint, the avocado doesn’t really factor in. You could definitely just replace the avocado with an equal amount of room temperature butter (just make sure you let the chocolate mixture cool first, so you don’t melt your butter). No worries. Hey, since there's no butter, I guess this would technically be an avocadocream frosting?  And a term was coined...

What makes this frosting delicious is a combination of white chocolate, Bailey’s Irish Cream, and a splash of whiskey for good measure. I don’t know what to say about it other than it is a sweet, smooth, ooey gooey frosting. I added the Bailey’s and whiskey to the white chocolate while it was melting because I was going more for flavor than a punch of alcohol. But don’t worry, it’s not shy. It still has creamy and ever so smoky flavor that warms you up from the inside out, and the white chocolate provides a nice counterbalance of sweetness that is more interesting than just straight sugar. A perfect pair to a chocolate stout cake.

Since it's just an unassuming sheet cake, it certainly isn't winning any beauty pageants. But that's part of its charm.  It will fit right in with your corned beef and cabbage.


Have I mentioned I’ve made this cake three times already? I wish I could say I gave most of it away. I gave some of it away. But most of it ended up in my tummy. Ok, mostly in Husband’s tummy. But you didn’t hear it from me.


Got any harebrained kitchen experiment fantabulous success stories of your own?


St. Patty’s Day Cake
aka: chocolate stout cake with white chocolate Irish cream avocadocream frosting

cake adapted from Smitten Kitchen

For the cake:
1 cup stout
1 cup (2 sticks) unsalted butter
⅓ cup whiskey
¾ cup unsweetened cocoa powder
1 TB instant espresso or coffee powder (optional)
2 cups AP flour
1 ½ tsp baking soda
1 tsp kosher salt
¼ tsp cayenne pepper (optional)
2 large eggs, at room temperature
⅔ cup sour cream, at room temperature
1 tsp vanilla

  1. Preheat the oven to 350 degrees and prepare a 9x13” baking dish with nonstick spray. In a medium saucepan over medium heat, bring the stout, butter, and whiskey to a simmer. Add the cocoa powder and instant espresso, if using, and whisk until it is fully incorporated and the mixture is smooth. Remove the pan from the heat and let it cool a bit. 
  2. In a medium bowl, whisk together the flour, baking soda, salt, and cayenne pepper, if using. In the bowl of a stand mixer fitted with a whisk attachment, beat the eggs and sour cream together on medium-low speed until they are well blended. Add the vanilla and blend. Add the stout mixture, making sure it is cool enough that it won’t hurt the eggs, and beat to combine. Add the flour mixture and mix on low speed until it is mostly incorporated, then use a spatula to fold any loose bits of flour into the batter. 
  3.  Pour the batter into the prepared baking dish, smooth it into an even layer, and bake for about 35 minutes, until a toothpick inserted in the middle comes out clean. Let it cool completely in the dish.

For the avocadocream:
1 cup white chocolate chips (or ~6oz. of a white chocolate bar, chopped)
¼ cup Bailey’s Irish Cream
1 TB whiskey
1 cup avocado flesh (~2 medium avocados), well mashed
1-2 TB fresh lemon juice
1 tsp vanilla
pinch of salt
2-3 cups powdered sugar

  1. In a double boiler (or a bowl sitting over a small saucepan of simmering water), melt the white chocolate. Add the Bailey’s and whiskey and stir to combine. Let it cook for a bit if you want the alcohol to burn off a bit, otherwise, remove it from the heat and set it aside to cool. 
  2. In a stand mixer fitted with a paddle attachment, beat the avocado on medium speed for a minute or so, until it’s smooth. Add 1TB of lemon juice, vanilla, and salt, and mix to combine. Add the cooled chocolate mixture, and mix until it is well combined. 
  3. Working ½ cup at a time, with the mixer on low speed, add the powdered sugar until a thickened, gloppy consistency is reached. Important note: the frosting will thicken more as the chocolate cools, so don’t worry if it’s not firming up like you expect. It’s more important to watch the level of sweetness from the sugar. Add the other TB of lemon juice to balance the flavor if desired. 
  4. Once the cake is cooled, spread the frosting over the top in an even layer, and enjoy!

Monday, October 11, 2010

Help me go to bootcamp!

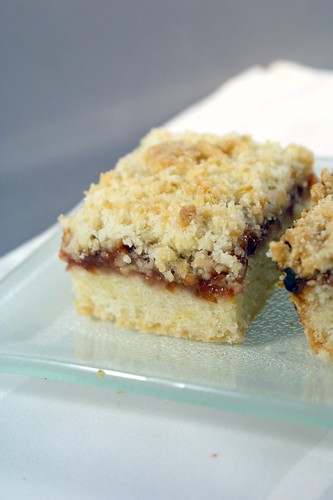
Recipe below: Earl Grey Plum Preserves Crumb Bars

Pacific Natural Foods is hosting an exciting food challenge...ok, the challenge isn't that exciting, but the prize is! An all-expenses paid two day trip to Napa to attend the Culinary Institute of America's culinary bootcamp program. Let me break down all the awesomeness I just smooshed into one sentence. Napa. A weekend in Napa. Cooking. Learning to cook. From a real culinary school! An awesome culinary school. It's the chance of a lifetime. Since money is the only thing stopping me from enrolling in culinary school tomorrow, it would be a great sneak peak into what it would be like and if it's really for me. Not to mention a weekend with a bunch of people who love food almost as much as I do.

With a prize like that, entering immediately was a no-brainer. All I had to do was post a recipe using Pacific chicken, beef, mushroom, or vegetable broth. Simple! Oh yeah, and include mushrooms in the recipe. Easy. The timing? Well that was problematic. Did I have time to run to the store, buy mushrooms and broth and other savory things and make something killer? Well no. So I did the next best thing, perused my Bananas for Bourbon recipes, and found the perfect recipe. Remember my favorite grilled mashed potatoes? Think they’re culinary bootcamp worthy? I think so!

Here's where you all come and in to help. Just go to my grilled mashed potatoes recipe on the challenge website, scroll down to the bottom of the page, and click to button to vote for my recipe. It's that easy! And you can do it everyday! Tell all your friends, and maybe a few random strangers while you're at it. Think of all the stories and recipes I'd bring home to share with you all. Everyone wins!


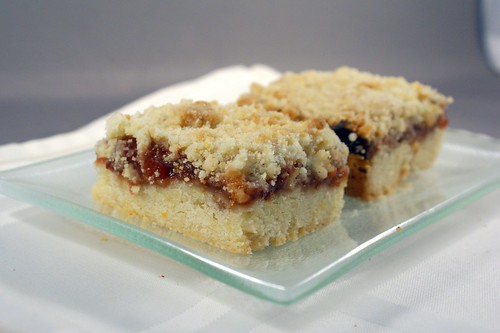
And in return for supporting me...dessert! Beautiful, ruby red plums have been prominently displayed at the store for weeks and weeks, and I finally decided to use some in more than just my morning cereal. These earl grey plum preserves are fantastic on their own, spread on some fresh bread or spooned over greek yogurt. Baked into these buttery, crumbly bars, they are even better. The preserves thicken into a sweet, almost candy-like in texture syrup, and the citrus and tea notes keep it fresh and interesting.  A beautiful pairing.

Earl Grey Plum Preserve Crumb Bars

crumb bars adapted from Smitten Kitchen
plum preserves adapted from The Kitchn

Makes 36 1 1/2”squares

For the preserves
1 1/4 lbs black or red plums*
1/4 cup sugar
1/4 cup honey
2 TB lemon juice
1 tsp orange zest
2 TB Grand Marnier (optional)
1 cup boiling water
2 TB Earl Grey tea leaves

For the bars
3 cups AP flour
1 cup sugar
1 tsp baking powder
1/4 tsp kosher salt
1 tsp lemon zest
1 tsp orange zest
1 cup (2 sticks) unsalted butter, cut into cubes and very cold
1 egg
1 TB cold water, optional

To make the preserves:
  1. Cut the plums into bite-sized pieces. I cut each plum into eighths and quartered each piece, but whatever works for you. Transfer the plums to a medium saucepan, along with the sugar, honey, lemon juice, orange zest, and Grand Marnier. Toss until the plum pieces are coated, then set it aside.
  2. Combine the boiling water and tea leaves in a small bowl and steep the mixture for 15 minutes. Strain the leaves out through a fine mesh strainer. Place the brewed tea in a small saucepan, bring it to a boil, and let it simmer uncovered for about 10 minutes, or until the liquid is reduced by half (~1/2 cup).
  3. Pour the concentrated tea into the saucepan with the plums. Bring the mixture to a boil, and let it simmer uncovered, stirring occasionally, for 25-30 minutes, or until the plums have broken down and the mixture has thickened. Let the preserves cool for about 30 minutes, then move them to the refrigerator for another 30 minutes to fully cool and thicken. 
Note: You want the preserves a little on the thin side, or what you would consider thin if you were going to spread some on a slice of bread. Remember they’ll thicken up more when you bake them into the bars.

To make the bars:
  1. Preheat the oven to 375 degrees and spray a 9x9” baking dish with baking spray.
  2. In a medium bowl whisk together the flour, sugar, baking powder, and salt. Stir in the lemon and orange zests. Using a pastry blender, a fork, or your finger tips, cut the cold butter into the flour until the butter and flour are worked into pea-sized crumbs. Stir in the egg to get a crumbly dough. If the dough feels a little too dry and isn’t forming very large crumbs, add the water. I didn’t do this and I wish I had.
  3. Press 1/2 to 2/3 of the dough into your prepared baking pan, depending on the bar-base to crumbly-top ratio you prefer. I used almost 2/3 because I wanted a more substantial shortbread base. Pour the chilled preserves over the dough, using a spatula to gently spread them to an even layer. Crumble the remaining dough over the preserves and very gently press them into the preserves.
  4. Bake the bars for 45 minutes, or until the crumbs are golden brown. Let it cool completely in the pan so everything sets up properly, about an hour. When cooled, cut the bars, using a sharp knife, into 1 1/2” squares.

*Don’t worry about buying exactly 1 1/4 lbs of plums, just make sure it’s on the heavy side of 1 lb. The pits take up a bit of the weight and I wanted a hair more plum when I bought just 1 lb.