Showing posts with label fall. Show all posts

Tuesday, December 13, 2011

Browned Butter Pumpkin Bundt Cake with Spiced Bourbon Pumpkin Glaze


Because everyone else is doing it. That's an acceptable reason to do something, right? All the predictions of what 2012 will bring got me thinking. It always does. I’m always wrong. Let’s move on.

Julie’s Grand Food Trend Predictions of 2012!
[Let’s be honest, this list is grand as in lofty. My lofty notions of what I wish 2012 would bring. One can dream, right?]

  • First off, I just need to say that macarons are not a new trend. They’re an old trend. They are not the new cupcake. Cupcakes are not out. Both are delicious, infinitely adaptable to many flavors, and portable - and thus will remain around until people decide they hate sugar. Cakepops, pies, donuts, and any obscure French pastry may join alongside them, but they will not replace them.
  • Already trendy vegetables will find new ways of staying on peoples' plates. Kale chips and roasted Brussels sprouts are so 2011. They’ve officially been introduced to the masses. Now that the initial shock has passed that these past-maligned veggies are as tasty as they are nutrient-dense, we’re ready for new ways to eat them. Less approachable ways. Like raw! Massaged kale salads and shredded sprouts slaws I’m looking forward to seeing you on a restaurant menu or two! One can dream...
  • Quick pickles. 2011 was the year of savory canning. We discovered we could mass-produce not only blackberry jams and dill pickles, but also our own tomato sauces, and pickles of the non-cucumber variety. And kimchi? That was a craze all its own. While acidic, fermented foods are fabulous in their funkiness, who has time for all that? Tossing crunchy raw veggies with a quick salt/vinegar/sugar solution produces quick and refreshing results to liven up richer dishes.

  • Approachable game. Game meats are nothing new, but I’ve traditionally seen them at nicer restaurants, setting their menu apart by offering something beyond just the same ol’ proteins. I’m all about fine dining on squab leg and venison loin, but I think we’ll see more rabbit burgers and wild boar meatloaf - more casual restaurants using game to reinvent the classics. Because, inextricably, the classics are always boring and need reinvention yet we are unwilling to let them stray too far from our forks.

  • Exotic spices are no longer very exotic. You know smoked paprika has arrived when you can buy it in the big bulk container at Costco. And that’s a great thing because smoked paprika makes a lot of dishes more yummy, and I go through it, well, in Costco quantities! Finding cardamom used to be such a treasure hunt, I would covet the lone jar I was able to locate, only breaking it out for the most appropriate of flavor pairings. Now each spice company not only sells garam masala right alongside the curry powder, but I’m thinking we’ll see ras el hanout and zaatar in the near future as well.
  • Food trucks and craft breweries are reaching critical mass, a girl can only get ripped off eat and drink so much, but they are another trend that’s not going anywhere. I foresee the not as well executed places falling on hard times while the real gems will be just fine. After all, both of these trended so hard in the first place because of crazy internet buzz. People will still buzz about the places that are worth while. And yes, sour beers are the new IPA. Glad I’ve finally started developing a taste for them.
  • I have no idea what the next diet fad will be, but vegan and gluten free have proven to be such a profitable marketing scheme for food companies, I’m sure something will pop up. Perhaps something as simple as sugar-free? Sugar is the latest evil, after all. But I just don’t see that happening. It’s also an addiction. While I might disagree, the world at large would argue that eggs (runny eggs!) are not habit forming. Nor is sourdough bread. Supposedly. If I had my way, the next fad would be “reasonably sweet”. I’m all for sugar, just not in the ridiculous quantities we use currently.


That’s it! My wishlist for 2012. Can we get on this, people? Take to the interwebs! #hashtag things! If we can get runny yolks on rabbit burgers at Applebee’s by September, I’ll learn to brew killer beer at home and give you all a bottle. Promise.


This whole exercise was really just to distract from the fact that I’m posting a recipe with nothing more than this grainy Instagram picture a couple of shoddy pics I shot on my iPhone. The holidays have really thrown me for a loop and come 8pm on a Tuesday night I am decidedly unwilling to break out the fancy camera to get the money shots while I drool all over the floor in anticipation of stuffing my face with the confection in question. Sorry.

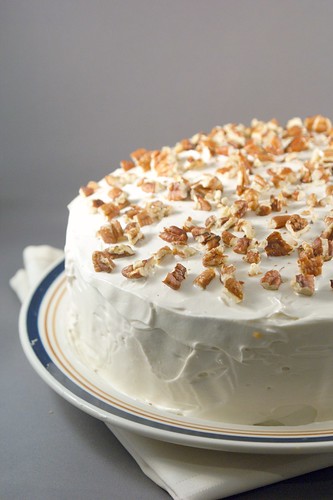
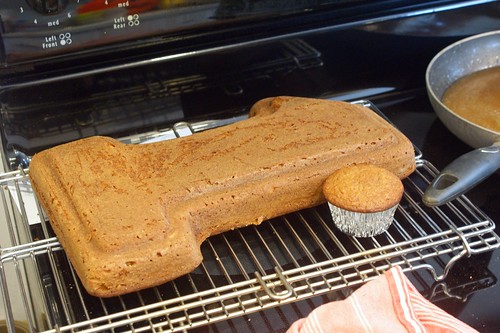
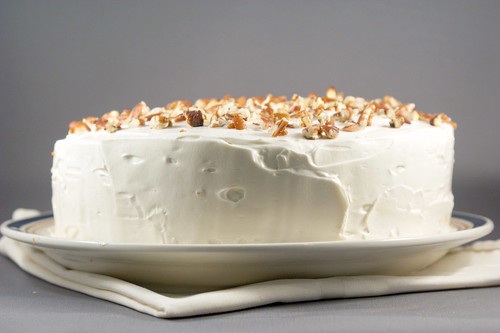
The confection in question contains really amazing things that will make you drool everywhere too. Browned butter. It’s very 2011. It makes things buttery (obbbbviously), with a nuttier flavor. You know how I love the nutty flavor. … Please resist the dirty joke I just opened myself up for. We have cake to talk about. Pumpkin cake. Oh yes.  We’re not over the pumpkin yet are we? Good. Because it’s delicious. I know come December 1st, every fiber of my being screams for gingerbread flavored anything. But this cake is very heavy on the spice. Including ginger. Not pepper though. Good in gingerbread, but cardamom is best when it comes to pumpkin. And of course it has bourbon. The smokey flavor goes swimmingly with the browned butter. Bourbon, browned butter, and pumpkin. In a cake. You can forgive the picture now, right?

And let’s not forget the glaze. I love glaze on a bundt cake. The way it oozes over the cake when you first mix it. Watching it harden into a shiny shell, like it’s protecting something precious. Because it is protecting something precious. Unless you mixed up the salt and sugar. Then it's not so precious anymore. Then there's the panic that sets in when it slides right off the cake because you didn’t thicken it enough, as you hurry to scoop it up and re-pour it so you can get adequate glaze coverage. Oh yeah, that’s another reason I didn’t take any beauty shots. Thicken it right, people. You won’t want any paltry coating of this glaze. I used the remaining few tablespoons of the canned pumpkin puree in the glaze to boost the pumpkin oomph. And of course more bourbon. Oomph indeed! With the maple syrup and spices, I wanted to eat just a bowl of glaze. I might have licked a scoop or two off my finger, but you'll never know for sure.

So here’s to pumpkin, a food that will always be trendy. And delicious.  And remember to always brown your butter.


Please resist the dirty joke I just opened myself up for, and instead tell me what you'd like to see hit it big in 2012.


Browned Butter Pumpkin Bundt Cake with Spiced Bourbon Pumpkin Glaze

Cake adapted from Sprinkle Bakes

For the cake:
6 oz. (¾ cup) unsalted butter
8.5 oz. (2 cups) AP flour
1 ½ tsp baking soda
2 tsp ground cinnamon
2 tsp ground ginger
1 tsp ground nutmeg
½ tsp ground cloves
¼ tsp ground cardamom
1 tsp salt
7 oz. (1 cup) granulated sugar
7.5 oz. (1 cup) firmly packed brown sugar
1 ½ cups pumpkin puree
3 large eggs, room temperature
½ cup Greek yogurt, room temperature
3 TB bourbon
1 tsp vanilla extract

For the glaze:
2 cups powdered sugar
1 TB bourbon
1 TB maple syrup
2 TB pumpkin puree
½ tsp cinnamon
½ tsp ground ginger
½ tsp nutmeg (optional)
pinch of fine sea salt
1-2 TB milk, if needed


For the cake:
  1. Preheat oven to 350 degrees. Spray a bundt pan with baking spray.
  2. Melt the butter in a small saucepan over medium heat. Cook until the butter turns a rich, golden brown, swirling or stirring often so it doesn’t burn. Keep a watchful eye. It goes from brown to black very quickly. Pour the browned butter into a small bowl and let it stand until cool but not solidified.
  3. In a medium bowl, whisk the flour, baking soda, cinnamon, ginger, nutmeg, cloves, cardamom, and salt. Set aside.
  4. In a large bowl, whisk together the pumpkin puree, granulated sugar, brown sugar, eggs, Greek yogurt, vanilla, and bourbon until well combined. Whisk in the browned butter until it’s well blended. Stir in the flour mixture and mix until it is just combined.
  5. Pour the batter into the prepared bundt pan and bake for 45-55 minutes, until a toothpick inserted in the middle comes out clean. Allow it to rest for 10 minutes, then remove it from the pan and cool it completely on a cooling rack.

For the glaze:
  1. In a small bowl, whisk together the powdered sugar, bourbon, maple syrup, and pumpkin puree, until the mixture is smooth and there are no lumps. Add the spices and salt and whisk to combine. Add the milk (if needed), a small amount at a time, until the glaze is thin enough to pour and drip, but thick enough to stay mostly on the cake. Glaze too thin will pour right off the cake. If it’s too thin, add more powdered sugar until your desired consistency is reached.
  2. Drizzle the glaze over the completely cooled cake. Give it a few minutes to set up, then slice and enjoy.

Sunday, November 13, 2011

Pumpkin Ravioli Surprise

My Ode To Dough:


Here’s how my crazy brain works: rather than a measure of your skill in the kitchen, I think a recipe’s degree of difficulty is more like your investment in making it from scratch vs. just buying it.  Muffins, pancakes, and cookies are totally worth making at home because they’re easy and taste a thousand times better.  But a rustic ciabatta loaf?  I can hear my mom in the back of my mind saying “why go through all that work when you can just find a good bakery where they make it better than you anyway?”  Because let’s face it - bread is hard.  Your yeasts can be temperamental and sluggish.  Your gluten can be obstinate and unpliable. Your environment can cause changes in moisture absorption and and rising times.  But you don’t have to be a bread-whisperer or anything.  It’s a matter of practice in some cases - like getting a feel for working the dough, and knowledge in others - like learning that when you use water that’s too warm you kill all your yeasts.  Oops!

So why do I waste my time?  Because it’s fun and rewarding!  Because I like knowing there’s nothing in my bread except flour, water, salt, and yeast.  And because I don’t always have access to a good bakery!  So while I won’t say bread isn’t an undertaking, I will say if it’s something that interests you, you should give it a go.  It takes time to perfect, but not necessarily prone to disasters of epic proportions. The trick is finding someone to walk you through it.  This is where Nicole of the wonderful Pinch my Salt comes in.  She’s posted a plethora of bread recipes, always with great step by step pictorial instructions and lessons to learn.  Essentially, she makes bread baking a whole heckofalot less scary.

Back in September Nicole posted a day by day set of instructions for how to create your own wild yeast sourdough starter.  From scratch!  Using just water, flour, and a little pineapple juice to start.  In case you’re wondering the pineapple juice is used because the acidity helps the right kind of bacteria to grow, which is what the wild yeasts come to the party to eat.  Err, or something like that...?


I love sourdough bread.  I love that tangy, sour flavor.  I love the smell.  And Husband has a special soft spot for it too.  We’re both Bay Area natives, after all.  It’s in our blood or something.  But sourdough starters scared me.  Sent me for the hills.  Arms flailing.  All that. Even after I conquered my fear of yeast, this blob of gloppy mess gave me pause.  But there was something about the bubbles and the way the blob would climb up the jar a little more each day.  It was like a pet, but one you wouldn’t feel too bad about accidentally killing.  Tamagotchi!  And on top of that, Linda from Salty Seattle was posting her usual food porn featuring sourdough recipe (linguine with chocolate lamb ragu? omg!) after sourdough recipe (sourdough pumpkin beignets with pork belly? Hello!).  Those two trouble-making ladies have since gotten together and declared this month in the name of Doughvember.  

Good thing I had already decided to take the plunge and my starter was already under way!  I am now the proud owner/parent of my very own sourdough starter.  I grew/birthed it myself!  It did take a couple of tries, and it was touch and go there for awhile, but I think we’ve ultimately reached a delicious understanding.  I feed it - it feeds me.  Here are some lessons I learned in my failed and almost failed attempts (most of it either wisdom directly from Nicole or online resources pointed out to me by Nicole - she rocks!):

  • It’s easier to create a starter with whole wheat flour instead of refined flour because the sugars in the whole wheat provide more food for the yeasts to feed off of.
  • If your starter is a bit sluggish at the get-go, it can be helpful to stir it once a day or so, just to redistribute stuff.
  • After day 5 or so, when you’re feeding it twice a day, it helps to move to a scale.  Measure 8 oz. of starter and mix in 4 oz. flour and 4 oz. water. And make sure your water isn’t too hot or cold or you’ll kill/scare away your yeasts.
  • When you’re ready to move your starter to the fridge, cover it in plastic wrap with a few holes poked in it.  That way the yeasts can breathe, but the blob won’t dry out.
  • When adding your starter to recipes, 1 cup of starter can replace approximately 1 cup of flour and ½ cup of water in the recipe.


My favorite recipe to use my extra sourdough starter so far has been these sourdough crumpets from Chocolate & Zucchini.  They take literally 10 minutes to make, start to finish (7 minutes of that is letting your pan heat up), making them invaluable for a quick weeknight meal accompaniment.  It helps that they’re flipping delicious too - like a tangy, savory pancake.  I’ve also tried throwing a little starter in pumpkin muffins and cream cheese biscuits, to great success.  It really just adds a hint of something extra.  


I ended up making Salty Seattle’s sourdough pasta recipe.  I would recommend halving it, unless you truly have an army to feed.  Half was plenty for the chocolate lamb ragu I made (recipe coming!), and after making pumpkin ravioli for dinner last night, I still have a small dough left for a rainy day.  I wasn’t going to blog the ravioli.  It was an experiment.  I didn’t even really expect it to turn out edible.  But thank goodness it did because I had no backup dinner standing by, and now I can tell you all about the magic of egg yolks inside pasta dumplings.  Oh yes, these raviolis featured a raw egg yolk placed in the center of a filling with pumpkin, pistachios, sage, shallots, garlic, and Parmesan cheese.  Every good thing, right?  It was like hiding all the magic of a poached egg inside for a nice surprise.  I cooked the ravioli long enough for the yolk to cook to about the point of a poached egg.  It’s hard to judge because you don’t know how done it is until you eat it, right? I did a test run before I cooked the rest, just to be sure.  I would recommend it.  But one fork-pierce and out runs the yolky goodness!  It’s heaven.  Pure heaven.  Who needs marinara?  The pumpkin and pistachio filling was a sweet accompaniment that actually paired wonderfully with the richness of the egg and the slight tang of the pasta dough (remember, it’s sour!).

So while my lame ineptitude prevented me from having the foresight to get a money shot of these babies - the one where you see yolk running from the center like an erupting volcano - I did remember to write down the method to my madness, so you can give it a go and see the insanity for yourself.  You’re welcome.  
Doughvember, for the win!

PS: Why yes, I am addicted to instagram. Feel free to follow me at bananasforbourbon!


Pumpkin Ravioli (with an egg yolk - surprise!)

Makes 8 raviolis (these are rich, so I would say that’s more than 2 portions)

~ ¼ batch of this recipe for sourdough pasta dough
1 large shallot, finely chopped
4 cloves of garlic, minced
6-7 leaves of sage, minced
1 TB olive oil
pinch of kosher salt
¼ tsp ground black pepper
¼ tsp ground nutmeg
½ cup white wine
1 cup pumpkin puree
¼ cup pistachios, lightly toasted and cooled
¼ cup Parmesan cheese
lemon juice (optional)
8 egg yolks

  1. In a small saucepan, heat the olive oil over medium heat.  Add the shallots with a pinch of salt and saute until softened, about 5 minutes. Add the garlic and cook for a minute or two to soften.  Add the pepper and nutmeg and stir to incorporate. Add the wine and bring it to a simmer.  Once the wine has reduced by about half, or a little more, remove it from the heat and let it cool.
  2. In a food processor, finely grind the pistachios.  Add the pumpkin puree, Parmesan cheese, and the cooked shallot mixture.  Process until the mixture is smooth.  Adjust the seasoning to your taste.  Add a little lemon juice if it needs some brightness.  Add the mixture to a ziplock bag (or pastry bag if you want to be fancy), and cut the corner so you can pipe it.
  3. Roll out the pasta dough into very thin sheets.  I don’t have a roller, so I did it by hand.  You’ll need about a 4 inch square to work with.  Pipe the filling in a circle, leaving about an inch-wide circle of open space in the middle (about the size of your egg yolk).  I didn’t measure, but I’d say it was about 1-2 TB of filling.  Basically, you want about ½ inch of thickness and ½ inch of height for the filling, or about the level with the yolk.  Carefully place an egg yolk in the middle of the filling.  Place a sheet of dough on top and gently press around the filling, sealing it as tightly as possible.  Then press a little firmer to make sure the dough it good and sealed.  Cut out the ravioli with a glass, a biscuit cutter, or just a knife.  I opted for about ¼ - ½ inch between the edge and the filling.  Repeat this for as many ravioli as you want to make.
  4. In a pot of gently simmering water, add the ravioli.  Make sure the water doesn’t boil too hard, or you raviolis could fall apart, and make sure it’s not set too low or once you add them, it’ll take too long to come back to a boil.  Boil the ravioli for 4-5 minutes, depending on how runny you like your yolks.  
  5. Remove the ravioli from the water, and add them to whatever sauce floats your boat.  I did a simple olive oil drizzle (with good olive oil), since the yolks are essentially all the sauce you need, but I’m sure tossing them with some browned butter and sage would be divine too.

Sunday, October 16, 2011

Halloween Trifle


I’m going to drop some embarrassingly honest Julie history on you.

A few years ago I ate out pretty much every meal except breakfast. My gourmet kitchen offerings back then? Something along the lines of 2 cans of chili dumped in a bowl with a package of shredded cheese, sour cream, and a jar of salsa, microwaved until melty and disgusting and enjoyed with a giant bag of blue corn chips. No joke. We called it nachos and boy was it ever delicious. Generally, we were happier to pay someone else to prep our plates, so we’d stop at Rubios or Panera. I’d order something one might consider on the healthy side - by comparison to some of their other offerings - a burrito bowl, or a cup of soup and half sandwich. But let’s be honest, I couldn’t say no to just one fish taco on the side, or a stop at Maggie Moos next door for ice cream.

I never exercised with any regularity. I couldn’t run for 5 minutes, let alone a mile. Even the sensation of my heart rate in the proper cardio zone had me asking my doctor if I had exercise induced asthma. Oh, you mean it’s supposed to feel like I’m gonna keel over and die? Ick! There were bouts of motivation where Husband and I would trek out to the gym for a couple of hours - once or twice a month at our best - and eke out some semblance of a workout. But wouldn’t you know it, I only ever put on pounds. Maybe it’s because we’d always stop at Jamba Juice on the way home from those workouts?

I admit, I was a victim of the Chili’s quesadilla explosion salad - the one that famously caught flack when they started posting the nutritional stats on their website. The “healthy option” many of us were outraged to learn actually had 1200 calories. But let’s not blame Chili's for my dissatisfaction with the scale. The choice of where to eat and what to order was all mine. In the end, my seemingly good habits were bad habits, and my bad habits were downright disgustingly awful habits. No wonder every shopping spree had me wondering why the clothes kept getting smaller and smaller!

So what changed? Looking back, everything. But not all at once. I didn’t wake up one day and say to myself "From this day forward I will change all my habits." Heck no! When did it change? I can’t even pinpoint how long it’s been since I lost that first pound. It was so gradual and non-purposeful. Has it really been almost 3 years?  I started reading a food blog or two. I tried a recipe here and there to pretty good success. I started going for walks, and playing around on that new-fangled Wii Fit. I did things that required a small, doable change. And when I got comfortable with that routine, I did a little more.  Can you believe just being a little more mindful of the choices I made and being a little more realistic about what those choices meant would get noticeable results?  How noticeable?  Well, I lost that first pound.  The hardest pound of my life.

I’ve been seeing a lot of posts by food bloggers I follow talking about their struggles with balancing food obsession and a healthy lifestyle. It really got me thinking about my own weight loss journey, and looking back, my food obsession and weight loss developed hand in hand. Go figure.


Now that I eat salads heavy on vegetables and light on dressing (and no cheese quesadillas on top), I can work in a little dessert without totally undoing my day. Like cookies. And mousse. And curd. All together in a trifle. I had never made a trifle. I would even go so far as to say I didn’t think I was much of a trifle person. But I take it back! Trifles are as awesome as the delicious components that are their makeup.

This trifle came about so very randomly. I got a bag of oranges four CSA shipments in a row. I was overwhelmed with oranges! But I didn’t want to just juice them. I wanted to really use their orange essence in something that would showcase their awesomeness. Because oranges are awesome. Sweet. Acidic. So I decided to make a curd. Despite the unfortunate name, curds are delicious. They’re bright and tart; sweet and creamy. But generally not something to enjoy alone. They’re a great accompaniment. 


Accompany what? Chocolate, of course! I originally considered pudding, but Husband requested chocolate mousse. Good call. So glad I listened. The light as a cloud, bittersweet mousse contrasted so nicely with the heavier, creamier sweet yet tart curd.  And this curd was all about the orange essence.  I didn't just use orange juice, you see.  I reduced it first. So I could get as much orange flavor out of those babies as possible!  And if you have to ask if I boozed it up, do you even know what blog you’re reading? I opted for Grand Marnier in the chocolate mousse to compliment the orange curd, and bourbon in the orange curd because I love the dimension the smokiness adds.

The flavors together were wonderfully indulgent, and the layers of orange and deep brown made me think instantly of Halloween. But I wanted a crunch element for texture, and what’s a Halloween treat without pumpkin? I love pumpkin! It pairs great with chocolate and orange. So I made the crunchiest cookie I could think of: biscotti! Pumpkin biscotti to be exact. It’s crunchy yet slightly crumbly texture was perfect for crumbling in between the chocolate mousse and orange curd layers, or leaving whole and dunking.

Who needs chili reminiscent of dog food in nachos when you can have this?  Definitely a small change for the better.

Any personal Halloween confections being made in your house this year that are strictly for personal, non-treat-or-treater enjoyment? 

  
Halloween Trifle

Makes ~8 individual trifles, depending on your container, or 1 big one

4 cups chocolate mousse (recipe below)
3 cups orange curd (recipe below)
8-10 pumpkin biscotti (recipe below)
  1. In a 4-6 oz. glass container (like a glass mug or jar), spoon in a layer of chocolate mousse, about 2 TB. Add a layer of orange curd, a little shy of 2 TB. If you want the biscotti crumbled directly into the trifle, crumble about ¼ of the cookie over the orange curd. Continue layering until you reach the top of your container, ending with a chocolate mousse layer. 
  2. Repeat for as many containers as you would like to prepare.
  3. Alternatively, if you are doing one big trifle, just follow the same procedure, but increase the quantities until you have an inch or so for each layer (or however you prefer it!). 

Chocolate Mousse

Adapted from David Lebovitz

Makes 6-8 servings

6 ounces bittersweet chocolate, chopped (I used 70%)
6 ounces unsalted butter, cut into small pieces
¼ cup dark-brewed coffee
¼ tsp of sea salt
4 large eggs, separated
⅔ cup, plus 1 TB sugar
2 TB Grand Marnier (or bourbon)
1 TB water
½ tsp vanilla extract
  1. In a bowl set over a pot of gently simmering water, melt together the chocolate, butter, coffee, and salt, stirring frequently. Once smooth, remove it from the heat to cool down.
  2. Fill a large bowl with ice water and set aside.
  3. In another bowl set over the pot of gently simmering water, whisk the egg yolks with the ⅔ cup of sugar, liquor, and water for about 3 minutes until the mixture is light and thick, like runny mayonnaise. Whisk constantly so the yolks don’t curdle. 
  4. Set the bowl with the egg yolk mixture in the bowl of ice water and beat until cool and thick (it will make thick ribbons when you bring your whisk out of the bowl). Then fold the chocolate mixture into the egg yolks. It might look broken at first, but just keep mixing, and it’ll smooth out.
  5. In the bowl of a stand mixer (or by hand if you have the stamina), beat the egg whites with the salt on medium-high speed until frothy. Continue to beat until they start to hold their shape. Whip in the tablespoon of sugar and continue to beat until thick and shiny, but not completely stiff (don’t over-beat!), then add the vanilla and mix on low to combine.
  6. Fold one-third of the beaten egg whites into the chocolate mixture to lighten it, then in two increments, fold in the remainder of the whites just until incorporated, but don’t overdo it or the mousse will lose volume. It’s ok to have a few white streaks.
  7. Transfer the mousse to a serving bowl and refrigerate for at least 4 hours, until firm.

Orange Curd

Adapted from Ina Garten

Makes about 3 cups

4 oranges, at room temperature
¾ - 1 cup freshly squeezed orange juice (from the 4 oranges above)
1 ½ cups sugar
½ cup (1 stick) unsalted butter, at room temperature
4 large eggs, at room temperature
1 large egg yolk, at room temperature
¼ cup bourbon (or Grand Marnier)
⅛ tsp sea salt
  1. In a small saucepan, bring the orange juice to a rapid simmer and reduce until you have ½ cup of liquid. Set aside to cool.
  2. Remove the zest from the oranges with a vegetable peeler or zester, no pith please. Put the zest in the bowl of a food processor. Add the sugar and pulse until the zest is very finely minced and evenly distributed among the sugar. 
  3. Cream the butter in the bowl of an electric mixer fitted with a paddle attachment. Add the sugar/orange zest mixture and beat on medium speed until it is light and fluffy, a few minutes. Add the eggs and egg yolk, one at a time, then add the reduced orange juice, liquor, and salt. Mix until combined.
  4. Place a mesh strainer over a medium bowl and set aside. Pour the mixture into a medium saucepan and cook over low heat stirring constantly for about 10 minutes, until it is thickened enough to coat the back of a spoon (~175 degrees if you have a candy thermometer). Be careful not to overcook, or it will curdle. Remove the mixture from the heat and pour it through the strainer set over the bowl. Refrigerate the curd until fully cooled, a few hours. It will thicken further as it cools.

Pumpkin Biscotti

adapted from Simply Recipes

Makes about fifteen cookies

1 ½ cups of flour
1 cup whole wheat flour
1 cup of sugar
1 tsp baking powder
1 tsp cinnamon
½ tsp nutmeg
¼ tsp ginger
¼ tsp cloves
¼ tsp kosher salt
2 eggs
½ cup of pumpkin purée
1 TB bourbon
1 tsp vanilla extract
  1. Preheat the oven to 350 degrees. In a large bowl, sift together the flour, salt, sugar, baking powder, and spices.
  2. In another bowl, whisk together the eggs, pumpkin purée, bourbon, and vanilla extract. Pour the pumpkin mixture into the flour mixture. Give it a rough stir to incorporate the ingredients.  The dough will be crumbly.
  3. Flour your hands and a clean kitchen surface and lightly knead the dough until it is uniformly mixed. It will be a little on the sticky side. On a baking sheet lined with parchment paper, form the dough into a large log, about 1 inch tall and 15 inches long. Bake for 22-28 minutes, until the center is firm to the touch. 
  4. Reduce the oven temperature to 300 degrees. Let the biscotti cool for 15 minutes and then, using a serrated knife cut into pieces about an inch wide. Lay the cookies flat on the baking sheet and bake for another 15-20 minutes. Let them cool completely.

Sunday, October 2, 2011

Fall Vegetable and Beef Bolognese


Fall is here. Almost. I’m ready for warm stews and casseroles. Almost. I’m ready to stop eating anything that doesn’t involve a whole can of pumpkin. Getting there. But it’s also still sunny and warm out. I’m still hanging on to the late summer peaches and plums. And does zucchini even have a season in San Diego? Seems like I can get it locally and cheap year-round. Fine by me! So I made this sauce. It’s warm and comforting like I’ve been craving, but I don’t even have to turn on the oven. Because this sauce is made, for the most part, in my crock pot. How about that? Don’t use that thing nearly enough. With my uber-busy new schedule, this recipe is definitely one I’m remembering when it’s Wednesday night and I haven't got much in the way of food for Thursday.

This sauce is a bolognese. It’s got beef (but you could totally use turkey, chicken, or bison if you want to be fancy). It’s got milk and wine, which sounds weird, but actually makes the meat flavor more succulent and delicious. True. Besides the tomatoes, it’s chalked full of other vegetables. Because I’m me, and I up the veg. Always. It all bubbles away all the live long day or night and when it’s done it’s chunky and meaty and savory. I would argue one doesn’t even need to serve this on anything besides a spoon headed for my mouth. 

 
But I didn’t serve it that way. I didn’t serve it over spaghetti either. Or penne. Or bowtie. Not even spaghetti squash, though I’ve done that before and I highly recommend it. I had red potatoes and an idea. I roasted those suckers until they were cooked through. Then I carefully smashed them flat, about ½ inch thick. Then I heated some olive oil in a skillet, and fan fried my roasted/flattened potatoes until they were golden and crispy on the outside and soft and wonderful on the inside. Then I topped those suckers with my bolognese. Then I ate them. Well, the ones Husband would let me get to. Men really are all about steak and potatoes at heart, aren’t they?

But that explains the funky pictures. That and the fact I was photographing my lunch container for the next day. But don’t let the funk fool you. This sauce is just what the don’t-leave-me-late-summer-it’s-almost-fall season calls for.


Fall Vegetable and Beef Bolognese

adapted from The Kitchn

Makes about 8 servings

1 TB olive oil
1 medium onion, finely chopped
2 celery stalks, finely chopped
1 medium carrot, finely chopped
1 medium eggplant, chopped
2 medium zucchini, chopped
8 oz cremini mushrooms, finely chopped
5 cloves of garlic, minced
1 lb. ground beef
⅛ tsp nutmeg
a few pinches of kosher salt
½ tsp freshly ground black pepper
¼ tsp crushed red pepper flakes
1 cup milk (I used 2%)
1 cup white wine or dry sherry
2 28 oz. cans of whole peeled tomatoes, drained and finely chopped (juices reserved)
1 cup reserved tomato juices
¼ cup parsley, finely chopped for garnish

  1. In a large saute pan or pot heat the olive oil over medium-high heat. Add the beef and let it sit, undisturbed for a few minutes until it browns. Flip the beef over and break it into pieces using a wooden spoon or spatula. Once the other side has browned, remove the beef from the pan and set it aside. Lower the heat to medium and add the onion, celery, and carrot with a pinch of salt and cook until the vegetables have softened, about 10 minutes. Add the eggplant, mushrooms, and zucchini, and cook until their water releases and evaporates, another 10 minutes. Add the garlic and cook until fragrant, about 30 seconds, and then add the nutmeg, black pepper, crushed red pepper, and another pinch of salt. Add the beef back into the pan and any juices that have accumulated, and stir to combine.
  2. Stir in the milk, bring it to a simmer and cook until the milk has reduced completely and very little liquid remains, about 10 minutes. Stir in the wine and simmer again until reduced completely, about 10 minutes.
  3. In your slow cooker, add the beef mixture, the chopped tomatoes and one cup of the reserved tomato juices. Stir to combine. Cover and cook on HIGH for 6 hours or LOW for 8 hours.
  4. In the last hour of cooking, make sure the cooking temperature is set to high and remove the lid to allow any excess liquid to evaporate and reduce the sauce. Stir every 15 minutes or so, until the sauce is chunky.
  5. Serve over pasta or smashed roasted potatoes, and garnish with chopped parsley and Parmesan cheese.

Tuesday, December 7, 2010

Pumpkin Buttermilk Pie


Has it really been almost 2 weeks since Thanksgiving!? Where did last week go? Oh yeah, it was swallowed up by the ugly bug that’s been lazily kicking the crap out of my immune system and other bodily functions. Let’s just say...I wouldn’t recommend drinking the pink eye tears of a toddler. That’s a story for another time. 

Did you think the long hiatus between posts was because I was compiling a mass of Thanksgiving pictures? A collage of every dish and paragraphs upon paragraphs of wordy description? Sorry to disappoint, but I have a confession to make - I didn’t take any pictures during Thanksgiving. None. My camera battery is still sitting on the charger, currently residing under my feet. I don’t know who I am anymore! But that’s just what happens when you spend 2 days in the kitchen and 5 days entertaining family.

Ah family. My family. And our ridiculously stubborn adherence to superfluous traditions. I love that about us. A movie on Christmas day, preferably on a sci-fi or fantasy theme. It’s tradition! Mom reading the Polar Express in front of the fireplace on Christmas Eve. It’s tradition! Me squeezing behind the driver’s seat on any family outing, even though the passenger side has more legroom. It’s tradition! And of course, Thanksgiving comes with its own set of traditions. Starting, naturally, with the menu. Turkey, mashed potatoes, stuffing, cranberry sauce, and pumpkin pie are the musts. I remember the year my mom tried to get away with not serving mashed potatoes. My sister called a family holiday party foul and made them herself. I might have helped, but I was a lazy, moody teenager, so I probably didn’t. Sorry sis!

Sure, every family has dishes they love and want year after year. In my family, we actually have dishes a lot of us don’t like, but we make anyway. Like the cranberry sauce. My sister always takes a no-thank-you helping, so I knew she wasn’t a fan. But it wasn’t until this year that I realized my parents also aren’t cranberry sauce eaters. Yet it’s always on the table! Well, minus the year my mom had it in the nice serving bowl, sitting in the fridge, and forgot to take it out. Guess now I know why she didn’t miss it. Heh. I probably could have gotten away with not having any, but I figured it’d be way more fun to try and make a cranberry sauce everyone would actually enjoy. Not to mention...it’s tradition! I made a cranberry applesauce, hoping the natural sweetness from the apples would be a nice contrast to the tartness from the cranberries without the cloying sweetness of regular sugar. Along with a little fresh ginger to make it more savory and a healthy glug of Grand Marnier (ok, maybe two healthy glugs, after encouragement from my mom), it was a success. My sister had seconds!

I’m sure I’m blowing the minds of my family as they read this post. Can you believe I used to be a picky eater? There were several foods I didn’t like, and even more foods I probably would have liked fine, but still wouldn’t eat. For years I thought I didn’t like guacamole. Really my sister didn’t like it, and I had just taken her word for it. And now I’m talking about changing people’s minds about foods they don’t like! I’m blowing my own mind here.


The pumpkin pie at my Thanksgiving table has a bit of a history. My grandma, on my dad’s side, always brought the pumpkin pie. She wasn’t a baker (not that there’s anything wrong with that), so she would dump a can of Libby’s pumpkin pie filling into a store-bought crust, bake it, and bring it over with a can of reddi-wip. To me, that was pumpkin pie. It was good and all, but I didn’t exactly grow up with the impression that pumpkin was the be-all and end-all of pie flavorings. Turns out my mom doesn’t even like pumpkin pie. How did I never know these things before?!

This year I wanted to make a pumpkin pie from scratch. A good one. My first attempt was a bust. I don’t want to talk about it...except to say that I took issue with the massive amounts of heavy cream and sugar the recipe called for. Then I saw a recipe for a sweet potato buttermilk pie that used lowfat buttermilk instead of heavy cream, and folded in whipped up egg whites for a light and fluffy texture. I was intrigued! After my mom mentioned what she didn’t like about pumpkin pie was the puddingy texture, I thought this might be just the thing. So I swapped out the sweet potato for pumpkin, but kept just a little sweet potato in there for a flavor boost. Pumpkin can be a little on the bland side, ya know. I adjusted the seasonings, upped the sugar (sweet potatoes are sweeter than pumpkin, after all), and of course, I added booze! It’s not pumpkin [insert delicious baked good here] without bourbon, right? Another thing that turned me onto this recipe was blind-baking the crust first. No worries about a soupy pie or a soggy crust.

The resulting pie was a light, fluffy, spiced pumpkin cloud.  And still so silky smooth without the heaviness. The trick was definitely folding in the egg whites. It really kept the pie light. I was concerned the lightness of the texture and lack of fat would lose the pumpkin pie flavor, but the spices still came through beautifully. And the hint of sweet potato added a nice layer of sweetness. It seemed to be a success. It didn't last long, and as my mom put it, “Julie, I enjoyed my slice...and I don’t even like pumpkin pie.” Good enough for me! Into the archives this recipe goes.

But wait! I haven’t even mentioned the whipped cream! It was an afterthought. Spur of the moment. I bought heavy whipping cream, thinking I would just whip it up with a little sugar right before dessert. Nothing special, but better than the canned stuff. Well 4 glasses of wine and a big turkey dinner later I had the bright idea to whip that cream with maple syrup and a splash of bourbon instead...

Oh my word. 

That is all that can be said about this whipped cream. Nevermind the two pies and vanilla ice cream I had on the table for dessert. I wanted to just eat gobs and gobs of this whipped cream. Yeah. It was that good. It went great on the pie. I highly recommend you don’t skip it.


PS: If you're wondering why I have pictures of the pie when I said I didn't take any, it's because this was my test run.  It was a new recipe after all.  Better safe and full of pie than sorry, right?


Pumpkin Buttermilk Pie
adapted from Smitten Kitchen’s Sweet Potato Buttermilk Pie

½ cup mashed sweet potato (1 small potato, poked with fork and microwaved for 7 mins)
1 14oz can pumpkin puree
4 TB unsalted butter, melted
2 TB fresh lemon juice
½ tsp freshly grated nutmeg
1 tsp ground cinnamon
½ tsp ground ginger
¼ tsp ground cloves
¼ tsp ground cardamom
½ tsp kosher salt
3 large eggs, separated
½ cup sugar
¼ cup brown sugar
2 TB AP flour
3 TB bourbon
¾ cup buttermilk
1 pre-baked pie crust (recipe below)
maple bourbon whipped cream (recipe below)

  1. In a medium bowl, mix together the sweet potato and pumpkin puree. Add the butter, lemon juice, nutmeg, cinnamon, ginger, cloves, cardamom, and salt and mix thoroughly after each addition. 
  2. In a small bowl, beat the egg yolks lightly with a whisk for about 30 seconds. Add the sugar and beat until they’re a creamy light yellow color, about 2 minutes. Add the egg mixture to the pumpkin mixture and stir until the eggs are fully incorporated. Add the flour a little at a time, stirring after each addition until thoroughly incorporated. Add the buttermilk and bourbon and stir until incorporated. 
  3. In the bowl of an electric mixer, beat the egg whites to soft peaks in a clean, dry bowl. With a spatula, gently fold the egg whites, one-third at a time, into the sweet potato-buttermilk mixture until thoroughly combined. Pour the mixture into the pre-baked crust and bake on the middle rack of the oven set at 375 degrees until the center is firm and set, about 35 to 40 minutes. Cool the pie completely on a rack, then chill for at least 4 hours before serving. 

For the pie crust:
1 ¼ cups flour
1 ½ tsp sugar
½ tsp salt
½ cup (1 stick) unsalted butter
3 TB ice cold vodka (or substitute water)
ice cold water

  1. Cut the butter into small pieces (I do quarter tablespoons), and place in the freezer along with the vodka for about 30 minutes, or until it just starts to freeze. 
  2. In a small bowl whisk together the flour, sugar, and salt. Dump the mixture out onto a large cutting board or clean counter. Using a bench scraper (a rolling pin also works), work in the frozen butter by smooshing the flat side of the bench scraper into the flour, scooping and mixing it often. When the butter pieces are all flattened and well incorporated, use your fingers to break up any large pieces until they are pea-sized. Sprinkle the vodka over the dough and mix, then 1 TB at a time, add enough water until the dough just comes together, and all the flour is incorporated. Knead the dough into a ball and cover tightly in plastic wrap. Smoosh the dough flat into a hockey puck shape and refrigerate for 1 hour. 
  3. After the dough has chilled, preheat the oven to 325 degrees and place the dough on a well-floured cutting board or clean counter. Turning often, and using as much flour as you need to keep it from sticking, roll the dough into an even layer about ¼” thick, or until it is large enough to fit into your 9” pie plate with ½” overhanging. Move the dough to the pie plate and trim any excess dough, leaving that ½” overhang. Fold and pinch the edges of the dough around the pie plate so it’s nice and pretty. 
  4. Lay a sheet of aluminum foil over the dough and carefully on scatter pie weights (I use dried beans). Bake on the middle rack of your oven for 12 minutes. Remove the pie weights and the foil, prick the bottom of the crust with a fork, and bake for another 10 minutes. 

For the maple bourbon whipped cream:
1 cup heavy whipping cream
2 TB maple syrup
1 TB bourbon

  1. In a stand mixer, add the cream, maple syrup, and bourbon. Start the mixer at a low speed and work up to high to avoid splashing. Whip the mixture until it is thickened. Taste the whipped cream and add more cream, maple syrup, or bourbon according to your preference. If you’re shy, you might want to start with just a tsp or two of the bourbon. 

Tuesday, November 16, 2010

Lightened Up Green Bean Casserole


It will come as a surprise to no one when I tell you that I am a big fan of Thanksgiving. Besides being a holiday whose sole purpose is the celebrate food (let’s face it, that whole giving thanks concept is just an excuse to stuff our faces...and I’m okay with that), it’s one of only two holidays where my whole family generally congregates together - the other being our Passover seder, which I consider Thanksgiving for Jews (plus singing!). I love family congregation! Which is why I also never miss a wedding, graduation, or other fun family party.

Due to my current reduced circumstances, Husband and I decided to forgo travel this year and just stay at home. Thankfully our families are awesome - his parents (and their canine companion), my parents, and my sister, her husband and my nephew are all coming to town to celebrate with us. Yay! Also due to my reduced circumstances, I have a lot of alone time on my hands, and I spend a lot of it thinking about food. Okay, most of it.  As a result I’m not just excited for Turkey Day, I am Thanksgivingsessed! I had the menu all planned out a month ago. Actually, more like two. I have since also created an Excel spreadsheet that details ingredient totals, my shopping list, a to-do list for the week, and a full schedule for the day before and the day of. I may be crazy, but the first step is admitting you have a problem right? Anyway, I’m also playing it smart. I’m planning to tackle most of the cooking myself, so I have to make sure I have my game plan all worked out. How else would I have realized that while I'm baking two pies, I only have one pie plate?  No worries, the problem is already solved.  I do get flustered cooking on a schedule, but with everything planned to a T, how could anything go wrong? Yes, I know I just ensured that everything will go wrong. But between all the guests, there will be more than enough cooks in the kitchen to sort things out. I’m breezy!

Besides being in need of a fun project, our families have been so awesome and supportive this year, we’d really like to treat them a nice dinner. It’s the least we could do. So we’re going all out! A 16lb heritage turkey, free-range and organic of course, brined and roasted, and with all the fixins around the table: gravy, cranberry applesauce, grilled mashed potatoes, sourdough apple pecan stuffing (technically dressing since Husband is squeamish about bird germs), beets with a balsamic reduction, hashed Brussels sprouts, sweet potato rolls, and - as I mentioned - two kinds of pie for dessert. Apple and buttermilk pumpkin pie, with vanilla ice cream on the side. I’m sure I’ll be posting all about it after next week. Of course, a lot of those recipes aren’t mine (some are!), so I’ll post links at the bottom of this post in case someone is in need of ideas.  I can vouch for them all except the stuffing, though I'm sure it'll be delicious. And if those don't entice, I may have developed my own Thanksgiving side last weekend. Read on!

This isn't my first time hosting my family for Thanksgiving, but it is the first time since my big transformation. I wanted to keep all the familiar flavors, but put the Julie spin on them, so last weekend I tried out some recipes - roasted one of those cheap $5 turkeys from Vons and made gravy from pan drippings for the first time (killed it!). I also used it as an excuse to make some dishes that didn’t quite fit into my Thanksgiving menu.


See, I had been toying with the idea of green bean casserole. Thanksgiving + Food Network = lots of mention of green bean casserole. I was thinking of the one traditionally made with condensed cream of mushroom soup and crispy fried onions on top. That dish doesn’t so much scream yummy deliciousness to me, more like heavy, preservative-induced stomachache. But the flavors of the casserole still appeal. Plump green beans in a creamy sauce with earthy mushrooms and fragrant herbs, topped with sweet onions and just a little crispy crunch for texture. Sounds good, right? Well I set about seeing if I could lighten the dish up and make it into something presentable. I don’t know if I accomplished presentable, but it sure was tasty. 

I started with frozen green beans - haricot verts from Trader Joe’s, actually. Then I created the mushroom cream sauce using evaporated milk. I hadn’t used evaporated milk before, and the stuff is just great. It’s just milk with some of the water evaporated out, so it’s already nice and thickened, but much lighter than using cream. I caramelized onions, since that’s my favorite way to eat them. But caramelized onions are soft and buttery, not crispy crunchy. No problem. After the onions caramelized, I added a little butter to the pan with some bread crumbs, and tossed everything together. I topped the green beans coated in the mushroom cream sauce with the onions and bread crumbs, and after it baked up, it came together juuuuust right. Plump green beans, creamy mushroom sauce, and sweet onions with a crunch. Mission accomplished!  Panko bread crumbs would probably  be even crunchier and better (I buy whole wheat panko), but I had some whole wheat bread to use up, so use whatever is easier for you.  Next time I might experiment with throwing some walnuts in as well, though I would probably catch flack from Husband, since he's really not a walnut fan.  It's terrible, I know.

I'm always fascinated by other families and their own traditions.  What are you doing for Thanksgiving?  Pot luck or solo hosting?  What's in the menu?  And finally, how delicious is Thanksgiving food?  Right?!


Green Bean Casserole

Makes about 18 servings

2 16oz bags of frozen green beans, thawed (or fresh and blanched)
16oz cremini mushrooms, sliced
1 12oz can evaporated milk
1 medium shallot, minced
5-6 garlic cloves, minced
2 tsp paprika
1 tsp ground black pepper
1/4 tsp cayenne pepper
1 TB dried thyme
1/2 tsp dried sage
1/2 tsp celery seeds (optional)
1 cup white wine
2 TB flour
4 TB unsalted butter, divided
2 medium onions, quartered and sliced
1 tsp white wine vinegar
1/2 to 3/4 cup whole wheat bread crumbs (~3 slices of bread) or panko bread crumbs
2TB olive oil
kosher salt to taste

  1. Preheat the oven to 375 degrees. You’ll also need a 9x13” baking dish. 
  2. In a medium skillet, heat 1TB olive oil over medium heat. Add the onions and a pinch of salt. Sweat the onions until their water is released, stirring often to prevent browning. Turn the heat down to medium-low and cook, stirring occasionally, until the onions turn golden brown and caramelize, about 45 minutes. 
  3. Meanwhile, in a large saute pan, heat 1TB olive oil over medium heat. Add the shallot and cook until soft, about 3 minutes. Add the garlic and cook for 1 minute. Add the mushrooms and a pinch of kosher salt, and cook until the mushrooms have given up their water and softened, about 7 minutes. Add the paprika, pepper, cayenne, thyme, sage, and celery seeds, mix everything together and cook for 1 minute. 
  4. Clear a space in the pan and add 2TB of butter. Once it melts, mix in the flour, and let the mixture cook for a minute or two to remove any raw flour flavor. Increase the heat to medium-high and add the wine to deglaze the pan, scraping up all the browned bits. Simmer the mixture until about half the wine has cooked out. Add the evaporated milk and stir to combine everything. Let the mixture simmer for about 3 minutes, until it has thickened a bit. 
  5. Turn off the heat and stir in the green beans, tossing until they are well coated in the mushroom mixture. Pour the green beans into your baking dish and set aside. 
  6. Once the onions have caramelized, add the white wine vinegar and toss to coat. Melt the remaining 2TB of butter, and when it has melted, add the bread crumbs and toss until the bread crumbs are well-coated with butter and evenly mixed with the onions. Spoon the bread crumb and onion mixture over the green beans in an even layer. Bake the casserole for about 45 minutes, or until the topping is a crunchy golden brown. 

Links for Thanksgiving dishes:
Cranberry applesauce
Sourdough apple pecan stuffing
Sweet potato rolls
Hashed Brussels sprouts

Wednesday, November 10, 2010

Pumpkin Spice Cake with Butterscotch Swiss Meringue Buttercream


One week before Halloween my adorable little nephew turned one year old. It was kind of a big deal for me. He is my only sister’s only child (thus far), and I absolutely love him to death. My sister threw a fun family party to celebrate, with a full compliment of party fixin’s - balloons, streamers, deviled eggs, and, of course, cake!

After we all met up in Reno a few months ago my sister gave me an assignment: come up with a recipe for my nephew’s first birthday cake. And I took it seriously. I didn’t want to let the little guy down! So I thought about flavors, researched recipes, and practiced a few test-runs to get things juuuuust right. And when I was confident in my creation, I handed the final, approved recipe over to my sis. Here are the results of her deft hand:


Way to decorate, sis!

Since the party was taking place so close to Halloween, my sister was thinking something with pumpkin. Pumpkin just so happens to be one of my favorite Fall flavors! I was looking forward to experimenting with recipes...just a tiny bit. There were just a few conditions. First, no chocolate. I guess the caffeine in cocoa isn’t great for the wee ones. Second, no lemon or banana cake. My sister isn’t a fan of lemon cake, and my mom is in the banana = ick camp. Such a shame on both counts, in my opinion. Finally, and most importantly, no cream cheese frosting. Sis doesn't do cream cheese frosting - it’s the tangy flavor. She hates it. She’s actually foregone eating cupcakes from her favorite local cupcakery because she unknowingly bought one with cream cheese frosting.

With these parameters in mind, I came up with a spiced-up pumpkin cake. Since the more traditional cream cheese frosting was off the table, I took inspiration from my favorite pumpkin cookies, and decided on a butterscotch buttercream. Pumpkin and butterscotch is a fantastic combination. Ever had it? You should. It’s yum. But butterscotch sauce is sweet. Super duper sweet. Husband says I’m just extra sensitive, but I thought my first butterscotch buttercream - a simple butter and powdered sugar mixture - was way too sweet. I didn’t see a way to reduce the sugar, so I just made some adjustments to help balance it. I added some acid. A little lemon juice really brightened up the flavor and gave the sweet somewhere to go. Also, I switched to a Swiss meringue buttercream. The light, fluffy texture did a good job of distributing the sweet on my palette, and was especially delicious paired with the warm spices of the cake.

The third and final test run I made a finished cake and brought it over to share with some lovely ladies I know. This cake here...

...was a big hit! Our host insisted on no leftovers, sent us home with every morsel of food, but when I asked her if she wanted the last slice of cake, she grinned sheepishly and nodded. With such approval I knew the recipe was ready for sisterly publication.

The day before the party my sister put her expert baking skills to action and whipped up my nephew’s birthday cake while I stood wringing my hands in the corner, prepared to die of shame should anything not turn out as expected. Even with a dozen other party provisions to prep, she made an awesome cake with an adorable smash cake of my nephew’s very own to match. She’s a rock star!


Whether for a special Fall occasion or just because cake is delicious, this cake is light and tender, very fragrant from the warm pumpkin spices, and so worth making! Sufficed to say I did not mind making - and subsequently eating - this cake three times.

Nephew's First Birthday Cake
(AKA: Pumpkin Spice Cake with Butterscotch Swiss Meringue Buttercream)

adapted from Martha Stewart

For the cake:
2 cups AP flour
1 tsp baking soda
1 tsp baking powder
1 tsp kosher salt
1 tsp ground cinnamon
1/2 tsp ground ginger
1/2 tsp ground nutmeg
1/4 tsp ground cloves
1/4 tsp ground allspice
1 cup sugar
1 cup dark brown sugar
1 cup (2 sticks) unsalted butter, melted and cooled
4 large eggs
1 can (15 ounces) pumpkin puree
1 tsp vanilla extract

  1. Preheat the oven to 350 degrees. Grease two 9-inch cake pans with baking spray, line the bottoms with parchment paper, then spray the parchment paper. 
  2. In a medium bowl, whisk together the flour, baking soda, baking powder, salt, cinnamon, ginger, nutmeg, cloves, and allspice. In a large bowl, whisk together the sugar, brown sugar, butter, eggs, pumpkin puree, and vanilla. Add the dry ingredients to the wet, and whisk until just incorporated and smooth. 
  3. Pour the batter evenly between the two prepared cake pans. Bake for 25-30 minutes, rotating the pans halfway through, until a cake tester (i.e. toothpick) inserted in the middle comes out clean. Transfer the cakes to a wire rack and cool completely. 

For the buttercream:
4 large egg whites
1 1/4 cup sugar
1 1/2 cups (3 sticks) unsalted butter, room temperature
2 tsp vanilla extract
pinch of sea salt
1TB lemon juice (or more to taste)
1/2 cup butterscotch sauce (see below)

(makes about 4 cups)

1/2 cup toasted pecans, chopped (to garnish the finished cake), optional

  1. In the bowl for your electric mixer (or a medium heatproof bowl if you’re using a hand mixer), combine the egg whites and sugar, and place the bowl over a small pot of gently simmering water. Whisking the mixture constantly until the sugar has fully dissolved, about 2-3 minutes. Rub a little between your fingers, and if there is no hint of a grainy texture, it’s done (or when it reaches 160 degrees in temperature). 
  2. Place the bowl in your mixer fitted with the whisk attachment, and set at high speed, beat the egg mixture until stiff peaks form. Continue beating until the eggs are fluffy and the mixture has cooled, about 5-6 minutes. Make sure the stiff peaks don’t become dry, you want them to stay glossy. 
  3. Switch to the paddle attachment and with the mixer on medium-low speed, add the butter 2 TB at a time, waiting until it is fully incorporated into the mixture before adding the next addition. If the buttercream begins in separate, turn the mixer up to medium-high speed and beat for a few minutes, until it is smooth again. Add the vanilla, salt, lemon juice, and butterscotch sauce (make sure it’s cool, you don’t want to melt your buttercream), and beat until incorporated. Again, if the mixture separates or thins out too much, beat on medium-high speed until it is light and fluffy again. Taste the buttercream and add more salt, lemon juice, or butterscotch if you think it’s needed. Reduce the mixer speed to low and beat for 2 minutes to eliminate any air bubbles. 
  4. Trim the tops of the cake layers so they are flat. Stack the first layer onto a cake plate and using a spatula, spread about 1/2 cup of buttercream in an even layer over the top. Place the second cake layer on top, making sure the two layers line up. Spread a very thin layer of the buttercream around the cake for a crumb layer. This will glue the crumbs to the cake, so they don't show through the light colored buttercream. Then apply a regular, thick layer of the buttercream, until the cake is evenly covered. Sprinkle the top with the toasted pecans and enjoy! 

For the butterscotch sauce:
1/2 cup (1 stick) unsalted butter
1/2 cup sugar
1/2 cup dark brown sugar
3/4 cup light corn syrup
1/2 tsp sea salt (or more to taste)
1/3 cup heavy cream
2 tsp vanilla

adapted from Martha Stewart
(makes about 1 1/2 cups)

  1. In a medium skillet, melt the butter over low heat. Add the sugar, brown sugar, corn syrup, and salt, and increase the heat to medium to bring the mixture to a boil. Let it cook for 2 minutes, then remove the pan from the heat and stir in the heavy cream and vanilla. Allow it to cool at room temperature. It will seem too thin at first, but don’t worry, it’ll thicken as it cools.