Showing posts with label lunch. Show all posts

Wednesday, February 15, 2012

Crave-ably Healthy Veggie Wrap


Healthy eating (and on the flip side unhealthy eating) seems to ebb and flow. It can be affected by the season, the weather, and especially holidays. December was cookies and prime rib and champagne. January was green smoothies and citrus salads and new gym memberships. Now it’s February and the juice cleanses are over. Wings were consumed. Red velvet is everywhere. Sees is booming with business. We might have overindulged with our sweethearts. I know I did!

I’ve noticed one of the keys to keeping myself in check is watching how extreme I let those ebbs and flows get. I’m too delicate to handle crazy yo-yo’s in my body. And by delicate, I mean panic attacks on the scale, inconsolable by Husband. And by panic attacks and inconsolable, I mean about a half a second of whining while Husband drops the obligatory, well-rehearsed “I’m sorry”, thinly veiling the fact that he’s not really listening to me. (I never blame him. Thankfully, he’s well used to my crazy.) In other words, I prefer to balance mostly healthy eating with regular small indulgences, rather than hard, fast weight loss and weight gain. And really, I think the key is how you approach that mindset. If I were drinking beet juice and bland chicken soup for a week, then I’d be hard-pressed to resist that giant bowl of macaroni and cheese I’d been craving that entire week. Because when you’re eating foods you don’t enjoy, you think about the foods you’re denying yourself that much more, right? I know I do!

A diet shouldn’t feel like diet. In fact, the word diet should denote the foods you have a tendency to stuff into your facehole, rather than being defined by the foods you pointedly do not stuff in your facehole. It’s a small distinction, but one that makes a big difference.  Last week, I told a friend who was lamenting her bland bowl of chicken & vegetable soup (and craving bacon in its place) to nevermind the bacon. If she was going to eat soup, she should make it good soup and then eat the heck out of that soup. Sure, the grass is always greener. Get over it! Instead focus on being happy to eat what you’re eating. Feeling sorry for your dinner is a cop out. Food doesn’t have to be a gazillion grams of fat and tetragillions of calories to be something to savor. If you’re soup is bland, try adding gobs of hot sauce and cry tears of pain triumph when you power through it. Or maybe just a squeeze of lemon juice to brighten it up if masochism isn’t your thing. Say you made a salad of carefully chopped fruits and vegetables, every color of the rainbow represented, and while beautiful to behold, you still feel like a bit of a rabbit chomping grass. Try sprinkling in just a few goodies - crumbled goat cheese, a handful of sliced almonds, toasted pepitas. The added protein will make it more filling too. Or experiment with making your own vinaigrette. They are quick, simple, and with all the fancy oil & vinegar options out there, as varied as your imagination! Your side of steamed brown rice? Try sprinkling on some salty seaweed or add some fresh ginger while it’s cooking to boost the flavor. Adding coconut milk in place of some of the cooking water is my favorite!

Break the cycle of denying and indulging. Instead choose healthy options every day, prepare them with love - not necessarily time, just consideration - and when faced with your result look it straight in the plate and say “I am going to eat the heck out of you and love every minute of it!” Now that’s eating mindfully.


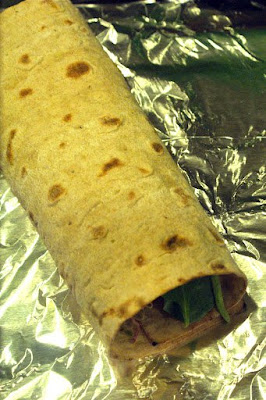
Take this simple veggie wrap. Sure, it looks pretty ho-hum. It sounds pretty ho-hum too. But let’s look closer. I used a whole wheat lavash sold by my favorite local market (I heart you forever, Jimbo’s!). It’s just flour, yeast, salt, and water. Or something like that. It’s soft and airy and slightly chewy with a nutty flavor - totally different from a Mission flour tortilla. I made my own hummus. Only because I like making hummus. But really because I'm cheap and dried chickpeas are cheaper. They also sell pretty awesome hummus pretty much everywhere nowadays. This is the wonderful world we live in. My hummus had roasted garlic and a ton of roasted tahini. I’m a sucker for both. At first I thought about adding cheese, but decided avocado would be better. The creamier texture and richer fat flavors were just right. This level of health food must take flavor and texture punch wherever it can be got! I used baby spinach and sprouts. Not lettuce. I’m not much for the crunch of lettuce in wraps, and it’s too watery. Sprouts taste so wonderfully grassy. Wonderful might not be the word that springs to mind when you think of something tasting “grassy”, but my mind was a pasture-raised bovine in a past life, apparently, because grassy sprouts make me swoon. It’s all about balance, really. Grassy sprouts in the same bite as creamy avocado? Good stuff. I went a little crazy and sliced up some of my favorite local fresh tofu. Plain. Because it gives me something silky to sink my teeth into. Because apparently good quality tofu does have a bit of flavor. And it’s quite tasty.

Substitution potential on this wrap are out of bounds. Tortillas for lavash. Arugula for spinach. Black bean, white bean, or lentil purees instead of traditional hummus - or a flavored hummus. Baked, marinated, or spice-rubbed tofu. Leftover shredded chicken. Canned tuna or salmon. The possibilities are endless.

But wait! I have yet to mention the best part. This wrap would be a sad story indeed without the piece de resistance. The pickled red onions and carrots. The acid. The crunch. The life of this wrap. I used to pass-over recipes that called for pickles. How complicated! Not so. Can you make ramen noodles on the stove? Then you can make pickles. Err, with a few more ingredients, and a bit more chopping (unless you buy pre-cut!). It’s just a matter of time. Stewing time. Not stove time.

So to recap, this simple encasement of bovine-approved greenery, pulverized and fermented legumes, luscious Aztecan fertility fruit, and mouth-puckeringly preserved roots is not food you dream about cheese pizza while eating. O-ho no. Before taking your first bite, behold its glory and say “I am going to eat the heck out of this puppy!” I know I did!

But, you know, with small, slow bites. Mindful eating, people.


Crave-ably Healthy Veggie Wrap

1 whole wheat lavash
1 handful fresh baby spinach leaves (~1/2 cup)
½ cup hummus
¼ avocado, sliced
½ cup sprouts
3 oz. firm tofu, thinly sliced (optional)
1 small handful pickled red onions & carrots (see recipe below)

  1. Lay out the lavash in a hamburger orientation. (As opposed to hot dog, naturally.) Down the center of the lavash lay out a flat layer of spinach leaves. Over the spinach, spread the hummus in an even layer, then top it with the avocado slices. Spread the sprouts along the side of the hummus. Lay the tofu over the top, if using. Top everything with the red onions and carrots. Roll up the wrap and enjoy! 
Note: I don't recommend cutting the wrap in half, and it tends to lead to more spillage than it's worth.

Quick Pickled Onions & Carrots

adapted from Simply Recipes

1 large or 2 small red onions, julienned
3 large carrots, julienned
½ cup red wine vinegar
½ cup white distilled vinegar
½ cup sugar
½ cup water
1 tsp salt
1 bay leaf

  1. In a medium saucepan, heat the vinegars, sugar, water, and salt over medium heat until the salt and sugar has fully dissolved. Remove the pan from the heat and set it aside to cool.
  2. Place the onions, carrots, and bay leaf in a seal-able container and pour over the cooled liquid. The onions and carrots should be fully submerged in the liquid. Cover the container and refrigerate at least 8 hours, and up to a week. The onions and carrots will soak up more pickle flavor and break down in texture the longer they marinate.

Sunday, November 13, 2011

Pumpkin Ravioli Surprise

My Ode To Dough:


Here’s how my crazy brain works: rather than a measure of your skill in the kitchen, I think a recipe’s degree of difficulty is more like your investment in making it from scratch vs. just buying it.  Muffins, pancakes, and cookies are totally worth making at home because they’re easy and taste a thousand times better.  But a rustic ciabatta loaf?  I can hear my mom in the back of my mind saying “why go through all that work when you can just find a good bakery where they make it better than you anyway?”  Because let’s face it - bread is hard.  Your yeasts can be temperamental and sluggish.  Your gluten can be obstinate and unpliable. Your environment can cause changes in moisture absorption and and rising times.  But you don’t have to be a bread-whisperer or anything.  It’s a matter of practice in some cases - like getting a feel for working the dough, and knowledge in others - like learning that when you use water that’s too warm you kill all your yeasts.  Oops!

So why do I waste my time?  Because it’s fun and rewarding!  Because I like knowing there’s nothing in my bread except flour, water, salt, and yeast.  And because I don’t always have access to a good bakery!  So while I won’t say bread isn’t an undertaking, I will say if it’s something that interests you, you should give it a go.  It takes time to perfect, but not necessarily prone to disasters of epic proportions. The trick is finding someone to walk you through it.  This is where Nicole of the wonderful Pinch my Salt comes in.  She’s posted a plethora of bread recipes, always with great step by step pictorial instructions and lessons to learn.  Essentially, she makes bread baking a whole heckofalot less scary.

Back in September Nicole posted a day by day set of instructions for how to create your own wild yeast sourdough starter.  From scratch!  Using just water, flour, and a little pineapple juice to start.  In case you’re wondering the pineapple juice is used because the acidity helps the right kind of bacteria to grow, which is what the wild yeasts come to the party to eat.  Err, or something like that...?


I love sourdough bread.  I love that tangy, sour flavor.  I love the smell.  And Husband has a special soft spot for it too.  We’re both Bay Area natives, after all.  It’s in our blood or something.  But sourdough starters scared me.  Sent me for the hills.  Arms flailing.  All that. Even after I conquered my fear of yeast, this blob of gloppy mess gave me pause.  But there was something about the bubbles and the way the blob would climb up the jar a little more each day.  It was like a pet, but one you wouldn’t feel too bad about accidentally killing.  Tamagotchi!  And on top of that, Linda from Salty Seattle was posting her usual food porn featuring sourdough recipe (linguine with chocolate lamb ragu? omg!) after sourdough recipe (sourdough pumpkin beignets with pork belly? Hello!).  Those two trouble-making ladies have since gotten together and declared this month in the name of Doughvember.  

Good thing I had already decided to take the plunge and my starter was already under way!  I am now the proud owner/parent of my very own sourdough starter.  I grew/birthed it myself!  It did take a couple of tries, and it was touch and go there for awhile, but I think we’ve ultimately reached a delicious understanding.  I feed it - it feeds me.  Here are some lessons I learned in my failed and almost failed attempts (most of it either wisdom directly from Nicole or online resources pointed out to me by Nicole - she rocks!):

  • It’s easier to create a starter with whole wheat flour instead of refined flour because the sugars in the whole wheat provide more food for the yeasts to feed off of.
  • If your starter is a bit sluggish at the get-go, it can be helpful to stir it once a day or so, just to redistribute stuff.
  • After day 5 or so, when you’re feeding it twice a day, it helps to move to a scale.  Measure 8 oz. of starter and mix in 4 oz. flour and 4 oz. water. And make sure your water isn’t too hot or cold or you’ll kill/scare away your yeasts.
  • When you’re ready to move your starter to the fridge, cover it in plastic wrap with a few holes poked in it.  That way the yeasts can breathe, but the blob won’t dry out.
  • When adding your starter to recipes, 1 cup of starter can replace approximately 1 cup of flour and ½ cup of water in the recipe.


My favorite recipe to use my extra sourdough starter so far has been these sourdough crumpets from Chocolate & Zucchini.  They take literally 10 minutes to make, start to finish (7 minutes of that is letting your pan heat up), making them invaluable for a quick weeknight meal accompaniment.  It helps that they’re flipping delicious too - like a tangy, savory pancake.  I’ve also tried throwing a little starter in pumpkin muffins and cream cheese biscuits, to great success.  It really just adds a hint of something extra.  


I ended up making Salty Seattle’s sourdough pasta recipe.  I would recommend halving it, unless you truly have an army to feed.  Half was plenty for the chocolate lamb ragu I made (recipe coming!), and after making pumpkin ravioli for dinner last night, I still have a small dough left for a rainy day.  I wasn’t going to blog the ravioli.  It was an experiment.  I didn’t even really expect it to turn out edible.  But thank goodness it did because I had no backup dinner standing by, and now I can tell you all about the magic of egg yolks inside pasta dumplings.  Oh yes, these raviolis featured a raw egg yolk placed in the center of a filling with pumpkin, pistachios, sage, shallots, garlic, and Parmesan cheese.  Every good thing, right?  It was like hiding all the magic of a poached egg inside for a nice surprise.  I cooked the ravioli long enough for the yolk to cook to about the point of a poached egg.  It’s hard to judge because you don’t know how done it is until you eat it, right? I did a test run before I cooked the rest, just to be sure.  I would recommend it.  But one fork-pierce and out runs the yolky goodness!  It’s heaven.  Pure heaven.  Who needs marinara?  The pumpkin and pistachio filling was a sweet accompaniment that actually paired wonderfully with the richness of the egg and the slight tang of the pasta dough (remember, it’s sour!).

So while my lame ineptitude prevented me from having the foresight to get a money shot of these babies - the one where you see yolk running from the center like an erupting volcano - I did remember to write down the method to my madness, so you can give it a go and see the insanity for yourself.  You’re welcome.  
Doughvember, for the win!

PS: Why yes, I am addicted to instagram. Feel free to follow me at bananasforbourbon!


Pumpkin Ravioli (with an egg yolk - surprise!)

Makes 8 raviolis (these are rich, so I would say that’s more than 2 portions)

~ ¼ batch of this recipe for sourdough pasta dough
1 large shallot, finely chopped
4 cloves of garlic, minced
6-7 leaves of sage, minced
1 TB olive oil
pinch of kosher salt
¼ tsp ground black pepper
¼ tsp ground nutmeg
½ cup white wine
1 cup pumpkin puree
¼ cup pistachios, lightly toasted and cooled
¼ cup Parmesan cheese
lemon juice (optional)
8 egg yolks

  1. In a small saucepan, heat the olive oil over medium heat.  Add the shallots with a pinch of salt and saute until softened, about 5 minutes. Add the garlic and cook for a minute or two to soften.  Add the pepper and nutmeg and stir to incorporate. Add the wine and bring it to a simmer.  Once the wine has reduced by about half, or a little more, remove it from the heat and let it cool.
  2. In a food processor, finely grind the pistachios.  Add the pumpkin puree, Parmesan cheese, and the cooked shallot mixture.  Process until the mixture is smooth.  Adjust the seasoning to your taste.  Add a little lemon juice if it needs some brightness.  Add the mixture to a ziplock bag (or pastry bag if you want to be fancy), and cut the corner so you can pipe it.
  3. Roll out the pasta dough into very thin sheets.  I don’t have a roller, so I did it by hand.  You’ll need about a 4 inch square to work with.  Pipe the filling in a circle, leaving about an inch-wide circle of open space in the middle (about the size of your egg yolk).  I didn’t measure, but I’d say it was about 1-2 TB of filling.  Basically, you want about ½ inch of thickness and ½ inch of height for the filling, or about the level with the yolk.  Carefully place an egg yolk in the middle of the filling.  Place a sheet of dough on top and gently press around the filling, sealing it as tightly as possible.  Then press a little firmer to make sure the dough it good and sealed.  Cut out the ravioli with a glass, a biscuit cutter, or just a knife.  I opted for about ¼ - ½ inch between the edge and the filling.  Repeat this for as many ravioli as you want to make.
  4. In a pot of gently simmering water, add the ravioli.  Make sure the water doesn’t boil too hard, or you raviolis could fall apart, and make sure it’s not set too low or once you add them, it’ll take too long to come back to a boil.  Boil the ravioli for 4-5 minutes, depending on how runny you like your yolks.  
  5. Remove the ravioli from the water, and add them to whatever sauce floats your boat.  I did a simple olive oil drizzle (with good olive oil), since the yolks are essentially all the sauce you need, but I’m sure tossing them with some browned butter and sage would be divine too.

Sunday, August 14, 2011

Sautéed Swiss Chard and Mushrooms with Chicken Sausage


Life is crazy. Life is a whirlwind. Confession: I am a homebody. A shut-in at heart, though not in practice. I like spending my evenings quietly with my husband and my dog, my days in simple, solitary tasks that allow for personal reflection. But I’m a complicated woman. Local breweries throw parties, my favorite restaurant tempts me with wildly amazing new burgers (a lobster-crab patty and a wagyu beef patty together, and that was only half of what all came on it! Words cannot describe...), wineries want me to come pickup the wine I’ve ordered while pouring me glass after glass of their wares, family visits and the sights must be shown. People I know inexplicably want my company more often than I’m able to give it. I can’t say no to any of it. I’ve been having fun. Why is fun so durn tiring? It’s all I can do to bake a batch of cupcakes to research recipes and flavor combinations for my nephew’s second birthday cake. That’s happening. Remember last years? I’m really excited to share it with you when the time is right. Oh, and did I mention I’m changing jobs? Again. I’m scared. It’s new and challenging, but also old and familiar. And completely crazy and unexpected. Hopefully it’s the right decision. We never know until we know, right? So life is a whirlwind. But it’s also full of love, fun, and opportunity. It’s exciting and engaging. And most importantly, there are cupcakes.

With all the libation partakage, face-stuffing, and uncharacteristic socialbility, it can be hard to maintain one’s girlish figure. It’s a constant...I want to say battle, but that’s not the right word. I’m not at war with my body. It’s more like I need to keep constant vigilance! I’m at war with my fatty fatty fat fat. If I let my guard down, it’ll sneak in and squat. Not cool. So even though I despise waking up at 5am to fit in a decent workout before work, I despise forgoing drinks and dessert far more. Even though some days I want to quit my run at mile 3, I push on to mile 5 and follow up with a couple sets of burpees and jack-knives because I want to have a good time out with my friends, and not feel guilty if I don’t order a shamefully made salad that will ultimately leave me feeling hostile towards the establishment. Burpees are the bane of my existence. My motivation is my lifestyle. I like it. I want to keep doing what I’m doing. But I like my body too. I’m healthy. I feel good. My clothes fit. It’s all about the choices we make and the priorities we set, right? Finding that balance. 


One way I offset my weekend escapades is to cook as deliciously healthy as possible during the week. You know, cook vegetables. The stuff most restaurants seem to stubbornly shy away from except in the most fleeting capacity. I get so disappointed when a dish boasts of a protein and starchy side resting on a bed of, say, Swiss chard, and the reality of what’s presented before me is a mere morsel compared to the gluttony of the other components. Proportions people! How about a whole big bunch of Swiss chard? And fungus is uber-healthy. Lots of vitamins and fiber and not much else. And ingestion is supposed to help prevents cancers and other lethalities. Not to mention mushrooms are a huge source of “umami”. Which, since I’m not Japanese and most of my vocabulary is construed as some form of English, I tend to refer to as “earthy”. Wonderfully earthy. So let’s throw a heap of mushrooms in there too. And how about some protein? It doesn’t need to be a giant hunk of meat on top. It can be the flavor base of the dish. The thing that makes it deceptively filling. And if your grocery store happens to sell a fantastic chicken and mushroom sausage behind the meat counter? Well I think you should tell Mr. Meat Counter Man to pack you up a couple of links!

As a quick weeknight meal, this simple saute of Swiss chard and mushrooms and chicken sausage was a pleasant surprise. One of those meals I didn’t plan, didn’t expect to be anything exceptional, and upon tasting, immediately ran to write down the recipe while it was still fresh in my head so I could make it again and again. One of those meals Husband made lots of quiet grunting noises while eating between expressions of fondness for the dish. It was, unfortunately, not long for this world with such ardent admiration. But I snapped a pic or two and here I am to share it with you.

Besides coming together fast, it’s also very adaptable to what you have in the fridge. I think Swiss chard works best, but collards or kale would do. Cremini mushrooms are a bit more rich in flavor, but button mushrooms are mighty tasty too. I love the flavor of dry sherry and mushrooms, but a dry white wine would be a lovely substitution. No sausage on hand, but a crisper drawer full of bacon? Well it’s not quite the same, but I’m sure it would still be pretty dang tasty. Whatever dry or fresh herbs that tickle your fancy would be nice, but thyme and tarragon fit that bill for me. Freshly squeezed orange juice was all the sweetness and acidity I needed, but a squeeze of lemon juice and a touch of honey could be just the thing. Just promise me one thing. If you do use Swiss chard, don’t throw away those bright and delectable stems! Their color not only adds an enticing hue to the dish, but you paid for a bunch of chard. Why are you going to throw half of it away? Let’s practice root to leaf practices here, people. It’s like celery. It just needs some time and love, but you’ll be glad you did.


Sauteed Swiss Chard and Mushrooms with Chicken Sausage

Makes about 6 servings

1 lb. fresh chicken sausage (I used a chicken mushroom), or any preferred sausage
1 yellow onion, chopped
5 cloves garlic, minced
1 bunch Swiss chard, stems chopped and leaves cut into ribbons
1 lb. cremini mushrooms, sliced
1 tsp dried thyme
½ tsp dried tarragon
¼ tsp freshly ground black pepper
1 cup dry sherry (or wine)
¼ cup fresh orange juice (~ ½ a juicy orange)
kosher salt to taste
2 TB olive oil, divided

  1. In a large skillet (preferably cast iron), heat 1 TB of the olive oil over medium-high heat. Once it is good and hot, crumble the fresh sausage evenly into the pan and let it sit undisturbed for a bit to brown. Flip the sausage for the other side to brown, and using a spatula or wooden spoon, break up any large chunks that are sticking together. Once the sausage is browned and cooked, remove it from the pan to a plate and set aside.
  2. Reduce the heat to medium, and if it is needed, add the second TB of olive oil. Add the onion and a pinch of salt and saute until it is soft and translucent, about 3 minutes. Add the Swiss chard stems and cook for another 3-5 minutes, until they have begun to soften. Add the garlic and cook for another minute, until it is softened and aromatic. (This is around the time people in your household will comment on how good it smells)
  3. Add the mushrooms with another pinch of salt, as well as the thyme, tarragon, and black pepper. Cook the mixture until the mushrooms have given off their water, shrunken, and the water has mostly cooked off. Add the sherry to deglaze the pan, scraping up any browned bits that have formed on the bottom of the pan. Let the mixture simmer for a minute so the sherry can slightly reduce and concentrate. Add the Swiss chard leaves and the orange juice and cook until the leaves have wilted and softened, about 5 minutes.
  4. Add the sausage, and any juices that have pooled on the plate, back to the pan and simmer for a couple more minutes so the flavors can fully marry together.

Wednesday, May 18, 2011

Grilled Shaved Asparagus Pizza


Pardon the bandwagon jumping, I hear it’s great for toning your butt. I’m going to be yet another food blogger talking about shaved asparagus this week. It’s everywhere! If you’ve tried it, you’ll know why – because it’s awesome! I actually shaved the asparagus in question almost two weeks ago, and was only completely copying inspired by one food blog (a certain Kitchen we’re all completely Smitten with) in particular. My dish turned out great. Figured I’d blog it (which unfortunately rates below painting guest rooms and attending anniversary parties at local breweries on the priority scale). Then boom, come Monday morning, shaved-asparagus-palooza! Dang! But none of that matters. What matters is the utter deliciousness of what I made.

That’s not the only bandwagon I jumped on recently. A few weeks ago Husband and I joined the scores of other bloggers who have made the same big, life-changing decision of late. That’s right...we joined a CSA*! Every other week we’ll be getting a big box of fresh from the local farm organic produce. The “get what you get” nature of a CSA gave me pause when we first considered joining a couple of years ago. Another way my confidence in my cooking has progressed – I don’t need a recipe to follow and an iron-clad shopping list to buy from every week. I’m now comfortable with pulling a head of romanesco cauliflower out of a box, knowing I’ve never cooked with it before. In the end produce is produce. Sure, certain flavors and preparations work better than others, but ultimately, if it’s fresh, it’s going to be delicious. And if I’m ever really stumped, I’ll channel my grandmother and throw it into a pot of broth and add things until it is some kind of delicious soup. I’m glad we waited to join. A few years ago, I might have met the bi-weekly pickup with stress and trepidation of how to consume everything in a delicious way before it expired. Now I wake up excited for “CSA pickup day”! It helps that my love of fresh produce has grown to obsessive proportions.

It’s a good thing Husband doesn’t mind being married to a woman whose idea of evening conversation is naming off the different possibilities for dishes using CSA ingredients…

I’m happy to report my first CSA box experience had very little stumpage. Quite the opposite, in fact. I pulled out a beautiful bushel of asparagus and did a little dance (I hope no one was watching…) because I knew exactly how I wanted to use it. Here’s how it went down:
  1. Husband had requested I make grilled pizza of some kind.
  2. The pizza dough recipe I wanted to try required overnight resting, so there were several balls of pizza dough ready and waiting in the fridge.
  3. I had bought some Iberico cheese on a whim at Trader Joe’s. I wanted to try something Spanish and it had a nice soft, yet sturdy feel to it.
  4. I had just read about a shaved asparagus salad that sounded divine. 

When I saw that asparagus, everything clicked. Husband might like his bbq chicken pizzas, but he was just going to have to go without. Shaved.Asparagus.Salad.Grilled.Pizza. It called to me. “If you grill it, deliciousness will come…”

Did I mention I made garlic-infused olive oil, then used the oil to brush the pizza dough before it went on the grill, and used the resulting garlic confit on top of the pizza, hidden beneath the creamy melted cheese? That happened.

I also put raw asparagus on a pizza that only cooked for about 2 minutes. Not quite raw, but definitely not cooked. It was sweet! Who knew raw asparagus had a mild sweetness to it? After I had shaved each asparagus spear down to a nub with my vegetable peeler, I bit off that last nubby bit before the woody stem. It was so crunchy and succulent, I knew the salad by itself, which I simply tossed with lemon juice and red pepper flakes, would be fantastic.

The farm fresh asparagus made an interesting and discernable difference. All asparagus spears get woody and tough at the bottom of the stem, but this asparagus was so tender that quite a few spears weren’t woody at all. I was able to use all but the tiniest of partial inches off the bottom. And I have been known to sacrifice almost half a stalk out of fear of the woody end.

I was equally pleased with how my pizza dough turned out. Some extra hydration and the overnight resting allowed the whole wheat flour to properly mellow along with it’s already mellow cousin, AP flour. When I went to start shaping it, it practically melted over my fists and stretched beautifully with just the slighted tug. More relaxed gluten I have never seen. I stretched it super thin, so the quick, high heat from the grill would give it a charred, crispy flatbread consistency. The earthy flavors from char and whole wheat went beautifully with the Iberico and Parmesan cheeses.

The Iberico cheese was a new ingredient to me, and I was so happy with it. It was sturdy enough to grate, yet creamy enough to pair nicely with the Parmesan. Sometimes creamy cheeses can be a little bland in pizza applications. Not this one. I wouldn’t say it’s pungent, but it definitely has a mild grassy earthiness that was a perfect complement to the vegetal asparagus. Milder than goat cheese, but stronger than mozzarella. I think I’m in love.

It sure sounds like a lot of steps – making dough, infusing oil, peeling individual asparagus spears, etc. But that’s the great thing about grilled pizza – it comes together really fast! The actual cook time is almost negligible. “Infusing” something sounds like a lot of work, but really you just throw some garlic cloves in some oil over low heat and mostly forget about it for a few minutes (like, say, while you’re prepping the asparagus). And of course, you can always buy pizza dough. Trader Joe’s even has a wheat option! Because if you’re like me, you balk at eating white breads, yet inexplicably have no qualms with using white flour in cakes, pies, muffins, and every other dessert application. Um, moderation?

This pizza has, after just one go, already carved a special place in my mouth stomach heart. It was the perfect way to celebrate the end of this highly unusual rainy season. [At least, it would have been, had the rain not inexplicably come back yesterday.] Dough chewy and blistered, cheeses creamy and walnutty, and a bright, crunchy salad on top to make you feel like you’re eating a real meal. And let’s not forget the occasional bite of sweet, mellow garlic. Oh yes, this was worth every bounce of my happy dance.

Sorry for the pictures, featuring what can only be described as limp pizza. In my rush to get the leftover pizza put away and out of the reach of a certain cohabitating pizza-monster, I may have stacked and smushed the slices into a Tupperware container, forever ruining their structural integrity. Don’t be like me. Just wrap it in foil.


*Did I get ya!? Have you noticed all the bloggers are pregnant right now? Not gonna lie, it’s weirding me out.


Grilled Shaved Asparagus Pizza
adapted from Smitten Kitchen

Makes one 10-12” pizza

1 portion of pizza dough (see recipe below – Note: it’s an overnight process!)
¼ cup olive oil
6 cloves garlic
1 bunch asparagus (~1 lb.)
Juice of ½ lemon (~ 1 TB)
¼ tsp salt
¼ tsp freshly ground black pepper
¼ tsp red pepper flakes
½ cup freshly grated parmesan cheese
½ cup freshly grated Iberico cheese (any soft cheese like mozzarella, goat, or feta will do)

  1. Preheat your grill to medium heat.
  2. In a small saucepan over the lowest heat you can manage on your stove, combine the olive oil and garlic cloves. Let this mixture stew or a good 20 minutes so the flavors can marry. Check on it every few minutes, giving the pan a good swirl, to ensure that the garlic doesn’t brown. We want the flavors to cook out, but not sauté. When it is done to your liking, remove the pan from the heat and set aside to cool.
  3. Once the oil is cooled, fish out the garlic cloves (you’ve made garlic confit!). Either chop them into small pieces, or leave them whole. Those babies are going on the pizza. I opted for chopped for more garlic coverage. 
  4. Using a vegetable peeler, shave the asparagus stalks into beautiful ribbons (or hack into ribbon-like bits, if you’re me). You can use the woody ends as a handle and discard it once you’ve shaved down to the nub. In a medium bowl, combine the asparagus ribbons, lemon juice, salt, pepper, and red pepper flakes. Toss to combine.
  5. On a pizza peel or large cutting board, stretch your pizza dough to your desired shape and thickness. I did most of my dough stretching on my fists, letting gravity do the work. The gluten in the dough was so relaxed, that it pretty much melted over my hands. I also opted for a very thin dough, since the crispy texture you get from the grill goes best with a thin crust.
  6. From here on out, things happen fast, so make sure you have everything prepped and ready to go – tongs, plates, brushes, etc. at the ready.
  7. Brush the shaped dough with the garlic oil. Carefully (it’s going to stretch, it’s ok, it doesn’t have to be pretty) lay the pizza dough with the oiled side down on the grill. While that side cooks, brush the top of the dough with more garlic oil. Using tongs, peak under the dough after about 2 minutes to check doneness. You want some nice char marks, but you don’t want it to burn. When it’s ready, flip the dough over. Working quickly because this is going to cook fast, sprinkle the garlic over the dough. Then sprinkle the parmesan Iberico cheeses. Then top with as much of the asparagus as you think fits nicely without too much heaping (I heaped quite a bit because I’m like that). Close the lid on the grill and let it cook for 2 minutes. Check the pizza to see if the cheese has melted. If it hasn’t, keep cooking it covered until it melts. Once it’s melted and the underside of the dough is nicely charred, remove it from the grill. 
  8. Slice and enjoy!

Note: You can alternatively bake this pizza on a baking stone or sheet pan in a 450 degree oven.

Partial Wheat Pizza Dough
adapted from 101 Cookbooks

Makes 6 portions

2 ½ cups white whole wheat flour
2 cus bread flour
1 tsp instant yeast
1 ¾ tsp kosher salt
¼ cup olive oil
1 ¾ - 2 cups ice cold water
  1. In the bowl of a stand mixer fitted with the paddle attachment, stir together the flours, salt, and yeast on the slowest setting until mixed. Stream in the oil, and then 1 ¾ cups of the cold water. Switch to the dough hook and mix on medium speed. The dough should clear the sides of the bowl but stick to the bottom of the bowl. If it is too dry, add the remaining water, a tablespoon or so at a time until it sticks appropriately. Continue mixing for 5 to 7 minutes, or until the dough is smooth and sticky, and a small piece passes the window pane test (to tell if the gluten has fully developed). The finished dough will be springy, elastic, and sticky, but not just tacky.
  2. Transfer the dough to a floured countertop, and portion into 6 equal pieces (I used a scale because I’m anal like that). Mold each into a ball, creating some nice surface tension (Peter Reinhart and I are all about surface tension). Rub each ball with olive oil and seal into ziplock bags. Refrigerate overnight (or up to a few days). Alternatively, you can freeze the dough balls at this point – just thaw them in the refrigerator when you’re ready to use them.
  3. The next day remove the desired number of dough balls from the refrigerator at least 1 hour before making the pizza (I’d suggest 2 unless it’s a hot day). Leave them in their plastic bags, so they don’t dry out. I like to turn my oven on for literally a minute, then turn it off and put the dough inside. It’s slightly warmer than room temperature, so they wake up nicely.
  4. When you’re ready to shape the dough, on a floured surface, press it gently with your fingers into a round disk. Balance the disk on your fists and gently work the dough apart as evenly as possible. You can also use your hands to stretch it. If the dough is not cooperating, it means the gluten isn’t relaxed enough, and letting it rest for 15-20 minutes should help.
  5. Bake in a 450 degree oven or grill on the barbecue with desired toppings until the crust is crisp and nicely colored.
Note: You can use all AP flour, but you'll want to reduce the water to 1 ¾ cups.

Sunday, April 17, 2011

Roasted Garlic Cauliflower Soup


A moment to sit in quiet contemplation and reflection.  What a concept.  Feels like it's been, oh, a month since I've last had the pleasure.  And what do you know?  It's been about that long since my last post.  Spring always seems to be a busy time.  With sunshine and flowers comes holidays, weddings, festivals, parties, and every other fun thing that is supposed to get us through the winter.  Of course, having the means once again to participate the these festivities helps immensely.  I finally found employment, you see.  Ah, the relief of a steady paycheck again.  It took lots of sorting out, getting back into the swing of things.  Not that the work hours was an adjustment,  job hunting was pretty much a full-time gig.  Rather, my life was put on hold for almost a year.  I didn't realize how much until I was employed again.  I can now attend family functions and spring festivals.  I can go to the mall when my belt is hanging together by a thread, or I need shoes fit for a nice evening out.  I can have nice evenings out!  Free time didn't come from my lack of 9 to 5 commitment so much as my self-imposed house arrest weekend after weekend, because let's face it, being social costs money!  I've been reconnecting with some good people who were very over due for some Julie time, getting the household in order, and mostly just running around like a crazy person.  Trying to fit a square day into a round schedule.  Oh, the joys of rejoining society!  For reals, it's great to have my life back.  Unfortunately, things aren't yet sorted enough that I can promise a weekly blog update like I've so enjoyed in the past.  But I'm still in the kitchen, cooking and baking away.  Still writing down my recipes, celebrating my successes and failures.   


This recipe is from a few weeks ago, when the weather was darn right cold and a thick, creamy soup with big bold flavors was needed for comfort.  But of course you know I don't do real big creamy soups.  That's why this soup is so great - it's thick and silky, but still light.  It has a rich, sweet flavor, but you won't feel gross after eating it.  That's just how I roll.  Plus, wait till you get a load of the twist!

This soup is all about the garlic.  6 heads, in fact.  Roasted until they are all mild sweetness, their spicy pungency a victim of the wondrous sugar caramelization process.  It started off a typical Julie soup.  I threw in the usual aromatics, herbs, and spices.  I used cauliflower to lend a sweet and slightly vege-floral flavor (yaknowadimean?) and silky texture.  And of course what's soup without wine and stock?  But I wasn't quite satisfied.   As I said, I was craving comfort - that stick to your ribs kind of soup - but I didn't want it to actually stick to my ribs.  Substance, I craved.  I rummaged in the pantry and pulled out some cashews.  Then I threw them in the food processor...and turned it on.  After making enough racket to send my dog fleeing from the room, the nuts finally resigned to their fate and melted to my will...for nut butter.  Cashew nut butter.  I stirred it into the soup, and all was right in the world.  There was substance, there was sweetness, and there was oh so much lovely roasted garlic.

Husband is really not a soup person.  Especially pureed soups.  Give him a bowl of stew or chili and he's happy, but puree up some vegetables and he doesn't exactly shoot off fireworks.  But he loved this soup.  He ate bowls and bowls of it until it was all gone and we were both sad.  I should make it again.  Or at least go eat dinner.  But I'll be back, hopefully very soon!


In the mood for a more seasonally-appropriate soup?  You can re-acquaint yourself with my very first post.  Mushrooms and asparagus, such a magical combination.


 Roasted Garlic Cauliflower Soup

1 head cauliflower, roughly chopped
6 heads garlic, roasted
1 medium onion, chopped
2 shallots, chopped (~1/4 cup)
4-5 stalks celery, chopped (~1 cup)
1 TB olive oil
½ tsp freshly ground black pepper
½ tsp dried thyme
¼ tsp celery salt
pinch of cayenne pepper
1 cup dry white wine
1 cup whole cashews
5-6 cups chicken stock
fresh chives, chopped finely, for garnish
  1. Chop the top off each head of garlic and drizzle with olive oil. Wrap them in foil and roast in a 400 degree oven for about an hour, or until softened. Let cool.
  2. In a food processor, grind the cashews until a uniformly-pureed cashew butter forms. It will take a few minutes. Set aside.
  3. In a dutch oven over medium heat, saute the onion, shallots, and celery in the olive oil until softened, about 5 minutes. Add the black pepper, thyme, celery salt, and cayenne pepper, and cook for 1 minute, until fragrant.
  4. Add the wine to deglaze the pan, scrapping up any browned bits. Simmer the mixture for a few minutes, until the wine has reduced by about half. Add the cashew butter and stir until it is incorporated and the mixture is smooth. Add the chicken stock and cauliflower, bring the mixture back to a simmer and cook at a gentle simmer for about 30 minutes, or until the cauliflower is tender and soft.
  5. Remove the soup from the heat and add the roasted garlic, squeezing out each clove like a tube of toothpaste. Using an immersion blender, puree the soup. Garnish with the chives.


Edit for SoupaPalooza 2012: Come join SoupaPalooza at TidyMom and Dine and Dish sponsored by KitchenAid, Red Star Yeast and Le Creuset

Monday, February 21, 2011

Pasta with Roasted Spring Vegetables in Cambozola Sauce


Let’s start with the giveaway winner. Congratulations...

...drum-rolling...


 ...Kelly! You win the CSN Stores gift certificate! Congratulations! And who says the person who enters 5 minutes after you post it won’t win? Not I. I’ll be sending your email address to my contact with the company. Stay tuned!


When I researched the best ways to start an exercise plan - what was now all those moons ago - one thing I always saw mentioned was goal setting. Most “professionals” agree that it is important to set both long term and short term goals, the idea being to motivate yourself early with small accomplishments, and to keep the motivation going for the long term. By accomplishing your smaller short term goals, you’ll build up enough muscle, endurance, discipline, etc. to complete your long term goals. Makes sense. And for some people, like Husband, it’s invaluable advice. Results can be slow to show on the scale or on our bodies, but when you have a cold, hard accomplishment under your belt, that can be just the thing to keep you going. Me? I make goals, sure. But I never took much time to structure them or really give much thought to them. I was so overweight that the scale provided me with all the motivation I needed pretty early on. I guess that’s one advantage to to being obese vs. just overweight? Heh.

I’ve been thinking more about goals lately, and I’ve come to realize it’s kind of like the approach you take when applying to colleges. When deciding where to apply you have the schools you’ll probably get into, and probably end up going to. Those are the realistic schools that are “the middle”. But what if by some catastrophe, you don’t get into any of those middle schools? The probability is low, sure, but you don’t want to be caught with no acceptances. Catastrophe indeed! So you apply to a “safe” school or two - schools you know for sure you’ll get into and wouldn’t be completely miserable attending. Even better is when your safe school has rolling admissions. Having that acceptance under your belt does wonders for your confidence when applying to the better schools. And then, of course, you have to apply to a few schools - the ivy leagues - that you don’t seriously think you’ll get into, and never really considered attending, but figured it’d be fun to try on the off chance that by some miracle of paperwork error, they let you in.

What does any of that have to do with goal setting? Bear with me. As I’m writing this, I’ve just come from a local wine-maker’s house. Ever had a pot luck luncheon with a wine-maker? Let’s just say my glass was never allowed to go empty. Let’s also say it was very good wine, and it seemed to evaporate from my glass as soon as wine was poured in.

I expect I’ll be getting an email from my editor sister tomorrow with a few dozen corrections and even more questions of clarification of what the heck I’m talking about.

But I do have a point! And it’s that goal setting should be like applying to college. Shoot for the stars, hope to get there, but at the same time be practical and expect for something a bit closer to earth. When I first started running, I couldn’t even run a mile. So that was my first goal. Run a mile. Did that. Then my goal was to run a mile under 14 minutes. Then 12. Then run 2 miles. Then 3. When I first started out, my long term goal was to be able to run a 5K (aka: 3.1 miles). It sounded so far, but I was confident I could reach it with a little work. And I was right! My next long term goal was a 10K (aka: 6.2 miles). I started getting my runs to 3.5 miles, then 4, etc., etc.. The thought of running over 6 miles sounded crazy, and I wasn’t sure I’d ever get there, but I figured I’d try. And with a little more work, I did it! I just kept pushing back my goals, and eventually meeting them - both short term and long. They were like getting into my safe schools right away and my middle schools eventually. All the while I was secretly shooting for the stars.

I was at the gym once - gosh, maybe almost a year ago now. A neighbor who had seen me running around the area and being a regular at the gym asked me if I was training for a marathon. I scoffed. A marathon!? At that point I wasn’t yet able to run a 10K let alone several 10Ks. I still don’t think I’ll ever be crazy enough to run a full marathon (aka: 26.2 miles). Just can’t imagine doing that to my poor, poor body. But. In just a few weeks, I’ll be running my very first race. A half marathon, no less! Aka: 13.1 miles. I’ve never actually run that far before, but I’m confident I can finish. That confidence actually blows my mind. This time last year I was scoffing at the very idea of running a half marathon, and now I’m actually going to do it. I feel like I just go into Stanford!


I’m a little embarrassed to admit this, but I am far too sauced to think of a not-so-witty segue into this dish. Besides mentioning that the recipe is basically a sauce. So there’s that. Not my best work, I know.

A Facebook friend of mine has been mentioning her current obsession with paninis, and especially her complete obsession with cambozola cheese on these paninis. Always one willing to talk food, I commented on her status, asking what was this cambozola cheese and why was it so special? And then proceeded to Google the stuff, since I’m impatient and a dork. And let’s just say it went downhill from there. Cambozola cheese is described as a blue brie, and that’s exactly how I would describe it too. It’s a triple cream cheese, so it’s rich and creamy like brie, but it’s also made from the blue mold of other blue cheeses, so it does have what I like to call, a bit of stinkiness to it. Who doesn’t like a beautiful marriage of a creamy, stinky cheese?

On a happy, splurging shopping fest last week I picked up a wedge of the cambozola, along with some Brussels sprouts and asparagus. I thought a good cheese with two of my favorite vegetables would be a good way to celebrate my finally landing a job. No biggie. I start tomorrow. I’m breezy.

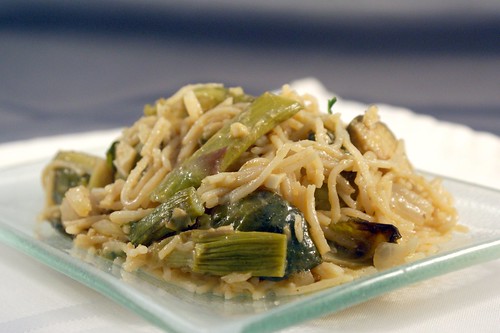
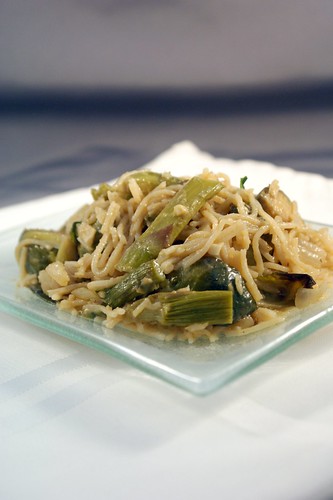
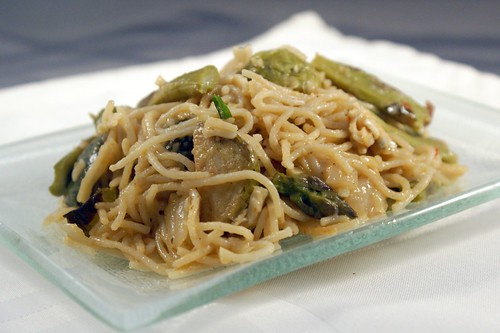
Who knows what possesses me to cook the things that I cook, but I thought the cheese would go beautifully in a pasta sauce. The creaminess added a wonderful, velvety texture, and the stinkiness added a beautiful dimension to the dish. I could definitely taste it, but it sat in the background and sang me a light tune. Husband came home and tried this pasta, and he of the not very sensitive taste buds concurred. He loved how the flavor came through, and he’s not even big into the stinky cheeses. Another thing I appreciated was that while this sauce is completely heavy on flavor, as you can see from the pictures, it’s not very saucy. There is no puddle of creamy liquid that’s dripped off the pasta to rest at the bottom of the plate. All the sauce is stuck firmly to the food, as it should be. In that sense, it doesn’t feel like a heavily sauced dish. But the flavor is so present, you don’t miss it. By all means, if you like a looser sauce, go ahead and add some cream or milk or chicken broth. Whatever your heart desires. My heart desired this sauce as is, and so did my taste buds.

Think you don’t like Brussels sprouts and asparagus? Ever tried roasting it? Brussels sprouts can be bitter, but roasting them for a long time under high heat with some balsamic vinegar brings out their hidden sugars and really makes them something special. I would highly recommend giving it a try. But if you’re not into it, any vegetable will do. You could throw in some artichoke hearts and peas, or broccoli would be delicious. I used whole wheat pasta, an angel hair.  You could use a regular fusilli.  That’s the great thing about cooking - just tweak it till you love it!


Pasta with Roasted Vegetables in Cambozola Sauce

Makes ~6-8 servings

½ lb. whole wheat pasta (I used angel hair)
1 ½ lb. Brussels sprouts, trimmed and quartered
½ lb. asparagus, trimmed
3 TB olive oil, divided
2 TB balsamic vinegar
2 pinches of salt
1 medium yellow onion, chopped
1 small shallot, chopped
5-6 cloves of garlic, minced
2 TB butter
2 TB flour
2 cups dry white wine
½ tsp crushed red pepper flakes
½ tsp ground black pepper
6 oz. cambozola cheese
¼ cup freshly grated parmesan cheese
1 TB fresh lemon juice (about half a lemon)
¼ cup fresh parsley, minced

  1. Preheat the oven to 400 degrees. In a roasting pan, toss the Brussels sprouts and asparagus with 2 TB of olive oil, the balsamic vinegar, and a pinch of salt. Roast the vegetable mixture in the oven for 25-30 minutes, until they are soft and have a nice golden brown color, tossing every about 10 minutes to ensure they brown evenly.
  2. Now would be a good time to get a large pot of water boiling for your pasta. The sauce only takes about 15 minutes, not counting the prep for the mise en place, so might want to wait until the vegetables have a good head start in the oven before starting.
  3. In a large sauté pan over medium heat, sauté the onion and shallot in the remaining 1 TB of olive oil and pinch of salt until they are softened, about 5 minutes. Add the garlic and cook for another minute. Add the black pepper and red pepper flakes, stir, and cook for one more minute.
  4. Now would be a good time to drop your pasta, if you haven’t done it yet.
  5. Clear a space in the pan and add the butter. When it has started to melt down, add the flour and mix them together to form a paste. Let the paste cook for a minute or two to get rid of the raw flour taste. Add the wine and bring the mixture to a simmer. Let the mixture cook until it has thickened and the wine has reduced by about half, about 3 minutes.
  6. Turn the heat down to low and add the cheeses, stirring until they are fully melted and incorporated into the sauce. Stir in the lemon juice, parsley, and roasted asparagus and Brussels sprouts. Stir in the cooked pasta drained straight from the pot, you can use a little of the starchy pasta water if you want to thin out the sauce at all.

Friday, January 14, 2011

Roasted Vegetable Winter Soup


Last post I promised a healthy soup to help shed those extra pounds we tend to get as a result of all that sticky toffee pudding, gingerbread, and eggnog around the holidays, and I am quite the deliverer, if I do say so myself. And I do!

I gullibly keep recording shows on the Food Network promising healthy and light meals, excited that it’s finally the time of year when those celebrity chefs might just be cooking something I’d like to try. Then they pull out the lite mayo or top a plain, grilled chicken breast with cheese and pepperoni and call it pizza (and healthy pizza no less!), and I stop and delete the episode. Healthy does not mean diet! Diet food is flavorless, rubbery chicken with microwaved broccoli. Diet food is a punishment to teach yourself not to be such a pig the next holiday season. Diet food is stupid. Healthy eating is about thinking outside the deep fryer box and finding ways to prepare fresh foods in flavorful ways that make us want to eat them. It’s about shifting your habits to eat a different way. Instead of trying to take an unhealthy dish and removing everything that makes it taste good, just eat something that’s healthy to begin with. No brainer, right?

I learned early in my healthy eating transition that I like to eat. Actually, I love to eat. Sure, I’ve lessened my portions, but I used to eat on par with Husband and his roommates in college. I am not a 6’2” male, but I sure liked to eat like one. I still eat plenty because I knew for this to work, I had to let myself eat. Then I found vegetables. They’re such wonderful things. So full of flavor and texture and every good thing. There’s a reason that Weight Watchers puts vegetables at zero points, and that would be how totally nutrient rich are for being so low in calories. As Rachel Ray likes to say - if you eat healthy, you can eat more. A sentiment I always identified with. Just remember that eating too much stretches your stomach, which is a recipe for disaster later. Eat until you’re satisfied, not waddling. Be reasonable. 

One way I like to fill up my tummy without filling up my calorie bank is soup. Broth-based soups feel substantial because of their high water content, but still add a great amount of flavor. Toss in a healthy dose of vegetables and some form of lean protein and/or whole grains, and you’ve got yourself a meal you can sink a spoon into.


I love soup. I have always loved soup. It’s a love affair that started with my grandmother. She made a mean soup, and growing up a picky eater, I was always happy to go to her house knowing there would be a large pot of soup that had been sitting on the stove slow cooking all day and brimming with vegetables, barley, lentils, and meat (though I ate around that part). Her theory was that I just didn’t like to chew. I think I just like the infinite blend of flavors and the comforting feeling it brings. Warm liquids bring me joy. I love my sludgy coffee in the morning, my steamy afternoon tea, and a silky bowl of soup for dinner. I had a friend in college who didn’t like warm liquids of any kind. We no longer keep in touch.

I’m actually surprised I haven’t posted twenty soup recipes by now, but I guess they’re usually so flung together that I don’t really have a recipe prepared, or sometimes they’re so simple I would feel silly posting it.

If you couldn't tell already, I might be a little obsessed with vegetables. I never feel like I eat enough of them, even though probably 75% of my diet is vegetables (if we don’t count breakfast because I eat zero for breakfast, and if we’re counting breakfast the percentage drops to like 45% because even if I ate nothing but vegetables for lunch and dinner, the most it could be is 66%, so let’s just not count it, m’kay?). I have this little trick with soups. It helps me with portion control and it’s a good way to get a few more leafy greens in my diet. Because I’m seriously lacking in that department, right? I’m talking about spinach. I line my soup bowl with a good helping of fresh baby spinach leaves (I always have some on hand from Trader Joe’s, they have those handy resealable bags), more if it’s a veggie-lite soup, less if it’s veggie-heavy. Then I add the soup until my piggy eyes see it reach the rim of the bowl. This is where it helps with the portion control. The fresh spinach takes up a lot of room in the bowl, so even though I can’t stop myself from filling the bowl, it’s not really full. Of soup anyway. Aw, what a trickster I am! After a few minutes in the microwave the soup is hot and the spinach is wilted, and magically (good ol’ water evaporation!) the level of soup in the bowl is no longer threatening to spill over the sides. It’s ok to be a piggy if you recognize it and trick yourself from letting it impede your health, right? Right. Plus, spinach is delicious and is always a yummy addition to whatever soup I’m enjoying, such as this roasted vegetable soup I made recently.

I am a master of the segue.
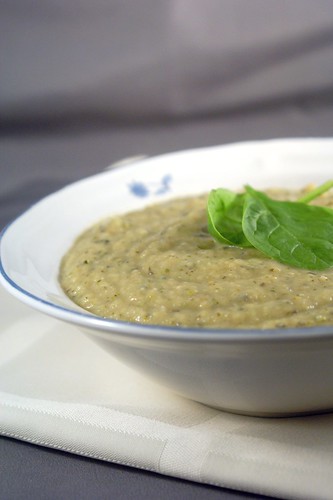
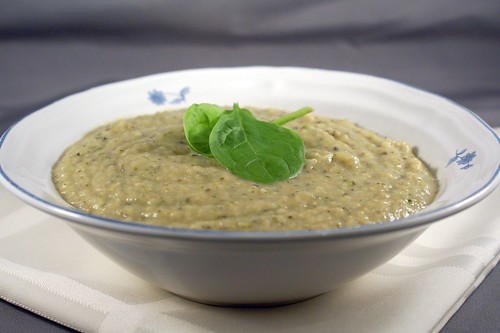
This soup was just a happy accident, brought together - like the plot of many a good novel - by a random string of circumstances. Zucchini and eggplant were on sale (seriously, how crazy has the zucchini crop been this year?). I had fresh thyme leftover from my Thanksgiving splurge. I happened to be drinking white wine that night. I wanted the soup creamier without using cream. But here’s the kicker - I was freezing my booty off and I wanted an excuse to turn on the oven. I may be too poor (err, cheap) to heat my house properly, but it encouraged me to roast my veggies before throwing them into the soup, and man did it make this one of the better soups I’ve ever made. 

Husband gobbled it all up in record time, and he's not even a soup person!  We no longer keep in touch.  

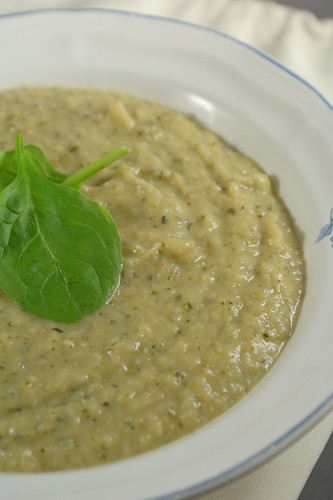
Roasting the vegetables caramelized the sugars, making the soup sweeter, richer, and more complex. Love it! And apparently eggplant pureed in soup is like liquid silk, it adds a lovely texture. Who knew?  The evaporated milk thickened the soup beautifully without all that pesky fat. I just need to be mindful that it’s concentrated milk, so 1 cup of evaporated milk is still a hefty amount of calories compared to a cup of milk. But a little goes a long way, so it's all good. Definitely a trick I'm going to remember.  Oh, and did I mention this soup is pretty darn quick? Definitely doable for a weeknight meal. Only about 30 minutes of total cook time, and since I used the broiler setting on the oven, I didn’t even have to wait forever for it to heat up. Win!

So to sum up the awesomeness of this soup, let’s count the ways:
  1. Healthy - fresh vegetables, stock, and lowfat milk 
  2. Fast - 45 minutes tops, depending on how long it takes you to chop
  3. Easy - mostly just chop, dump, or stir
  4. Delicious - eggplant = silky 
  5. Comforting - it’s cold everywhere right now 
  6. Why are you still reading this? Go make this soup! 

What healthy foods are you cooking up to stay warm?  Will you be bringing home your own bag of spinach from Trader Joe's?


Roasted Vegetable Winter Soup 

4 medium zucchini, roughly chopped
2 small eggplant, roughly chopped
2 medium onions, roughly sliced
5-6 cloves of garlic, minced
1 TB fresh thyme, minced
2 cups dry white wine
1 cup chicken broth (or vegetable broth)
1 12oz. can evaporated milk (I used 2%)
2 TB white wine vinegar
olive oil
salt and pepper

  1. Turn the oven on to broil (500 degrees). In a large roasting pan, toss the zucchini, eggplant, and onions with about 2 TB of olive oil, a pinch of salt, and a pinch of pepper. Roast the vegetables until they are soft and nicely browned, tossing every 5-7 minutes so they cook evenly. This will take about 20 minutes total. 
  2. When the vegetables are out of the oven heat 2 TB of olive oil in a dutch oven or soup pot over medium heat. Add the garlic and cook for a minute or two until it is softened and fragrant. Add the thyme and cook for another minute. Add the wine and bring the mixture to a simmer. Cook until it is reduced by half, then add the chicken broth and roasted vegetables. Bring the mixture back to a boil and simmer for about 10 minutes, until everything is softened and incorporated. 
  3. Turn off the heat and let the soup cool down a bit. Once cooled, puree with an immersion blender (or regular blender or food processor). Add the evaporated milk, as much as you prefer. I added the whole can for optimal creaminess, but a few tablespoons would have been plenty. Then add vinegar, and salt and pepper to taste.


Edit for SoupaPalooza 2012: Come join SoupaPalooza at TidyMom and Dine and Dish sponsored by KitchenAid, Red Star Yeast and Le Creuset