Showing posts with label cake. Show all posts

Tuesday, December 13, 2011

Browned Butter Pumpkin Bundt Cake with Spiced Bourbon Pumpkin Glaze


Because everyone else is doing it. That's an acceptable reason to do something, right? All the predictions of what 2012 will bring got me thinking. It always does. I’m always wrong. Let’s move on.

Julie’s Grand Food Trend Predictions of 2012!
[Let’s be honest, this list is grand as in lofty. My lofty notions of what I wish 2012 would bring. One can dream, right?]

  • First off, I just need to say that macarons are not a new trend. They’re an old trend. They are not the new cupcake. Cupcakes are not out. Both are delicious, infinitely adaptable to many flavors, and portable - and thus will remain around until people decide they hate sugar. Cakepops, pies, donuts, and any obscure French pastry may join alongside them, but they will not replace them.
  • Already trendy vegetables will find new ways of staying on peoples' plates. Kale chips and roasted Brussels sprouts are so 2011. They’ve officially been introduced to the masses. Now that the initial shock has passed that these past-maligned veggies are as tasty as they are nutrient-dense, we’re ready for new ways to eat them. Less approachable ways. Like raw! Massaged kale salads and shredded sprouts slaws I’m looking forward to seeing you on a restaurant menu or two! One can dream...
  • Quick pickles. 2011 was the year of savory canning. We discovered we could mass-produce not only blackberry jams and dill pickles, but also our own tomato sauces, and pickles of the non-cucumber variety. And kimchi? That was a craze all its own. While acidic, fermented foods are fabulous in their funkiness, who has time for all that? Tossing crunchy raw veggies with a quick salt/vinegar/sugar solution produces quick and refreshing results to liven up richer dishes.

  • Approachable game. Game meats are nothing new, but I’ve traditionally seen them at nicer restaurants, setting their menu apart by offering something beyond just the same ol’ proteins. I’m all about fine dining on squab leg and venison loin, but I think we’ll see more rabbit burgers and wild boar meatloaf - more casual restaurants using game to reinvent the classics. Because, inextricably, the classics are always boring and need reinvention yet we are unwilling to let them stray too far from our forks.

  • Exotic spices are no longer very exotic. You know smoked paprika has arrived when you can buy it in the big bulk container at Costco. And that’s a great thing because smoked paprika makes a lot of dishes more yummy, and I go through it, well, in Costco quantities! Finding cardamom used to be such a treasure hunt, I would covet the lone jar I was able to locate, only breaking it out for the most appropriate of flavor pairings. Now each spice company not only sells garam masala right alongside the curry powder, but I’m thinking we’ll see ras el hanout and zaatar in the near future as well.
  • Food trucks and craft breweries are reaching critical mass, a girl can only get ripped off eat and drink so much, but they are another trend that’s not going anywhere. I foresee the not as well executed places falling on hard times while the real gems will be just fine. After all, both of these trended so hard in the first place because of crazy internet buzz. People will still buzz about the places that are worth while. And yes, sour beers are the new IPA. Glad I’ve finally started developing a taste for them.
  • I have no idea what the next diet fad will be, but vegan and gluten free have proven to be such a profitable marketing scheme for food companies, I’m sure something will pop up. Perhaps something as simple as sugar-free? Sugar is the latest evil, after all. But I just don’t see that happening. It’s also an addiction. While I might disagree, the world at large would argue that eggs (runny eggs!) are not habit forming. Nor is sourdough bread. Supposedly. If I had my way, the next fad would be “reasonably sweet”. I’m all for sugar, just not in the ridiculous quantities we use currently.


That’s it! My wishlist for 2012. Can we get on this, people? Take to the interwebs! #hashtag things! If we can get runny yolks on rabbit burgers at Applebee’s by September, I’ll learn to brew killer beer at home and give you all a bottle. Promise.


This whole exercise was really just to distract from the fact that I’m posting a recipe with nothing more than this grainy Instagram picture a couple of shoddy pics I shot on my iPhone. The holidays have really thrown me for a loop and come 8pm on a Tuesday night I am decidedly unwilling to break out the fancy camera to get the money shots while I drool all over the floor in anticipation of stuffing my face with the confection in question. Sorry.

The confection in question contains really amazing things that will make you drool everywhere too. Browned butter. It’s very 2011. It makes things buttery (obbbbviously), with a nuttier flavor. You know how I love the nutty flavor. … Please resist the dirty joke I just opened myself up for. We have cake to talk about. Pumpkin cake. Oh yes.  We’re not over the pumpkin yet are we? Good. Because it’s delicious. I know come December 1st, every fiber of my being screams for gingerbread flavored anything. But this cake is very heavy on the spice. Including ginger. Not pepper though. Good in gingerbread, but cardamom is best when it comes to pumpkin. And of course it has bourbon. The smokey flavor goes swimmingly with the browned butter. Bourbon, browned butter, and pumpkin. In a cake. You can forgive the picture now, right?

And let’s not forget the glaze. I love glaze on a bundt cake. The way it oozes over the cake when you first mix it. Watching it harden into a shiny shell, like it’s protecting something precious. Because it is protecting something precious. Unless you mixed up the salt and sugar. Then it's not so precious anymore. Then there's the panic that sets in when it slides right off the cake because you didn’t thicken it enough, as you hurry to scoop it up and re-pour it so you can get adequate glaze coverage. Oh yeah, that’s another reason I didn’t take any beauty shots. Thicken it right, people. You won’t want any paltry coating of this glaze. I used the remaining few tablespoons of the canned pumpkin puree in the glaze to boost the pumpkin oomph. And of course more bourbon. Oomph indeed! With the maple syrup and spices, I wanted to eat just a bowl of glaze. I might have licked a scoop or two off my finger, but you'll never know for sure.

So here’s to pumpkin, a food that will always be trendy. And delicious.  And remember to always brown your butter.


Please resist the dirty joke I just opened myself up for, and instead tell me what you'd like to see hit it big in 2012.


Browned Butter Pumpkin Bundt Cake with Spiced Bourbon Pumpkin Glaze

Cake adapted from Sprinkle Bakes

For the cake:
6 oz. (¾ cup) unsalted butter
8.5 oz. (2 cups) AP flour
1 ½ tsp baking soda
2 tsp ground cinnamon
2 tsp ground ginger
1 tsp ground nutmeg
½ tsp ground cloves
¼ tsp ground cardamom
1 tsp salt
7 oz. (1 cup) granulated sugar
7.5 oz. (1 cup) firmly packed brown sugar
1 ½ cups pumpkin puree
3 large eggs, room temperature
½ cup Greek yogurt, room temperature
3 TB bourbon
1 tsp vanilla extract

For the glaze:
2 cups powdered sugar
1 TB bourbon
1 TB maple syrup
2 TB pumpkin puree
½ tsp cinnamon
½ tsp ground ginger
½ tsp nutmeg (optional)
pinch of fine sea salt
1-2 TB milk, if needed


For the cake:
  1. Preheat oven to 350 degrees. Spray a bundt pan with baking spray.
  2. Melt the butter in a small saucepan over medium heat. Cook until the butter turns a rich, golden brown, swirling or stirring often so it doesn’t burn. Keep a watchful eye. It goes from brown to black very quickly. Pour the browned butter into a small bowl and let it stand until cool but not solidified.
  3. In a medium bowl, whisk the flour, baking soda, cinnamon, ginger, nutmeg, cloves, cardamom, and salt. Set aside.
  4. In a large bowl, whisk together the pumpkin puree, granulated sugar, brown sugar, eggs, Greek yogurt, vanilla, and bourbon until well combined. Whisk in the browned butter until it’s well blended. Stir in the flour mixture and mix until it is just combined.
  5. Pour the batter into the prepared bundt pan and bake for 45-55 minutes, until a toothpick inserted in the middle comes out clean. Allow it to rest for 10 minutes, then remove it from the pan and cool it completely on a cooling rack.

For the glaze:
  1. In a small bowl, whisk together the powdered sugar, bourbon, maple syrup, and pumpkin puree, until the mixture is smooth and there are no lumps. Add the spices and salt and whisk to combine. Add the milk (if needed), a small amount at a time, until the glaze is thin enough to pour and drip, but thick enough to stay mostly on the cake. Glaze too thin will pour right off the cake. If it’s too thin, add more powdered sugar until your desired consistency is reached.
  2. Drizzle the glaze over the completely cooled cake. Give it a few minutes to set up, then slice and enjoy.

Friday, March 11, 2011

St. Patty's Day Cake


When reflecting back on my greatest culinary successes over the last couple of years, I think the most rewarding ones have been the experiments. The dishes that I went in with a harebrained, what-the-heck attitude, and came out with something to log in the favorites section of my recipe archive (i.e. this blog). It’s more satisfying knowing my creativity didn’t completely lead me astray. Know what I mean? I can still track the evolution of how this cake came to be. It was a quiet Saturday afternoon, and I wanted to bake. What? I had no idea. There were no recipes on the tip of my brain that were jumping out at me to bake them. I hunted around my go-to food blogs, printed some possibilities, and brought them to Husband for final approval. Aren’t husbands handy when you’re feeling indecisive? One of the recipes was a chocolate stout bundt cake with a chocolate glaze. Chocolate + booze + Husband = a must make. I was prepping the ingredients when I had a thought. Here’s the creative process in action, people. Check it out:


Me: Hey Babe, what do you think about baking this as a sheet cake instead of a bundt?

Husband: Umm…

Me: That way I could do a frosting with some Bailey’s instead of the chocolate glaze.

Husband: But I like chocolate…but a Bailey’s frosting sounds good too…Hmm…

Me: Oh! I know!!! I could try doing an avocado buttercream! With Bailey’s! And white chocolate!

Husband: Avocado? In the frosting?

Me: Yeah, it does the same thing as butter. Remember Alton Brown did it on an episode of Good Eats?


And with the mention of AB, as is usually the case, Husband was all confidence and trust. If Alton says it’s good, it’ll be good. Did I ever mention I have that show to thank for my Le Creuset dutch oven? Thanks for Kiwi, AB!

And that’s how this cake was born. A lazy day and a lack of dessert in the house. This was a few weeks ago. I’ve made it a total of three times already. We love it that much. I still have dreams about it.

The cake itself is a great recipe. Obviously, I never got around to trying the original recipe, but if a chocolate stout bundt with chocolate glaze is the order of the day, I’m sure this one would be a big winner. A rich, velvety stout goes with chocolate like bananas and bourbon. I was curious whether the quality of beer would make that much difference in the cake, so I used Guinness my first attempt. An admirable baking beer, to be sure, but I’m a bit of a craft beer snob these days (I do live in the city with the most craft breweries per capita, after all), and it’s an everyday beer, if yaknowhatImean. On a later attempt I used Husband’s all time favorite stout he is completely obsessed with at the moment. It wasn’t exactly a side-by-side comparison, since they were made several weeks apart, but I think the smoother, nuttier flavors of the higher quality stout definitely came through in the cake.

But if you’d like the excuse to bake this cake several times in succession (not that you need an excuse besides that it’s delicious enough to make several times in rapid succession), go ahead and forget I mentioned it. It is March, after all. Stouts are cheap!

My cake had a few extra additions from the original recipe. I wanted to up the St. Patty’s Day theme, so I threw in some whiskey…because why not, right? I also added come instant espresso powder and cayenne pepper, just to elevate the flavors a bit more. Supposedly coffee makes chocolate things taste more chocolaty – works for me! - and I also might have a spice addiction. But that’s another post. Sufficed to say, both those additions are completely optional, but as the cake turned out light as a cloud, moister than pudding, but still with all the flavor of a decadent chocolate cake, I’m going to go ahead and recommend them! The best compliment I can pay this cake is to say it wasn't just a vehicle for the frosting. As much as I loved the frosting, I found myself making sure each bite was the perfect ratio of frosting to cake.

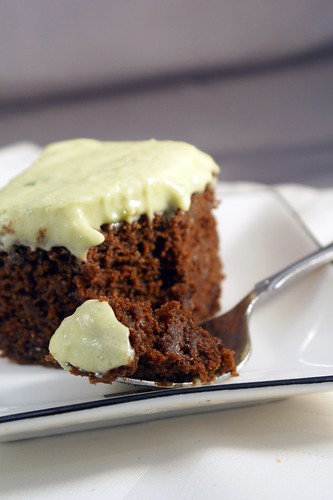
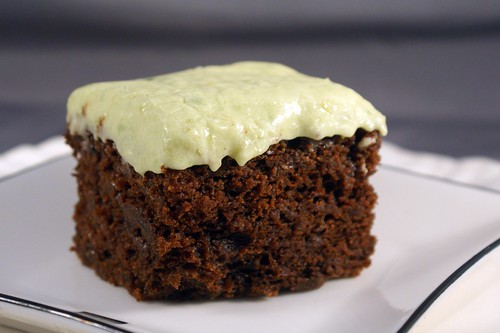
Speaking of frosting. Since you’ve been good enough to read all this way, I should probably tell you a bit about avocado buttercream. It’s not a new concept, by any means, but it’s not exactly run of the mill either, is it? So regular buttercream frosting is really made up of two main components – powdered sugar and fat. That fat is usually butter, though I’ve seen it in combination in shortening too. The fat provides the creamy, melt in your mouth texture, and the powdered sugar provides the sweetness and stability. Everything else tweaks the flavor or texture, and it is pretty much optional. Avocados - poor, misunderstood avocados - are on many people’s naughty list because they are very high in fat. But fat is not fat, people! While shortening is grown in a lab with methods I don’t want to know about, and butter, while amazingly delicious, is made up of saturated animal fats, avocados are high in wonderful, plant-based monounsaturated fats. Now I’m not fooling myself into thinking this cake is good for me, but a healthy diet is as much about the minor choices we make in our day as the major ones, right? And if you don’t buy any of that, how about the fact that this St. Patty’s Day cake has green frosting, and I didn’t use a single drop of food coloring! Point for Mother Nature!

I know you’re wondering, so I will allay your fears posthaste. You can’t taste the avocado. You won’t believe there’s avocado even in it. Seriously. Would it be uncouth of me to say you won’t believe it’s not butter? Really, besides making the overall cake a slight iota healthier, and providing a natural and very appropriate greenish tint, the avocado doesn’t really factor in. You could definitely just replace the avocado with an equal amount of room temperature butter (just make sure you let the chocolate mixture cool first, so you don’t melt your butter). No worries. Hey, since there's no butter, I guess this would technically be an avocadocream frosting?  And a term was coined...

What makes this frosting delicious is a combination of white chocolate, Bailey’s Irish Cream, and a splash of whiskey for good measure. I don’t know what to say about it other than it is a sweet, smooth, ooey gooey frosting. I added the Bailey’s and whiskey to the white chocolate while it was melting because I was going more for flavor than a punch of alcohol. But don’t worry, it’s not shy. It still has creamy and ever so smoky flavor that warms you up from the inside out, and the white chocolate provides a nice counterbalance of sweetness that is more interesting than just straight sugar. A perfect pair to a chocolate stout cake.

Since it's just an unassuming sheet cake, it certainly isn't winning any beauty pageants. But that's part of its charm.  It will fit right in with your corned beef and cabbage.


Have I mentioned I’ve made this cake three times already? I wish I could say I gave most of it away. I gave some of it away. But most of it ended up in my tummy. Ok, mostly in Husband’s tummy. But you didn’t hear it from me.


Got any harebrained kitchen experiment fantabulous success stories of your own?


St. Patty’s Day Cake
aka: chocolate stout cake with white chocolate Irish cream avocadocream frosting

cake adapted from Smitten Kitchen

For the cake:
1 cup stout
1 cup (2 sticks) unsalted butter
⅓ cup whiskey
¾ cup unsweetened cocoa powder
1 TB instant espresso or coffee powder (optional)
2 cups AP flour
1 ½ tsp baking soda
1 tsp kosher salt
¼ tsp cayenne pepper (optional)
2 large eggs, at room temperature
⅔ cup sour cream, at room temperature
1 tsp vanilla

  1. Preheat the oven to 350 degrees and prepare a 9x13” baking dish with nonstick spray. In a medium saucepan over medium heat, bring the stout, butter, and whiskey to a simmer. Add the cocoa powder and instant espresso, if using, and whisk until it is fully incorporated and the mixture is smooth. Remove the pan from the heat and let it cool a bit. 
  2. In a medium bowl, whisk together the flour, baking soda, salt, and cayenne pepper, if using. In the bowl of a stand mixer fitted with a whisk attachment, beat the eggs and sour cream together on medium-low speed until they are well blended. Add the vanilla and blend. Add the stout mixture, making sure it is cool enough that it won’t hurt the eggs, and beat to combine. Add the flour mixture and mix on low speed until it is mostly incorporated, then use a spatula to fold any loose bits of flour into the batter. 
  3.  Pour the batter into the prepared baking dish, smooth it into an even layer, and bake for about 35 minutes, until a toothpick inserted in the middle comes out clean. Let it cool completely in the dish.

For the avocadocream:
1 cup white chocolate chips (or ~6oz. of a white chocolate bar, chopped)
¼ cup Bailey’s Irish Cream
1 TB whiskey
1 cup avocado flesh (~2 medium avocados), well mashed
1-2 TB fresh lemon juice
1 tsp vanilla
pinch of salt
2-3 cups powdered sugar

  1. In a double boiler (or a bowl sitting over a small saucepan of simmering water), melt the white chocolate. Add the Bailey’s and whiskey and stir to combine. Let it cook for a bit if you want the alcohol to burn off a bit, otherwise, remove it from the heat and set it aside to cool. 
  2. In a stand mixer fitted with a paddle attachment, beat the avocado on medium speed for a minute or so, until it’s smooth. Add 1TB of lemon juice, vanilla, and salt, and mix to combine. Add the cooled chocolate mixture, and mix until it is well combined. 
  3. Working ½ cup at a time, with the mixer on low speed, add the powdered sugar until a thickened, gloppy consistency is reached. Important note: the frosting will thicken more as the chocolate cools, so don’t worry if it’s not firming up like you expect. It’s more important to watch the level of sweetness from the sugar. Add the other TB of lemon juice to balance the flavor if desired. 
  4. Once the cake is cooled, spread the frosting over the top in an even layer, and enjoy!

Wednesday, November 10, 2010

Pumpkin Spice Cake with Butterscotch Swiss Meringue Buttercream


One week before Halloween my adorable little nephew turned one year old. It was kind of a big deal for me. He is my only sister’s only child (thus far), and I absolutely love him to death. My sister threw a fun family party to celebrate, with a full compliment of party fixin’s - balloons, streamers, deviled eggs, and, of course, cake!

After we all met up in Reno a few months ago my sister gave me an assignment: come up with a recipe for my nephew’s first birthday cake. And I took it seriously. I didn’t want to let the little guy down! So I thought about flavors, researched recipes, and practiced a few test-runs to get things juuuuust right. And when I was confident in my creation, I handed the final, approved recipe over to my sis. Here are the results of her deft hand:


Way to decorate, sis!

Since the party was taking place so close to Halloween, my sister was thinking something with pumpkin. Pumpkin just so happens to be one of my favorite Fall flavors! I was looking forward to experimenting with recipes...just a tiny bit. There were just a few conditions. First, no chocolate. I guess the caffeine in cocoa isn’t great for the wee ones. Second, no lemon or banana cake. My sister isn’t a fan of lemon cake, and my mom is in the banana = ick camp. Such a shame on both counts, in my opinion. Finally, and most importantly, no cream cheese frosting. Sis doesn't do cream cheese frosting - it’s the tangy flavor. She hates it. She’s actually foregone eating cupcakes from her favorite local cupcakery because she unknowingly bought one with cream cheese frosting.

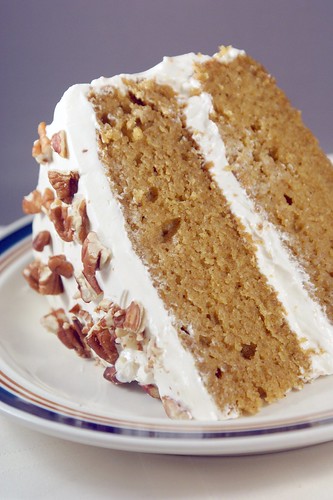
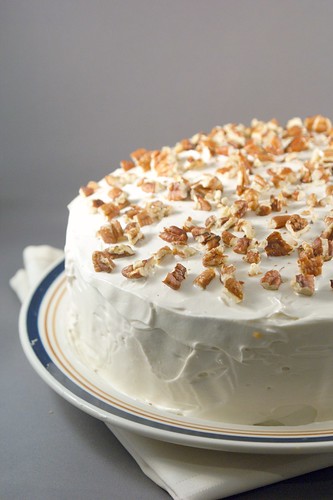
With these parameters in mind, I came up with a spiced-up pumpkin cake. Since the more traditional cream cheese frosting was off the table, I took inspiration from my favorite pumpkin cookies, and decided on a butterscotch buttercream. Pumpkin and butterscotch is a fantastic combination. Ever had it? You should. It’s yum. But butterscotch sauce is sweet. Super duper sweet. Husband says I’m just extra sensitive, but I thought my first butterscotch buttercream - a simple butter and powdered sugar mixture - was way too sweet. I didn’t see a way to reduce the sugar, so I just made some adjustments to help balance it. I added some acid. A little lemon juice really brightened up the flavor and gave the sweet somewhere to go. Also, I switched to a Swiss meringue buttercream. The light, fluffy texture did a good job of distributing the sweet on my palette, and was especially delicious paired with the warm spices of the cake.

The third and final test run I made a finished cake and brought it over to share with some lovely ladies I know. This cake here...

...was a big hit! Our host insisted on no leftovers, sent us home with every morsel of food, but when I asked her if she wanted the last slice of cake, she grinned sheepishly and nodded. With such approval I knew the recipe was ready for sisterly publication.

The day before the party my sister put her expert baking skills to action and whipped up my nephew’s birthday cake while I stood wringing my hands in the corner, prepared to die of shame should anything not turn out as expected. Even with a dozen other party provisions to prep, she made an awesome cake with an adorable smash cake of my nephew’s very own to match. She’s a rock star!


Whether for a special Fall occasion or just because cake is delicious, this cake is light and tender, very fragrant from the warm pumpkin spices, and so worth making! Sufficed to say I did not mind making - and subsequently eating - this cake three times.

Nephew's First Birthday Cake
(AKA: Pumpkin Spice Cake with Butterscotch Swiss Meringue Buttercream)

adapted from Martha Stewart

For the cake:
2 cups AP flour
1 tsp baking soda
1 tsp baking powder
1 tsp kosher salt
1 tsp ground cinnamon
1/2 tsp ground ginger
1/2 tsp ground nutmeg
1/4 tsp ground cloves
1/4 tsp ground allspice
1 cup sugar
1 cup dark brown sugar
1 cup (2 sticks) unsalted butter, melted and cooled
4 large eggs
1 can (15 ounces) pumpkin puree
1 tsp vanilla extract

  1. Preheat the oven to 350 degrees. Grease two 9-inch cake pans with baking spray, line the bottoms with parchment paper, then spray the parchment paper. 
  2. In a medium bowl, whisk together the flour, baking soda, baking powder, salt, cinnamon, ginger, nutmeg, cloves, and allspice. In a large bowl, whisk together the sugar, brown sugar, butter, eggs, pumpkin puree, and vanilla. Add the dry ingredients to the wet, and whisk until just incorporated and smooth. 
  3. Pour the batter evenly between the two prepared cake pans. Bake for 25-30 minutes, rotating the pans halfway through, until a cake tester (i.e. toothpick) inserted in the middle comes out clean. Transfer the cakes to a wire rack and cool completely. 

For the buttercream:
4 large egg whites
1 1/4 cup sugar
1 1/2 cups (3 sticks) unsalted butter, room temperature
2 tsp vanilla extract
pinch of sea salt
1TB lemon juice (or more to taste)
1/2 cup butterscotch sauce (see below)

(makes about 4 cups)

1/2 cup toasted pecans, chopped (to garnish the finished cake), optional

  1. In the bowl for your electric mixer (or a medium heatproof bowl if you’re using a hand mixer), combine the egg whites and sugar, and place the bowl over a small pot of gently simmering water. Whisking the mixture constantly until the sugar has fully dissolved, about 2-3 minutes. Rub a little between your fingers, and if there is no hint of a grainy texture, it’s done (or when it reaches 160 degrees in temperature). 
  2. Place the bowl in your mixer fitted with the whisk attachment, and set at high speed, beat the egg mixture until stiff peaks form. Continue beating until the eggs are fluffy and the mixture has cooled, about 5-6 minutes. Make sure the stiff peaks don’t become dry, you want them to stay glossy. 
  3. Switch to the paddle attachment and with the mixer on medium-low speed, add the butter 2 TB at a time, waiting until it is fully incorporated into the mixture before adding the next addition. If the buttercream begins in separate, turn the mixer up to medium-high speed and beat for a few minutes, until it is smooth again. Add the vanilla, salt, lemon juice, and butterscotch sauce (make sure it’s cool, you don’t want to melt your buttercream), and beat until incorporated. Again, if the mixture separates or thins out too much, beat on medium-high speed until it is light and fluffy again. Taste the buttercream and add more salt, lemon juice, or butterscotch if you think it’s needed. Reduce the mixer speed to low and beat for 2 minutes to eliminate any air bubbles. 
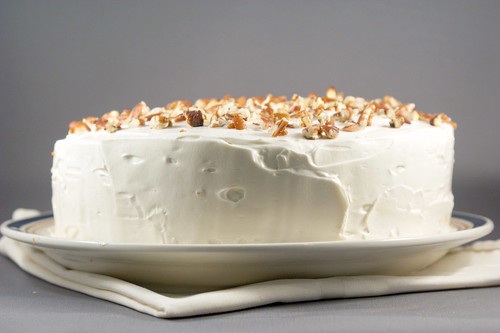
  4. Trim the tops of the cake layers so they are flat. Stack the first layer onto a cake plate and using a spatula, spread about 1/2 cup of buttercream in an even layer over the top. Place the second cake layer on top, making sure the two layers line up. Spread a very thin layer of the buttercream around the cake for a crumb layer. This will glue the crumbs to the cake, so they don't show through the light colored buttercream. Then apply a regular, thick layer of the buttercream, until the cake is evenly covered. Sprinkle the top with the toasted pecans and enjoy! 

For the butterscotch sauce:
1/2 cup (1 stick) unsalted butter
1/2 cup sugar
1/2 cup dark brown sugar
3/4 cup light corn syrup
1/2 tsp sea salt (or more to taste)
1/3 cup heavy cream
2 tsp vanilla

adapted from Martha Stewart
(makes about 1 1/2 cups)

  1. In a medium skillet, melt the butter over low heat. Add the sugar, brown sugar, corn syrup, and salt, and increase the heat to medium to bring the mixture to a boil. Let it cook for 2 minutes, then remove the pan from the heat and stir in the heavy cream and vanilla. Allow it to cool at room temperature. It will seem too thin at first, but don’t worry, it’ll thicken as it cools. 

Monday, June 14, 2010

The 3 Ps, Portion, And Delicious Cake

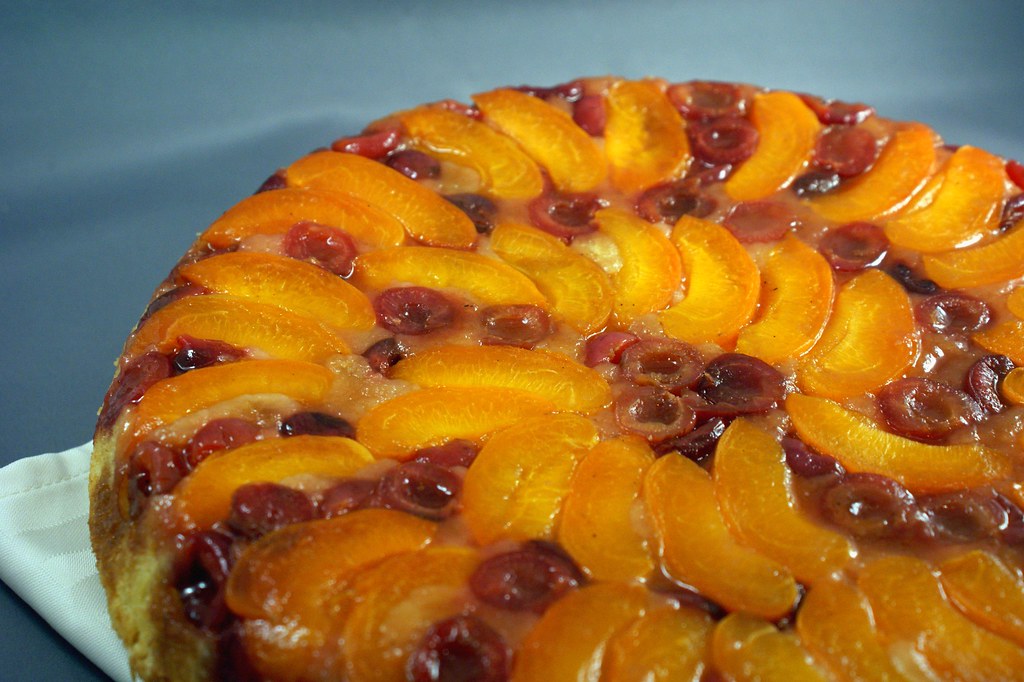
Recipe: Brandy Buttermilk Apricot Cherry Upside-Down Cake

I read somewhere a few months ago that one of the reasons maintaining weight loss is so difficult is that a person spends so much time thinking about food while they're losing the weight, that when they've finally lost it, they are completely food obsessed.  As you can imagine, it's very difficult for someone who is obsessed with food not to eat...and eat...and eat...to the point of obesity!  And I can tell you, it is so true.  I was food obsessed before I lost 70 pounds, so you can imagine my struggle to balance my constant desire to shovel food in my mouth with my desire to stay healthy.  No really, when I say obsessed, I mean obsessed!  A good or bad meal can instantly affect my emotional state.  My social activities generally involve food in some way.  Want to hang out?  Sure, let's grab lunch!  You want to see that new movie with me?  Awesome, let's hit up the matinée and get dinner afterwards!  Hey Julie, how was your vacation?  Great!  The food was good!*  So yeah, I think it's safe to say I genuinely love food.  I am not one of those people couldn't care less what foods they ate, so eating healthy is just as easy as eating unhealthy. Oh ho ho ho, no.

I've developed a few methods for keeping my eating in check because a healthy lifestyle is about so much more than just switching to healthier food choices.  Despite what the masses tell you, there are no "good foods" and "evil foods".  Fat (and then Carbohydrates) is not the Devil's nutrient. Everything is a balance, and the loss of that sense of balance is why we're all fat!  And I could go on, but you don't have all day.

One of these methods, it's really more of a healthy lifestyle philosophy, I call the 3 Ps.  And those Ps would be portion, proportion, and practicality.  [I thought about prudence instead of practicality, but who wants to be prudent?]  Yeah, I know...it's is beyond cheesy.  But I can't help it they all begin with P!  Just bear with me people, mkay?  In the interest of keeping this post at short story length, I'm going to break this explanation up into a series.  Today I'll talk just about portion.

One of the keys to eating right is eating the right amount and eating the right amount of the right things.  [And if you only had to read that sentence once to understand it...10 points for you!] That's where portion comes in.  It refers, of course, to portion size.  As gluttonous, greedy Americans, we have been bred to always want more.  It's economical.  And we're nothing if not economical, am I right?  I'm sure you've read the news stories about how much more a single serving of coffee is today versus 50 years ago, or how much bigger portion sizes are at restaurants.  The first thing you need to do is get your portions back under control.

I find this difficult because when I'm eating something I like, I want to keep eating it until I can't possibly eat any more.  Well that's just too damn bad.  Now I (on my good days) eat the amount of food I need, rather than the amount of food I want.  I judge my need based on both hunger and calories.  I took some time to research the amount of calories I needed to eat in a day based on my sex, height, weight, and activity level, divided it up between whatever meals and snacks I wanted to eat in a day, and tried to hit those goals.

I just scared you away, didn't I?  Counting calories scares a lot of people away.  Including me.  Fear not!  In all that work I figured out that if I also ate the right proportions of types of food and stayed practical and realistic, I was hitting my calorie target all on my own.  No counting calories needed!  Thank goodness!  Basically, the idea is eat until you're no longer hungry, and try to eat sensibly.

So as I was saying, one important step to overcoming over-eating was getting a handle on my portions.  I'm sure you've heard this before, but it is so true.  Using smaller vessels to hold your food helps you eat less.  Now, I'm not saying switch your soup bowl out for a shot glass.  Be reasonable!  But switch out your ridiculously large dinner plate for a salad plate, perhaps.  Not only does it keep you from piling too much food on your plate, but you'll feel like you're eating a lot of food because the plate is full.  No joke!  If you scoop a correct serving of rice onto a giant plate, your eyes are going to tell you you're not eating very much, and your eyes send data to your brain way faster than your stomach!  I know when Husband and I finally replace our hand-me-down dinnerware collection (We kind of desperately need to.  As much as I love it, it's totally chipped!), it's going to be hard to find something isn't ridiculously over-sized.  Gluttonous, greedy Americans, remember?  If you're worried about taking too little food, just remember you can always go back for seconds if you really need to.  I don't recommend having seconds as a general rule, but if you do just be sure to wait 15-20 minutes between helpings to give your stomach a chance to tell your brain you're full.

The same goes for containers you pack your lunch in.  If you have some huge 4 cup capacity container to hold your super healthy brown rice and vegetable stir fry, when you go to fill it up, you're going to keep filling and filling until it's full, or at least way fuller than it should be.  And while one of the perks of healthier eating is getting to eat more food for the same amount of calories as unhealthy foods, there is a limit.  Be reasonable!  Here's why.  When you eat a lot of food, your stomach expands.  When you eat less food, it shrinks.  When your super stretched out stomach is empty, you eat until that big stretched tummy feels full.  If your stomach isn't so stretched, you feel full sooner, and as a result eat less to get that same satisfied feeling.  So it's not just about what you eat, but how much.  Being able to control your portions is essential.

Baby steps!  When faced with a sweet tooth and an uncut cake, I'll take a bigger piece than I should just as sure as the next gal.  That's why I take steps to prevent Piggy Julie from rearing her ugly snout.  You may recall I posted a few of those steps? Just being aware of your portions ensures you're headed in the right direction!


*It's completely true that I judge a place I've been based on how good the food was.  What's worse, my desire to visit a particular location is generally right on par with how good their food reputation is.  Case in point, I couldn't wait to visit France and Greece, and oh my word is the food there ever the best!  Germany?  Not such a huge desire.  That's not normal, right?


If you couldn't tell from the pictures of cake sprinkling this post, I may have just been bestowing my wisdom about eating right as a way to off-set that fact that I'm posting another delicious Summer fruit dessert.  Not to mention, that makes you one of the most unobservant people ever.  Way to go.  Did you also fail to observe that the Summer stone fruit is finally here?   I for one did not!  I love stone fruit!  Apricots, peaches, and plums, oh my!  What's more, I love baking with stone fruit!

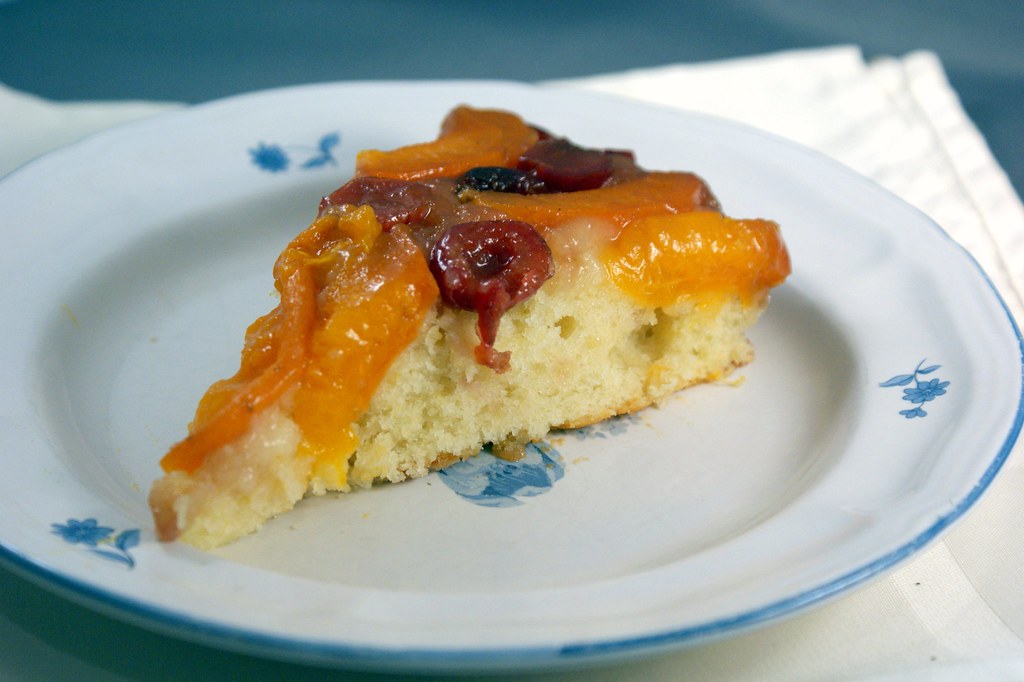
You know what I really love about this cake?  It was one of those unexpected kitchen successes. I had some apricots and wanted to do an upside-down cake, so I hunted around my Google Reader until I found one that tickled my fancy.  As luck would have it, I had cherries on hand too!  I thought I'd get something ordinary but delicious, but this cake was delicious!  I actually exclaimed "Oh my!" when I took the first bite.  The cake was light and fluffy (and boozy!), and the fruit topping was sweet and bright (and boozy!).  The apricots were a little bit tart, the cherries had that deep, sweet cherry flavor.  Everything was beautifully balanced and delicious. And the brandy!  Oh the brandy.  It was a beautiful compliment to both the cake and fruit.  It's richness and complexity are definitely part of what made this cake so memorable.  When can I make it again?


Brandy Buttermilk Apricot Cherry Upside-Down Cake
adapted from Eating Out Loud

Makes a 12" cake

For the topping:
1/4 cup butter (1/2 a stick)
3/4 cup brown sugar, packed
2 TB brandy

For the cake:
1/2 cup butter (1 stick)
1 cup sugar
2 eggs
1/2 cup buttermilk
1 1/2 cups flour
1 1/2 tsp baking powder
1/2 tsp salt
1 tsp vanilla
1/4 cup brandy
1 tsp fresh lemon zest
7 apricots, sliced into medium-thin slices
1/2 cup cherries, pitted and sliced in half

  1. Preheat oven to 350 degrees.
  2. In an oven-proof skillet (preferably cast iron), about 10-12", melt the butter, brown sugar, and brandy.  Over medium heat, cook the mixture until it begins to bubble.  Remove the skillet from the heat and set aside to cool.
  3. In a bowl, beat the butter and sugar together until light and fluffy.  Add the eggs, one at a time, and then the buttermilk.
  4. Slowly add the flour, and then add the baking powder, salt, vanilla, brandy, and lemon zest.  Mix just until a smooth batter is reached.
  5. Arrange the slices of apricots and cherries in the skillet, on top of the sugar mixture.  I wanted the top of the cake completely covered in fruit, so I really jam packed it in there.  If you want more of the cake to show through, use less.
  6. Pour the batter over the fruit, and use a spatula to smooth it evenly over the cake, making sure to spread it all the way to the edge of the skillet. Move the skillet to the oven and bake for 40-45 minutes, until a tester comes out clean.
Make it your own!  This recipe can be done in a ton of variations.  You can use any stone fruit in place of the apricots and cherries.  You can use any liquor you think will compliment the flavors well.  You know what would be really delicious?  Bananas and bourbon, of course!  I'll have to try that sometime soon.  

For the more vestal readers, first, I have no idea what you're doing reading a blog all about pairing booze and food (not that I don't appreciate the readership), and second, I'm confident this cake is still a knock-out without the brandy.  

Wednesday, May 12, 2010

The Birthday Cake


As in the birthday cake.  The birthday cake to end all birthday cakes!  When Husband's birthday was approaching last month, I said I would cook him any food for his birthday dinner, and bake him any birthday dessert.  After much thought, he decided on sweet and sour pork for dinner (I have no idea where it came from, since I had never made it before), and his usual for dessert.  He always requests a cake, chocolate and raspberry.  This year was no exception.  The flavor combination is both our favorites.  Being the person I am...I wanted to make something special...and I put way more thought into it than I probably should have...I landed on the most complicated, but delicious cake I have ever made.

Are you ready to hear about it?

Prepare yourself.  It's quite a mouthful.  Ha!  Get it?

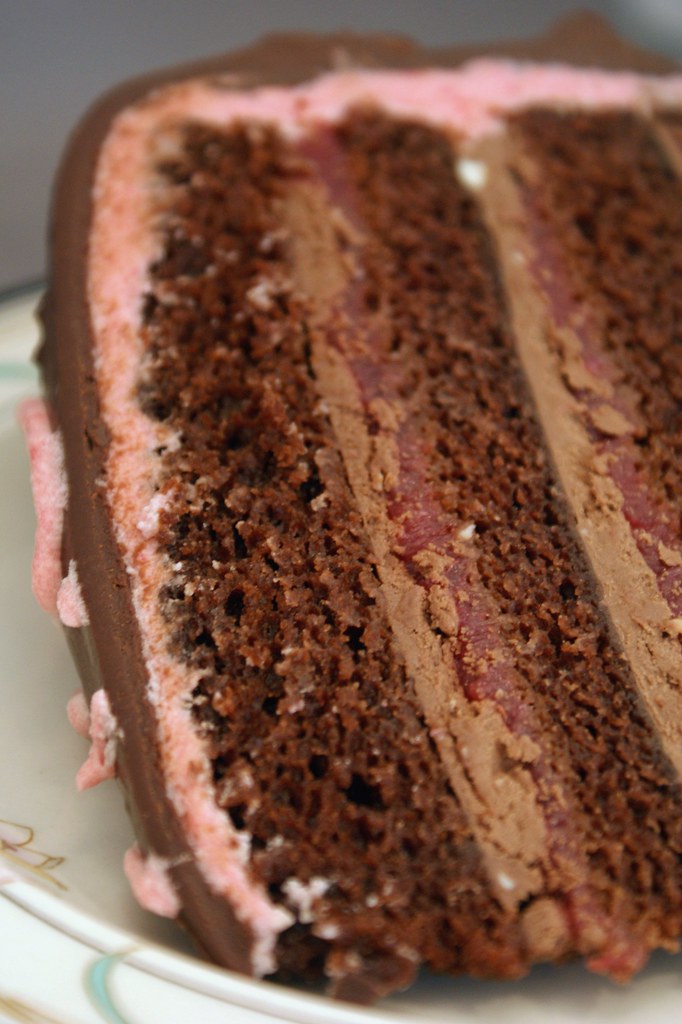
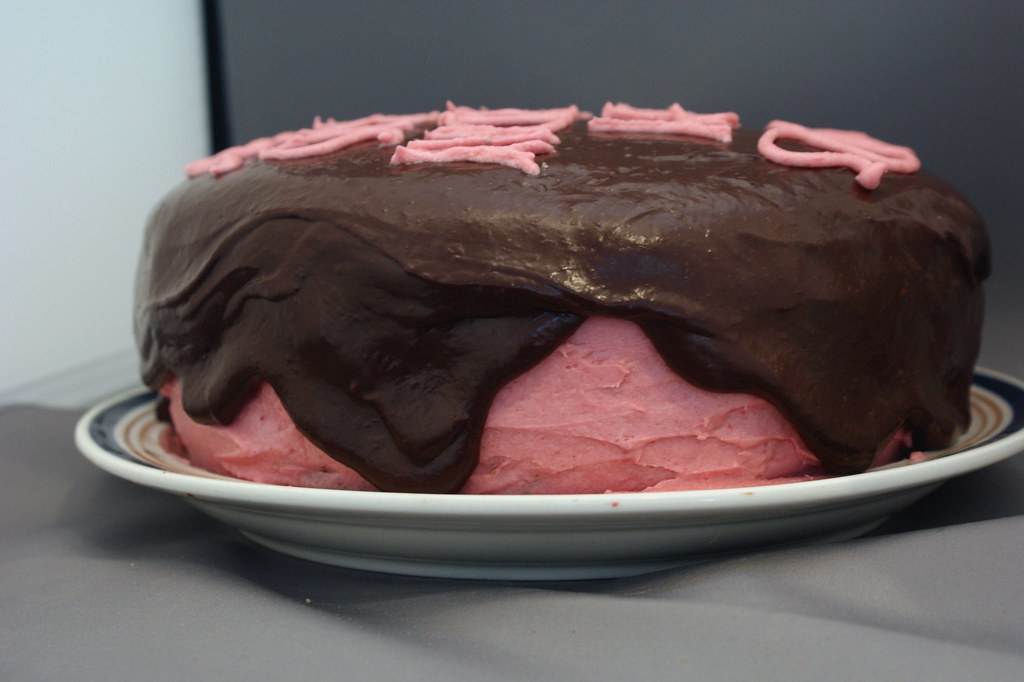
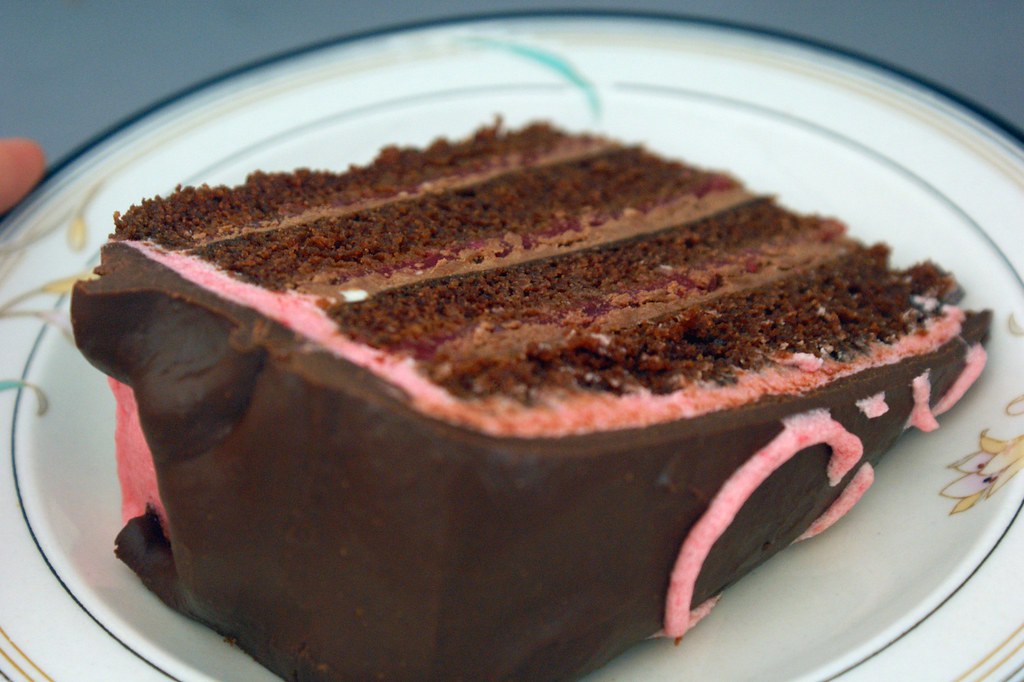
It's my favorite chocolate cake, layered with both raspberry filling and chocolate buttercream frosting.  It's topped with a raspberry buttercream, and then that's topped with a chocolate raspberry glaze.

I'm drooling right now.

Husband likes frosting.  I gave him some options on how to put the cake together, and he liked this way the best.  Cutting the layers in half allowed for more layers of frosting without adding more cake.  If you prefer more cake, or even just a taller cake, you could always do 3 or even 4 full layers instead of 2.  That cake would be a doozy!  Or, just keep the 2 layers in tact with only one measly layer of frosting between them.


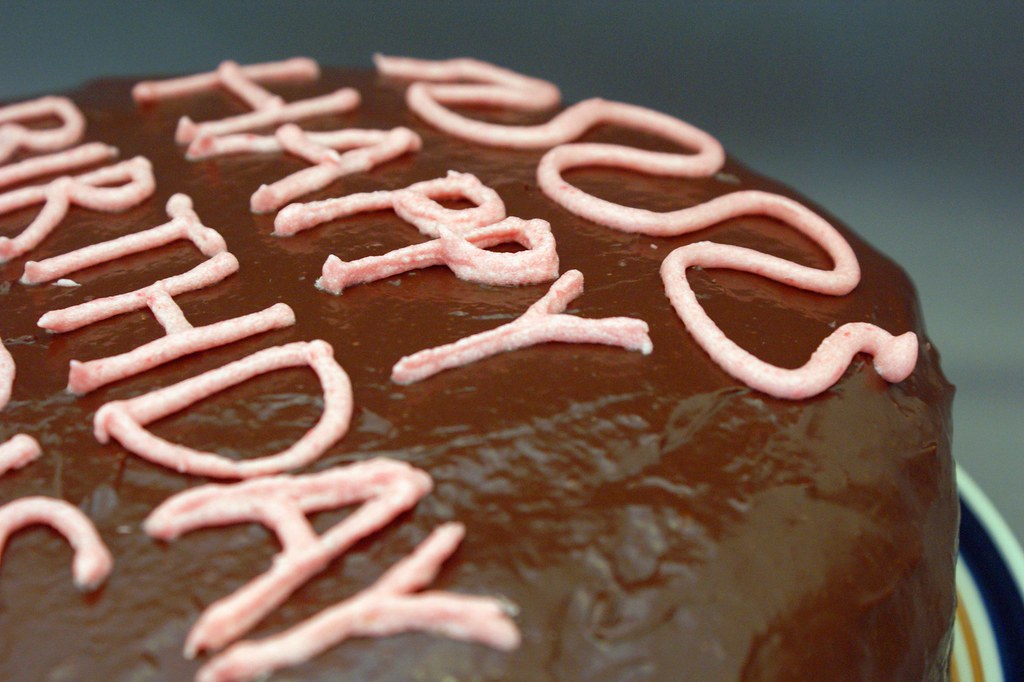
I used some of the extra buttercream to decorate the top of the cake.  Lettering and squiggles and what not.  An expert I most certainly am not.  Fresh raspberries would have worked well too, but they were too rich for my unemployed blood.

Now this may shock you, given the subject and title of this blog, but there is, in fact, no booze in this cake.  A travesty, I know!  The recipe below contains no booze.  Unthinkable!

But fear not!  I wouldn't leave you hanging.  While this blog will, from time to time, feature recipes without alcohol, this cake could easily work some in.  And so next time I will.  I just didn't have the right booze on hand, so it was left out.  Sad, I know.  I'm talking about Chambord raspberry liqueur, of course.  Wouldn't that go nicely?  When I make this cake again I plan to incorporate it in the chocolate glaze on top of the cake, as well as brush some of the liquor on the cake layers.  Did you know brushing baked and cooled cake layers with water, simple syrup, or liquor is a good way to keep a cake moist, and in the case of the latter, delicious?  This chocolate cake definitely doesn't need the moisture, but I never say no to flavor.  If you're not a fan of Chambord, I'll bet that Godiva chocolate liqueur would be delicious as well, though chocolate on chocolate...it would probably get a bit lost.

While hunting the interwebs for ideas and recipes for what I wanted to do with this cake, I happened upon this invaluable post from Deb at Smitten Kitchen.  If you're planning to make a layer cake, it's definitely worth reading her tips for a successful cake.  My chilling technique and use of the crumb layer came from her.  And her tip for baking the cakes at a lower temperature for longer to prevent the middle from puffing up is ingenious!  Totally worked for me. Check it out.


Making this cake felt like running a marathon.  Seriously.  It took me all day.  I missed a Corgi meetup at the beach because I knew I needed every available minute of the day.  It didn't really take all day.  And it didn't require constant attention.  But I took my time, making sure not to rush, so I was sure that I would be happy with the end result.  Also, I have an issue with time management.

But it was so worth it!  This cake was by far the best cake I've ever baked.  I was afraid there would be too much going on, but since I kept the flavors to just chocolate and raspberry, the taste was complex, but still cohesive and delicious.  If anything all the different fillings and frostings added a great textural element.  Especially after refrigerating it. That chocolate cake recipe really is my favorite.  The cake comes out light and very moist, and the chocolate flavor is deep, not watered down like some other cakes can taste.  Oddly enough, I think all the different fillings and frostings actually balanced themselves out well.  Without the chocolate frosting, the raspberry in the filling and buttercream together would probably have been too pronounced. And the frosting without the raspberry filling would have left the raspberry flavor not pronounced enough.  You see?

Apparently our guests liked it because they actually took some home!  Husband freaked out a bit when he saw after only one day it was already half gone.  But he's a bit selfish (read: oink, oink!) when it comes to my baked goods.  It's endearing.  And when I sent him to work with some of the leftovers when Monday rolled around, people were actually fighting over it!  Heh, ok, not really.  But Husband did bring in a slice for our old manager, a woman who has always appreciated and encouraged my baking efforts, so I share with her as much as Husband lets me.  She was out of town, but very much wanted to try the cake, so she told him to put it in the freezer for when she got back.  A few co-workers got wind of the frozen slice, and decided to pilfer it for themselves.  They're also friends who encouraged my baking efforts, so I was glad they were able to try it, but apparently my old manager was not happy to hear the cake had not-so-mysteriously disappeared from the freezer.  Husband actually asked me to bake another cake so she could try it!  I'm nice, but I'm not that nice.  Cakes are rather expensive to make!  And remember the whole marathon comment?  Pretty sure it's not healthy to run a marathon every month.  Ok, maybe it is, but I still don't want to do it.

That reminds me of a tip for people who, like me, love to bake, but don't want the calories that come with being responsible for eating an entire cake, or batch of scones, or pan of muffins.  My first line of defense is my husband.  If anything gets past him after 48 hours, then it goes to work with him to share with his co-workers.  Only the ones he likes, though.  He thinks it's an insult to feed my extra delicious baking to people who are not worthy.  This is why I bake him cakes that take all day to make.  He's a sweetie.  But I should amend that, since there are co-workers who he likes, but sometimes he just doesn't have enough to go around to everyone because he eats half of it at his desk before sharing.  The frozen slice of cake, anyone?  Sometimes I have to give him specific instructions.

Oh, and a word of warning.  If you're going to make this cake for a dude, I wouldn't skip the chocolate glaze.  I didn't realize until I frosted the cake, but without the glaze it would be a pink cake.  I don't think Husband would have particularly appreciated a pink cake.  Just sayin'.

Portions of the cake could in theory be done the day before.  I baked the cakes the day before and froze them with no issue.  But for the filling, frostings, and glaze, I wanted to make sure it was freshly made so I didn't have any consistency issues.  If you do attempt to undertake this cake, I applaud you.  I'm sure you'll make a beautiful cake, and I hope you like how it turns out!


Husband's Ultimate Birthday Cake


The Contents:
  • the cake - 2 layers chocolate cake cut in half to make 4 thin layers
  • between the cake layers - chocolate frosting and raspberry filling
  • on top of the cake - raspberry buttercream and chocolate glaze
  • decoration for the cake - leftover raspberry buttercream for lettering or fresh raspberries

The Recipes:

The Best Ever Chocolate Cake
Adapted from the Cafe Beaujolais Cookbook

3 cups flour
2/3 cup unsweetened cocoa
2 tsp baking soda
2 cups sugar
1 tsp salt
2 cups cold water
1/2 cup + 2 TB canola oil
1 TB vanilla extract
2 TB white vinegar
  1. Preheat the oven to 300 degrees.  Grease two 9-inch cake pans with baking spray, line the bottoms with parchment paper, then spray the parchment paper.
  2. Mix the flour, cocoa, baking soda, sugar, and salt, and sift together in a medium-sized bowl. In a separate bowl, combine the water, canola oil, vanilla, and vinegar. Whisk the wet and dry ingredients together, and pour through a fine mesh strainer to break up any lumps.  Whisk one more time.
  3. Pour the batter evenly into the two prepared cake pans.  Drop the pans, one at a time, about 6 inches from the counter or floor a few times to pop the air bubbles.  Bake for 30-40 minutes, until a tester inserted in the middle comes out clean.  Cool completely.

Bittersweet Chocolate Buttercream Frosting
Adapted from Smitten Kitchen

Makes about 1 1/2 cups

3.5 ounces bittersweet chocolate
1/2 cup heavy cream
4 TB unsalted butter, at room temperature
  1. Melt the chocolate and heavy cream in a double boiler, and whisk to combine.  Remove from heat and let the mixture sit, whisking occasionally, until it reaches a thick, gloppy consistency (which Deb likened to mayonnaise, which was right on).  This took me about 30 minutes.
  2. In a stand mixer, cream the butter using the whisk attachment, on medium speed until it is light and fluffy.  Add the chocolate mixture and whip until it is thicker and lighter in color, about 2 minutes.  Don't overwhip, or it could break.

    Raspberry Filling

    Makes about 1 1/2 cups

    20 ounces frozen raspberries (2 packages), thawed
    1/3 cup sugar
    2 TB cornstarch
    1 tsp freshly squeezed lemon juice
    1. Puree the raspberries in a food processor, and push liquid through a fine mesh strainer to remove any seeds.
    2. Combine all ingredients in a large saucepan and heat the mixture over medium heat, stirring constantly until it boils and thickens.  Let it cool completely, so the mixture will come to a thick enough consistency. 

    Raspberry Buttercream

    1 cup (2 sticks) unsalted butter, at room temperature
    5-6 cups confectioners sugar
    10 ounces frozen raspberries (1 package), thawed
    1 1/2 tsp vanilla extract
    1. Puree the raspberries in a food processor, and push liquid through a fine mesh strainer to remove any seeds. Set aside 3 TB of the puree for the chocolate glaze.  (To save time, I pureed the raspberries for both recipes together at once.)
    2. In the bowl of a stand mixer, cream the butter using the whisk attachment on medium speed until it is light and fluffy.
    3. Slowly add 2 cups of the confectioners sugar, and mix until smooth.  Then add 10 TB of the raspberry puree, slowly, and mix until smooth.  Add the rest of the sugar, in 1/2 cup increments, and mix until fully incorporated.  When you've added in 4 1/2 to 5 cups of sugar stop and taste the mixture.  If it is sweet enough for your liking, stop there.  If you need more, keep tasting after each 1/2 cup addition until it's sweet enough.  The exact amount of sugar will vary depending on the sweetness of the raspberries and, of course, personal preference.
    4. Finally, add the vanilla extract and beat the mixture at medium-high speed for 2-3 minutes, until it is light and fluffy.
    Note: Don't refrigerate the buttercream if you make it in advance.  It will become too hard and won't be spreadable.  It should be ok at room temperature in an airtight container.  This recipe makes enough to frost an entire cake, which will be too much since you're not using it between the cake layers.  I wasn't sure if I'd have enough if I halved the recipe, but if you're feeling brave (or miserly!), you can try it.


    Chocolate Raspberry Glaze
    Adapted from Smitten Kitchen

    8 ounces bittersweet chocolate, coarsely chopped
    3 TB raspberry puree
    2 TB light corn syrup
    1/2 cup heavy cream
    1. Melt the chocolate and corn syrup together in a double boiler.  Whisk often until the chocolate is fully melted and the mixture is smooth.  
    2. Remove the mixture from heat, and whisk in the raspberry puree and heavy cream until it is smooth.
    Note: Don't do this part until you are ready to use it (the cake is assembled).  It needs to be warm when it is poured over the cake, so it's oozy and drippy.  I waited just a few minutes to pour mine, and it stayed a little thick.

    Booze It Up!  Add 2 TB of Chambord raspberry liqueur when you add the raspberry puree and cream.


    The assembly:
    1. Cut the cooled cake layers evenly in half, so there are four thin layers.  Be careful!  They'll be very delicate.  If the tops have puffed up in the middle, use a bread knife to level them.  Put them in the freezer to firm up, about 30 minutes to an hour.
    2. Place the first layer on your cake plate.  (If boozing it up, brush the top of the first cake layer with a little Chambord raspberry liqueur.) Using a spatula, spread about 1/2 cup of the raspberry filling in an even layer over the cake.  Make sure it gets all the way to the edge.  Spread about 1/2 cup (or one third) of the chocolate frosting over the raspberry filling.  Place cake in the refrigerator to firm up, if needed. (Note: If the raspberry filling is on the runny side, put the chocolate frosting layer down first.  My filling was very thick, so it worked best for me to use it first.)
    3. Repeat Step 2 for the next two layers, making sure to work slowly and letting it set in the refrigerator if it is slipping and sliding at all.  Chilly cake is your friend!  Then place the final layer of cake on top.
    4. If there is unevenness in the shape of the cake, now is the time to even it out.  Cut off any bits that stick out...and eat them!  Gotta test for poison, right?
    5. Spread a very thin layer of the raspberry buttercream around the cake for a crumb layer.  This will glue the dark crumbs to the cake, so they don't show through the light colored buttercream.  Chill the cake in the refrigerator for 15 minutes until firm.  Apply a regular, thick layer of the buttercream, then chill again for another 15 minutes.
    6. Pour the chocolate glaze over the top of the cake and using a spatula, push the glaze just to the edge of the cake, so it spills down the sides.  Refrigerate the cake for at least 30 minutes to set completely.
    7. Decorate the top of the cake with leftover raspberry buttercream and/or fresh raspberries.
    Yum!