Showing posts with label summer. Show all posts

Sunday, August 14, 2011

Sautéed Swiss Chard and Mushrooms with Chicken Sausage


Life is crazy. Life is a whirlwind. Confession: I am a homebody. A shut-in at heart, though not in practice. I like spending my evenings quietly with my husband and my dog, my days in simple, solitary tasks that allow for personal reflection. But I’m a complicated woman. Local breweries throw parties, my favorite restaurant tempts me with wildly amazing new burgers (a lobster-crab patty and a wagyu beef patty together, and that was only half of what all came on it! Words cannot describe...), wineries want me to come pickup the wine I’ve ordered while pouring me glass after glass of their wares, family visits and the sights must be shown. People I know inexplicably want my company more often than I’m able to give it. I can’t say no to any of it. I’ve been having fun. Why is fun so durn tiring? It’s all I can do to bake a batch of cupcakes to research recipes and flavor combinations for my nephew’s second birthday cake. That’s happening. Remember last years? I’m really excited to share it with you when the time is right. Oh, and did I mention I’m changing jobs? Again. I’m scared. It’s new and challenging, but also old and familiar. And completely crazy and unexpected. Hopefully it’s the right decision. We never know until we know, right? So life is a whirlwind. But it’s also full of love, fun, and opportunity. It’s exciting and engaging. And most importantly, there are cupcakes.

With all the libation partakage, face-stuffing, and uncharacteristic socialbility, it can be hard to maintain one’s girlish figure. It’s a constant...I want to say battle, but that’s not the right word. I’m not at war with my body. It’s more like I need to keep constant vigilance! I’m at war with my fatty fatty fat fat. If I let my guard down, it’ll sneak in and squat. Not cool. So even though I despise waking up at 5am to fit in a decent workout before work, I despise forgoing drinks and dessert far more. Even though some days I want to quit my run at mile 3, I push on to mile 5 and follow up with a couple sets of burpees and jack-knives because I want to have a good time out with my friends, and not feel guilty if I don’t order a shamefully made salad that will ultimately leave me feeling hostile towards the establishment. Burpees are the bane of my existence. My motivation is my lifestyle. I like it. I want to keep doing what I’m doing. But I like my body too. I’m healthy. I feel good. My clothes fit. It’s all about the choices we make and the priorities we set, right? Finding that balance. 


One way I offset my weekend escapades is to cook as deliciously healthy as possible during the week. You know, cook vegetables. The stuff most restaurants seem to stubbornly shy away from except in the most fleeting capacity. I get so disappointed when a dish boasts of a protein and starchy side resting on a bed of, say, Swiss chard, and the reality of what’s presented before me is a mere morsel compared to the gluttony of the other components. Proportions people! How about a whole big bunch of Swiss chard? And fungus is uber-healthy. Lots of vitamins and fiber and not much else. And ingestion is supposed to help prevents cancers and other lethalities. Not to mention mushrooms are a huge source of “umami”. Which, since I’m not Japanese and most of my vocabulary is construed as some form of English, I tend to refer to as “earthy”. Wonderfully earthy. So let’s throw a heap of mushrooms in there too. And how about some protein? It doesn’t need to be a giant hunk of meat on top. It can be the flavor base of the dish. The thing that makes it deceptively filling. And if your grocery store happens to sell a fantastic chicken and mushroom sausage behind the meat counter? Well I think you should tell Mr. Meat Counter Man to pack you up a couple of links!

As a quick weeknight meal, this simple saute of Swiss chard and mushrooms and chicken sausage was a pleasant surprise. One of those meals I didn’t plan, didn’t expect to be anything exceptional, and upon tasting, immediately ran to write down the recipe while it was still fresh in my head so I could make it again and again. One of those meals Husband made lots of quiet grunting noises while eating between expressions of fondness for the dish. It was, unfortunately, not long for this world with such ardent admiration. But I snapped a pic or two and here I am to share it with you.

Besides coming together fast, it’s also very adaptable to what you have in the fridge. I think Swiss chard works best, but collards or kale would do. Cremini mushrooms are a bit more rich in flavor, but button mushrooms are mighty tasty too. I love the flavor of dry sherry and mushrooms, but a dry white wine would be a lovely substitution. No sausage on hand, but a crisper drawer full of bacon? Well it’s not quite the same, but I’m sure it would still be pretty dang tasty. Whatever dry or fresh herbs that tickle your fancy would be nice, but thyme and tarragon fit that bill for me. Freshly squeezed orange juice was all the sweetness and acidity I needed, but a squeeze of lemon juice and a touch of honey could be just the thing. Just promise me one thing. If you do use Swiss chard, don’t throw away those bright and delectable stems! Their color not only adds an enticing hue to the dish, but you paid for a bunch of chard. Why are you going to throw half of it away? Let’s practice root to leaf practices here, people. It’s like celery. It just needs some time and love, but you’ll be glad you did.


Sauteed Swiss Chard and Mushrooms with Chicken Sausage

Makes about 6 servings

1 lb. fresh chicken sausage (I used a chicken mushroom), or any preferred sausage
1 yellow onion, chopped
5 cloves garlic, minced
1 bunch Swiss chard, stems chopped and leaves cut into ribbons
1 lb. cremini mushrooms, sliced
1 tsp dried thyme
½ tsp dried tarragon
¼ tsp freshly ground black pepper
1 cup dry sherry (or wine)
¼ cup fresh orange juice (~ ½ a juicy orange)
kosher salt to taste
2 TB olive oil, divided

  1. In a large skillet (preferably cast iron), heat 1 TB of the olive oil over medium-high heat. Once it is good and hot, crumble the fresh sausage evenly into the pan and let it sit undisturbed for a bit to brown. Flip the sausage for the other side to brown, and using a spatula or wooden spoon, break up any large chunks that are sticking together. Once the sausage is browned and cooked, remove it from the pan to a plate and set aside.
  2. Reduce the heat to medium, and if it is needed, add the second TB of olive oil. Add the onion and a pinch of salt and saute until it is soft and translucent, about 3 minutes. Add the Swiss chard stems and cook for another 3-5 minutes, until they have begun to soften. Add the garlic and cook for another minute, until it is softened and aromatic. (This is around the time people in your household will comment on how good it smells)
  3. Add the mushrooms with another pinch of salt, as well as the thyme, tarragon, and black pepper. Cook the mixture until the mushrooms have given off their water, shrunken, and the water has mostly cooked off. Add the sherry to deglaze the pan, scraping up any browned bits that have formed on the bottom of the pan. Let the mixture simmer for a minute so the sherry can slightly reduce and concentrate. Add the Swiss chard leaves and the orange juice and cook until the leaves have wilted and softened, about 5 minutes.
  4. Add the sausage, and any juices that have pooled on the plate, back to the pan and simmer for a couple more minutes so the flavors can fully marry together.

Sunday, July 10, 2011

Mint Chocolate Chunk Ice Cream


If you can believe it, I was never a big fan of mint. When I was a kid I hated anything with the slightest hint of mint. Believe it. You can see where I’m going with this...

It blows my mind how many foods I didn’t like as a child, considering how much I now profess my undying love for them. Forbidden foods that wouldn’t make it past my picky trap as a kid?

Meat (except the ground up, super processed, exceedingly disgusting kind)
Poultry (absolutely none of it)
Fish (except tuna, canned of course)
Avocado (because my sister didn’t like guacamole and I idolized her)
Eggplant
Polenta
Pine nuts
Caraway seeds
Bok Choy
Mint-flavored anything

Those are the stand-outs. I’m sure given inputs from my family, that list would double. Now? Avocado is my fatty fatty fat fat of choice in any application I can squeeze it into. There’s no animal, bird, and swimming creature I can think of that I wouldn’t try and most likely enjoy (except the taboo ones like dolphin!). I love it all. And life is so much easier when you’re a good eater. I am no longer the soup and salad cheap date my best friend’s mom said I was when I was 14. That’s a lie, I totally am. Good soup and salad is the ultimate. Course, nowadays salads aren’t the cheap date entree they used to be. Don’t even get me started.

Am I totally weird in my taste bud 180? Are there foods you hated as a child, genuinely gave a second chance to as an adult, and to this day cannot stand? Odd psychological circumstances not withstanding. I’m curious only because I can’t relate! I know my sister now crushes on guacamole as hard as I do. Husband never had a food he wouldn’t eat growing up. His parents were lucky.


Even though I now have nothing but love for mint, I wouldn’t say it’s high on my list for devoted enthusiasm. Though let’s face it, when it comes to food, I can still scrounge up a fair amount of enthusiasm even for the very bottom. I’ve come to realize it depends on the execution. While on my tour at the Theo Chocolate Factory, we got to try a rather pathetically small portion of a truffle. Husband chose mint. At first I was disappointed by his selection because I knew he’d want to share and have half of my fig & fennel truffle, and what’s so special about a mint truffle? And this is why I should always listen to Husband. My truffle was only just ok, but that mint? Amazing! It tasted like someone wrapped a square of soft chocolate in a mint leaf. In a good way. No mint extract or anything artificial. When we were trying to narrow down our purchases in the store (we started with one of every item sold in the store, and took things out of the basket from there...), we found a section of chocolate that was, well, basically like the remnants section of a fabric store. It was plastic bags full of the odds and ends of chocolate bars. Not pretty, not packaged, but cheaper and just as delicious. And they happened to be the mint flavor that day. Score!

You can see where I’m going with this.

This ice cream was born of a half-eaten bag of mint chocolate bar bits and 5 leftover egg yolks. Of course it was. It’s a chocolate ice cream base, because Husband doesn’t feel like he’s eaten dessert unless chocolate was overwhelmingly featured in every aspect involved. I don’t know why he even bothers. He should just eat a whole bar of chocolate every night. He’d probably complain it needed more chocolate. This is the guy who claims to love garlic, but aside from eating a straight clove, can never seem to taste it. But just chocolate wasn’t special enough for my special chocolate. I wanted to capture and bring out the mint essence. Without the fake stuff.

Pay no attention to that vanilla extract behind the curtain! Not everyone can afford vanilla beans!

Luckily, making mint chocolate ice cream is just as easy as making chocolate ice cream. There’s just the easy added step of steeping fresh mint leaves in the heavy cream while you warm it up. I actually ran out of time while attempting my ice cream base one evening after work, so my cream and mint actually got it on in the fridge, overnight. If you can swing it, the longer you can let them get to know each other, the mintier you end cream will be. But it really needn’t be a 3 day process. I’m confident a few minutes while it warms is plenty for those minty oils to work their devilish ways.

This ice cream turned out so good. So good. Like the kind of good where you take a minute to marvel that it actually came from your own two hands. I finally get mint chocolate. What all the rage is about. It’s the creamy, bittersweet taste from any good chocolate ice cream, plus this amazingly refreshing, fragrant essence of mint. It’s a natural pairing. Like chipotle and chocolate. I majorly heart that too. Essence.

I might be a bit obsessed with essences lately.

I was concerned the mint chocolate chunks from the leftover bars would get lost and wasted, but it was all for naught. Every bite with a chunk was that much mintier and more delicious. Definitely better than just eating it straight up. Would I make this ice cream with only regular chocolate chunks? Heck yes! The ice cream holds its own in the mint department, for sure. And regular chocolate chunks are still a nice textural contrast. Gotta have some crunch.

Give it a try! I hear it’s national ice cream month or something. Though I’m pretty sure every hot day of summer is national ice cream day, whether it falls in June or August. So says my ice cream maker. 

PS: Can we just not even talk about these pictures?  Ice cream food styling is just beyond me without a real ice cream scoop and cute clear vessel.  Pretty pics just ain't happening.


Mint Chocolate Chunk Ice Cream
Adapted from Annie’s Eats Chocolate Ice Cream Recipe

Makes ~ 1 ½ quarts

Ingredients:
2 cups heavy cream
¼ cup fresh mint leaves
3 TB Dutch-process cocoa powder
5 oz. bittersweet chocolate, finely chopped
1 cup whole milk
¾ cup sugar
Pinch of kosher salt
5 large egg yolks
½ tsp vanilla extract
2 TB bourbon
1 cup good chocolate bar (preferably mint flavored), chopped into chunks

Directions:
  1. Massage the mint leaves in your hands a bit to release the oils, and then combine them with the cream in a medium saucepan over medium-low heat. Let the mixture warm up and infuse for at least 20 minutes. I let it sit overnight for ultimate mint flavor.
  2. Pull out the mint leaves, and wring them out to get every drop of mint flavor in the cream. Increase the heat to medium-high, add the cocoa powder, and whisk until it is fully dissolved. Once the mixture comes up to a bare boil, reduce the heat back to medium-low and let simmer for 30 seconds, whisking constantly. Remove the pan from the heat, mix in the bittersweet chocolate and whisk until it is melted and smooth. Transfer this mixture to a medium mixing bowl, and set a fine mesh strainer over the top.
  3. In the same saucepan, combine the milk, sugar and salt and warm the mixture over medium heat. In a small mixing bowl, whisk together the egg yolks. When the milk mixture is warm (not quite to a boil), temper the eggs by very gradually whisking the milk mixture, a little at a time, into the egg yolks, beating constantly. Return the egg-milk mixture to the saucepan and continue heating over medium heat, stirring constantly and scraping the bottom and sides of the pan with a spatula, until the mixture is thick enough to coat the back of the spatula (or 170-175° F on a thermometer). Remove it from the heat, and pour the mixture through the strainer into the chocolate-cream mixture and stir to blend. Stir in the vanilla extract and bourbon.
  4. Cover with plastic wrap and chill overnight in the refrigerator. Once the mixture is well chilled, freeze in an ice cream maker according to the manufacturer’s instructions. Once churned, add in the mint chocolate pieces. Store in an airtight container and freeze.

Thursday, June 30, 2011

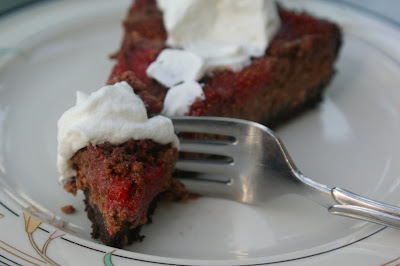
Chocolate Strawberry Ricotta Tart


I had a thought the other day - yep, just the one.  If I could go back in time and talk to my teenage self, what would I say?  We’ve all had this thought, right?  Though you probably have other thoughts to go with it.  High school.  Hormones.  Literal growing pains.  ‘Nuff said.

I would skip the clichéd advice: It gets better.  High school is something to be gotten through, everyone hates it.  All the things that seem epic today will be so small tomorrow.  Because really, we all did get that advice, one way or another, in high school, and it did squat to make it any better.  So nevermind that stuff.  Here’s what I would tell my younger self:

  1. Own it.  Whoever you are, whatever you do, own it.  When people say “be yourself”, they really mean, don’t be embarrassed by whatever “yourself” is.
  2. You are as apathetic as you are passionate.  Don’t feign apathy for the things you are passionate about.  Don’t feign passion for the things you are apathetic about.  People will just have to get over that you love Star Trek: TNG and listen to your parents’ Queen CDs, and you could give a rat’s furry tail about conch shell necklaces or Tupac.
  3. You’re tall.  Buying pants that fit is a pain in the rat’s furry tail, and all the cute boys are self-conscious about it.  Can’t say that ever gets better.  But it does mean you’ll end up with someone tall.  Go ahead and buy some heels.  People will just have to get over it.
  4. Learn to eat!  I don’t mean quantity.  You’ve got that down.  You say you don’t like meat, and a slew of other foods.  In reality you do.  Now it’s your turn to get over it. Open your mind.  And stop picking all the cashews out of the cashew chicken.  The family really hates that.
  5. Get your rat’s furry tail in the kitchen – and not to make grilled cheese or Stouffer’s mac and cheese!  Look, Mom works hard all day and then comes home to a house full of people whining for attention and wanting things, and still has to get dinner on the table in an hour or all the whining steers towards hunger pangs.  You, on the other hand, get home from school to an empty house with, let’s face it, no intention of starting homework so early.  You might not realize how much you enjoy cooking just yet, but for how much Mom would appreciate the salad already made, or a pasta sauce already done up, it’s not really about that.
  6. And finally, read more books and watch less television.  You’ll be so glad you did.

I’ve got you thinking now, haven’t I?  Let’s hear it.  What would you tell your teenage self?


What’s this got to do with ricotta cheese, strawberries, and tarts?  Nothing!  Though I could have been enjoying it in my life a lot sooner, had I listened to myself about number 5.  That will just have to do for a segue.  It’s my blog, and I can be random if I want to!  Now, onto the chocolate graham cracker ricotta strawberry tart!

A chocolate graham cracker ricotta strawberry tart to anyone who can say “chocolate graham cracker ricotta strawberry tart” 10 times, fast.

This creation came about by a need to use up soon-to-go-stale graham crackers (They should sell graham crackers in packs that are exactly enough for a tart or pie crust, so you don’t have to worry about how much you need to grind into crumbs, or whether you have enough left in the box.  I’m totally marketing that idea.  Don’t steal it, k?), ricotta cheese (because in a moment of utter stupidity I wasn’t sure if 32 oz. was enough for a recipe that called for 2 cups, so I bought 15 oz. more), and strawberries from my CSA box.  Because Husband would ultimately be eating it, I decided to incorporate chocolate as well.  Lots of it.  It just made sense.  I considered dotting the tart with fresh strawberries at the end, but a recent failed attempt at strawberry rhubarb pie left me with a need for cooked berry vindication.  Always drain your strawberry juices people!  Also, when you strain them into, say, a small saucepan and simmer them until they cook down into a lusciously sweet syrup, you’ve got the mighty fine makings of something to brush onto this tart at the end.  Yeah, I did that.  I shudder to waste one ounce of strawberry essence!

To break it down, the crust is graham crackers and pecans and cocoa powder.  Pecans because I ran out of graham crackers (which would not have happened, had the product I mentioned existed!), and also because they’re delicious.  Cocoa powder because I wanted the chocolate flavor to really come though, and also because it’s delicious.  I didn’t add sugar.  I thought the sweetness from the rest of the tart and the sugar already in the graham crackers was plenty, but there’s also a lot of cocoa powder in it, so I could see it being too much for some.  I recognize my sweet tooth, while very demanding, is also very susceptible to being overwhelmed.  Husband agreed the level of sweet was spot on, but a tablespoon of sugar could be thrown in without any harm.

The filling is my leftover 15 oz. container of ricotta cheese, the usual sweeteners and stabilizers, and melted chocolate.  Why is ricotta cheese and sugar so good?  I wonder if my sister, who hates the combination of cream cheese and sugar, also hates ricotta and sugar.  They’re totally different flavors, but maybe the dislike stems from disconcertion over mixing savory cheese with enough sugar to transform it to a decidedly dessert setting?  Creamy, salty, and sweet?  It’s a-ok in my book.  You’ll have leftover filling.  A fair amount.  It’s not ideal, but I didn’t want to mess with untested ratios, and it uses a standard 15 oz. container.  Not to mention, what are you going to do with just a little extra ricotta?  Instead you’ll face a bowl of delicious filling with no home besides your stomach as you try to resist just another spoonful while you wait for your tart to bake and your strawberry juices to reduce.  You’re welcome.

My strawberries were tiny, so I didn’t end up using the full 16 oz. package, but I’m confident more regular, American strawberries would yield the perfect amount.  The more strawberries, the better I say!  This tart takes forever to bake.  An hour?  What is in there that takes so long to become un-jiggly?  No idea.  Of course, checking the doneness at 40 minutes, and every 5 minutes thereafter probably extended the baking time a wee bit.  I was so afraid of over-baking!  It actually ended up taking an extra 10 minutes or so. But once it was done, and the syrup was brushed over the top, and it had cooled in the fridge…such good stuff.  The rich chocolate, earthy yet savory cheese filling, and texture from the crust all contrasted nicely.  The strawberries had a lusciously soft bite and sweet flavor, not to mention the syrup essence!  The whipped cream on top isn’t completely, necessary, per se, but I did try it both ways, and the airy, creamy element was a definite plus.  All in all, we both loved it and I wouldn’t change a thing. Oh, did I mention I infused a good amount of Grand Marnier in there? Yeah, I did that. It was tasty.

Except maybe how many spoonfuls of leftover filling I ate.


Have any tasty creations ever spawned out of your kitchen because of an abhorrence for wasted food?  Or a food fail?  Are they all the tastier for it?


Chocolate Strawberry Ricotta Tart

For the crust:
6 oz. graham crackers
2 oz. pecans
8 oz. (1 stick) butter, melted
1 tsp orange zest
¼ cup cocoa powder
2 TB sugar

For the strawberries:
1 lb. strawberries, halved and hulled
¼ cup sugar
2 TB Grand Marnier

For the filling:
15 oz. ricotta cheese (I used part skim), room temperature
½ cup honey
2 large eggs, room temperature
2 TB Grand Marnier
1 tsp orange zest
1 tsp vanilla extract
¼ tsp kosher salt
4 oz. bittersweet chocolate, melted*

  1. Preheat the oven to 350 degrees.
  2. In a food processor, pulse together the graham crackers and pecans until they are small crumbs.  Add the orange zest, cocoa, and sugar and pulse until it’s mixed.  Add the melted butter and process until the crumbs are coated.
  3. Prepare a 9” tart pan with baking spray.  Press the crumbs evenly around the bottom and sides of the tart pan.  Bake the crust for 10 minutes until it is toasted and set.  Let cool.
  4. In a large bowl, stir together the strawberries, sugar, and Grand Marnier.  Let it sit for about 20 minutes, or until the strawberry releases some of its juices.
  5. In the bowl of an electric mixer fitted with a whisk attachment, mix together the ricotta and honey until they are well incorporated.  Add the eggs, one at a time, mixing until they are incorporated.  Add the Grand Marnier, orange zest, vanilla, and salt, and mix to combine.  With the mixer running, slowly pour in the melted chocolate, and mix until everything is well combined.
  6. Pour the filling into the cooled crust.  Top the filling with the strawberry halves, reserving the juices left behind in the bowl.  The strawberries will sink a bit.**  
  7. Bake the tart for about an hour, or until the filling is set and a toothpick inserted in the middle comes out clean.  
  8. While the tart is baking, transfer the reserved strawberry juices to a small saucepan.  Over medium heat, bring the juices to a simmer and cook until it is reduced by about half, about 10 minutes.
  9. Once the tart is out of the oven, either brush or drizzle the strawberry syrup over the top.  Cool completely in the refrigerator for about 2 hours before serving.


*To melt the chocolate, microwave the chopped up chocolate, stirring every 15 seconds until it’s melted.

**If you prefer your strawberries less cooked, and more on the surface of the tart, put the tart in the oven without the strawberries on top.  After about 30 minutes, when the filling has set up a bit, remove the tart from the oven, set the strawberries on top of the filling, and put it back in the oven to cook for the rest of the time.

Wednesday, May 18, 2011

Grilled Shaved Asparagus Pizza


Pardon the bandwagon jumping, I hear it’s great for toning your butt. I’m going to be yet another food blogger talking about shaved asparagus this week. It’s everywhere! If you’ve tried it, you’ll know why – because it’s awesome! I actually shaved the asparagus in question almost two weeks ago, and was only completely copying inspired by one food blog (a certain Kitchen we’re all completely Smitten with) in particular. My dish turned out great. Figured I’d blog it (which unfortunately rates below painting guest rooms and attending anniversary parties at local breweries on the priority scale). Then boom, come Monday morning, shaved-asparagus-palooza! Dang! But none of that matters. What matters is the utter deliciousness of what I made.

That’s not the only bandwagon I jumped on recently. A few weeks ago Husband and I joined the scores of other bloggers who have made the same big, life-changing decision of late. That’s right...we joined a CSA*! Every other week we’ll be getting a big box of fresh from the local farm organic produce. The “get what you get” nature of a CSA gave me pause when we first considered joining a couple of years ago. Another way my confidence in my cooking has progressed – I don’t need a recipe to follow and an iron-clad shopping list to buy from every week. I’m now comfortable with pulling a head of romanesco cauliflower out of a box, knowing I’ve never cooked with it before. In the end produce is produce. Sure, certain flavors and preparations work better than others, but ultimately, if it’s fresh, it’s going to be delicious. And if I’m ever really stumped, I’ll channel my grandmother and throw it into a pot of broth and add things until it is some kind of delicious soup. I’m glad we waited to join. A few years ago, I might have met the bi-weekly pickup with stress and trepidation of how to consume everything in a delicious way before it expired. Now I wake up excited for “CSA pickup day”! It helps that my love of fresh produce has grown to obsessive proportions.

It’s a good thing Husband doesn’t mind being married to a woman whose idea of evening conversation is naming off the different possibilities for dishes using CSA ingredients…

I’m happy to report my first CSA box experience had very little stumpage. Quite the opposite, in fact. I pulled out a beautiful bushel of asparagus and did a little dance (I hope no one was watching…) because I knew exactly how I wanted to use it. Here’s how it went down:
  1. Husband had requested I make grilled pizza of some kind.
  2. The pizza dough recipe I wanted to try required overnight resting, so there were several balls of pizza dough ready and waiting in the fridge.
  3. I had bought some Iberico cheese on a whim at Trader Joe’s. I wanted to try something Spanish and it had a nice soft, yet sturdy feel to it.
  4. I had just read about a shaved asparagus salad that sounded divine. 

When I saw that asparagus, everything clicked. Husband might like his bbq chicken pizzas, but he was just going to have to go without. Shaved.Asparagus.Salad.Grilled.Pizza. It called to me. “If you grill it, deliciousness will come…”

Did I mention I made garlic-infused olive oil, then used the oil to brush the pizza dough before it went on the grill, and used the resulting garlic confit on top of the pizza, hidden beneath the creamy melted cheese? That happened.

I also put raw asparagus on a pizza that only cooked for about 2 minutes. Not quite raw, but definitely not cooked. It was sweet! Who knew raw asparagus had a mild sweetness to it? After I had shaved each asparagus spear down to a nub with my vegetable peeler, I bit off that last nubby bit before the woody stem. It was so crunchy and succulent, I knew the salad by itself, which I simply tossed with lemon juice and red pepper flakes, would be fantastic.

The farm fresh asparagus made an interesting and discernable difference. All asparagus spears get woody and tough at the bottom of the stem, but this asparagus was so tender that quite a few spears weren’t woody at all. I was able to use all but the tiniest of partial inches off the bottom. And I have been known to sacrifice almost half a stalk out of fear of the woody end.

I was equally pleased with how my pizza dough turned out. Some extra hydration and the overnight resting allowed the whole wheat flour to properly mellow along with it’s already mellow cousin, AP flour. When I went to start shaping it, it practically melted over my fists and stretched beautifully with just the slighted tug. More relaxed gluten I have never seen. I stretched it super thin, so the quick, high heat from the grill would give it a charred, crispy flatbread consistency. The earthy flavors from char and whole wheat went beautifully with the Iberico and Parmesan cheeses.

The Iberico cheese was a new ingredient to me, and I was so happy with it. It was sturdy enough to grate, yet creamy enough to pair nicely with the Parmesan. Sometimes creamy cheeses can be a little bland in pizza applications. Not this one. I wouldn’t say it’s pungent, but it definitely has a mild grassy earthiness that was a perfect complement to the vegetal asparagus. Milder than goat cheese, but stronger than mozzarella. I think I’m in love.

It sure sounds like a lot of steps – making dough, infusing oil, peeling individual asparagus spears, etc. But that’s the great thing about grilled pizza – it comes together really fast! The actual cook time is almost negligible. “Infusing” something sounds like a lot of work, but really you just throw some garlic cloves in some oil over low heat and mostly forget about it for a few minutes (like, say, while you’re prepping the asparagus). And of course, you can always buy pizza dough. Trader Joe’s even has a wheat option! Because if you’re like me, you balk at eating white breads, yet inexplicably have no qualms with using white flour in cakes, pies, muffins, and every other dessert application. Um, moderation?

This pizza has, after just one go, already carved a special place in my mouth stomach heart. It was the perfect way to celebrate the end of this highly unusual rainy season. [At least, it would have been, had the rain not inexplicably come back yesterday.] Dough chewy and blistered, cheeses creamy and walnutty, and a bright, crunchy salad on top to make you feel like you’re eating a real meal. And let’s not forget the occasional bite of sweet, mellow garlic. Oh yes, this was worth every bounce of my happy dance.

Sorry for the pictures, featuring what can only be described as limp pizza. In my rush to get the leftover pizza put away and out of the reach of a certain cohabitating pizza-monster, I may have stacked and smushed the slices into a Tupperware container, forever ruining their structural integrity. Don’t be like me. Just wrap it in foil.


*Did I get ya!? Have you noticed all the bloggers are pregnant right now? Not gonna lie, it’s weirding me out.


Grilled Shaved Asparagus Pizza
adapted from Smitten Kitchen

Makes one 10-12” pizza

1 portion of pizza dough (see recipe below – Note: it’s an overnight process!)
¼ cup olive oil
6 cloves garlic
1 bunch asparagus (~1 lb.)
Juice of ½ lemon (~ 1 TB)
¼ tsp salt
¼ tsp freshly ground black pepper
¼ tsp red pepper flakes
½ cup freshly grated parmesan cheese
½ cup freshly grated Iberico cheese (any soft cheese like mozzarella, goat, or feta will do)

  1. Preheat your grill to medium heat.
  2. In a small saucepan over the lowest heat you can manage on your stove, combine the olive oil and garlic cloves. Let this mixture stew or a good 20 minutes so the flavors can marry. Check on it every few minutes, giving the pan a good swirl, to ensure that the garlic doesn’t brown. We want the flavors to cook out, but not sauté. When it is done to your liking, remove the pan from the heat and set aside to cool.
  3. Once the oil is cooled, fish out the garlic cloves (you’ve made garlic confit!). Either chop them into small pieces, or leave them whole. Those babies are going on the pizza. I opted for chopped for more garlic coverage. 
  4. Using a vegetable peeler, shave the asparagus stalks into beautiful ribbons (or hack into ribbon-like bits, if you’re me). You can use the woody ends as a handle and discard it once you’ve shaved down to the nub. In a medium bowl, combine the asparagus ribbons, lemon juice, salt, pepper, and red pepper flakes. Toss to combine.
  5. On a pizza peel or large cutting board, stretch your pizza dough to your desired shape and thickness. I did most of my dough stretching on my fists, letting gravity do the work. The gluten in the dough was so relaxed, that it pretty much melted over my hands. I also opted for a very thin dough, since the crispy texture you get from the grill goes best with a thin crust.
  6. From here on out, things happen fast, so make sure you have everything prepped and ready to go – tongs, plates, brushes, etc. at the ready.
  7. Brush the shaped dough with the garlic oil. Carefully (it’s going to stretch, it’s ok, it doesn’t have to be pretty) lay the pizza dough with the oiled side down on the grill. While that side cooks, brush the top of the dough with more garlic oil. Using tongs, peak under the dough after about 2 minutes to check doneness. You want some nice char marks, but you don’t want it to burn. When it’s ready, flip the dough over. Working quickly because this is going to cook fast, sprinkle the garlic over the dough. Then sprinkle the parmesan Iberico cheeses. Then top with as much of the asparagus as you think fits nicely without too much heaping (I heaped quite a bit because I’m like that). Close the lid on the grill and let it cook for 2 minutes. Check the pizza to see if the cheese has melted. If it hasn’t, keep cooking it covered until it melts. Once it’s melted and the underside of the dough is nicely charred, remove it from the grill. 
  8. Slice and enjoy!

Note: You can alternatively bake this pizza on a baking stone or sheet pan in a 450 degree oven.

Partial Wheat Pizza Dough
adapted from 101 Cookbooks

Makes 6 portions

2 ½ cups white whole wheat flour
2 cus bread flour
1 tsp instant yeast
1 ¾ tsp kosher salt
¼ cup olive oil
1 ¾ - 2 cups ice cold water
  1. In the bowl of a stand mixer fitted with the paddle attachment, stir together the flours, salt, and yeast on the slowest setting until mixed. Stream in the oil, and then 1 ¾ cups of the cold water. Switch to the dough hook and mix on medium speed. The dough should clear the sides of the bowl but stick to the bottom of the bowl. If it is too dry, add the remaining water, a tablespoon or so at a time until it sticks appropriately. Continue mixing for 5 to 7 minutes, or until the dough is smooth and sticky, and a small piece passes the window pane test (to tell if the gluten has fully developed). The finished dough will be springy, elastic, and sticky, but not just tacky.
  2. Transfer the dough to a floured countertop, and portion into 6 equal pieces (I used a scale because I’m anal like that). Mold each into a ball, creating some nice surface tension (Peter Reinhart and I are all about surface tension). Rub each ball with olive oil and seal into ziplock bags. Refrigerate overnight (or up to a few days). Alternatively, you can freeze the dough balls at this point – just thaw them in the refrigerator when you’re ready to use them.
  3. The next day remove the desired number of dough balls from the refrigerator at least 1 hour before making the pizza (I’d suggest 2 unless it’s a hot day). Leave them in their plastic bags, so they don’t dry out. I like to turn my oven on for literally a minute, then turn it off and put the dough inside. It’s slightly warmer than room temperature, so they wake up nicely.
  4. When you’re ready to shape the dough, on a floured surface, press it gently with your fingers into a round disk. Balance the disk on your fists and gently work the dough apart as evenly as possible. You can also use your hands to stretch it. If the dough is not cooperating, it means the gluten isn’t relaxed enough, and letting it rest for 15-20 minutes should help.
  5. Bake in a 450 degree oven or grill on the barbecue with desired toppings until the crust is crisp and nicely colored.
Note: You can use all AP flour, but you'll want to reduce the water to 1 ¾ cups.

Friday, October 1, 2010

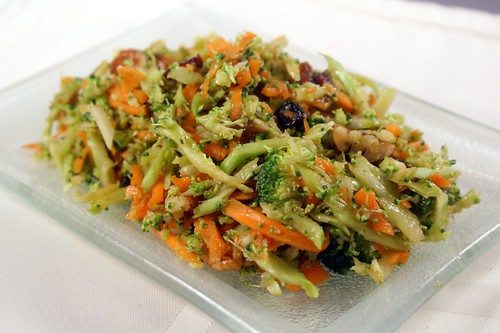
Vidalia Onion Fig Broccoli Slaw


We have a winner, folks. I’m very happy to report the winner of the CSN Stores giveaway is none other than......drum roll please.......

Geri!

Congrats, Geri! No one deserves it more. A more committed and caring doggy mama you will never meet. Of course, it was still all chance. See?


A big thanks to everyone who participated!

Well no surprise here, you all are ready for fall. Fragrant pumpkin breads, hearty squash soups, slow oven-braised meats, and the like. I've just got a few more end of summer recipes to share with you first. How lame am I? Torturing you with such deliciousness, it’s unconscionable, I know. But you know what? Sure, we’re all in a big rush to eat the fruits of fall, but San Diego is just not ready to let summer go. While enduring triple-freaking-digit temperatures this week, I was glad to have a nice cooling slaw in the fridge. Right next to my even coolingier beer. Naturally. So you East Coasters who are dealing with torrential downpours and beautiful foliage, well, you’ll just have to wait.


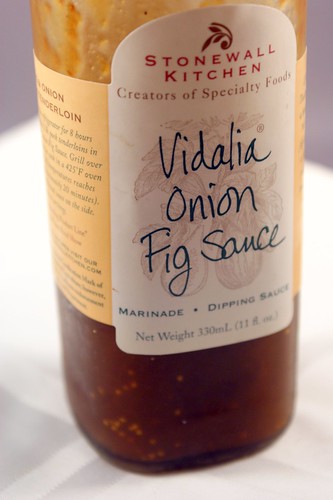
This broccoli slaw is pretty straight forward. It was actually one of those happy accidents. You know, when you buy broccoli at the store because it’s on sale and you love it in just about everything, and when you go to make something with it, you just kind of throw something together, whatever sounds good? Yeah, one of those happy accidents. I had some of that lovely vidalia onion fig sauce leftover from my awesomely delicious glazed pork, and turned it into a vinaigrette for the slaw. Good and gussied up with dried cranberries and toasted pecans, this slaw turned out better than anything I imagined when I first brought home that broccoli from the store. Don’t you love it when that happens?

I’m sure it will come as a shock to no one who reads this blog with regularity that I usually opt for a vinegar/oil-based dressing for slaws rather than drowning them in gobs of the devil’s condiment. Who needs fat when you've got flavor?  And this one had some great flavor. The fig sauce really came through when mixed with the oil, vinegar, and lemon juice to make a nice, cohesive dressing. The sauce added all the complexity needed.  No garlic, shallots, or any other finicky vegetable cutting or obscure spice procurement necessary! I’m very dressing-shy and will under-dress a salad or slaw to a fault, so feel free to double the recipe if you think you need more. Just remember you can’t remove it once you add it! Alternately, my slaws tend to be quite large in volume, so you could also cut that recipe in half very easily too. But then you won’t have as many leftovers.  And trust me, you're going to want leftovers.


Vidalia Onion Fig Broccoli Slaw

Makes about 6 cups, or about 12 servings

1 1/2 lbs broccoli
5 medium carrots
1 cup dried cranberries
1 cup toasted pecans, chopped

For the dressing:
2 TB fresh lemon juice (about 1 lemon)
2 TB sherry vinegar (or white wine vinegar)
pinch of salt
pinch of ground black pepper
1/4 cup Stonewall Kitchens Vidalia Onion Fig Sauce
1/2 cup olive oil

  1. Using a food processor fitted with the grater blade, shred the broccoli and carrots. [If you don’t have a food processor (you poor thing!), a box grater will work, though is a bit more labor intensive.] Combine the shredded broccoli and carrots with the cranberries and pecans in a large bowl.
  2. In a small bowl, combine the lemon juice, vinegar, salt, pepper, vidalia onion fig sauce, and olive oil. Whisk vigorously until the ingredients are emulsified (i.e. the oil and vinegar are combined into a cohesive liquid). Pour the dressing over the slaw and toss until everything is well-coated.

Wednesday, September 15, 2010

Grilled Corn Pesto


I have been remiss. I totally forgot all about this recipe until I was rifling through my “food pictures” folder and saw this right next to my grilled corn chowder folder - it’s alphabetized, ya know. Oh snap! How could I have forgotten such deliciousness? I was unconscionable of me, really. But the remedy is easy - sharing the recipe with you! Right now. Forthwith.

And by forthwith, I mean after I’m done talking my head off about it. Terse I am not, people.

I made this a few weeks ago when corn was on super sale at the store. Actually, I thought it was a super sale at the time, but I found out my naivety the next week when I was all corned out and it was even cheaper. The same thing happened to me last week with peaches. Don’t you hate that? Anyway, I had come across a pasta dish in the course of my interweb travels that was topped with a fresh corn pesto, which used corn instead of the more traditional greenery of basil or spinach. Intrigued, and laden with several ears of corn, I decided to do my own spin.

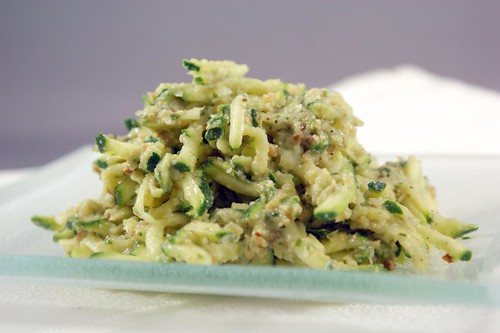
First off, I grilled the corn. Of course I did. Remember when I said that I’ll never cook corn another way? Ok, I don’t think I ever actually put it in those terms, but I figured the sweet, caramelized flavors of grilled corn would add a great flavor to the pesto. I was right - it was amazing. I’m too modest, I know. Other than the corn, this is a pretty traditional pesto. Or at least, traditional for me. I don’t usually have pine nuts in the pantry, so I like to use almonds. The silky, mellow nut flavor from the almonds went really well with the corn. All ground up, it’s like velvet. That’s a taste, right? I had a handful of basil thanks to an awesome friend who had sent me home with some from her garden the day before, so I threw it in. Along with the parsley, it did a great job of brightening the sauce with some needed herbaciousness, but the lesser amount kept it as a complimentary background flavor. The corn was the star of this pesto. It was creamy, sweet, and tasted distinctly of summer. Definitely a winner!

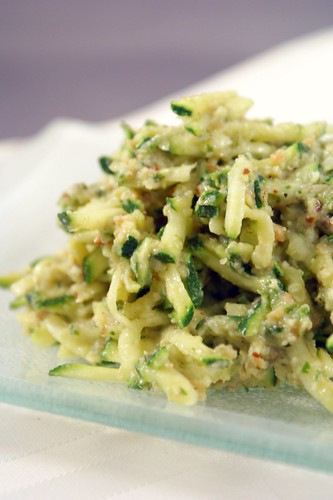
I know pasta is the traditional means of delivering sauces, like pesto, to your mouth. But corn is a very starchy vegetable*, and, well I admit it, I am totally neurotic about eating too many carbs. It has absolutely nothing to do with any kind of moronic low-carb diet. I just know my body, and super starchy meals result in a very unhappy Julie, hungry with low blood-sugar. It’s pretty much the worst thing ever because I love carbs. It’s pretty much all I ate for the first, um, 27 years of my life...or so. Sometimes feeling your best means sacrificing your wants for your needs. Also? I needed a vegetable for this particular meal. So I shredded up some zucchini (using my handy-dandy Cuisinart food processor with the shredding blade. (I’ve been using that shredding blade all summer to make all kinds of slaws. Yum! (I’m not trying to plug Cuisinart, but last week a friend asked what food processor I use, so I figured I’d share. (She’s getting married. Congrats! (I think all people getting married should register for a food processor. You might not use it right off that bat, but one day you’ll need it, and the love affair will begin...)))))**, and tossed it with the pesto to make a delightful side. Somewhere Husband is laughing at my use of the word “side,” saying that, in terms of proportions, vegetables are always my main. And he’s right, but nevermind that. I think the punch of flavor from the pesto and the fresh, crisp texture from the zucchini was a great combination, but of course, there are a million ways to have fun with how you eat this. Grilled corn pesto pizza? That’s a salivating idea, indeed! Want to go a healthier route, but not tickled by the idea of zucchini? Try roasted spaghetti squash. You’ll still get that fresh bite (even though it’s fully cooked, spaghetti squash, amazingly, still manages to maintain a crispness to it), but with a bit of a milder flavor. You could also serve it directly over some meat.  Since you're grilling anyway, maybe a few slices of grilled steak?  Heck, I went ahead and ate a few spoonfuls right out of the bowl. So, you know, that’s always an option too.

However you choose to eat this pesto, I highly recommend you make it. It’s sweet, it’s silky, and it tastes like summer.  In hindsight, I wish I had captured a shot of the sauce by itself.  But after spending hours thinking about the recipe, buying the ingredients, and putting it all together, I just wanted to eat it.  Can you blame me?

How would you serve this? I’m always looking for ideas.


*You know that Manwich commercial where the kid is dressed up like a Manwich for a school play and some kid in a corn costume chides her, saying she’s supposed to be a vegetable? I always yell at that kid that I don’t count him as a vegetable either. And really, that commercial is just a bunch of BS. When a food company tells you their product “counts” as a serving of something healthy, don’t buy it.
**You counted my parentheses to make sure I closed them all off, didn’t you? Admit it.


Grilled Corn Pesto

makes about 3 cups

4 ears of grilled corn (see instructions below)
1 cup Parmesan cheese, shredded
1/2 cup almonds, toasted
3 cloves garlic
juice of 1 lemon (about 2 TB)
1/4 cup parsley, chopped
1/2 cup basil, chopped
salt and pepper to taste
1/4 cup of olive oil, or more for desired taste and consistency

Blend all the ingredients in a food processor, minus the olive oil. When the ingredients are well blended, with the food processor running, stream in the olive oil until a thinned out sauce forms. Add enough olive oil until your desired consistency is reached. Serve over pasta, meat, or shredded vegetables.

Note: You can toast almonds in the oven at 350 degrees for a few minutes or in a dry pan over low heat. Just until you can smell their oils releasing. I use my toaster oven. It’s fastest. 


Grilled Corn (cut and pasted from this post)
  1. Over medium heat, place the corn (in their husks!) on the grill, directly over the flames. Turn the corn every 2-3 minutes, when the husks begin to blacken. The silk or ends of the husks might catch fire as they dry out. I think this adds an amazing smoky flavor to the corn, but if you’re scared (chicken!), just make sure to trim those bits off before you put them on the grill. [Practice proper safety! Always use long tongs when handling the corn, and keep your digits away from the flame.] 
  2. When the husks are good and charred and the kernels are mostly cooked, remove the corn from the grill and place it in a pan or bowl you have standing by until it cools down a bit. Carefully peel back and remove the husks, watching out for any trapped hot steam. Place the naked ears (teehee!) back on the grill and turn every 1-2 minutes, or until as many kernels as possible have browned and caramelized. Brown = sweet flavor! 
  3. Remove the corn from the grill, and when it is cool enough to handle, cut the kernels from the cob. Scrape the back of your knife along the cob to really get all the creamy corn bits out of there.

Tuesday, September 7, 2010

Cinnamon Spiked Blueberry Icebox Pie


Remember when I said you should buy up every clamshell of blueberries you can still find at the store? Well that’s partly because I have another blueberry pie up my sleeve. What a minx I am! But this pie couldn’t be more different than my previous azure berry exploit. That blueberry pie was a traditional pie. The kind of pie that comes to mind at the mention of pie. The kind with a tender, buttery crust and a warm, ooey gooey center. The kind that bakes forever in the oven and then cools mercilessly on the counter all afternoon. This blueberry pie is not that kind of pie. This is an icebox pie. Totally different! Ever had an icebox pie? I hadn’t until I made this one. I think I may need a do-over of the last 28 years, just so I can work this pie into my childhood food memories. When I was 5 - barbecue beef (it was my favorite kind of chicken!) and icebox pie. When I was 10 - blueberry pancakes and icebox pie (sounds like quite a combo to me!). When I was 16 - macaroni salad and icebox pie.  Annual Mother's Day picnic - Everett and Jones BBQ and icebox pie (*drool!*).

But what is it?

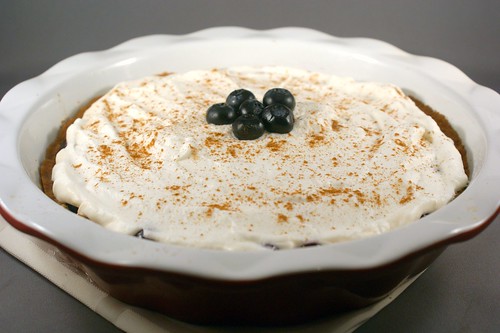
It’s a chilled pie (a correlation I'm sure you made on your own) with a graham cracker crust, a thick fruit jam filling, and a whipped cream topping. It’s a pie for those hot summer days when you don’t want your oven on for an hour. It’s a pie for when you’re craving something sweet and creamy, yet light and cool. It’s a pie for you, right now. Promise.

It all started a few weeks ago. I had an odd craving for graham crackers - odd because I don’t really ever eat graham crackers. Apart from this pie, the cheesecake squares, and the ‘smores in Reno, I haven’t eaten a graham cracker since I was maybe 14. No joke. (I used to think they ruined the 'smore.  The idiocy of youth, right?)  So when I saw graham crackers on sale that very week, I picked up a box. Why not, right? Then, the very next week, a giant 18oz container of blueberries was on sale for $2! Why,those little buggers hopped into my cart of their own accord. They know a good home when they see one. So there I was, craving graham crackers and mulling over blueberry recipes, and it just clicked. I searched around my Google reader for recipes, landed on a strawberry icebox pie I could modify for my own devilish purposes, and the rest, as they say, is history.


Now, let me tell you about this icebox pie. Because you know I gave it the Julie touch. I spiked it of course! I just love the combination of cinnamon and blueberry, so I gave the Goldschlager a second try, and I think it came through much more prominently this time. I used it in the crust and the whipped cream topping, and the cinnamon liqueur flavor that added that hint of something extra I looking for was definitely present. The blueberry jam filling for the pie also turned out great. I let half the blueberries break down into a syrup, and I left out the other half until the very end so they would stay intact. That way it felt like you were still eating a blueberry pie and not a blueberry syrup pie. I wanted some identifiable berry. And I needn’t mention yet again how well brandy goes with berries in baked goods. If you’ve tried it, you know. I kept the sugar in this recipe pretty low because I prefer to let the flavor of the fruit come through, and there’s enough sweetness that comes from the graham crackers (especially sugar-leaden store-bought ones), but you could always add more if you've got a sweet tooth.

Overall, this pie was amazingly good, satisfying my craving and then some! Don't you love it when you make something on a whim and it turns out far better than you expected? It makes it all that much more satisfying, I think.  The crust has that sweet, kind of comforting taste you get from graham crackers, the filling is really just a jam, but a jam you might eat straight out of the jar because it’s so tasty. It's light and summery, yet with the cinnamon and graham cracker crust, almost homey and comforting.  (As good desserts should be. Or maybe I’m just comforted by weird things...)  The whipped cream topping just turns everything to silk in your mouth, brings it all together. It's definitely the star, and I’m not even a whipped cream kind of person.  I think doctoring it up made all the difference. I also really like the proportions of the three components in this recipe. The crust to filling to topping ratio is right on.

Yes, the pie is good.  But really, it's dangerously good. I couldn’t stop eating it! I kid you not, I ate a third of this pie in one night. In my defense, it is a bit of a vertically challenged dessert.  But it's also a baked good of mass waistline destruction, people! Make at your own risk!

But really, make it.  It's yummy.

Cinnamon Spiked Blueberry Icebox Pie

adapted heavily from Shutterbean

For the crust:
10 graham crackers (standard 2 1/2 by 5 inches)
2 TB sugar
1 tsp cinnamon
5 TB melted unsalted butter
2 TB Goldschlager

For the filling:
18oz fresh blueberries
1/4 cup sugar (or more to taste)
1/2 cup fresh squeezed orange juice (about 1 1/2 oranges)
3 TB cornstarch
1 tsp cinnamon
1/4 tsp kosher salt
1/2 tsp vanilla
1/4 cup brandy

For the topping:
1/2 cup heavy whipping cream
2 TB powdered sugar
1 TB Goldshlager
1/2 tsp vanilla
pinch of cinnamon

  1. Preheat the oven to 350 degrees. 
  2. In a food processor, pulse the graham crackers, cinnamon, and sugar together until they are reduced to fine crumbs. With the machine running, stream in the melted butter and Goldschlager and process until the crumbs are moistened. 
  3. Press the crumb mixture into a 9” pie plate in an even layer. Bake the crust for 12-14 minutes until it is golden brown and when you poke it with your finger, it feels like a crust, rather than moistened crumbs. Let the crust cool completely. 
  4. In a medium saucepan over medium heat, combine the sugar and half of the blueberries, and bring the mixture to a simmer. Let the berries cook until they have started to break down and form a thickened syrup, about 5-10 minutes. 
  5. In a small bowl, whisk together the orange juice, cornstarch, cinnamon, salt, vanilla, and brandy until the cornstarch is fully incorporated. Stir this slurry into the blueberry mixture, and continue to simmer for a few more minutes, until it has thickened to the consistency of a jam. Stir in the rest of the blueberries, reserving a small handful for garnishing the top of the pie. Remove the blueberry mixture from the heat and let it cool for a few minutes. 
  6. Pour the blueberry mixture into the cooled pie crust and refrigerate for at least 4 hours. 
  7. To finish the pie, pour the heavy whipping cream into the bowl of a stand mixer set with the whisk attachment and beat on high until soft peaks form. Add the powdered sugar, Goldschlager, and vanilla, and continue to beat on high until soft peaks form again. Be careful not to overbeat! 
  8. Spread the whipped cream evenly over the chilled pie and sprinkle with cinnamon and the reserved blueberries. 

Wednesday, September 1, 2010

Blueberry Rhubarb Pie


I apologize for my lack of posting last week.  Took the husband and furkid up to Reno for a visit with the family and I was just having far too much fun to talk to you.  The highlight?  There was 'smores making by the firepit in my parents' backyard on a gorgeous, crystal clear night.  There was getting smashed together on cocktails and wine and then stumbling around the neighborhood, attempting to take my dog for a walk.  But the real highlight was definitely getting to hang with my 10 month old nephew, who is the perfect package of happy, hilarious, and adorable.  The kid has what my sister calls "his badass face" for goodness sakes!  It's badass.

Another highlight was a second go at Husband's Ultimate Birthday Cake.  You may recall I made this for Husband's birthday a few months ago with much success.  Too much success!  Husband had been bugging me to make it for him ever since, and this trip finally seemed like a good time to do it.  Something about having 4 other people in the house to help eat it quickly was certainly appealing.  This was actually the first time I've followed one of my own recipes.  Sure, I've written stuff down as I go, jotted down quick instructions to myself, or modified and adapted other people's recipes, but hearing my own voice come through as I followed this recipe step by step was kind of surreal.  And kind of awesome!  I kept thinking, "I know exactly what I mean!" 

And having made this cake twice now, I can safely boast that it is awesome!!!  Seriously.  Not to toot my own horn or anything, but both my sister and my dad declared their disdain of the chocolate/raspberry flavor combination before trying this cake.  [*GASP!*  Blasphemy!  Chocolate and raspberry are the ultimate!  ULTIMATE!  Ok, only my dad expressed disdain.  My sister merely said she had never tried a chocolate raspberry dessert to her liking before.  My sister - always the diplomat.]  After they each tried a piece, however, it was a whole other matter.  There was lots of raving.  And not polite raving.  Adamant, genuine, "I'm a believer!!!" raving.  They both said the flavors were perfectly balanced - not too sweet, not too tart.  And my mom, who was of the opinion that no cake could be worth that much effort, decided that this cake was worth that much effort, as long as someone else was making it.  Anyone know the onomatopoeia for a head inflating?  *Wooshooop!*  Because that's what's happening right now.  I just love cooking for my family.  Part of the reason I'm so neurotic about feeding other people is that I get so worried that they hate my food but they're too polite to say so, so I just tend to assume no one liked anything and I was just this crazy food-pusher they couldn't get away from.  But family is different.  You can tell when they're lying. Mwhahaha!

And one more highlight - my discovery of pumpkin seed oil!  Have you ever heard of it?  Apparently it's common in Europe, and there's a European market in Reno where my mom can buy it.  I'm, of course, kicking myself for not getting to that market to get my own bottle because it is some seriously nommy stuff.  For dinner one night my mom grilled some veggies simply tossed with a little olive and pumpkin seed oils, then threw it all together with some brown rice and shrimp.  I figured it would be tasty, but the pumpkin seed oil hit this meal out of the park.  It was that secret ingredient that made all the flavors come together perfectly. Yum!   Mom, if you are reading this, please bring me a bottle next time you visit! 

But enough about cake and plant oils.  I'm here to talk about pie.  I've been sitting on this recipe far longer than I wanted to.  It's still blueberry season, right?  Well I highly suggest you run out and buy every last clamshell of blueberries you can find because this pie is worth it.  I know, rhubarb usually goes with strawberries, in fact strawberry rhubarb is Husband's favorite pie, but one bite of this baby had him saying "Strawberry who?" No joke.

Pie crust.  Let's hash it out and get it out of the way.  Tender vs. flaky.  Shortening vs. butter.  Everyone has their own pie crusts tastes.  Some people like all of one or another, some people have different ratios of both.  I have by no means baked pie crusts extensively enough to give a definitive opinion on the matter, but I will say that of the crusts I've made so far, I am in the all butter camp.  First, shortening doesn't taste like anything.  People use it because it makes for a flakier crust.  But here's the thing.  I find butter crusts plenty flaky, and I actually prefer the more tender texture all butter crusts have.  Not to mention their amazingly buttery flavor.  You just have to incorporate the butter the right way, and maybe have a trick or two up your sleeve.  Like booze!  Have you heard of using vodka in pie dough?  It's wet enough to bring the dough together, but it doesn't gum up the flour like water does.  But vodka has no flavor, so I decided to try Goldshlager instead.  I thought the cinnamon liqueur might infuse a little extra flavor into the dough.  While it succeeded in keeping my dough light, I didn't get a lot of cinnamon flavor, so next time I might just stick with vodka.  I'm on a budget, after all, and they unfortunately don't sell Goldschlager at Costco.  The most important thing with a good pie dough is making sure everything is cold.  I actually stuck the butter in the freezer until it was just frozen, which worked perfectly.  I like to work the dough with my hands, but that always warms the butter too much.  This way the frozen butter actually needed the heat from my finger tips to become workable. 

To the novices out there who are completely intimidated at the thought of making pie: you can totally do this.  Pie crust can be a pain, and if you want it perfect, you do have to be somewhat of an artist, but I maintain that anyone can make a decent pie crust.  It'll probably be flawed, sure, but it'll be tasty, and isn't a tasty pie the real goal?  Start off by reading Deb's tips for the logistics of proper pie construction at Smitten Kitchen.  I always thought the hardest part was rolling it out.  I remember my mom's many failed attempts to get her pie crusts from the mat to the pie plate in one piece.  Turns out the secret is just lots of flour, and lots of turning.  Easy!

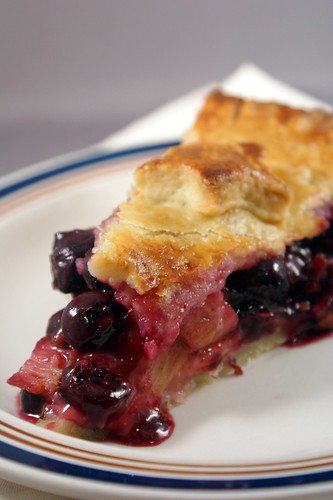
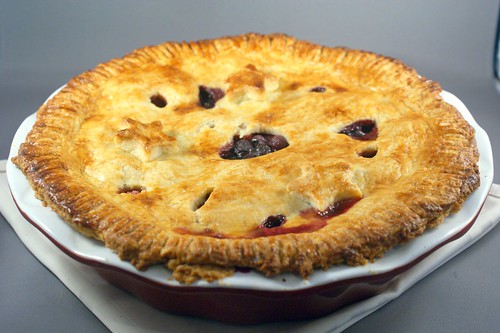
Now the filling.  I'm swooning just thinking about it.  I actually set out just to make a plain blueberry pie, but when I had all the berries in the bowl, I knew it was lacking in volume.  I had by chance bought some frozen rhubarb at Sprouts a few weeks ago because I was curious (also, it was on sale - impulse buy!). I had never seen frozen rhubarb before, and neither had the cashier who rang me up.  She asked if it was good, and I told her I'd have to let her know.  I figured, what the hell, and threw it in with the rest of the filling.  I guess it was fate because this is easily the best pie I've ever made - including strawberry rhubarb!  It was just the right balance of sweetness from the blueberries and that touch of sour tartness from the rhubarb.  I love the sweetness of blueberries, but find a little acid to break up their flavor really brings them up a notch. And the deeper sweet flavor of the brandy brought everything together perfectly.  But the real secret was the tapioca starch.  All purpose flour is normally used in pies to help thicken the filling, but tapioca starch does a much better job of making a glutenous mixture.  Got that trick from Alton Brown.  I buy tapioca starch at the Asian market, but I'm sure it can be found at other specialty markets.  If you don't have any, just use regular AP flour.

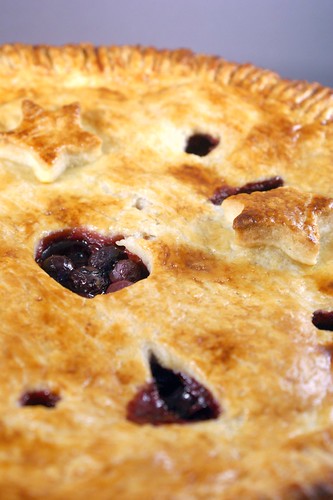
It may be an ugly pie, but it was darn delicious.  When Husband and I were ready for dessert all conversation would cease while consumption was happening. Unless it was one of us chiming in to say how good the pie tasted.  But usually it just came out as approving grunts and groans.

  
Blueberry Rhubarb Pie

crust adapted from Smitten Kitchen
filling adapted from Joy the Baker

For the crust (both top and bottom):

2 1/2 cups flour
1 tablespoon sugar
1 teaspoon salt
1 cup (2 sticks) unsalted butter
2 TB ice cold water
Goldshlager (or vodka)
For the filling:

18oz fresh blueberries
12oz bag frozen rhubarb, thawed (or about 2 cups fresh rhubarb, chopped)
1 cup sugar
1/2 cup tapioca starch (or substitute AP flour)
zest of half a lemon (about 1/2 tsp)
1 tsp lemon juice
1 tsp cinnamon
pinch of kosher salt
3 TB brandy
1 egg
1 TB milk
To make the dough:
  1. Cut the butter into small pieces and break them apart. [I like to cut the stick lengthwise, turn it 90 degrees, and then cut it lengthwise again, so I have 4 long sticks. Then I cut regular tablespoon-size pats, so I end up with a bunch of 1/4 TB pieces.] Put the well-separated pieces into a bowl and place it in the freezer for about 30-40 minutes, or until they are just barely frozen through.
  2. In a medium bowl, mix together the flour, sugar, and salt. Add the frozen butter and gently work it into the flour with your fingertips. Since it’s frozen, you’ll have to kind of smush it out. Use your finger muscles! The butter will be incorporated enough when you have small pea-sized bits of butter left.
  3. Add the very, very cold water and stir it into the mixture. This shouldn’t be enough moisture to bring the dough together, so add the Goldshlager 1 TB at a time until the dough will just form into a ball. Divide the dough evenly into two balls. Wrap each ball tightly in plastic wrap and squish it into the shape of a round disc, like a giant hockey puck.
  4. Chill the dough in the refrigerator for at least 2 hours, but overnight is okay too.
To make the pie:

  1. In a bowl, combine the blueberries, rhubarb, sugar, tapioca starch, lemon zest, lemon juice, cinnamon, salt, and brandy. Mix until everything is incorporated and the fruit is well coated. Set aside.
  2. Remove one hockey puck of dough from the refrigerator. On a very well floured surface, roll out the dough evenly until it is big enough to cover your pie plate, plus a 1/2 inch or so. This is best achieved by constantly turning and flipping your dough so it doesn’t stick to your surface. Don’t be afraid to add too much flour, you can’t. Transferring to the pie plate can be tricky. I like to fold the dough in half, and then in half again, and then transfer the quarter wedge to the plate and carefully unfold it. But use whatever method you like.
  3. Gently press the dough into the plate and trim off any dough overhanging more than a 1/2 inch over the plate. Using the excess bits to fill any holes or imperfections you have. Remember, you won’t see the bottom crust, but you’ll taste any spots where there’s missing dough. Pour the blueberry mixture over the bottom crust and set aside.
  4. Remove the second hockey puck of dough from the refrigerator, and roll it out the same way you did the first one. When it is big enough to cover the pie with at least a 1/2 inch overhang, figure out what’s going to be the center. You need to make vents in the top crust for the steam to escape. I cut a hole about the size of a shot glass in the very center, but it can be anywhere. You’ll want at least one. I also cut a few smaller holes around the edges. When the dough is properly ventilated, carefully cover the pie, and again trim any excess. Tuck the two crusts under so it is flush with the plate. Using your fingers or a fork, crimp all the way around the edge of the pie so it’s sealed. Cut a few more vents in the crust. Put the pie in the refrigerator to chill for about 20 minutes.
  5. While the pie chills, preheat your oven to 425 degrees and move the rack to the lower third of your oven. If you’re worried about filling bubbling over and making a mess you can put a cookie sheet under the rack to catch any drippings.
  6. Beat the egg and milk together and brush evenly over the top of the chilled pie, making sure none of it pools.When the oven is ready, bake for 30 minutes, then knock the heat down to 375 degrees and bake for another 30 minutes. If the pie starts to get too brown before it is finished baking, cover it loosely with foil (I did this about 45 minutes in). The pie is finished baking when the crust is golden brown and the filling is thick and bubbling.
  7. Let the pie sit and fully cool before cutting into it to give the filling time to come together, at least 4 hours.  Don't jump the gun, you'll regret it!