Showing posts with label pie. Show all posts

Tuesday, December 7, 2010

Pumpkin Buttermilk Pie


Has it really been almost 2 weeks since Thanksgiving!? Where did last week go? Oh yeah, it was swallowed up by the ugly bug that’s been lazily kicking the crap out of my immune system and other bodily functions. Let’s just say...I wouldn’t recommend drinking the pink eye tears of a toddler. That’s a story for another time. 

Did you think the long hiatus between posts was because I was compiling a mass of Thanksgiving pictures? A collage of every dish and paragraphs upon paragraphs of wordy description? Sorry to disappoint, but I have a confession to make - I didn’t take any pictures during Thanksgiving. None. My camera battery is still sitting on the charger, currently residing under my feet. I don’t know who I am anymore! But that’s just what happens when you spend 2 days in the kitchen and 5 days entertaining family.

Ah family. My family. And our ridiculously stubborn adherence to superfluous traditions. I love that about us. A movie on Christmas day, preferably on a sci-fi or fantasy theme. It’s tradition! Mom reading the Polar Express in front of the fireplace on Christmas Eve. It’s tradition! Me squeezing behind the driver’s seat on any family outing, even though the passenger side has more legroom. It’s tradition! And of course, Thanksgiving comes with its own set of traditions. Starting, naturally, with the menu. Turkey, mashed potatoes, stuffing, cranberry sauce, and pumpkin pie are the musts. I remember the year my mom tried to get away with not serving mashed potatoes. My sister called a family holiday party foul and made them herself. I might have helped, but I was a lazy, moody teenager, so I probably didn’t. Sorry sis!

Sure, every family has dishes they love and want year after year. In my family, we actually have dishes a lot of us don’t like, but we make anyway. Like the cranberry sauce. My sister always takes a no-thank-you helping, so I knew she wasn’t a fan. But it wasn’t until this year that I realized my parents also aren’t cranberry sauce eaters. Yet it’s always on the table! Well, minus the year my mom had it in the nice serving bowl, sitting in the fridge, and forgot to take it out. Guess now I know why she didn’t miss it. Heh. I probably could have gotten away with not having any, but I figured it’d be way more fun to try and make a cranberry sauce everyone would actually enjoy. Not to mention...it’s tradition! I made a cranberry applesauce, hoping the natural sweetness from the apples would be a nice contrast to the tartness from the cranberries without the cloying sweetness of regular sugar. Along with a little fresh ginger to make it more savory and a healthy glug of Grand Marnier (ok, maybe two healthy glugs, after encouragement from my mom), it was a success. My sister had seconds!

I’m sure I’m blowing the minds of my family as they read this post. Can you believe I used to be a picky eater? There were several foods I didn’t like, and even more foods I probably would have liked fine, but still wouldn’t eat. For years I thought I didn’t like guacamole. Really my sister didn’t like it, and I had just taken her word for it. And now I’m talking about changing people’s minds about foods they don’t like! I’m blowing my own mind here.


The pumpkin pie at my Thanksgiving table has a bit of a history. My grandma, on my dad’s side, always brought the pumpkin pie. She wasn’t a baker (not that there’s anything wrong with that), so she would dump a can of Libby’s pumpkin pie filling into a store-bought crust, bake it, and bring it over with a can of reddi-wip. To me, that was pumpkin pie. It was good and all, but I didn’t exactly grow up with the impression that pumpkin was the be-all and end-all of pie flavorings. Turns out my mom doesn’t even like pumpkin pie. How did I never know these things before?!

This year I wanted to make a pumpkin pie from scratch. A good one. My first attempt was a bust. I don’t want to talk about it...except to say that I took issue with the massive amounts of heavy cream and sugar the recipe called for. Then I saw a recipe for a sweet potato buttermilk pie that used lowfat buttermilk instead of heavy cream, and folded in whipped up egg whites for a light and fluffy texture. I was intrigued! After my mom mentioned what she didn’t like about pumpkin pie was the puddingy texture, I thought this might be just the thing. So I swapped out the sweet potato for pumpkin, but kept just a little sweet potato in there for a flavor boost. Pumpkin can be a little on the bland side, ya know. I adjusted the seasonings, upped the sugar (sweet potatoes are sweeter than pumpkin, after all), and of course, I added booze! It’s not pumpkin [insert delicious baked good here] without bourbon, right? Another thing that turned me onto this recipe was blind-baking the crust first. No worries about a soupy pie or a soggy crust.

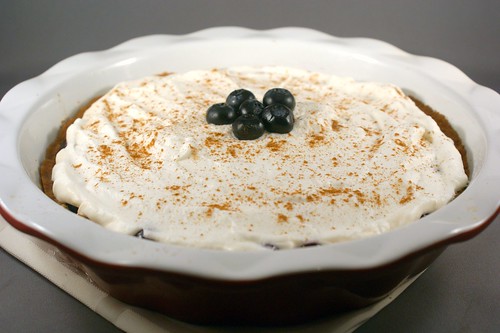
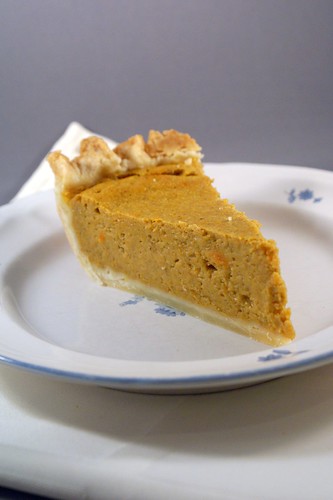
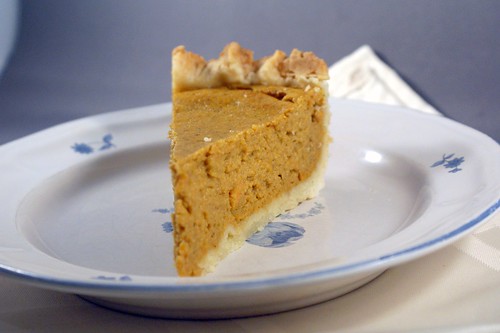
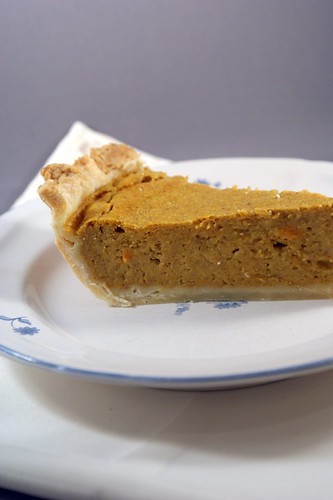
The resulting pie was a light, fluffy, spiced pumpkin cloud.  And still so silky smooth without the heaviness. The trick was definitely folding in the egg whites. It really kept the pie light. I was concerned the lightness of the texture and lack of fat would lose the pumpkin pie flavor, but the spices still came through beautifully. And the hint of sweet potato added a nice layer of sweetness. It seemed to be a success. It didn't last long, and as my mom put it, “Julie, I enjoyed my slice...and I don’t even like pumpkin pie.” Good enough for me! Into the archives this recipe goes.

But wait! I haven’t even mentioned the whipped cream! It was an afterthought. Spur of the moment. I bought heavy whipping cream, thinking I would just whip it up with a little sugar right before dessert. Nothing special, but better than the canned stuff. Well 4 glasses of wine and a big turkey dinner later I had the bright idea to whip that cream with maple syrup and a splash of bourbon instead...

Oh my word. 

That is all that can be said about this whipped cream. Nevermind the two pies and vanilla ice cream I had on the table for dessert. I wanted to just eat gobs and gobs of this whipped cream. Yeah. It was that good. It went great on the pie. I highly recommend you don’t skip it.


PS: If you're wondering why I have pictures of the pie when I said I didn't take any, it's because this was my test run.  It was a new recipe after all.  Better safe and full of pie than sorry, right?


Pumpkin Buttermilk Pie
adapted from Smitten Kitchen’s Sweet Potato Buttermilk Pie

½ cup mashed sweet potato (1 small potato, poked with fork and microwaved for 7 mins)
1 14oz can pumpkin puree
4 TB unsalted butter, melted
2 TB fresh lemon juice
½ tsp freshly grated nutmeg
1 tsp ground cinnamon
½ tsp ground ginger
¼ tsp ground cloves
¼ tsp ground cardamom
½ tsp kosher salt
3 large eggs, separated
½ cup sugar
¼ cup brown sugar
2 TB AP flour
3 TB bourbon
¾ cup buttermilk
1 pre-baked pie crust (recipe below)
maple bourbon whipped cream (recipe below)

  1. In a medium bowl, mix together the sweet potato and pumpkin puree. Add the butter, lemon juice, nutmeg, cinnamon, ginger, cloves, cardamom, and salt and mix thoroughly after each addition. 
  2. In a small bowl, beat the egg yolks lightly with a whisk for about 30 seconds. Add the sugar and beat until they’re a creamy light yellow color, about 2 minutes. Add the egg mixture to the pumpkin mixture and stir until the eggs are fully incorporated. Add the flour a little at a time, stirring after each addition until thoroughly incorporated. Add the buttermilk and bourbon and stir until incorporated. 
  3. In the bowl of an electric mixer, beat the egg whites to soft peaks in a clean, dry bowl. With a spatula, gently fold the egg whites, one-third at a time, into the sweet potato-buttermilk mixture until thoroughly combined. Pour the mixture into the pre-baked crust and bake on the middle rack of the oven set at 375 degrees until the center is firm and set, about 35 to 40 minutes. Cool the pie completely on a rack, then chill for at least 4 hours before serving. 

For the pie crust:
1 ¼ cups flour
1 ½ tsp sugar
½ tsp salt
½ cup (1 stick) unsalted butter
3 TB ice cold vodka (or substitute water)
ice cold water

  1. Cut the butter into small pieces (I do quarter tablespoons), and place in the freezer along with the vodka for about 30 minutes, or until it just starts to freeze. 
  2. In a small bowl whisk together the flour, sugar, and salt. Dump the mixture out onto a large cutting board or clean counter. Using a bench scraper (a rolling pin also works), work in the frozen butter by smooshing the flat side of the bench scraper into the flour, scooping and mixing it often. When the butter pieces are all flattened and well incorporated, use your fingers to break up any large pieces until they are pea-sized. Sprinkle the vodka over the dough and mix, then 1 TB at a time, add enough water until the dough just comes together, and all the flour is incorporated. Knead the dough into a ball and cover tightly in plastic wrap. Smoosh the dough flat into a hockey puck shape and refrigerate for 1 hour. 
  3. After the dough has chilled, preheat the oven to 325 degrees and place the dough on a well-floured cutting board or clean counter. Turning often, and using as much flour as you need to keep it from sticking, roll the dough into an even layer about ¼” thick, or until it is large enough to fit into your 9” pie plate with ½” overhanging. Move the dough to the pie plate and trim any excess dough, leaving that ½” overhang. Fold and pinch the edges of the dough around the pie plate so it’s nice and pretty. 
  4. Lay a sheet of aluminum foil over the dough and carefully on scatter pie weights (I use dried beans). Bake on the middle rack of your oven for 12 minutes. Remove the pie weights and the foil, prick the bottom of the crust with a fork, and bake for another 10 minutes. 

For the maple bourbon whipped cream:
1 cup heavy whipping cream
2 TB maple syrup
1 TB bourbon

  1. In a stand mixer, add the cream, maple syrup, and bourbon. Start the mixer at a low speed and work up to high to avoid splashing. Whip the mixture until it is thickened. Taste the whipped cream and add more cream, maple syrup, or bourbon according to your preference. If you’re shy, you might want to start with just a tsp or two of the bourbon. 

Tuesday, September 7, 2010

Cinnamon Spiked Blueberry Icebox Pie


Remember when I said you should buy up every clamshell of blueberries you can still find at the store? Well that’s partly because I have another blueberry pie up my sleeve. What a minx I am! But this pie couldn’t be more different than my previous azure berry exploit. That blueberry pie was a traditional pie. The kind of pie that comes to mind at the mention of pie. The kind with a tender, buttery crust and a warm, ooey gooey center. The kind that bakes forever in the oven and then cools mercilessly on the counter all afternoon. This blueberry pie is not that kind of pie. This is an icebox pie. Totally different! Ever had an icebox pie? I hadn’t until I made this one. I think I may need a do-over of the last 28 years, just so I can work this pie into my childhood food memories. When I was 5 - barbecue beef (it was my favorite kind of chicken!) and icebox pie. When I was 10 - blueberry pancakes and icebox pie (sounds like quite a combo to me!). When I was 16 - macaroni salad and icebox pie.  Annual Mother's Day picnic - Everett and Jones BBQ and icebox pie (*drool!*).

But what is it?

It’s a chilled pie (a correlation I'm sure you made on your own) with a graham cracker crust, a thick fruit jam filling, and a whipped cream topping. It’s a pie for those hot summer days when you don’t want your oven on for an hour. It’s a pie for when you’re craving something sweet and creamy, yet light and cool. It’s a pie for you, right now. Promise.

It all started a few weeks ago. I had an odd craving for graham crackers - odd because I don’t really ever eat graham crackers. Apart from this pie, the cheesecake squares, and the ‘smores in Reno, I haven’t eaten a graham cracker since I was maybe 14. No joke. (I used to think they ruined the 'smore.  The idiocy of youth, right?)  So when I saw graham crackers on sale that very week, I picked up a box. Why not, right? Then, the very next week, a giant 18oz container of blueberries was on sale for $2! Why,those little buggers hopped into my cart of their own accord. They know a good home when they see one. So there I was, craving graham crackers and mulling over blueberry recipes, and it just clicked. I searched around my Google reader for recipes, landed on a strawberry icebox pie I could modify for my own devilish purposes, and the rest, as they say, is history.


Now, let me tell you about this icebox pie. Because you know I gave it the Julie touch. I spiked it of course! I just love the combination of cinnamon and blueberry, so I gave the Goldschlager a second try, and I think it came through much more prominently this time. I used it in the crust and the whipped cream topping, and the cinnamon liqueur flavor that added that hint of something extra I looking for was definitely present. The blueberry jam filling for the pie also turned out great. I let half the blueberries break down into a syrup, and I left out the other half until the very end so they would stay intact. That way it felt like you were still eating a blueberry pie and not a blueberry syrup pie. I wanted some identifiable berry. And I needn’t mention yet again how well brandy goes with berries in baked goods. If you’ve tried it, you know. I kept the sugar in this recipe pretty low because I prefer to let the flavor of the fruit come through, and there’s enough sweetness that comes from the graham crackers (especially sugar-leaden store-bought ones), but you could always add more if you've got a sweet tooth.

Overall, this pie was amazingly good, satisfying my craving and then some! Don't you love it when you make something on a whim and it turns out far better than you expected? It makes it all that much more satisfying, I think.  The crust has that sweet, kind of comforting taste you get from graham crackers, the filling is really just a jam, but a jam you might eat straight out of the jar because it’s so tasty. It's light and summery, yet with the cinnamon and graham cracker crust, almost homey and comforting.  (As good desserts should be. Or maybe I’m just comforted by weird things...)  The whipped cream topping just turns everything to silk in your mouth, brings it all together. It's definitely the star, and I’m not even a whipped cream kind of person.  I think doctoring it up made all the difference. I also really like the proportions of the three components in this recipe. The crust to filling to topping ratio is right on.

Yes, the pie is good.  But really, it's dangerously good. I couldn’t stop eating it! I kid you not, I ate a third of this pie in one night. In my defense, it is a bit of a vertically challenged dessert.  But it's also a baked good of mass waistline destruction, people! Make at your own risk!

But really, make it.  It's yummy.

Cinnamon Spiked Blueberry Icebox Pie

adapted heavily from Shutterbean

For the crust:
10 graham crackers (standard 2 1/2 by 5 inches)
2 TB sugar
1 tsp cinnamon
5 TB melted unsalted butter
2 TB Goldschlager

For the filling:
18oz fresh blueberries
1/4 cup sugar (or more to taste)
1/2 cup fresh squeezed orange juice (about 1 1/2 oranges)
3 TB cornstarch
1 tsp cinnamon
1/4 tsp kosher salt
1/2 tsp vanilla
1/4 cup brandy

For the topping:
1/2 cup heavy whipping cream
2 TB powdered sugar
1 TB Goldshlager
1/2 tsp vanilla
pinch of cinnamon

  1. Preheat the oven to 350 degrees. 
  2. In a food processor, pulse the graham crackers, cinnamon, and sugar together until they are reduced to fine crumbs. With the machine running, stream in the melted butter and Goldschlager and process until the crumbs are moistened. 
  3. Press the crumb mixture into a 9” pie plate in an even layer. Bake the crust for 12-14 minutes until it is golden brown and when you poke it with your finger, it feels like a crust, rather than moistened crumbs. Let the crust cool completely. 
  4. In a medium saucepan over medium heat, combine the sugar and half of the blueberries, and bring the mixture to a simmer. Let the berries cook until they have started to break down and form a thickened syrup, about 5-10 minutes. 
  5. In a small bowl, whisk together the orange juice, cornstarch, cinnamon, salt, vanilla, and brandy until the cornstarch is fully incorporated. Stir this slurry into the blueberry mixture, and continue to simmer for a few more minutes, until it has thickened to the consistency of a jam. Stir in the rest of the blueberries, reserving a small handful for garnishing the top of the pie. Remove the blueberry mixture from the heat and let it cool for a few minutes. 
  6. Pour the blueberry mixture into the cooled pie crust and refrigerate for at least 4 hours. 
  7. To finish the pie, pour the heavy whipping cream into the bowl of a stand mixer set with the whisk attachment and beat on high until soft peaks form. Add the powdered sugar, Goldschlager, and vanilla, and continue to beat on high until soft peaks form again. Be careful not to overbeat! 
  8. Spread the whipped cream evenly over the chilled pie and sprinkle with cinnamon and the reserved blueberries. 

Wednesday, September 1, 2010

Blueberry Rhubarb Pie


I apologize for my lack of posting last week.  Took the husband and furkid up to Reno for a visit with the family and I was just having far too much fun to talk to you.  The highlight?  There was 'smores making by the firepit in my parents' backyard on a gorgeous, crystal clear night.  There was getting smashed together on cocktails and wine and then stumbling around the neighborhood, attempting to take my dog for a walk.  But the real highlight was definitely getting to hang with my 10 month old nephew, who is the perfect package of happy, hilarious, and adorable.  The kid has what my sister calls "his badass face" for goodness sakes!  It's badass.

Another highlight was a second go at Husband's Ultimate Birthday Cake.  You may recall I made this for Husband's birthday a few months ago with much success.  Too much success!  Husband had been bugging me to make it for him ever since, and this trip finally seemed like a good time to do it.  Something about having 4 other people in the house to help eat it quickly was certainly appealing.  This was actually the first time I've followed one of my own recipes.  Sure, I've written stuff down as I go, jotted down quick instructions to myself, or modified and adapted other people's recipes, but hearing my own voice come through as I followed this recipe step by step was kind of surreal.  And kind of awesome!  I kept thinking, "I know exactly what I mean!" 

And having made this cake twice now, I can safely boast that it is awesome!!!  Seriously.  Not to toot my own horn or anything, but both my sister and my dad declared their disdain of the chocolate/raspberry flavor combination before trying this cake.  [*GASP!*  Blasphemy!  Chocolate and raspberry are the ultimate!  ULTIMATE!  Ok, only my dad expressed disdain.  My sister merely said she had never tried a chocolate raspberry dessert to her liking before.  My sister - always the diplomat.]  After they each tried a piece, however, it was a whole other matter.  There was lots of raving.  And not polite raving.  Adamant, genuine, "I'm a believer!!!" raving.  They both said the flavors were perfectly balanced - not too sweet, not too tart.  And my mom, who was of the opinion that no cake could be worth that much effort, decided that this cake was worth that much effort, as long as someone else was making it.  Anyone know the onomatopoeia for a head inflating?  *Wooshooop!*  Because that's what's happening right now.  I just love cooking for my family.  Part of the reason I'm so neurotic about feeding other people is that I get so worried that they hate my food but they're too polite to say so, so I just tend to assume no one liked anything and I was just this crazy food-pusher they couldn't get away from.  But family is different.  You can tell when they're lying. Mwhahaha!

And one more highlight - my discovery of pumpkin seed oil!  Have you ever heard of it?  Apparently it's common in Europe, and there's a European market in Reno where my mom can buy it.  I'm, of course, kicking myself for not getting to that market to get my own bottle because it is some seriously nommy stuff.  For dinner one night my mom grilled some veggies simply tossed with a little olive and pumpkin seed oils, then threw it all together with some brown rice and shrimp.  I figured it would be tasty, but the pumpkin seed oil hit this meal out of the park.  It was that secret ingredient that made all the flavors come together perfectly. Yum!   Mom, if you are reading this, please bring me a bottle next time you visit! 

But enough about cake and plant oils.  I'm here to talk about pie.  I've been sitting on this recipe far longer than I wanted to.  It's still blueberry season, right?  Well I highly suggest you run out and buy every last clamshell of blueberries you can find because this pie is worth it.  I know, rhubarb usually goes with strawberries, in fact strawberry rhubarb is Husband's favorite pie, but one bite of this baby had him saying "Strawberry who?" No joke.

Pie crust.  Let's hash it out and get it out of the way.  Tender vs. flaky.  Shortening vs. butter.  Everyone has their own pie crusts tastes.  Some people like all of one or another, some people have different ratios of both.  I have by no means baked pie crusts extensively enough to give a definitive opinion on the matter, but I will say that of the crusts I've made so far, I am in the all butter camp.  First, shortening doesn't taste like anything.  People use it because it makes for a flakier crust.  But here's the thing.  I find butter crusts plenty flaky, and I actually prefer the more tender texture all butter crusts have.  Not to mention their amazingly buttery flavor.  You just have to incorporate the butter the right way, and maybe have a trick or two up your sleeve.  Like booze!  Have you heard of using vodka in pie dough?  It's wet enough to bring the dough together, but it doesn't gum up the flour like water does.  But vodka has no flavor, so I decided to try Goldshlager instead.  I thought the cinnamon liqueur might infuse a little extra flavor into the dough.  While it succeeded in keeping my dough light, I didn't get a lot of cinnamon flavor, so next time I might just stick with vodka.  I'm on a budget, after all, and they unfortunately don't sell Goldschlager at Costco.  The most important thing with a good pie dough is making sure everything is cold.  I actually stuck the butter in the freezer until it was just frozen, which worked perfectly.  I like to work the dough with my hands, but that always warms the butter too much.  This way the frozen butter actually needed the heat from my finger tips to become workable. 

To the novices out there who are completely intimidated at the thought of making pie: you can totally do this.  Pie crust can be a pain, and if you want it perfect, you do have to be somewhat of an artist, but I maintain that anyone can make a decent pie crust.  It'll probably be flawed, sure, but it'll be tasty, and isn't a tasty pie the real goal?  Start off by reading Deb's tips for the logistics of proper pie construction at Smitten Kitchen.  I always thought the hardest part was rolling it out.  I remember my mom's many failed attempts to get her pie crusts from the mat to the pie plate in one piece.  Turns out the secret is just lots of flour, and lots of turning.  Easy!

Now the filling.  I'm swooning just thinking about it.  I actually set out just to make a plain blueberry pie, but when I had all the berries in the bowl, I knew it was lacking in volume.  I had by chance bought some frozen rhubarb at Sprouts a few weeks ago because I was curious (also, it was on sale - impulse buy!). I had never seen frozen rhubarb before, and neither had the cashier who rang me up.  She asked if it was good, and I told her I'd have to let her know.  I figured, what the hell, and threw it in with the rest of the filling.  I guess it was fate because this is easily the best pie I've ever made - including strawberry rhubarb!  It was just the right balance of sweetness from the blueberries and that touch of sour tartness from the rhubarb.  I love the sweetness of blueberries, but find a little acid to break up their flavor really brings them up a notch. And the deeper sweet flavor of the brandy brought everything together perfectly.  But the real secret was the tapioca starch.  All purpose flour is normally used in pies to help thicken the filling, but tapioca starch does a much better job of making a glutenous mixture.  Got that trick from Alton Brown.  I buy tapioca starch at the Asian market, but I'm sure it can be found at other specialty markets.  If you don't have any, just use regular AP flour.

It may be an ugly pie, but it was darn delicious.  When Husband and I were ready for dessert all conversation would cease while consumption was happening. Unless it was one of us chiming in to say how good the pie tasted.  But usually it just came out as approving grunts and groans.

  
Blueberry Rhubarb Pie

crust adapted from Smitten Kitchen
filling adapted from Joy the Baker

For the crust (both top and bottom):

2 1/2 cups flour
1 tablespoon sugar
1 teaspoon salt
1 cup (2 sticks) unsalted butter
2 TB ice cold water
Goldshlager (or vodka)
For the filling:

18oz fresh blueberries
12oz bag frozen rhubarb, thawed (or about 2 cups fresh rhubarb, chopped)
1 cup sugar
1/2 cup tapioca starch (or substitute AP flour)
zest of half a lemon (about 1/2 tsp)
1 tsp lemon juice
1 tsp cinnamon
pinch of kosher salt
3 TB brandy
1 egg
1 TB milk
To make the dough:
  1. Cut the butter into small pieces and break them apart. [I like to cut the stick lengthwise, turn it 90 degrees, and then cut it lengthwise again, so I have 4 long sticks. Then I cut regular tablespoon-size pats, so I end up with a bunch of 1/4 TB pieces.] Put the well-separated pieces into a bowl and place it in the freezer for about 30-40 minutes, or until they are just barely frozen through.
  2. In a medium bowl, mix together the flour, sugar, and salt. Add the frozen butter and gently work it into the flour with your fingertips. Since it’s frozen, you’ll have to kind of smush it out. Use your finger muscles! The butter will be incorporated enough when you have small pea-sized bits of butter left.
  3. Add the very, very cold water and stir it into the mixture. This shouldn’t be enough moisture to bring the dough together, so add the Goldshlager 1 TB at a time until the dough will just form into a ball. Divide the dough evenly into two balls. Wrap each ball tightly in plastic wrap and squish it into the shape of a round disc, like a giant hockey puck.
  4. Chill the dough in the refrigerator for at least 2 hours, but overnight is okay too.
To make the pie:

  1. In a bowl, combine the blueberries, rhubarb, sugar, tapioca starch, lemon zest, lemon juice, cinnamon, salt, and brandy. Mix until everything is incorporated and the fruit is well coated. Set aside.
  2. Remove one hockey puck of dough from the refrigerator. On a very well floured surface, roll out the dough evenly until it is big enough to cover your pie plate, plus a 1/2 inch or so. This is best achieved by constantly turning and flipping your dough so it doesn’t stick to your surface. Don’t be afraid to add too much flour, you can’t. Transferring to the pie plate can be tricky. I like to fold the dough in half, and then in half again, and then transfer the quarter wedge to the plate and carefully unfold it. But use whatever method you like.
  3. Gently press the dough into the plate and trim off any dough overhanging more than a 1/2 inch over the plate. Using the excess bits to fill any holes or imperfections you have. Remember, you won’t see the bottom crust, but you’ll taste any spots where there’s missing dough. Pour the blueberry mixture over the bottom crust and set aside.
  4. Remove the second hockey puck of dough from the refrigerator, and roll it out the same way you did the first one. When it is big enough to cover the pie with at least a 1/2 inch overhang, figure out what’s going to be the center. You need to make vents in the top crust for the steam to escape. I cut a hole about the size of a shot glass in the very center, but it can be anywhere. You’ll want at least one. I also cut a few smaller holes around the edges. When the dough is properly ventilated, carefully cover the pie, and again trim any excess. Tuck the two crusts under so it is flush with the plate. Using your fingers or a fork, crimp all the way around the edge of the pie so it’s sealed. Cut a few more vents in the crust. Put the pie in the refrigerator to chill for about 20 minutes.
  5. While the pie chills, preheat your oven to 425 degrees and move the rack to the lower third of your oven. If you’re worried about filling bubbling over and making a mess you can put a cookie sheet under the rack to catch any drippings.
  6. Beat the egg and milk together and brush evenly over the top of the chilled pie, making sure none of it pools.When the oven is ready, bake for 30 minutes, then knock the heat down to 375 degrees and bake for another 30 minutes. If the pie starts to get too brown before it is finished baking, cover it loosely with foil (I did this about 45 minutes in). The pie is finished baking when the crust is golden brown and the filling is thick and bubbling.
  7. Let the pie sit and fully cool before cutting into it to give the filling time to come together, at least 4 hours.  Don't jump the gun, you'll regret it!