Showing posts with label wine. Show all posts

Sunday, October 2, 2011

Fall Vegetable and Beef Bolognese


Fall is here. Almost. I’m ready for warm stews and casseroles. Almost. I’m ready to stop eating anything that doesn’t involve a whole can of pumpkin. Getting there. But it’s also still sunny and warm out. I’m still hanging on to the late summer peaches and plums. And does zucchini even have a season in San Diego? Seems like I can get it locally and cheap year-round. Fine by me! So I made this sauce. It’s warm and comforting like I’ve been craving, but I don’t even have to turn on the oven. Because this sauce is made, for the most part, in my crock pot. How about that? Don’t use that thing nearly enough. With my uber-busy new schedule, this recipe is definitely one I’m remembering when it’s Wednesday night and I haven't got much in the way of food for Thursday.

This sauce is a bolognese. It’s got beef (but you could totally use turkey, chicken, or bison if you want to be fancy). It’s got milk and wine, which sounds weird, but actually makes the meat flavor more succulent and delicious. True. Besides the tomatoes, it’s chalked full of other vegetables. Because I’m me, and I up the veg. Always. It all bubbles away all the live long day or night and when it’s done it’s chunky and meaty and savory. I would argue one doesn’t even need to serve this on anything besides a spoon headed for my mouth. 

 
But I didn’t serve it that way. I didn’t serve it over spaghetti either. Or penne. Or bowtie. Not even spaghetti squash, though I’ve done that before and I highly recommend it. I had red potatoes and an idea. I roasted those suckers until they were cooked through. Then I carefully smashed them flat, about ½ inch thick. Then I heated some olive oil in a skillet, and fan fried my roasted/flattened potatoes until they were golden and crispy on the outside and soft and wonderful on the inside. Then I topped those suckers with my bolognese. Then I ate them. Well, the ones Husband would let me get to. Men really are all about steak and potatoes at heart, aren’t they?

But that explains the funky pictures. That and the fact I was photographing my lunch container for the next day. But don’t let the funk fool you. This sauce is just what the don’t-leave-me-late-summer-it’s-almost-fall season calls for.


Fall Vegetable and Beef Bolognese

adapted from The Kitchn

Makes about 8 servings

1 TB olive oil
1 medium onion, finely chopped
2 celery stalks, finely chopped
1 medium carrot, finely chopped
1 medium eggplant, chopped
2 medium zucchini, chopped
8 oz cremini mushrooms, finely chopped
5 cloves of garlic, minced
1 lb. ground beef
⅛ tsp nutmeg
a few pinches of kosher salt
½ tsp freshly ground black pepper
¼ tsp crushed red pepper flakes
1 cup milk (I used 2%)
1 cup white wine or dry sherry
2 28 oz. cans of whole peeled tomatoes, drained and finely chopped (juices reserved)
1 cup reserved tomato juices
¼ cup parsley, finely chopped for garnish

  1. In a large saute pan or pot heat the olive oil over medium-high heat. Add the beef and let it sit, undisturbed for a few minutes until it browns. Flip the beef over and break it into pieces using a wooden spoon or spatula. Once the other side has browned, remove the beef from the pan and set it aside. Lower the heat to medium and add the onion, celery, and carrot with a pinch of salt and cook until the vegetables have softened, about 10 minutes. Add the eggplant, mushrooms, and zucchini, and cook until their water releases and evaporates, another 10 minutes. Add the garlic and cook until fragrant, about 30 seconds, and then add the nutmeg, black pepper, crushed red pepper, and another pinch of salt. Add the beef back into the pan and any juices that have accumulated, and stir to combine.
  2. Stir in the milk, bring it to a simmer and cook until the milk has reduced completely and very little liquid remains, about 10 minutes. Stir in the wine and simmer again until reduced completely, about 10 minutes.
  3. In your slow cooker, add the beef mixture, the chopped tomatoes and one cup of the reserved tomato juices. Stir to combine. Cover and cook on HIGH for 6 hours or LOW for 8 hours.
  4. In the last hour of cooking, make sure the cooking temperature is set to high and remove the lid to allow any excess liquid to evaporate and reduce the sauce. Stir every 15 minutes or so, until the sauce is chunky.
  5. Serve over pasta or smashed roasted potatoes, and garnish with chopped parsley and Parmesan cheese.

Sunday, August 14, 2011

Sautéed Swiss Chard and Mushrooms with Chicken Sausage


Life is crazy. Life is a whirlwind. Confession: I am a homebody. A shut-in at heart, though not in practice. I like spending my evenings quietly with my husband and my dog, my days in simple, solitary tasks that allow for personal reflection. But I’m a complicated woman. Local breweries throw parties, my favorite restaurant tempts me with wildly amazing new burgers (a lobster-crab patty and a wagyu beef patty together, and that was only half of what all came on it! Words cannot describe...), wineries want me to come pickup the wine I’ve ordered while pouring me glass after glass of their wares, family visits and the sights must be shown. People I know inexplicably want my company more often than I’m able to give it. I can’t say no to any of it. I’ve been having fun. Why is fun so durn tiring? It’s all I can do to bake a batch of cupcakes to research recipes and flavor combinations for my nephew’s second birthday cake. That’s happening. Remember last years? I’m really excited to share it with you when the time is right. Oh, and did I mention I’m changing jobs? Again. I’m scared. It’s new and challenging, but also old and familiar. And completely crazy and unexpected. Hopefully it’s the right decision. We never know until we know, right? So life is a whirlwind. But it’s also full of love, fun, and opportunity. It’s exciting and engaging. And most importantly, there are cupcakes.

With all the libation partakage, face-stuffing, and uncharacteristic socialbility, it can be hard to maintain one’s girlish figure. It’s a constant...I want to say battle, but that’s not the right word. I’m not at war with my body. It’s more like I need to keep constant vigilance! I’m at war with my fatty fatty fat fat. If I let my guard down, it’ll sneak in and squat. Not cool. So even though I despise waking up at 5am to fit in a decent workout before work, I despise forgoing drinks and dessert far more. Even though some days I want to quit my run at mile 3, I push on to mile 5 and follow up with a couple sets of burpees and jack-knives because I want to have a good time out with my friends, and not feel guilty if I don’t order a shamefully made salad that will ultimately leave me feeling hostile towards the establishment. Burpees are the bane of my existence. My motivation is my lifestyle. I like it. I want to keep doing what I’m doing. But I like my body too. I’m healthy. I feel good. My clothes fit. It’s all about the choices we make and the priorities we set, right? Finding that balance. 


One way I offset my weekend escapades is to cook as deliciously healthy as possible during the week. You know, cook vegetables. The stuff most restaurants seem to stubbornly shy away from except in the most fleeting capacity. I get so disappointed when a dish boasts of a protein and starchy side resting on a bed of, say, Swiss chard, and the reality of what’s presented before me is a mere morsel compared to the gluttony of the other components. Proportions people! How about a whole big bunch of Swiss chard? And fungus is uber-healthy. Lots of vitamins and fiber and not much else. And ingestion is supposed to help prevents cancers and other lethalities. Not to mention mushrooms are a huge source of “umami”. Which, since I’m not Japanese and most of my vocabulary is construed as some form of English, I tend to refer to as “earthy”. Wonderfully earthy. So let’s throw a heap of mushrooms in there too. And how about some protein? It doesn’t need to be a giant hunk of meat on top. It can be the flavor base of the dish. The thing that makes it deceptively filling. And if your grocery store happens to sell a fantastic chicken and mushroom sausage behind the meat counter? Well I think you should tell Mr. Meat Counter Man to pack you up a couple of links!

As a quick weeknight meal, this simple saute of Swiss chard and mushrooms and chicken sausage was a pleasant surprise. One of those meals I didn’t plan, didn’t expect to be anything exceptional, and upon tasting, immediately ran to write down the recipe while it was still fresh in my head so I could make it again and again. One of those meals Husband made lots of quiet grunting noises while eating between expressions of fondness for the dish. It was, unfortunately, not long for this world with such ardent admiration. But I snapped a pic or two and here I am to share it with you.

Besides coming together fast, it’s also very adaptable to what you have in the fridge. I think Swiss chard works best, but collards or kale would do. Cremini mushrooms are a bit more rich in flavor, but button mushrooms are mighty tasty too. I love the flavor of dry sherry and mushrooms, but a dry white wine would be a lovely substitution. No sausage on hand, but a crisper drawer full of bacon? Well it’s not quite the same, but I’m sure it would still be pretty dang tasty. Whatever dry or fresh herbs that tickle your fancy would be nice, but thyme and tarragon fit that bill for me. Freshly squeezed orange juice was all the sweetness and acidity I needed, but a squeeze of lemon juice and a touch of honey could be just the thing. Just promise me one thing. If you do use Swiss chard, don’t throw away those bright and delectable stems! Their color not only adds an enticing hue to the dish, but you paid for a bunch of chard. Why are you going to throw half of it away? Let’s practice root to leaf practices here, people. It’s like celery. It just needs some time and love, but you’ll be glad you did.


Sauteed Swiss Chard and Mushrooms with Chicken Sausage

Makes about 6 servings

1 lb. fresh chicken sausage (I used a chicken mushroom), or any preferred sausage
1 yellow onion, chopped
5 cloves garlic, minced
1 bunch Swiss chard, stems chopped and leaves cut into ribbons
1 lb. cremini mushrooms, sliced
1 tsp dried thyme
½ tsp dried tarragon
¼ tsp freshly ground black pepper
1 cup dry sherry (or wine)
¼ cup fresh orange juice (~ ½ a juicy orange)
kosher salt to taste
2 TB olive oil, divided

  1. In a large skillet (preferably cast iron), heat 1 TB of the olive oil over medium-high heat. Once it is good and hot, crumble the fresh sausage evenly into the pan and let it sit undisturbed for a bit to brown. Flip the sausage for the other side to brown, and using a spatula or wooden spoon, break up any large chunks that are sticking together. Once the sausage is browned and cooked, remove it from the pan to a plate and set aside.
  2. Reduce the heat to medium, and if it is needed, add the second TB of olive oil. Add the onion and a pinch of salt and saute until it is soft and translucent, about 3 minutes. Add the Swiss chard stems and cook for another 3-5 minutes, until they have begun to soften. Add the garlic and cook for another minute, until it is softened and aromatic. (This is around the time people in your household will comment on how good it smells)
  3. Add the mushrooms with another pinch of salt, as well as the thyme, tarragon, and black pepper. Cook the mixture until the mushrooms have given off their water, shrunken, and the water has mostly cooked off. Add the sherry to deglaze the pan, scraping up any browned bits that have formed on the bottom of the pan. Let the mixture simmer for a minute so the sherry can slightly reduce and concentrate. Add the Swiss chard leaves and the orange juice and cook until the leaves have wilted and softened, about 5 minutes.
  4. Add the sausage, and any juices that have pooled on the plate, back to the pan and simmer for a couple more minutes so the flavors can fully marry together.

Friday, June 10, 2011

In Which I Talk About Food, Near and Far

Been cooking.  Been baking.  Nothing I'm ready to share yet.  Lame, right?  But my mother taught me sharing is caring*, so here we are.
  • I made this roasted mango salsa from Cara's Cravings.  Have you checked out her blog?  It's lovely.  I used jalapeno instead of habanero because that's what I had on hand.  I reserved the ribs and seeds in case I needed some extra spice, but it totally wasn't needed.  I had one spicy jalapeno!  I don't buy the ones with perfect skin.  I buy the ugly ones.  They're spicier.  I mixed a few tablespoons with a mashed avocado and lime juice.  Best guacamole ever.  Don't have fresh mango?  They sell it frozen at Trader Joe's.  That's what I used.  Works great.

  • I was in Seattle last weekend.  My friend was not only nice enough to get married and invite me, but he had the consideration to live in Seattle at the time.  It's a beautiful city.  Wonderful.  One of my favorites.  And I'm not even a city person, generally.  This friend's bride is the maid who caught the bouquet at my wedding 5 years ago.  It was nice to be a part of their big day and remind them of that moment.
  • Husband and I toured Theo Chocolate Factory.  It's organic and fair trade.  More importantly, it's delicious!  It was interesting how the beans from different regions create such different finished chocolate bars.  I tried a 91% chocolate bar that was actually quite fruity and smooth.  I once tried a 89% chocolate bar in Paris.  It tasted like dirt.  How did I taste so many different bars without going broke?  That would be the overflowing mounds of samples they have dotted throughout their store.  Yeah.  Go there.  You're welcome.

  • I also made sure to schedule a trip to World Spice Merchants.  I spent at least an hour in there.  Smelling mixtures in jars.  Over and over.  Unable to decide between the 20 different blends of Middle Eastern curry.  Not even counting the Asian curries. I had to call Husband over to trim my list down to something manageable.  The place is amazing, but I'm way to indecisive to handle it without an adult to hold my hand.  They give you the option to get your spice blends freshly ground while you wait or whole to grind at home.  That's understanding of quality!  Alton Brown featured the place in an episode of Good Eats.  That's how I discovered it.  Thanks Alton!

  • Even had time to squeeze in a quick wine tasting at Chateau St. Michelle.  Their tasting room is so unique.  It's a large and open room that is made to look like an outdoor patio.  Smart, since they live in an area that gets a tad bit of rain.  Beautiful grounds too.  The wine was ok.

I'm still dreaming of my time there.  It was magical.  So was that salsa.  I'm still dreaming about it too.  I'm glad my friend just gave me more avocados from her tree.  

Happy eatings!


*Pretty sure if I ever heard my mother utter that phrase, I would die of shock.  After I accused her of being a pod person.

Friday, May 6, 2011

Spicy Apricot Chutney


I love my neighbor, Julie.  Not just because she has my name, but because when we meet a new neighbor, I can introduce us by saying "Wer're Julie."

I love my neighbor, Julie.  Not just because she has the most adorable, doe-eyed Beagle I've ever met, but because said Beagle parks her tush outside my house whenever they walk by because "she remembers where she'e been fed."  Also, I love that she brings the Beagle when she comes over for the occasional dinner party.  Theo likes to have playmates too!

I love my neighbor, Julie.  Not just because she works at Costco, but because this year she gave me her free frozen turkey Costco employees are given for Christmas.

I love my neighbor, Julie.  Not just because she loved the apricot chutney I served when she came over to help me eat that turkey, but because when I asked her this week what type of ice cream I should make she said "Vanilla ice cream...with your apricot chutney!"


Full disclosure, this was way back in February.  Poor Julie has been waiting for this recipe for a long time!  I had a few neighbors, including Julie, over for a (huge - true to Costco!) turkey dinner.  Just two months after Thanksgiving, I was looking to go beyond cranberry sauce and mashed potatoes.  And my Indian-flavored turkey dinner was born!  I'm a total dork, and apparently had trouble thinking too far out of the box, because I still roasted a turkey.  Instead of sage and thyme, I used garam masala, turmeric, and ginger.  Instead of mashed potatoes, I made mashed sweet potatoes with cinnamon and yogurt.  And instead of cranberry sauce, I made apricot chutney!

I was nervous how it would go over.  Indian flavors are a bit more...aggressive.  And this chutney was spicy, sweet, and so tangy it was positively pungent all at the same time!  I was sure a person or two wouldn't be able to handle it.  I was most nervous about Julie.  She who declares raisins aren't food surely wouldn't go for something so decidedly dried-fruity, and...aggressive.

So naturally, she took one bite, parked the serving bowl right next to her plate, and declared it would be staying right there the rest of the dinner.

And if we were nice to her, she might share with the rest of us.


Then she said I needed to blog the recipe.

Except I didn't have a recipe.

It was my first time making a chutney.  Ever.  And I kind of just added ingredients, tasting along the way, until it had just the right balance.  When it came time to write down the recipe, I had a hard time remembering what all I had thrown in, let along the quantities.  Don't you hate it when that happens?

So I made it again.  Darn!

This time I paid careful attention and took copious notes.  Until once again, I tasted the perfect balance of tangy vinegar against the sweet apricots, the savory aromatics, and the spice from the chiles.  The great thing about this chutney is how suitable it is to tinkering.  The proportions of vinegar to sugar to soy sauce can be adjusted to suit your own tastes, but I think this recipe yields pretty dang tasty results!

As reward for my efforts, I had an entire batch of chutney to eat to my hearts desire, and as I found, this chutney is great in all sorts of dishes.  My favorite was a fast and easy grilled cheese (panini style!) with pepperjack cheese.  *drool*

As a topping for all sorts of protein is delicious too.  Here, I opted for some simple grilled mahi mahi filets for a quick weeknight meal. Yum!

I don't know about vanilla ice cream though.  Sounds a bit weird.


Spicy Apricot Chutney

Makes about 2 1/2 cups

1 TB grapeseed oil (or canola or olive oil)
pinch of kosher salt
1/2 medium red onion, minced
1 shallot, minced
2 serrano chiles, minced (remove the seeds and ribs based on your spice preference!)
1 TB garlic, minced
1 TB ginger, minced
10 oz. dried apricots, chopped (~2 cups)
1 cup white wine
2 TB fresh lime juice
1 TB soy sauce
3 TB white wine vinegar
2 TB brown sugar
1/2 tsp ground black pepper
1/4 tsp ground cinnamon

  1. In a medium saucepan over medium heat, sweat the onion and shallot with a pinch of salt in the olive oil until softened, about 3 minutes.  Add the garlic, ginger, and chiles, and cook for another 2 minutes, stirring occasionally.
  2. Add the rest of the ingredients, and bring the mixture to a gentle simmer.  Cook, uncovered, for about 40 minutes, stirring occasionally, until the mixture is softened and reduced.  Once the flavors have simmered together for a few minutes, try the mixture and adjust the flavorings as suits you.
  3. Serve with whatever your heart desires!

Sunday, April 17, 2011

Roasted Garlic Cauliflower Soup


A moment to sit in quiet contemplation and reflection.  What a concept.  Feels like it's been, oh, a month since I've last had the pleasure.  And what do you know?  It's been about that long since my last post.  Spring always seems to be a busy time.  With sunshine and flowers comes holidays, weddings, festivals, parties, and every other fun thing that is supposed to get us through the winter.  Of course, having the means once again to participate the these festivities helps immensely.  I finally found employment, you see.  Ah, the relief of a steady paycheck again.  It took lots of sorting out, getting back into the swing of things.  Not that the work hours was an adjustment,  job hunting was pretty much a full-time gig.  Rather, my life was put on hold for almost a year.  I didn't realize how much until I was employed again.  I can now attend family functions and spring festivals.  I can go to the mall when my belt is hanging together by a thread, or I need shoes fit for a nice evening out.  I can have nice evenings out!  Free time didn't come from my lack of 9 to 5 commitment so much as my self-imposed house arrest weekend after weekend, because let's face it, being social costs money!  I've been reconnecting with some good people who were very over due for some Julie time, getting the household in order, and mostly just running around like a crazy person.  Trying to fit a square day into a round schedule.  Oh, the joys of rejoining society!  For reals, it's great to have my life back.  Unfortunately, things aren't yet sorted enough that I can promise a weekly blog update like I've so enjoyed in the past.  But I'm still in the kitchen, cooking and baking away.  Still writing down my recipes, celebrating my successes and failures.   


This recipe is from a few weeks ago, when the weather was darn right cold and a thick, creamy soup with big bold flavors was needed for comfort.  But of course you know I don't do real big creamy soups.  That's why this soup is so great - it's thick and silky, but still light.  It has a rich, sweet flavor, but you won't feel gross after eating it.  That's just how I roll.  Plus, wait till you get a load of the twist!

This soup is all about the garlic.  6 heads, in fact.  Roasted until they are all mild sweetness, their spicy pungency a victim of the wondrous sugar caramelization process.  It started off a typical Julie soup.  I threw in the usual aromatics, herbs, and spices.  I used cauliflower to lend a sweet and slightly vege-floral flavor (yaknowadimean?) and silky texture.  And of course what's soup without wine and stock?  But I wasn't quite satisfied.   As I said, I was craving comfort - that stick to your ribs kind of soup - but I didn't want it to actually stick to my ribs.  Substance, I craved.  I rummaged in the pantry and pulled out some cashews.  Then I threw them in the food processor...and turned it on.  After making enough racket to send my dog fleeing from the room, the nuts finally resigned to their fate and melted to my will...for nut butter.  Cashew nut butter.  I stirred it into the soup, and all was right in the world.  There was substance, there was sweetness, and there was oh so much lovely roasted garlic.

Husband is really not a soup person.  Especially pureed soups.  Give him a bowl of stew or chili and he's happy, but puree up some vegetables and he doesn't exactly shoot off fireworks.  But he loved this soup.  He ate bowls and bowls of it until it was all gone and we were both sad.  I should make it again.  Or at least go eat dinner.  But I'll be back, hopefully very soon!


In the mood for a more seasonally-appropriate soup?  You can re-acquaint yourself with my very first post.  Mushrooms and asparagus, such a magical combination.


 Roasted Garlic Cauliflower Soup

1 head cauliflower, roughly chopped
6 heads garlic, roasted
1 medium onion, chopped
2 shallots, chopped (~1/4 cup)
4-5 stalks celery, chopped (~1 cup)
1 TB olive oil
½ tsp freshly ground black pepper
½ tsp dried thyme
¼ tsp celery salt
pinch of cayenne pepper
1 cup dry white wine
1 cup whole cashews
5-6 cups chicken stock
fresh chives, chopped finely, for garnish
  1. Chop the top off each head of garlic and drizzle with olive oil. Wrap them in foil and roast in a 400 degree oven for about an hour, or until softened. Let cool.
  2. In a food processor, grind the cashews until a uniformly-pureed cashew butter forms. It will take a few minutes. Set aside.
  3. In a dutch oven over medium heat, saute the onion, shallots, and celery in the olive oil until softened, about 5 minutes. Add the black pepper, thyme, celery salt, and cayenne pepper, and cook for 1 minute, until fragrant.
  4. Add the wine to deglaze the pan, scrapping up any browned bits. Simmer the mixture for a few minutes, until the wine has reduced by about half. Add the cashew butter and stir until it is incorporated and the mixture is smooth. Add the chicken stock and cauliflower, bring the mixture back to a simmer and cook at a gentle simmer for about 30 minutes, or until the cauliflower is tender and soft.
  5. Remove the soup from the heat and add the roasted garlic, squeezing out each clove like a tube of toothpaste. Using an immersion blender, puree the soup. Garnish with the chives.


Edit for SoupaPalooza 2012: Come join SoupaPalooza at TidyMom and Dine and Dish sponsored by KitchenAid, Red Star Yeast and Le Creuset

Monday, February 21, 2011

Pasta with Roasted Spring Vegetables in Cambozola Sauce


Let’s start with the giveaway winner. Congratulations...

...drum-rolling...


 ...Kelly! You win the CSN Stores gift certificate! Congratulations! And who says the person who enters 5 minutes after you post it won’t win? Not I. I’ll be sending your email address to my contact with the company. Stay tuned!


When I researched the best ways to start an exercise plan - what was now all those moons ago - one thing I always saw mentioned was goal setting. Most “professionals” agree that it is important to set both long term and short term goals, the idea being to motivate yourself early with small accomplishments, and to keep the motivation going for the long term. By accomplishing your smaller short term goals, you’ll build up enough muscle, endurance, discipline, etc. to complete your long term goals. Makes sense. And for some people, like Husband, it’s invaluable advice. Results can be slow to show on the scale or on our bodies, but when you have a cold, hard accomplishment under your belt, that can be just the thing to keep you going. Me? I make goals, sure. But I never took much time to structure them or really give much thought to them. I was so overweight that the scale provided me with all the motivation I needed pretty early on. I guess that’s one advantage to to being obese vs. just overweight? Heh.

I’ve been thinking more about goals lately, and I’ve come to realize it’s kind of like the approach you take when applying to colleges. When deciding where to apply you have the schools you’ll probably get into, and probably end up going to. Those are the realistic schools that are “the middle”. But what if by some catastrophe, you don’t get into any of those middle schools? The probability is low, sure, but you don’t want to be caught with no acceptances. Catastrophe indeed! So you apply to a “safe” school or two - schools you know for sure you’ll get into and wouldn’t be completely miserable attending. Even better is when your safe school has rolling admissions. Having that acceptance under your belt does wonders for your confidence when applying to the better schools. And then, of course, you have to apply to a few schools - the ivy leagues - that you don’t seriously think you’ll get into, and never really considered attending, but figured it’d be fun to try on the off chance that by some miracle of paperwork error, they let you in.

What does any of that have to do with goal setting? Bear with me. As I’m writing this, I’ve just come from a local wine-maker’s house. Ever had a pot luck luncheon with a wine-maker? Let’s just say my glass was never allowed to go empty. Let’s also say it was very good wine, and it seemed to evaporate from my glass as soon as wine was poured in.

I expect I’ll be getting an email from my editor sister tomorrow with a few dozen corrections and even more questions of clarification of what the heck I’m talking about.

But I do have a point! And it’s that goal setting should be like applying to college. Shoot for the stars, hope to get there, but at the same time be practical and expect for something a bit closer to earth. When I first started running, I couldn’t even run a mile. So that was my first goal. Run a mile. Did that. Then my goal was to run a mile under 14 minutes. Then 12. Then run 2 miles. Then 3. When I first started out, my long term goal was to be able to run a 5K (aka: 3.1 miles). It sounded so far, but I was confident I could reach it with a little work. And I was right! My next long term goal was a 10K (aka: 6.2 miles). I started getting my runs to 3.5 miles, then 4, etc., etc.. The thought of running over 6 miles sounded crazy, and I wasn’t sure I’d ever get there, but I figured I’d try. And with a little more work, I did it! I just kept pushing back my goals, and eventually meeting them - both short term and long. They were like getting into my safe schools right away and my middle schools eventually. All the while I was secretly shooting for the stars.

I was at the gym once - gosh, maybe almost a year ago now. A neighbor who had seen me running around the area and being a regular at the gym asked me if I was training for a marathon. I scoffed. A marathon!? At that point I wasn’t yet able to run a 10K let alone several 10Ks. I still don’t think I’ll ever be crazy enough to run a full marathon (aka: 26.2 miles). Just can’t imagine doing that to my poor, poor body. But. In just a few weeks, I’ll be running my very first race. A half marathon, no less! Aka: 13.1 miles. I’ve never actually run that far before, but I’m confident I can finish. That confidence actually blows my mind. This time last year I was scoffing at the very idea of running a half marathon, and now I’m actually going to do it. I feel like I just go into Stanford!


I’m a little embarrassed to admit this, but I am far too sauced to think of a not-so-witty segue into this dish. Besides mentioning that the recipe is basically a sauce. So there’s that. Not my best work, I know.

A Facebook friend of mine has been mentioning her current obsession with paninis, and especially her complete obsession with cambozola cheese on these paninis. Always one willing to talk food, I commented on her status, asking what was this cambozola cheese and why was it so special? And then proceeded to Google the stuff, since I’m impatient and a dork. And let’s just say it went downhill from there. Cambozola cheese is described as a blue brie, and that’s exactly how I would describe it too. It’s a triple cream cheese, so it’s rich and creamy like brie, but it’s also made from the blue mold of other blue cheeses, so it does have what I like to call, a bit of stinkiness to it. Who doesn’t like a beautiful marriage of a creamy, stinky cheese?

On a happy, splurging shopping fest last week I picked up a wedge of the cambozola, along with some Brussels sprouts and asparagus. I thought a good cheese with two of my favorite vegetables would be a good way to celebrate my finally landing a job. No biggie. I start tomorrow. I’m breezy.

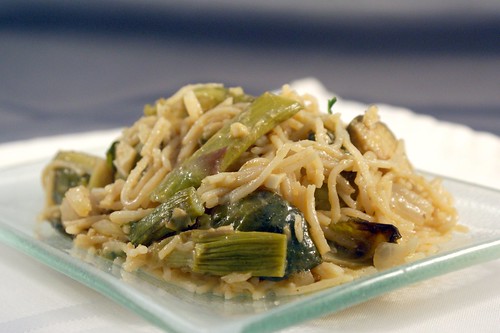
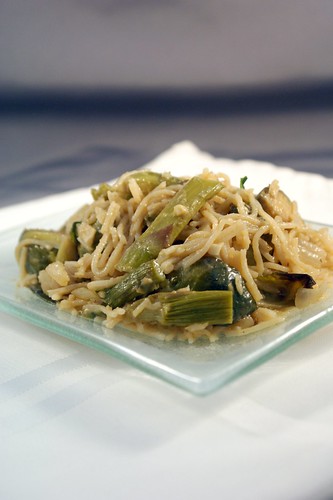
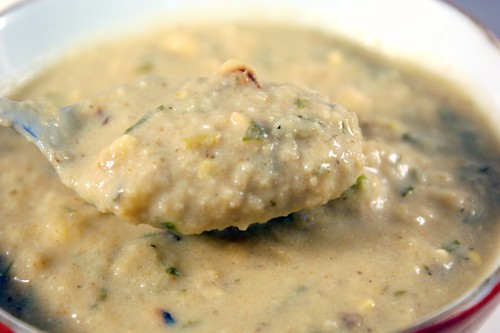
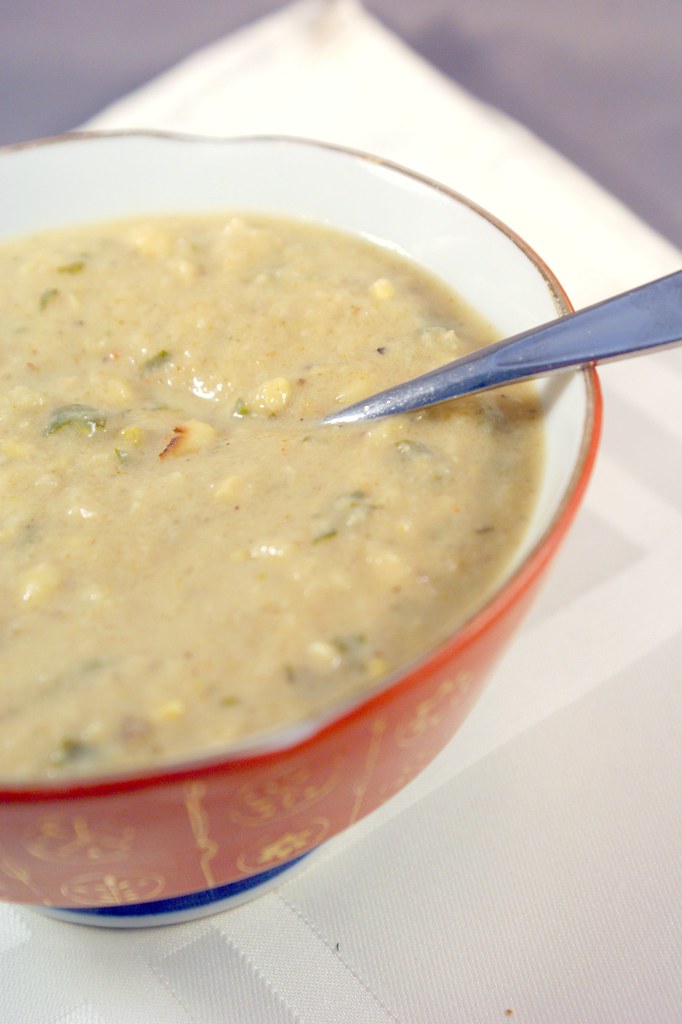
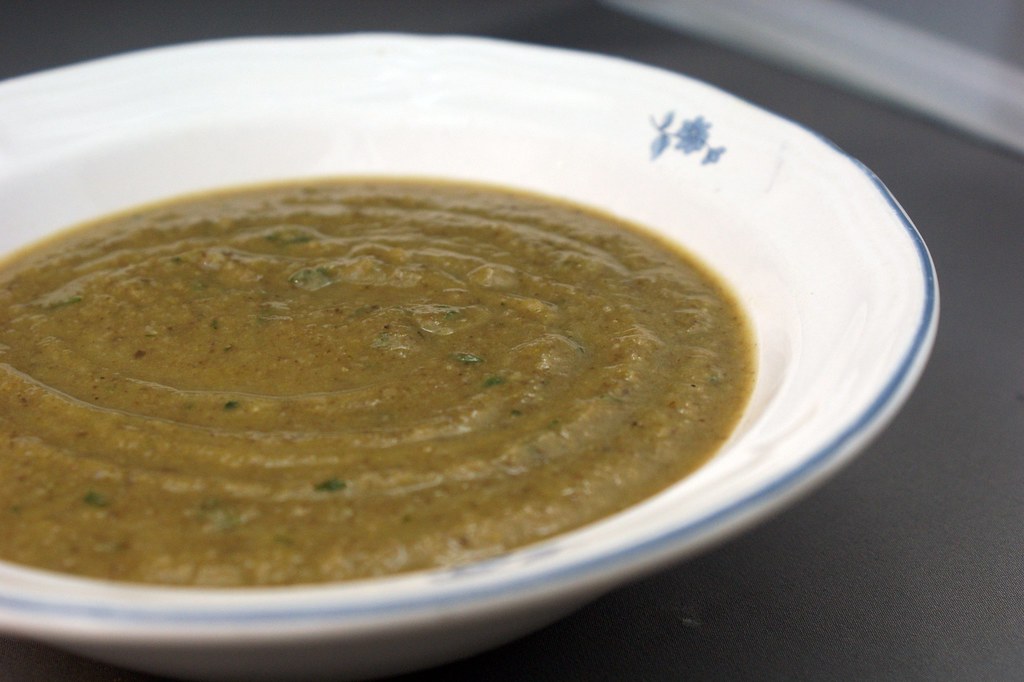
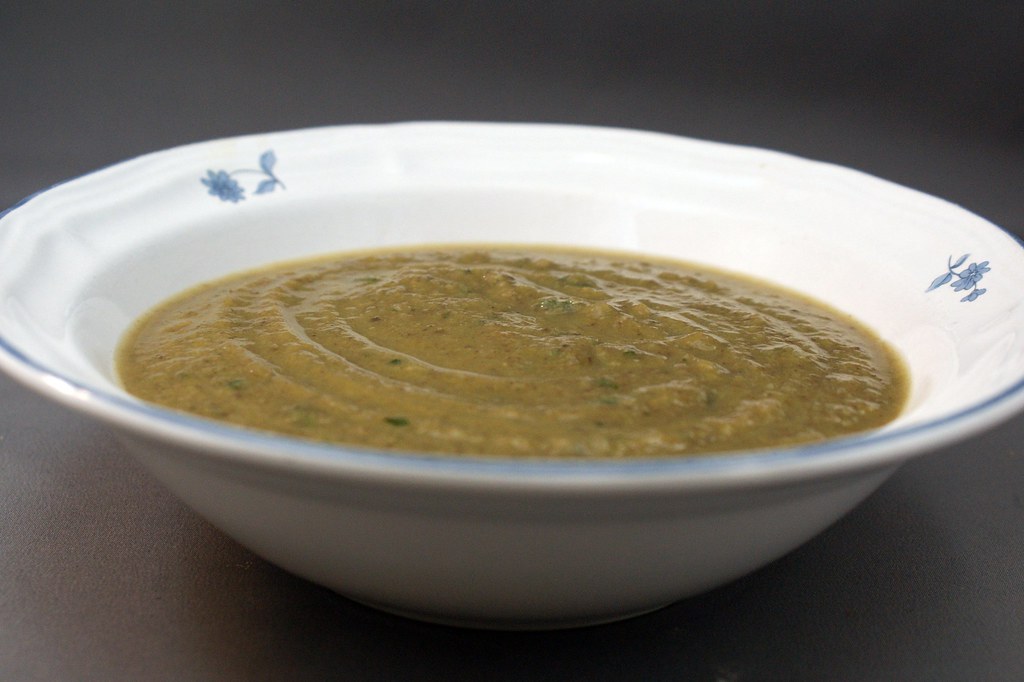
Who knows what possesses me to cook the things that I cook, but I thought the cheese would go beautifully in a pasta sauce. The creaminess added a wonderful, velvety texture, and the stinkiness added a beautiful dimension to the dish. I could definitely taste it, but it sat in the background and sang me a light tune. Husband came home and tried this pasta, and he of the not very sensitive taste buds concurred. He loved how the flavor came through, and he’s not even big into the stinky cheeses. Another thing I appreciated was that while this sauce is completely heavy on flavor, as you can see from the pictures, it’s not very saucy. There is no puddle of creamy liquid that’s dripped off the pasta to rest at the bottom of the plate. All the sauce is stuck firmly to the food, as it should be. In that sense, it doesn’t feel like a heavily sauced dish. But the flavor is so present, you don’t miss it. By all means, if you like a looser sauce, go ahead and add some cream or milk or chicken broth. Whatever your heart desires. My heart desired this sauce as is, and so did my taste buds.

Think you don’t like Brussels sprouts and asparagus? Ever tried roasting it? Brussels sprouts can be bitter, but roasting them for a long time under high heat with some balsamic vinegar brings out their hidden sugars and really makes them something special. I would highly recommend giving it a try. But if you’re not into it, any vegetable will do. You could throw in some artichoke hearts and peas, or broccoli would be delicious. I used whole wheat pasta, an angel hair.  You could use a regular fusilli.  That’s the great thing about cooking - just tweak it till you love it!


Pasta with Roasted Vegetables in Cambozola Sauce

Makes ~6-8 servings

½ lb. whole wheat pasta (I used angel hair)
1 ½ lb. Brussels sprouts, trimmed and quartered
½ lb. asparagus, trimmed
3 TB olive oil, divided
2 TB balsamic vinegar
2 pinches of salt
1 medium yellow onion, chopped
1 small shallot, chopped
5-6 cloves of garlic, minced
2 TB butter
2 TB flour
2 cups dry white wine
½ tsp crushed red pepper flakes
½ tsp ground black pepper
6 oz. cambozola cheese
¼ cup freshly grated parmesan cheese
1 TB fresh lemon juice (about half a lemon)
¼ cup fresh parsley, minced

  1. Preheat the oven to 400 degrees. In a roasting pan, toss the Brussels sprouts and asparagus with 2 TB of olive oil, the balsamic vinegar, and a pinch of salt. Roast the vegetable mixture in the oven for 25-30 minutes, until they are soft and have a nice golden brown color, tossing every about 10 minutes to ensure they brown evenly.
  2. Now would be a good time to get a large pot of water boiling for your pasta. The sauce only takes about 15 minutes, not counting the prep for the mise en place, so might want to wait until the vegetables have a good head start in the oven before starting.
  3. In a large sauté pan over medium heat, sauté the onion and shallot in the remaining 1 TB of olive oil and pinch of salt until they are softened, about 5 minutes. Add the garlic and cook for another minute. Add the black pepper and red pepper flakes, stir, and cook for one more minute.
  4. Now would be a good time to drop your pasta, if you haven’t done it yet.
  5. Clear a space in the pan and add the butter. When it has started to melt down, add the flour and mix them together to form a paste. Let the paste cook for a minute or two to get rid of the raw flour taste. Add the wine and bring the mixture to a simmer. Let the mixture cook until it has thickened and the wine has reduced by about half, about 3 minutes.
  6. Turn the heat down to low and add the cheeses, stirring until they are fully melted and incorporated into the sauce. Stir in the lemon juice, parsley, and roasted asparagus and Brussels sprouts. Stir in the cooked pasta drained straight from the pot, you can use a little of the starchy pasta water if you want to thin out the sauce at all.

Friday, January 14, 2011

Roasted Vegetable Winter Soup


Last post I promised a healthy soup to help shed those extra pounds we tend to get as a result of all that sticky toffee pudding, gingerbread, and eggnog around the holidays, and I am quite the deliverer, if I do say so myself. And I do!

I gullibly keep recording shows on the Food Network promising healthy and light meals, excited that it’s finally the time of year when those celebrity chefs might just be cooking something I’d like to try. Then they pull out the lite mayo or top a plain, grilled chicken breast with cheese and pepperoni and call it pizza (and healthy pizza no less!), and I stop and delete the episode. Healthy does not mean diet! Diet food is flavorless, rubbery chicken with microwaved broccoli. Diet food is a punishment to teach yourself not to be such a pig the next holiday season. Diet food is stupid. Healthy eating is about thinking outside the deep fryer box and finding ways to prepare fresh foods in flavorful ways that make us want to eat them. It’s about shifting your habits to eat a different way. Instead of trying to take an unhealthy dish and removing everything that makes it taste good, just eat something that’s healthy to begin with. No brainer, right?

I learned early in my healthy eating transition that I like to eat. Actually, I love to eat. Sure, I’ve lessened my portions, but I used to eat on par with Husband and his roommates in college. I am not a 6’2” male, but I sure liked to eat like one. I still eat plenty because I knew for this to work, I had to let myself eat. Then I found vegetables. They’re such wonderful things. So full of flavor and texture and every good thing. There’s a reason that Weight Watchers puts vegetables at zero points, and that would be how totally nutrient rich are for being so low in calories. As Rachel Ray likes to say - if you eat healthy, you can eat more. A sentiment I always identified with. Just remember that eating too much stretches your stomach, which is a recipe for disaster later. Eat until you’re satisfied, not waddling. Be reasonable. 

One way I like to fill up my tummy without filling up my calorie bank is soup. Broth-based soups feel substantial because of their high water content, but still add a great amount of flavor. Toss in a healthy dose of vegetables and some form of lean protein and/or whole grains, and you’ve got yourself a meal you can sink a spoon into.


I love soup. I have always loved soup. It’s a love affair that started with my grandmother. She made a mean soup, and growing up a picky eater, I was always happy to go to her house knowing there would be a large pot of soup that had been sitting on the stove slow cooking all day and brimming with vegetables, barley, lentils, and meat (though I ate around that part). Her theory was that I just didn’t like to chew. I think I just like the infinite blend of flavors and the comforting feeling it brings. Warm liquids bring me joy. I love my sludgy coffee in the morning, my steamy afternoon tea, and a silky bowl of soup for dinner. I had a friend in college who didn’t like warm liquids of any kind. We no longer keep in touch.

I’m actually surprised I haven’t posted twenty soup recipes by now, but I guess they’re usually so flung together that I don’t really have a recipe prepared, or sometimes they’re so simple I would feel silly posting it.

If you couldn't tell already, I might be a little obsessed with vegetables. I never feel like I eat enough of them, even though probably 75% of my diet is vegetables (if we don’t count breakfast because I eat zero for breakfast, and if we’re counting breakfast the percentage drops to like 45% because even if I ate nothing but vegetables for lunch and dinner, the most it could be is 66%, so let’s just not count it, m’kay?). I have this little trick with soups. It helps me with portion control and it’s a good way to get a few more leafy greens in my diet. Because I’m seriously lacking in that department, right? I’m talking about spinach. I line my soup bowl with a good helping of fresh baby spinach leaves (I always have some on hand from Trader Joe’s, they have those handy resealable bags), more if it’s a veggie-lite soup, less if it’s veggie-heavy. Then I add the soup until my piggy eyes see it reach the rim of the bowl. This is where it helps with the portion control. The fresh spinach takes up a lot of room in the bowl, so even though I can’t stop myself from filling the bowl, it’s not really full. Of soup anyway. Aw, what a trickster I am! After a few minutes in the microwave the soup is hot and the spinach is wilted, and magically (good ol’ water evaporation!) the level of soup in the bowl is no longer threatening to spill over the sides. It’s ok to be a piggy if you recognize it and trick yourself from letting it impede your health, right? Right. Plus, spinach is delicious and is always a yummy addition to whatever soup I’m enjoying, such as this roasted vegetable soup I made recently.

I am a master of the segue.
This soup was just a happy accident, brought together - like the plot of many a good novel - by a random string of circumstances. Zucchini and eggplant were on sale (seriously, how crazy has the zucchini crop been this year?). I had fresh thyme leftover from my Thanksgiving splurge. I happened to be drinking white wine that night. I wanted the soup creamier without using cream. But here’s the kicker - I was freezing my booty off and I wanted an excuse to turn on the oven. I may be too poor (err, cheap) to heat my house properly, but it encouraged me to roast my veggies before throwing them into the soup, and man did it make this one of the better soups I’ve ever made. 

Husband gobbled it all up in record time, and he's not even a soup person!  We no longer keep in touch.  

Roasting the vegetables caramelized the sugars, making the soup sweeter, richer, and more complex. Love it! And apparently eggplant pureed in soup is like liquid silk, it adds a lovely texture. Who knew?  The evaporated milk thickened the soup beautifully without all that pesky fat. I just need to be mindful that it’s concentrated milk, so 1 cup of evaporated milk is still a hefty amount of calories compared to a cup of milk. But a little goes a long way, so it's all good. Definitely a trick I'm going to remember.  Oh, and did I mention this soup is pretty darn quick? Definitely doable for a weeknight meal. Only about 30 minutes of total cook time, and since I used the broiler setting on the oven, I didn’t even have to wait forever for it to heat up. Win!

So to sum up the awesomeness of this soup, let’s count the ways:
  1. Healthy - fresh vegetables, stock, and lowfat milk 
  2. Fast - 45 minutes tops, depending on how long it takes you to chop
  3. Easy - mostly just chop, dump, or stir
  4. Delicious - eggplant = silky 
  5. Comforting - it’s cold everywhere right now 
  6. Why are you still reading this? Go make this soup! 

What healthy foods are you cooking up to stay warm?  Will you be bringing home your own bag of spinach from Trader Joe's?


Roasted Vegetable Winter Soup 

4 medium zucchini, roughly chopped
2 small eggplant, roughly chopped
2 medium onions, roughly sliced
5-6 cloves of garlic, minced
1 TB fresh thyme, minced
2 cups dry white wine
1 cup chicken broth (or vegetable broth)
1 12oz. can evaporated milk (I used 2%)
2 TB white wine vinegar
olive oil
salt and pepper

  1. Turn the oven on to broil (500 degrees). In a large roasting pan, toss the zucchini, eggplant, and onions with about 2 TB of olive oil, a pinch of salt, and a pinch of pepper. Roast the vegetables until they are soft and nicely browned, tossing every 5-7 minutes so they cook evenly. This will take about 20 minutes total. 
  2. When the vegetables are out of the oven heat 2 TB of olive oil in a dutch oven or soup pot over medium heat. Add the garlic and cook for a minute or two until it is softened and fragrant. Add the thyme and cook for another minute. Add the wine and bring the mixture to a simmer. Cook until it is reduced by half, then add the chicken broth and roasted vegetables. Bring the mixture back to a boil and simmer for about 10 minutes, until everything is softened and incorporated. 
  3. Turn off the heat and let the soup cool down a bit. Once cooled, puree with an immersion blender (or regular blender or food processor). Add the evaporated milk, as much as you prefer. I added the whole can for optimal creaminess, but a few tablespoons would have been plenty. Then add vinegar, and salt and pepper to taste.


Edit for SoupaPalooza 2012: Come join SoupaPalooza at TidyMom and Dine and Dish sponsored by KitchenAid, Red Star Yeast and Le Creuset

Monday, August 16, 2010

In Which I Say Naked A Lot


Recipe below: Grilled Corn Chowder

Well, fellow eaters, I am still on my exercise kick, so skip down past the next picture if you don’t want to read my latest soliloquy because either way, you are going to want to hear about this soup. The problem with discussing exercise is keeping it short, as there’s just so much to say! But I’ll attempt to rein myself in by keeping to one very specific topic. Equipment.

In my opinion there is only one piece of exercise equipment you absolutely need - a heart monitor. Whether you do swimming, running, walking, biking, cardio kick-boxing, or even weight lifting, the point of exercise is to get your heart rate up. That’s how you increase your fitness level. A higher heart rate means your heart is working harder to pump that blood through your system, making it stronger, and burning oodles of calories in the process. Monitoring my heart rate means I can ensure I am not over-doing or under-doing my workout (and it is so easy to do both!).

The way it works is a heart monitor comes with 2 pieces - a transmitter and a receiver. As I’ve seen them, the transmitter is a band that goes around your chest, just under the she-boob or he-boob, as the case may be (or as close to your heart as possible). It has these nifty sensors that can measure your heart rate pretty darn accurately when placed against your skin. The receiver is a wrist watch that displays your heart rate, and depending on the product you get, generally has a ton of other features. Mine has settings for my age, height, weight, and target heart rate, and uses this information in conjunction with my heart rate to display how many calories I’ve burned. And obviously, most can double as a real watch as well.

What should your target heart rate be? If you take a look at the cardio equipment at the gym, some machines will display a small graph with a descending line, comparing heart rate with age. That’s the really high level answer. The most basic formula is to subtract your age from the number 220 to give you your maximum heart rate. So as I’m 28, my maximum heart rate is 192. That means if I let my heart rate get that high, I am a moron who probably will seriously hurt myself. But don’t worry; I would probably pass out before it got that high anyway. Your target heart rate is all about the percentage of your maximum heart rate. And the percent you choose is based on how hard of a workout you’re looking for. 50-60% is a good place for beginners, and people looking for serious cardio health generally shoot for 70% or higher. I found this article to be a good, short summary of this information, and that website can be a great resource for more fitness information. Though it can be a bit intimidating, since it’s geared more to serious athletes that make me look like a lazy bum.

I’ve become so dependent on my heart monitor, I feel absolutely naked working out without it! But you might decide they’re not for you, and that’s okay too. There are other, far less accurate, but perfectly acceptable methods to give you an idea of how hard your heart is working. There’s the conversation method for one (or “talk test”). Do you ever come across a pair of women who are briskly walking and carrying on a full conversation? They are most likely not exercising in the aerobic zone. When your heart rate is in the aerobic zone, generally you can carry on light conversation, so short answers, not full sentences, and not easily. If your heart rate is too high, it’s uncomfortable to say more than one word before taking a breath. And, again, if you can carry on a full conversation without any trouble, your heart rate isn’t high enough.  And of course, that's not to say that going for a light walk with some pals isn't a perfectly acceptable form of exercise.  Something is always better than nothing.  But don't go eat a big burger and fries for dinner right after, thinking you've "earned it."  Be reasonable!  Another method is the perceived effort test, which I don't fully understand.  Basically, you figure, on a scale from 1-10 (or whatever scale you want), if 1 is no exertion and 10 is I'm gonna die if I don't stop, how hard do you perceive your current effort to be?  I think it sounds weird and subjective, but hey, it's all about what works for you.

If you’re interested in reading more than you ever wanted to know about how heart rates are calculated, check out this article. That website is another great resource for people looking to learn more about fitness and general health.

I’ll wrap it up by quickly mentioning that heart rate monitors completely vary both in price and features. You can get fancy ones that compile data from all your workouts that you can upload to your computer and make big nerdy graphs with, or you can get basic ones that do little more than display your current heart rate and the time. Unfortunately, even the basic monitors are on the pricey side. While the higher end models will easily cost you hundreds of dollars, there are several good options out there in the $60-$100 range. So they’re doable. I use my heart monitor every time I exercise, so I’ve definitely gotten my money’s worth! The one I use is a few years old now, but it’s pretty similar to this model from Polar.

Have you ever used a heart monitor and did you find it useful? Do you tend to over-work or under-work your love organ when you work out?

I meant your heart, what were you thinking of?


My greatest blog supporter sent me a message yesterday with a link to this article and mentioned it would be a good idea to make reference to some of the health benefits of the delicious, whole foods I’m always yapping on about. What a concept! You’ve probably seen the term “superfood” listed in hundreds of health articles. It’s quite the buzzword at the moment. But it’s a good buzzword! Eating a diet rich in whole foods instead of processed foods means you’re not just eating less calories and cutting out things your body doesn’t need, like preservatives, it also means you’re getting all the vitamins, minerals, and other compounds found in whole foods that are destroyed during processing. The general idea I would take from this list is that it’s important to eat a healthy variety of nuts, beans, lean proteins, and as many colorful fruits and vegetables as you can stomach. Hit up all the food groups, and don’t forget that herbs and spices come from Mother Earth too! Your well-harnessed radicals will thank you.

I will say it was a very timely message, since allllll the way at the bottom of that list is corn. And corn just so happens to be what I’m touting today! It apparently protects against UV damage. As someone as pale as a ghost and susceptible to sunburns faster than Husband can inhale a blueberry muffin, the antioxidants found in corn are for me! 

[And thank you, friend, for providing me a somewhat more graceful segue into today's recipe.  Trying to get from heart monitors to corn was really throwing me for a loop!]

So, it’s corn season! A fact that in past years wouldn’t have excited me in the least. I was just never a corn person. Then one day on a hot July afternoon, Husband grilled some corn, and it’s been a love affair I’ve been relishing ever since. Amazing how that grill, to borrow a phrase, makes my skirt fly up, it’nd it?

Now I’m sure most people have had grilled corn. Go to any place they’re grilling meat, and you’ll see naked ears thrown down and slathered in a ton of butter. That’s not the grilled corn I’m talking about. Oh-ho no. This grilled corn is fat-free. No joke! See, I leave the husks on. When I buy corn at the store I always see a gaggle of people standing around the corn bin, husking their corn and shoving the naked ears into plastic bags. It’s tragic! Corn deserves some dignity, people! By grilling the corn in the husk, the husk dries out over the open flame and gives off this amazing corn aroma that infuses into the kernel. Also, the corn can fully cook without burning because it cooks most of the way through in the husk, where the open flame can’t get it. Then I remove the husks and let the naked corn do its delicious caramelization thing, and voila! Perfectly cooked, sweet corn, plumped and browned kernels, and all with a totally punched up flavor.

You’ll never husk your corn at the store again. Admit it.

Since this amazing discovery - which I hate to admit is, once again, all Husband’s own genius. Darn him. - I have been grilling corn left and right. Grilled corn and edamame miso salad. Grilled corn pesto (this one is in the posting queue as well...*droooool*). And this here grilled corn chowder. I had been ogling corn chowders all summer, and with all the ingredients needed conveniently located in my kitchen, how could I say no?

This chowder was silky. It was sweet, it was spicy enough to make it interesting without making it hot, and it was creamy without being heavy. In a summer chowder it is imperative to be creamy but not heavy. Not only are soups leaden with cream, cheese, and butter generally pretty unhealthy, but they are just about the most unappetizing thing to eat on a hot summer day. So here’s my trick for getting a silky texture in a pureed soup sans dairy - roasted cauliflower. It lends a delicate sweetness that blends seamlessly with any soup, and has a thick, creamy texture that can rival cream without weighing it down. It is my secret weapon! That said, this recipe does actually have a small about of cream and milk. Quite honestly, I added them because I had tiny amounts of each in the fridge and just wanted somewhere to dump them before they spoiled. I think I would keep the milk in, but next time I would nix the cream. It was seriously not needed, and even a little too heavy for my taste. I left them in the recipe, though, because I know most people probably like creamier soups than I do. I’ve been off heavy foods for so long, I’m just uber-sensitive. Heck, you could even add more. Isn’t cooking to your liking, after all, what makes home cooking great?

I’ll also add that I used sherry in this recipe over white wine only because I was too lazy to go open a new bottle of wine when I had an open bottle of sherry sitting right next to me on the counter. All decisions are not taste inspired. I admit it openly! I also added the celery salt because I had just bought it on super clearance at the store and I wanted to try it. Yep, I’ll just air all my dirty laundry here today. But really, I think they both worked in the recipe. If you don’t have celery salt and an open bottle of white wine...well I think you know what to do. As for the rest of the herbs and spices that made this soup what it is...I used the Julie method - pull out the spice drawer in the pantry and just grab what sounds good! They did exactly what I wanted them to, which is add a complexity to the dish without overpowering the star - the corn. So many chowders just rely on the fat from the cream and the sugar from the corn to provide all the flavor. That’s boring! Punching up flavor without adding calories is what good healthy cooking is all about. 

The best thing about this soup was, of course, the corn!  And it was everywhere in this soup because I used every bit of it!  Once I had removed the cooked kernels from the cob, I simmered the empty cobs in the broth.  That's right, no weak corn flavor here!  This way I was able to keep the corn kernels whole and still get the rest of the soup infused with corn flavor.  This soup was sweet but not sugary, rich but not heavy, and rustic but not unsophisticated.  Definitely a permanent addition to my summer soup repertoire!  Take this recipe and make it your own.  Just make sure you grill the corn, you won't regret it!


Grilled Corn Chowder

makes about 8 servings

4 ears of corn (in their husks!)
2 TB olive oil, divided
1 tsp salt, divided
1 large onion, chopped
2 medium shallots, finely chopped
5 cloves garlic, minced
2 jalapenos, seeded and minced
1 large russet potato, diced
1 small head cauliflower, roughly chopped
1/2 tsp ground black pepper
1 1/2 tsp sweet paprika
1 tsp ground coriander
1/2 tsp celery salt (optional)
1/4 tsp cayenne (or more to taste)
2 tsp dried oregano
1 tsp dried tarragon
1/2 tsp cumin
2 cups dry sherry (or white wine)
4-5 cups chicken broth
1/4 cup heavy cream (optional)
1/2 cup whole milk
1/2 cup cilantro, finely chopped

To grill the corn:
  1. Over medium heat, place the corn (in their husks!) on the grill, directly over the heat. Turn the corn every 2-3 minutes, when the husks begin to blacken. The silk or ends of the husks might catch fire as they dry out. I think this adds an amazing smoky flavor to the corn, but if you’re scared (chicken!), just make sure to trim those bits off before you put them on the grill. [Practice proper safety! Always use long tongs when handling the corn, and keep your digits away from the flame.] 
  2. When the husks are good and charred and the kernels are mostly cooked, remove the corn from the grill and place it in a pan or bowl you have standing by until it cools down a bit. Carefully peel back and remove the husks, watching out for any trapped hot steam. Place the naked ears (teehee!) back on the grill and turn every 1-2 minutes, or until as many kernels as possible have browned and caramelized. Brown = sweet flavor! 
  3. Remove the corn from the grill, and when it is cool enough to handle, cut the kernels from the cob. Scrape the back of your knife along the cob to really get all the creamy corn bits out of there. Set the kernels aside, and reserve the empty cobs as well (don’t throw them away!). 
To make the soup:
  1. In a dutch oven or soup pot over medium heat, sauté the onion and shallots in 1 TB of olive oil and 1 tsp of salt until they are soft and starting to brown, about 10 minutes. Add the garlic and jalapeno and cook another 3 minutes, until softened. Add the potato and cook until starting to soften, about 5 minutes. Add the remaining tsp of the salt, pepper, paprika, coriander, celery salt, cayenne, oregano, tarragon, and cumin, stir to coat the vegetables, and let it cook for about a minute, until the spices release their fragrant oils. 
  2. Increase the heat to high and deglaze the pot with the sherry, making sure to scrape up any flavor bits from the bottom. Bring the sherry to a simmer and let it reduce by half, about 1 cup of liquid. Add the chicken broth, and when it has come to a boil add the reserved empty corn ears. Reduce the heat to low, cover the pot and simmer for at least 30 minutes. The longer you let it simmer, the more flavor the soup will have. I would shoot for an hour if you have the time.
  3. While the soup is simmering, preheat the oven to 425 degrees. Spread the chopped cauliflower in a single layer in a roasting pan, and toss with the remaining TB of olive oil. Roast in the oven for about 20-25 minutes, or until the cauliflower is soft and starting to brown around the edges.  Check on it about 10 minutes in and give it a good stir so it browns evenly.
  4. When the soup is simmered to your satisfaction, remove the pot from the heat and let it cool down a little. Remove and discard the ears of corn, and stir in the roasted cauliflower. When it is cool enough, puree the soup using an immersion blender, blender, or food processor. 
  5. Place the soup back over medium-low heat. Add the reserved corn kernels, cream, and milk. Bring the soup to a bare simmer and let it cook for 10 minutes or so, just to let all the flavors come together. 
  6. Stir in the chopped cilantro at the very end and serve. 

Friday, May 28, 2010

I Am A Man


I have a confession to make.  Bless me George Foreman, for I have sinned.  I'm kind of embarrassed about it.  My face is all kinds of sheepish at the moment.

Last week was my first time grilling.

Seriously!  I mean, I've eaten my fair share of grilled food, and some of it has even come out of my own backyard, but never prepared by me.  It was always Husband up to this point.  And since he doesn't do much of the cooking, my poor grill hasn't seen much use for the last few years.  Grilling always kind of scared me.  It's so...flamey!  And hot!  And I was afraid I would burn my face off, which if you know me, was actually a real possibility.  Still is.  I'm rather clumsy, did you know?  Plus, it's kind of a man thing, right?  Meat!  Fire!  Cook!  Eat!  Good!  Well last week I finally manned up and successfully grilled some awesome food.  It was so awesome in fact, that I went back and did it again...and again...and...I can't stop!  It just gets so hot, and charred.  Love me some char.  My name is Julie, and I am a grilling bad-ass.

And bonus?  Grilling also apparently makes me happy.  Picture it.  Last Saturday.  Husband, the puppers (my Pembroke Welsh Corgi, Theo (aka: Goofball McTroublemaker)), and I chilling and grilling in the backyard on a gorgeous Spring day.  Husband turning some vegetables on the grill, munching some bread and cheese, while I, nursing a glass of red wine, kicked the ball around for Theo to fetch.  That's my idea of a perfect day.  A little sad, but completely true.

But I don't want to talk about everything I grilled last week.  I just want to talk about one thing.  Potatoes.  Grilled.  Mashed.  These were the best mashed potatoes I have ever made.  For serious.  Let me tell you all about them.


First, I used red potatoes.  Russets work great and all, but I just have a thing for red potatoes.  They are so buttery and delicious.  And leave the skins on!  That's where all the nutrients are!  Do you know what nutrients taste like?  Deliciousness.  If your taste sensors aren't too deadened by constant exposure to processed ickiness, they respond to nutrients because your body needs them.  That's how we  survived in the wild and stuff!  So leave 'em on.  You won't even know they're there, except for the yumminess they impart to the dish.

Second, I sliced the potatoes into 1/2 inch slices for maximum surface area exposure.  More exposure means more char-grill taste and even cooking.  Win.  Then Husband did something that can only be classed as genius.  And really, it's too bad this idea didn't pop into my head, given the subject matter of this blog, but as long as my tummy ultimately got to reap the benefits, it's all good.  See, we wrapped the potatoes in a foil bundle once they were good and charred because they still needed a little cooking to be a mashable consistency.  I piled the potatoes on the foil, and right before I closed it up, Husband had the bright idea to dump the contents of my wine glass in with the potatoes. A wine marinade!  See what I mean?  Genius!

Did I mention there was garlic involved?  Roasted.  Two heads.  Now if you're not completely gaga over garlic like I am, don't be scared!  Garlic seriously sweetens and mellows when it's roasted, so you get that great garlic taste without it punching in the face.  If you're still not into it I would suggest first, that you never come over to my house to eat, and second, that you do just one head.  You won't be sorry.

I wanted to top the potatoes with a gravy, but I was completely out of stock of any kind.  Sad, I know.  So I ended up just doing onions and mushrooms cooked in as much red wine as I could spare from my own glass (not much, it's my preciouussssss), but the recipe below is for what I would have used, had I the proper ingredients on hand at the time.  I hesitate to call it a gravy because I have an irrational fear that some Southern person is going to read this post and reach through the series of tubes that make up the interwebs and kick my butt for daring to call it gravy when it is not real gravy.  I have no idea what makes gravy gravy, so I'll just call it a sauce.  I am such a peace maker. 

What I really love about this dish is that it was completely improvised, but surprisingly successful.  Earlier in the day Husband had made a comment that he hadn't had mashed potatoes in a while, and the seed was planted.  Later that day at the store I saw red potatoes at a great priced and figured I do something with them.  When I got home we fired up the grill for other purposes, and I thought, what the heck.  Grill the potatoes while we're at it.  And by the time the sun went down, we were eating the best mashed potatoes I have ever made.  Delicious and fulfilling all at the same time.

What makes these so good is that that smoky flavor you get from grilling the potatoes first.  You don't need to add two sticks of butter to make it taste like anything because it tastes like awesomeness before you even go to mash it!  Husband and I may had sneaked a potato or two from the batch before it became the mashed dish you see below.  When was the last time you sneaked a boiled russet, huh?


Julie's Favorite Mashed Potatoes
(aka: grilled red wine roasted garlic mashed potatoes with caramelized onion and mushroom gravy sauce)

Makes about 8 servings (6 if you're a side dish piggy like me)

For the potatoes:
3 lbs red potatoes
2 heads garlic
olive oil
1/4 cup red wine (white works too)
2 TB butter
1/2 cup Greek yogurt or sour cream
1 cup buttermilk
salt and pepper to taste


For the sauce:
2 large sweet onions, quartered then sliced
10 oz. cremini mushrooms, sliced
olive oil
2 TB butter
2 TB flour
1 cup red wine
2 cups chicken or vegetable stock
2 TB balsamic vinegar
salt and pepper to taste
chopped fresh parsley for garnish
For the potatoes:
  1. Slice the potatoes into 1/2 inch thick slices. Toss with about 1 TB of olive oil and a pinch of salt and pepper to coat.
  2. Cut the top off the heads of garlic to expose the top of the cloves. Place each head individually on a square of aluminum foil, drizzle with a little olive oil, and pinch the foil closed so it encases the head of garlic. Place these on a cooler part of the grill and forget about them, or alternatively, place in a 400 degree oven for about an hour.
  3. Grill the potato slices over medium heat until both sides have nice and dark grill marks, and a deep golden color. The longer these grill, the stronger grill flavor the final dish will have. I even let some of my slices get a little charred because I'm into that sort of thing.
  4. Once the slices are grilled, get a big sheet of aluminum foil, dump all the potatoes in the center, pour in the red wine, and pinch up the ends so you have a big enclosed bundle. Let this sit on the grill on low heat with the cover down.  This will let the potatoes cook until they reach mashability and infuse them with a rich wine flavor.
  5. Don't forget to check on your garlic! It's ready to come off the grill when it's soft to the touch. This for me happened to be the same amount of time it took to cook the potatoes.
  6. When the potatoes are fork tender, place them in a bowl, and while still warm, add the butter, yogurt, and buttermilk. With a potato masher, pulverize the mixture! The potatoes may have developed a bit of a crispy crust from the grilling, so initially it takes a little muscle to get the ball rolling, but don't worry, it gets easier once you break that crust down. Mash until it's the consistency you like.   It'll need more liquid than regular mashed potatoes because so much has cooked out during the grilling process.  I just kept adding buttermilk until it was creamy enough for my liking.  Add a little more salt and pepper to taste, as well as the roasted garlic. You can either tediously peel each clove, or just squeeze at the bottom until it squirts out like a tube of toothpaste.  

For the sauce:
  1. Heat a large skillet over medium heat with 1 TB of olive oil. Add the onions and a pinch of salt and sweat them until they give off all their water.  Before the onions start to brown, turn the heat down to low and cook until they fully caramelize and reach a rich, golden color, about 45 minutes to an hour.  You may need to increase the heat to medium-low if they still have a lot of moisture.  The trick is to make sure they don't brown.
  2. In a separate pan over medium heat, and add the mushrooms and a pinch of salt and pepper. Cook until the mushrooms give off their water and cook down, about 10 minutes.
  3. Clear a little spot in the mushroom pan and add the butter. When it has melted add the flour, and stir to combine into a paste. Let this cook for a minute or two to cook off the raw flour taste, then deglaze the pan with the red wine. After a couple of minutes when most of the wine has cooked down, add the chicken stock, balsamic vinegar, and caramelized onions, and let the mixture simmer until a nice, thick sauce forms.
  4. Serve this over your grilled mashed potatoes, top with some fresh parsley, and enjoy!

PS: I actually wrote up this entire post already once today, and in the course of events, mostly involving blogger being a complete tool (ha!  get it!?), it was all completely lost.  This post, naturally, pales in comparison to the work of art that was the original post.  Try as I might, I just can recreate the magic.  I hope this didn't come off as too ho hum.  

Monday, May 3, 2010

Jamming Around Town


I have a confession to make.  I'm scared of jam.  Making my own, I mean.  It's ridiculous, I know.  You hear all these horror stories about people dying horrible deaths from eating their home-canned goods in which the seals had broken!  Ok, maybe that's a bit of an exaggeration, but I still prefer not to poison myself.  Also, so much gear is required for the endeavor.  You have to have jars and racks and tongs...and you have to boil things and sterilize things!  I'm all about a clean kitchen, but the words sterilization and food together just...turns me off. And...it might have something to do with the fact that I don't own any of that gear I mentioned.

But that won't stop me from making jam!  Ever heard of freezer jam?  For those not hip to the lingo, that would be jam that you freeze, rather than can, to preserve it. It's made much the same method.  I made some recently...and I may have boozed it up a bit.  That's what I do, right?  When I saw the recipe call for grape juice, I immediately made the jump to wine.  I perused my wine cabinet and decided that Gewürztraminer would fit the bill.

Ever heard of it?  Don't let those two little dots above that u scare you off!  Say it with me: Guh-wurts-tra-mee-ner.  Look at you, speakin' all fancy.  It's not as popular a varietal as Chardonnay or Riesling, but if you've never tried it before, you should. It's totally tasty. I'm really not a wine connoisseur, so this won't be the most accurate description, but Gewürztraminer is a bright and light white wine.  It's floral and fruity, a little bit dry and a little bit sweet.  Only slightly!  I'm not usually a fan of sweet wines, but this wine isn't cloying by any means.  Actually, one of my favorite wines is the late harvest Gewürztraminer from Navarro in the Anderson Valley.  Heaven in a bottle.


So I made a strawberry Gewürztraminer freezer jam that turned out so bright and complex, I was eating it all week.  I really held back on the sugar because I wanted to make sure to taste the wine, and I think strawberries are sweet enough on their own.  But if you like sweeter jams, you can always up the sugar.  You can also try a different wine varietal!  I would suggest sticking with sweeter wines, nothing too dry.  My ingestion method of preference?  That would be on a sesame cracker with some fig goat cheese I bought at a Costco roadshow a few weeks ago.  So...amazingly...good.  A fresh-baked buttermilk biscuit would do nicely as well.

I wanted to tackle my own jam because store-bought jams tend to be, well, mostly sugar.  I don't think sugar is evil.  Not by any means.  But when I eat jam, I want to feel like I'm eating fruit, not eating dessert.  You gotta pick and choose your sugar battles, right?


Strawberry Gewürztraminer Jam

3 cups strawberries
1 3/4 cups Gewürztraminer
1/4 cup sugar
1 pouch pectin (I used the Ball no sugar needed variety)

  1. Mash the strawberries with a potato masher into small chunks. (Don't use the food processor for this, I hear if you break it down too much, you break down the pectin and it won't set)
  2. Combine the strawberries, wine, and pectin in a pot over medium-high heat.  Bring the mixture to a rolling boil (don't jump the gun, let it really boil!), and cook for 1 minute. 
  3. Remove the pot from the heat and stir in the sugar until it's dissolved.
  4. Pour the mixture into freezer jam containers (or any freezer-safe container that tickles your fancy), leaving at least half an inch of room from the top of the container, and move to the refrigerator to set up overnight.   

De-boozify it: Use white grape juice if you aren't so wine inclined!

Friday, April 23, 2010

Springing Up!


Welcome to my new blog.  I'm Julie, and I'm bananas for bourbon!  Well, booze in general, really.  Not that I hang around drinking all day.  No no.  I love food, you see, and I think alcohol does a fantastic job of adding complexity and depth of flavor to most dishes.  I may take a sip or two for myself while the rest goes in the pot, pan, or bowl, but I'm pretty sure that's some kind of law of the kitchen, right?  Well it's the law in my kitchen, anyway.

So here's a bit about me and my general philosophy.  A year and a half ago I was over 70 pounds heavier, an out of shape couch potato.  Somewhere around 38% body fat, according to my fancy bathroom scale I used to avoid like the plague.  I didn't cook, my husband and I ate out for pretty much every meal most days.  Today I am in the best shape of my life, and overall healthier and happier.  How?  Diet and exercise of course!

Wait!  Don't go!  Hear me out!

I've seen so many peoples' eyes fall in disappointment when they ask me how I lost so much weight and that's how I answer.  Here's the thing.  Diet and exercise doesn't mean I ate boiled chicken and lived at the gym for a year.  Heck no!  No fad diets, no starving myself, and no flavorless food!  A masochist, I am not.  First off, I quit my gym membership.  Seriously!  I looked long and hard at myself and really tried to be honest about what was going to work for me.  Piling myself and my husband in the car and driving 10 minutes to the nearest gym was something at the height of our motivation we only ever did once a week.  Not good enough.  It was an expense we weren't getting anything out of, so we quit!  If you are really determined to exercise, you don't even need to leave your house.  And no, I don't have fancy gym equipment in my house.  What a cop out it would be if there were, right?  I'll get more into that later.

In terms of diet, believe it or not, I started feeding myself better.  I started paying attention to proportions of what I was eating.  Everything in moderation.  Words to live by.  I still eat dessert every night.  I still eat unhealthy foods on occasion.  But most importantly, I still eat good food every single meal, every single day.  That's ultimately what we want, right?  It's not that we want to eat unhealthy food.  We want to eat good food, and fat tastes good.  Well the good news is that so does a whole hell of a lot of other food!  The key is being open.  Think you don't like vegetables?  Instead say that you don't like vegetables as you've had them prepared before.  Just because you don't like broccoli steamed to death in the microwave doesn't mean you wouldn't like it roasted in the oven, tossed with some olive oil, bread crumbs, and Parmesan cheese.  I went 20 years of my life saying I didn't like meat.  It's true that as I matured my taste buds changed, but really what changed was my ability to identify what I didn't like about meat and how I could go about preparing it in ways I do like.  Now I love it!

Over time I was essentially able to retrain my body.  Healthy foods starting tasting better to me, and unhealthy foods tasted worse. Exercise started feeling good, and eating heavy, fattening foods felt very bad. So far I've been able to maintain what I worked so hard to achieve because it really was a lifestyle change.  It changed for the better, and I've never looked back. By getting into the kitchen, and getting outside, I've taken responsibility for myself, and I've managed to keep myself in this non-flabby state.  Yay!

My goal with this blog is to share my recipes, healthy ones when I can help it.  And share some tips, methods, and ideas on how I got healthy and a year and a half later, have stayed healthy.  And, of course, to have some boozy fun!

I'm starting us off with a delicious spring soup!  I love soup.  It's warm and comforting during any season.  It's simple and easy to make.  And just about any combination of ingredients can be a soup.  The world is your oyster soup!  Also, it's pretty darn healthy.  Did you know studies have shown that starting a meal off with soup makes you some very scientific percentage less likely to overeat?  Basically, since it's usually water based (stock), you feel like you're eating a lot when you're not.  Works for me!

This mushroom and asparagus soup is thick and creamy without heavy cream.  It's light and a perfect way to bring in the Spring.  The asparagus is sweet and delicious, the mushrooms add a meaty substance, and the sherry plays a subtle role in the background, as booze in cooking tends to do.  Wine, sherry especially, goes with mushrooms like..bananas on bourbon!

See what I did there?  That's called bringing the conversation around full circle.  It's a gift.

When I first made the soup I thought it wasn't quite creamy enough with the vegetables and broth alone.  Don't get me wrong, it tasted awesome!  But it lacked a certain oomph...a depth of flavor. So I added the milk and butter, and that really gave it the consistency and flavor I was looking for.  Small amounts, that's the key.  Just a little lowfat milk, spiked with a couple of pats of butter, to bring a whole pot of soup to another level of delicious.

I hope you'll give it a try, and check back for more!


Creamy Mushroom and Asparagus Soup

makes about 4 servings

1 medium yellow onion, chopped
2 shallots, chopped
5 cloves of garlic, minced
1 bunch of asparagus, chopped into pieces about 1in long
10 oz cremini mushrooms, chopped
1 TB rosemary, finely chopped
1 tsp sage, finely chopped
1 cup dry sherry (a dry white wine would do nicely as well)
3-4 cups chicken stock
2 TB butter
1/3 cup milk (any kind, I used 1%)
1/4 cup parsley, finely chopped
salt and pepper to taste
olive oil

  1. In a dutch oven or heavy pot heat 1 TB of olive oil over medium heat. Add the onion and cook until just softened, about 3 minutes. Add the shallot and cook until they both sweat a bit, about 5 minutes. Add the garlic and cook for 1 minute. Add the asparagus and mushrooms, then add the rosemary, sage, and salt and pepper. Cook this mixture until the asparagus has started to soften and the mushrooms have given off their water and started to cook down, about 10 minutes.
  2. When the vegetables have cooked a bit, add the sherry (oooooh yeah!) and deglaze the pot (meaning, use a wooden spoon to scrape up the cooked on bits on the bottom, they have flavor you want!). After the liquid has mostly cooked off, add the chicken stock. Add as much as you want for as creamy a texture as you want. I like a thicker soup, so I only added 3 cups. Bring the soup to a boil, then drop the heat to low, place a lid on the pot, and simmer for about 15 minutes.
  3. When the soup is done, remove the pot from the heat and let it cool down for a few minutes. Use a blender, food processor, or my favorite, an immersion blender to blend the soup until creamy.
  4. In a microwave-safe container, combine the butter and milk and microwave until the milk heats up enough to melt the butter. Watch this carefully, it only takes about 20-30 seconds and you don't want to burn your milk. Stir the mixture until the butter is incorporated with the milk, then stir into the soup.
  5. Stir in the chopped parsley and enjoy!