Friday, March 11, 2011

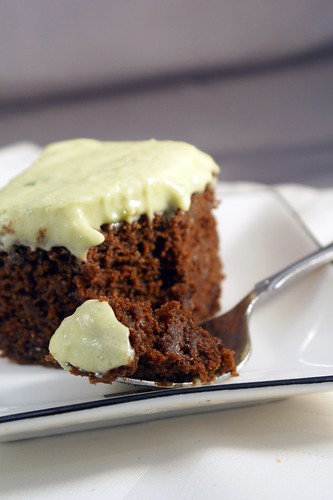
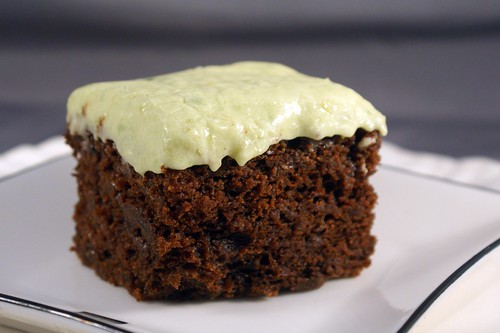
St. Patty's Day Cake


When reflecting back on my greatest culinary successes over the last couple of years, I think the most rewarding ones have been the experiments. The dishes that I went in with a harebrained, what-the-heck attitude, and came out with something to log in the favorites section of my recipe archive (i.e. this blog). It’s more satisfying knowing my creativity didn’t completely lead me astray. Know what I mean? I can still track the evolution of how this cake came to be. It was a quiet Saturday afternoon, and I wanted to bake. What? I had no idea. There were no recipes on the tip of my brain that were jumping out at me to bake them. I hunted around my go-to food blogs, printed some possibilities, and brought them to Husband for final approval. Aren’t husbands handy when you’re feeling indecisive? One of the recipes was a chocolate stout bundt cake with a chocolate glaze. Chocolate + booze + Husband = a must make. I was prepping the ingredients when I had a thought. Here’s the creative process in action, people. Check it out:


Me: Hey Babe, what do you think about baking this as a sheet cake instead of a bundt?

Husband: Umm…

Me: That way I could do a frosting with some Bailey’s instead of the chocolate glaze.

Husband: But I like chocolate…but a Bailey’s frosting sounds good too…Hmm…

Me: Oh! I know!!! I could try doing an avocado buttercream! With Bailey’s! And white chocolate!

Husband: Avocado? In the frosting?

Me: Yeah, it does the same thing as butter. Remember Alton Brown did it on an episode of Good Eats?


And with the mention of AB, as is usually the case, Husband was all confidence and trust. If Alton says it’s good, it’ll be good. Did I ever mention I have that show to thank for my Le Creuset dutch oven? Thanks for Kiwi, AB!

And that’s how this cake was born. A lazy day and a lack of dessert in the house. This was a few weeks ago. I’ve made it a total of three times already. We love it that much. I still have dreams about it.

The cake itself is a great recipe. Obviously, I never got around to trying the original recipe, but if a chocolate stout bundt with chocolate glaze is the order of the day, I’m sure this one would be a big winner. A rich, velvety stout goes with chocolate like bananas and bourbon. I was curious whether the quality of beer would make that much difference in the cake, so I used Guinness my first attempt. An admirable baking beer, to be sure, but I’m a bit of a craft beer snob these days (I do live in the city with the most craft breweries per capita, after all), and it’s an everyday beer, if yaknowhatImean. On a later attempt I used Husband’s all time favorite stout he is completely obsessed with at the moment. It wasn’t exactly a side-by-side comparison, since they were made several weeks apart, but I think the smoother, nuttier flavors of the higher quality stout definitely came through in the cake.

But if you’d like the excuse to bake this cake several times in succession (not that you need an excuse besides that it’s delicious enough to make several times in rapid succession), go ahead and forget I mentioned it. It is March, after all. Stouts are cheap!

My cake had a few extra additions from the original recipe. I wanted to up the St. Patty’s Day theme, so I threw in some whiskey…because why not, right? I also added come instant espresso powder and cayenne pepper, just to elevate the flavors a bit more. Supposedly coffee makes chocolate things taste more chocolaty – works for me! - and I also might have a spice addiction. But that’s another post. Sufficed to say, both those additions are completely optional, but as the cake turned out light as a cloud, moister than pudding, but still with all the flavor of a decadent chocolate cake, I’m going to go ahead and recommend them! The best compliment I can pay this cake is to say it wasn't just a vehicle for the frosting. As much as I loved the frosting, I found myself making sure each bite was the perfect ratio of frosting to cake.

Speaking of frosting. Since you’ve been good enough to read all this way, I should probably tell you a bit about avocado buttercream. It’s not a new concept, by any means, but it’s not exactly run of the mill either, is it? So regular buttercream frosting is really made up of two main components – powdered sugar and fat. That fat is usually butter, though I’ve seen it in combination in shortening too. The fat provides the creamy, melt in your mouth texture, and the powdered sugar provides the sweetness and stability. Everything else tweaks the flavor or texture, and it is pretty much optional. Avocados - poor, misunderstood avocados - are on many people’s naughty list because they are very high in fat. But fat is not fat, people! While shortening is grown in a lab with methods I don’t want to know about, and butter, while amazingly delicious, is made up of saturated animal fats, avocados are high in wonderful, plant-based monounsaturated fats. Now I’m not fooling myself into thinking this cake is good for me, but a healthy diet is as much about the minor choices we make in our day as the major ones, right? And if you don’t buy any of that, how about the fact that this St. Patty’s Day cake has green frosting, and I didn’t use a single drop of food coloring! Point for Mother Nature!

I know you’re wondering, so I will allay your fears posthaste. You can’t taste the avocado. You won’t believe there’s avocado even in it. Seriously. Would it be uncouth of me to say you won’t believe it’s not butter? Really, besides making the overall cake a slight iota healthier, and providing a natural and very appropriate greenish tint, the avocado doesn’t really factor in. You could definitely just replace the avocado with an equal amount of room temperature butter (just make sure you let the chocolate mixture cool first, so you don’t melt your butter). No worries. Hey, since there's no butter, I guess this would technically be an avocadocream frosting?  And a term was coined...

What makes this frosting delicious is a combination of white chocolate, Bailey’s Irish Cream, and a splash of whiskey for good measure. I don’t know what to say about it other than it is a sweet, smooth, ooey gooey frosting. I added the Bailey’s and whiskey to the white chocolate while it was melting because I was going more for flavor than a punch of alcohol. But don’t worry, it’s not shy. It still has creamy and ever so smoky flavor that warms you up from the inside out, and the white chocolate provides a nice counterbalance of sweetness that is more interesting than just straight sugar. A perfect pair to a chocolate stout cake.

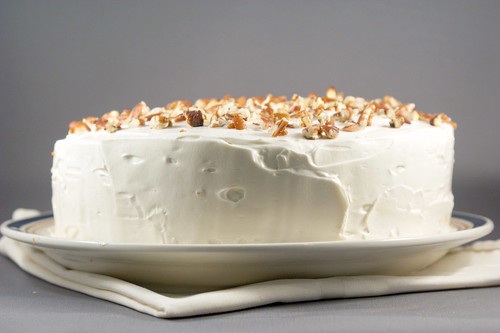
Since it's just an unassuming sheet cake, it certainly isn't winning any beauty pageants. But that's part of its charm.  It will fit right in with your corned beef and cabbage.


Have I mentioned I’ve made this cake three times already? I wish I could say I gave most of it away. I gave some of it away. But most of it ended up in my tummy. Ok, mostly in Husband’s tummy. But you didn’t hear it from me.


Got any harebrained kitchen experiment fantabulous success stories of your own?


St. Patty’s Day Cake
aka: chocolate stout cake with white chocolate Irish cream avocadocream frosting

cake adapted from Smitten Kitchen

For the cake:
1 cup stout
1 cup (2 sticks) unsalted butter
⅓ cup whiskey
¾ cup unsweetened cocoa powder
1 TB instant espresso or coffee powder (optional)
2 cups AP flour
1 ½ tsp baking soda
1 tsp kosher salt
¼ tsp cayenne pepper (optional)
2 large eggs, at room temperature
⅔ cup sour cream, at room temperature
1 tsp vanilla

  1. Preheat the oven to 350 degrees and prepare a 9x13” baking dish with nonstick spray. In a medium saucepan over medium heat, bring the stout, butter, and whiskey to a simmer. Add the cocoa powder and instant espresso, if using, and whisk until it is fully incorporated and the mixture is smooth. Remove the pan from the heat and let it cool a bit. 
  2. In a medium bowl, whisk together the flour, baking soda, salt, and cayenne pepper, if using. In the bowl of a stand mixer fitted with a whisk attachment, beat the eggs and sour cream together on medium-low speed until they are well blended. Add the vanilla and blend. Add the stout mixture, making sure it is cool enough that it won’t hurt the eggs, and beat to combine. Add the flour mixture and mix on low speed until it is mostly incorporated, then use a spatula to fold any loose bits of flour into the batter. 
  3.  Pour the batter into the prepared baking dish, smooth it into an even layer, and bake for about 35 minutes, until a toothpick inserted in the middle comes out clean. Let it cool completely in the dish.

For the avocadocream:
1 cup white chocolate chips (or ~6oz. of a white chocolate bar, chopped)
¼ cup Bailey’s Irish Cream
1 TB whiskey
1 cup avocado flesh (~2 medium avocados), well mashed
1-2 TB fresh lemon juice
1 tsp vanilla
pinch of salt
2-3 cups powdered sugar

  1. In a double boiler (or a bowl sitting over a small saucepan of simmering water), melt the white chocolate. Add the Bailey’s and whiskey and stir to combine. Let it cook for a bit if you want the alcohol to burn off a bit, otherwise, remove it from the heat and set it aside to cool. 
  2. In a stand mixer fitted with a paddle attachment, beat the avocado on medium speed for a minute or so, until it’s smooth. Add 1TB of lemon juice, vanilla, and salt, and mix to combine. Add the cooled chocolate mixture, and mix until it is well combined. 
  3. Working ½ cup at a time, with the mixer on low speed, add the powdered sugar until a thickened, gloppy consistency is reached. Important note: the frosting will thicken more as the chocolate cools, so don’t worry if it’s not firming up like you expect. It’s more important to watch the level of sweetness from the sugar. Add the other TB of lemon juice to balance the flavor if desired. 
  4. Once the cake is cooled, spread the frosting over the top in an even layer, and enjoy!

Monday, February 21, 2011

Pasta with Roasted Spring Vegetables in Cambozola Sauce


Let’s start with the giveaway winner. Congratulations...

...drum-rolling...


 ...Kelly! You win the CSN Stores gift certificate! Congratulations! And who says the person who enters 5 minutes after you post it won’t win? Not I. I’ll be sending your email address to my contact with the company. Stay tuned!


When I researched the best ways to start an exercise plan - what was now all those moons ago - one thing I always saw mentioned was goal setting. Most “professionals” agree that it is important to set both long term and short term goals, the idea being to motivate yourself early with small accomplishments, and to keep the motivation going for the long term. By accomplishing your smaller short term goals, you’ll build up enough muscle, endurance, discipline, etc. to complete your long term goals. Makes sense. And for some people, like Husband, it’s invaluable advice. Results can be slow to show on the scale or on our bodies, but when you have a cold, hard accomplishment under your belt, that can be just the thing to keep you going. Me? I make goals, sure. But I never took much time to structure them or really give much thought to them. I was so overweight that the scale provided me with all the motivation I needed pretty early on. I guess that’s one advantage to to being obese vs. just overweight? Heh.

I’ve been thinking more about goals lately, and I’ve come to realize it’s kind of like the approach you take when applying to colleges. When deciding where to apply you have the schools you’ll probably get into, and probably end up going to. Those are the realistic schools that are “the middle”. But what if by some catastrophe, you don’t get into any of those middle schools? The probability is low, sure, but you don’t want to be caught with no acceptances. Catastrophe indeed! So you apply to a “safe” school or two - schools you know for sure you’ll get into and wouldn’t be completely miserable attending. Even better is when your safe school has rolling admissions. Having that acceptance under your belt does wonders for your confidence when applying to the better schools. And then, of course, you have to apply to a few schools - the ivy leagues - that you don’t seriously think you’ll get into, and never really considered attending, but figured it’d be fun to try on the off chance that by some miracle of paperwork error, they let you in.

What does any of that have to do with goal setting? Bear with me. As I’m writing this, I’ve just come from a local wine-maker’s house. Ever had a pot luck luncheon with a wine-maker? Let’s just say my glass was never allowed to go empty. Let’s also say it was very good wine, and it seemed to evaporate from my glass as soon as wine was poured in.

I expect I’ll be getting an email from my editor sister tomorrow with a few dozen corrections and even more questions of clarification of what the heck I’m talking about.

But I do have a point! And it’s that goal setting should be like applying to college. Shoot for the stars, hope to get there, but at the same time be practical and expect for something a bit closer to earth. When I first started running, I couldn’t even run a mile. So that was my first goal. Run a mile. Did that. Then my goal was to run a mile under 14 minutes. Then 12. Then run 2 miles. Then 3. When I first started out, my long term goal was to be able to run a 5K (aka: 3.1 miles). It sounded so far, but I was confident I could reach it with a little work. And I was right! My next long term goal was a 10K (aka: 6.2 miles). I started getting my runs to 3.5 miles, then 4, etc., etc.. The thought of running over 6 miles sounded crazy, and I wasn’t sure I’d ever get there, but I figured I’d try. And with a little more work, I did it! I just kept pushing back my goals, and eventually meeting them - both short term and long. They were like getting into my safe schools right away and my middle schools eventually. All the while I was secretly shooting for the stars.

I was at the gym once - gosh, maybe almost a year ago now. A neighbor who had seen me running around the area and being a regular at the gym asked me if I was training for a marathon. I scoffed. A marathon!? At that point I wasn’t yet able to run a 10K let alone several 10Ks. I still don’t think I’ll ever be crazy enough to run a full marathon (aka: 26.2 miles). Just can’t imagine doing that to my poor, poor body. But. In just a few weeks, I’ll be running my very first race. A half marathon, no less! Aka: 13.1 miles. I’ve never actually run that far before, but I’m confident I can finish. That confidence actually blows my mind. This time last year I was scoffing at the very idea of running a half marathon, and now I’m actually going to do it. I feel like I just go into Stanford!


I’m a little embarrassed to admit this, but I am far too sauced to think of a not-so-witty segue into this dish. Besides mentioning that the recipe is basically a sauce. So there’s that. Not my best work, I know.

A Facebook friend of mine has been mentioning her current obsession with paninis, and especially her complete obsession with cambozola cheese on these paninis. Always one willing to talk food, I commented on her status, asking what was this cambozola cheese and why was it so special? And then proceeded to Google the stuff, since I’m impatient and a dork. And let’s just say it went downhill from there. Cambozola cheese is described as a blue brie, and that’s exactly how I would describe it too. It’s a triple cream cheese, so it’s rich and creamy like brie, but it’s also made from the blue mold of other blue cheeses, so it does have what I like to call, a bit of stinkiness to it. Who doesn’t like a beautiful marriage of a creamy, stinky cheese?

On a happy, splurging shopping fest last week I picked up a wedge of the cambozola, along with some Brussels sprouts and asparagus. I thought a good cheese with two of my favorite vegetables would be a good way to celebrate my finally landing a job. No biggie. I start tomorrow. I’m breezy.

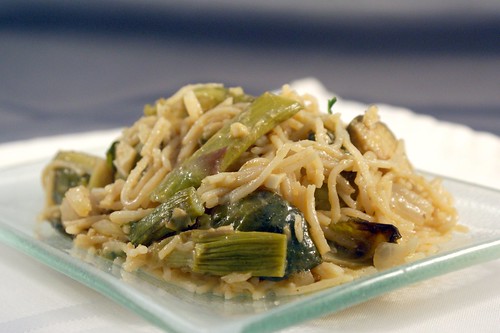
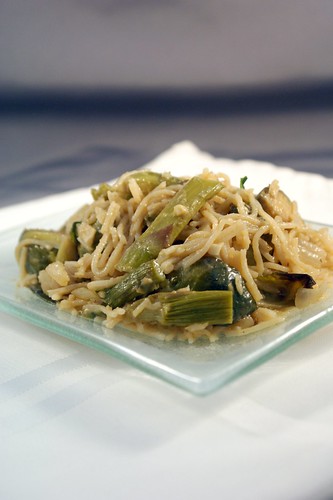
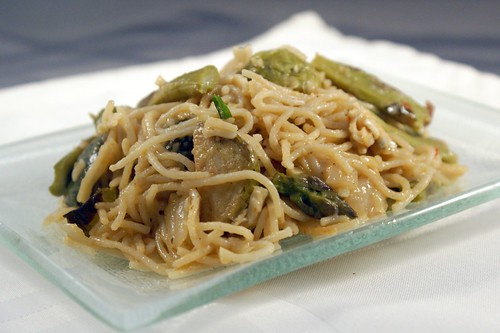
Who knows what possesses me to cook the things that I cook, but I thought the cheese would go beautifully in a pasta sauce. The creaminess added a wonderful, velvety texture, and the stinkiness added a beautiful dimension to the dish. I could definitely taste it, but it sat in the background and sang me a light tune. Husband came home and tried this pasta, and he of the not very sensitive taste buds concurred. He loved how the flavor came through, and he’s not even big into the stinky cheeses. Another thing I appreciated was that while this sauce is completely heavy on flavor, as you can see from the pictures, it’s not very saucy. There is no puddle of creamy liquid that’s dripped off the pasta to rest at the bottom of the plate. All the sauce is stuck firmly to the food, as it should be. In that sense, it doesn’t feel like a heavily sauced dish. But the flavor is so present, you don’t miss it. By all means, if you like a looser sauce, go ahead and add some cream or milk or chicken broth. Whatever your heart desires. My heart desired this sauce as is, and so did my taste buds.

Think you don’t like Brussels sprouts and asparagus? Ever tried roasting it? Brussels sprouts can be bitter, but roasting them for a long time under high heat with some balsamic vinegar brings out their hidden sugars and really makes them something special. I would highly recommend giving it a try. But if you’re not into it, any vegetable will do. You could throw in some artichoke hearts and peas, or broccoli would be delicious. I used whole wheat pasta, an angel hair.  You could use a regular fusilli.  That’s the great thing about cooking - just tweak it till you love it!


Pasta with Roasted Vegetables in Cambozola Sauce

Makes ~6-8 servings

½ lb. whole wheat pasta (I used angel hair)
1 ½ lb. Brussels sprouts, trimmed and quartered
½ lb. asparagus, trimmed
3 TB olive oil, divided
2 TB balsamic vinegar
2 pinches of salt
1 medium yellow onion, chopped
1 small shallot, chopped
5-6 cloves of garlic, minced
2 TB butter
2 TB flour
2 cups dry white wine
½ tsp crushed red pepper flakes
½ tsp ground black pepper
6 oz. cambozola cheese
¼ cup freshly grated parmesan cheese
1 TB fresh lemon juice (about half a lemon)
¼ cup fresh parsley, minced

  1. Preheat the oven to 400 degrees. In a roasting pan, toss the Brussels sprouts and asparagus with 2 TB of olive oil, the balsamic vinegar, and a pinch of salt. Roast the vegetable mixture in the oven for 25-30 minutes, until they are soft and have a nice golden brown color, tossing every about 10 minutes to ensure they brown evenly.
  2. Now would be a good time to get a large pot of water boiling for your pasta. The sauce only takes about 15 minutes, not counting the prep for the mise en place, so might want to wait until the vegetables have a good head start in the oven before starting.
  3. In a large sauté pan over medium heat, sauté the onion and shallot in the remaining 1 TB of olive oil and pinch of salt until they are softened, about 5 minutes. Add the garlic and cook for another minute. Add the black pepper and red pepper flakes, stir, and cook for one more minute.
  4. Now would be a good time to drop your pasta, if you haven’t done it yet.
  5. Clear a space in the pan and add the butter. When it has started to melt down, add the flour and mix them together to form a paste. Let the paste cook for a minute or two to get rid of the raw flour taste. Add the wine and bring the mixture to a simmer. Let the mixture cook until it has thickened and the wine has reduced by about half, about 3 minutes.
  6. Turn the heat down to low and add the cheeses, stirring until they are fully melted and incorporated into the sauce. Stir in the lemon juice, parsley, and roasted asparagus and Brussels sprouts. Stir in the cooked pasta drained straight from the pot, you can use a little of the starchy pasta water if you want to thin out the sauce at all.

Friday, February 18, 2011

Just a Giveaway

It's that time again, folks!  CSN stores is sponsoring another giveaway on this here humble food blog.   As you may recall, CSN stores sells, um, everything - from cookware (ahem, my personal fave thing to shop for) to swing sets!  So just like last time, one lucky winner will be awarded a one-time-use $35 gift certificate, good at any of CSN’s 200+ online stores.

To enter leave a comment on this post telling me your favorite thing to do with avocados besides guacamole. My very good friend might have an avocado tree that might be in bloom, and she might be the giving sort of person, and so I might have a few dozen (ok, more like 7 or 8) avocados ripening in my kitchen that are going to need a very permanent place in my belly sometime very soon.  Please make sure you provide an email address if there isn’t one linked to your profile.

For additional entries, do one or all of the following, then come back and leave a separate comment for each, letting me know the deed is done.
  1. Become a fan of (“Like”) Bananas for Bourbon on Facebook, and if you already are, just say so!
  2. Subscribe to my blog via an RSS feed (just click that “Follow” button in the toolbar on the right), and if you already do, just say so!
  3. Post a link to this giveaway on your blog, and let me know about it.

The rules: open to US and Canada residents only, as that is where CSN store's products ship. The giveaway closes this Sunday, February 20th at 12:01pm Pacific Time. The winner will be selected by a random number generator and announced (and contacted!) sometime after that.


I don't have a recipe fit to print just yet, but don't worry, there are a few in the pipeline.  If all goes to plan, you'll be seeing a new recipe and a winner by the end of the long weekend.

Sunday, January 30, 2011

Chocolate Covered Peanut Butter Bourbon Balls


This week’s soap box ramble will focus on shopping, and is brought to you by the letter $. Because you have to buy your food before you can cook it, right?

Facing a drastically lower income 10 months ago, I was forced to reexamine my food spending. I admit, prior to my layoff, I was spoiled. I shopped primarily at Jimbo’s out of loyalty and hoping my weekly spending would do it’s part toward keeping the only Whole Foods-like store in my area open. I loved their local, organic produce, their fresh, organic meats, their wide array of whole grain dried goods, and their minimally processed packaged food selection. I also shopped for convenience, valuing my time saved by shopping at just one or two stores a week, rather than hunting down the deals at several stores to save a few bucks. When suddenly faced with an excess of time and a deficit of money, old habits went out the window and I took the opportunity to pick up some new smart-shopper skills. I figure I can pass on a few tips I picked up while tightening the belt - not just how I saved a buck, but how I turned that into an opportunity for eating healthier foods. But first I want to preface this list by saying the very first step is to evaluate the value of your time vs. the money you could save with thriftier shopping. Obviously, if you really take the time to research the price of each product and each store to compare, are willing to hit up five or six grocery stores as opposed to just one or two, and basically able to spend hours a week being the thriftiest shopper you could be, you could save what ends up being oodles of money! But if you’re, say, juggling being a mom, working full time, and a flourishing social life, you’re probably less inclined to care if your bath tissue is 10 cents cheaper at the store across town. There’s nothing wrong with either scenario. The right thing for you is the right thing. Either way, here are some things I picked up along my miserly way that I intend to remember, no matter my food budget situation:

  • Learn all of the grocers in your neighborhood, not just the big names, and decide at which stores you are willing to shop - In my neighborhood I have Ralph’s, Vons, Albertsons, Stater Bros, Barons, Jimbo’s, Fresh and Easy, Trader Joe’s, Sprouts, Henry’s, and Costco. That’s too many stores, even for me, so I decided Stater Bros and Barons I was just going to ignore because they don’t offer anything particularly different from the others. Fresh and Easy isn’t actually open yet, so I have yet to evaluate it. Jimbo’s is out of my price range. Costco is a separate beast I’ll get to later. I treat Ralph’s, Vons, and Albertsons as one store (The Megamart, I dub thee). So that leaves Trader Joe’s, Sprouts, and Henry’s as my main stores (Love them!). 
  • Stop throwing away those weekly ad circulars - I used to curse the grocery stores clogging up my mail box with ads. It was such a waste, since I would throw them directly into the recycling, and I often wished for a way to opt out of having them sent. But they have become the highlight of my Monday evening. Pathetic, but true. First I check Sprouts and Henry’s. They often have similar foods on sale, but always slightly different, or one store will be slightly cheaper than the other. So I make a list of which store is carrying sale items I’m interested in. I made the mistake of not making a list in the beginning and often overpaid because I would forget the cheap apples were at Henry’s while shopping at Sprouts. Then I check The Megamart ads and pick out any extra special deals, whether $.77/lb chicken thighs at Vons, or $2 off Peet’s coffee at Ralph’s, whichever store has the deals I’m interested most in, and that’s which one I end up patronizing that week. It sounds like a big time commitment, but I actually peruse the ads while watching tv after dinner. I’m just sitting around anyway, right? 
  • Be flexible with your menu - One of the reasons I never bothered checking the ads before was because I didn't much care what was on sale. I knew what I wanted to make, and I was going to make it, sale or no. Now I plan my weekly menu around the ads. I’ll often turn to Husband and say “Cauliflower, eggplant, and zucchini is on sale. I’m thinking a vegetable lasagna with a side of roasted cauliflower, does that sound tasty?” Or usually it goes more like, “Broccoli is on sale again, and I already did roasted broccoli 3 weeks in a row. I’m thinking I’ll make a white bean, broccoli, cheddar soup to spice things up.” I admit that I totally plan my meals around what produce is on sale. Hey, it works for me! If you were planning to do pulled pork and chicken is on super sale, maybe you could substitute. 
  • Meat is expensive - And by meat I mean meat, poultry, and seafood. Especially seafood. I nice fillet of salmon hasn't been in my budget for a long time. But even when it’s just a couple of pounds of chicken thighs or some cheap ground beef, meat easily ends up making up half of the total cost on the receipt. If environmental and health reasons weren't enough to practice a meat-lite lifestyle, cost definitely is. I’m not suggesting conversion to vegetarianism or replacing your burger patty with a tofurky substitute. You know me better than that! I’m merely suggesting buying less. Eating less. And learning how to incorporate meat as a flavor rather than the main event of the plate. Remember, it’s not the only form of protein out there. 
  • Produce is cheap - I can buy two overflowing bags of produce for under $20. How much would the equal amount of meat set you back? Hundreds? The trick is to buy what’s in season and buy what’s on sale, though that usually means the same thing. When a crop is in season, the stores get an overflow and they sell it cheap to get rid of it before it spoils. So in summer it’s zucchini and berries, in fall it’s squash and apples, in winter it’s cruciferous vegetables (i.e. broccoli and cauliflower), etc. Some produce always costs more - asparagus, winter greens, persimmons, eggplant. Some produce is always reasonably priced - celery, carrots, onions, bananas, potatoes. But even the “expensive stuff” still only sets you back a few bucks. 
  • The bulk bins are your friend - Don’t fear the bulk bins! Sure, you’re forced to come up with your own air-tight packaging when you get it home, but it’s called $.99 tupperware, and it’s your friend. Dried beans, split peas, lentils, rice, quinoa, millet, almonds, pecans, peanuts, etc. These items are great because, aside from the nuts, which tend to be pricier (but worth it because you don’t typically use more than a cup or so at a time at most), they are dirt cheap and amazingly healthy. You can buy a pound of dried black beans for about a buck. That’s the equivalent of I don’t even know how many cans once they’re cooked. A ton! The trade-off is the time you take into account for soaking and cooking the beans (neither activity requires much active participation from you, it’s more a planning issue). Lentils and quinoa are two bulk bin items I’m never without because they are so fantastic in every way. They are high in protein and fiber, give you the satisfaction you get from eating carbs, but are still low in the glycemic index. They are very budget-friendly, cook up in about 20 minutes, and are very versatile for a number of varying applications. Win, win, win! My Megamart, tragically, doesn’t have bulk bins worth acknowledging, so that’s another reason to scope out the alternative markets in your area, if need be. 
  • Packaged foods often make you pay more for less - There’s two main points here. First, the more hands your food passes through before it gets to you, the less fresh it’s going to be, the more stuff they’re going to add to it to keep it a viable product, the more you have to pay to recoup those costs. You’re not only paying more, but you’re also eating all the preservatives and additives they add to the food to keep it shelf-worthy for all those years. Second, all the pretty packaging itself boosts the cost. That little 2 serving box of cous cous or quinoa is probably something you could get in the bulk bin for a fraction of the cost. 
  • Find the ethnic markets - Once every 2-3 months I have a list saved up of all the ingredients I need to stock up on at my local Asian market. It usually has some combination of soy sauce, rice wine, chili oil, sesame oil, seaweed, green tea, and brown rice. I can buy every one of those items at The Megamart, but for several times the cost, and without the option of selection. The soy sauce aisle at the Asian market? Dizzying. I still have it on my to-do list to find an Indian market in the hopes they have a vast and reasonably priced spice section. Sure, it’s a special trip where you’ll only pick up a few items, but that’s why you go just every once in a while. Treat it like a special occasion. 
  • Join Costco - You might say you don’t need a Costco membership, you’re fine without a 5lb jar or mayonnaise. I would agree, but there is a lot more to Costco than that nowadays. When it comes to certain items, pricing at Costco just can’t be beat. A bag of fresh frozen 4oz. mahi mahi fillets for $4.99/lb - pre-portioned, convenient, and actually very delicious! I go through vanilla extract like crazy, so the huge bottle is actually totally worth it, and it’s such a deal. It’s a great place to buy pantry staples - hot sauce, green chiles, tuna, diced tomatoes, tomato paste. Sure, you’ll take awhile to go through them, but it’s canned, it’ll keep. Their prices on dairy and meats is great, though you have to evaluate your consumption needs. I can’t drink 2 gallons of milk before it spoils, so I don’t bother. But I’ll pick up a whole pork loin, portion it into 1-2lb portions when I get it home, and freeze them for easy use later. And if you’re a booze hound like my, their prices on beer, wine, and hard liquor, if you can find what you want, can’t be beat. You might even be able to share your membership. When I joined in college they let Husband (who was then merely Boyfriend) join my account, even though we weren’t related or married, so we were able to split the cost of the membership. One section to stay away from, however, is the produce section. Their prices can be confusing because they post prices by the package, but if you look in the corner of the price tag you’ll see the price per pound, and it’s generally higher than even The Megamart. And since the quality of their produce tends to be more miss than hit for me, why pay more for it? 

I could go on, but I’m sure this glimpse into the inner-workings of my miserly mind is about as much as any person can take in one sitting. Basically, I try to stay on a varied and healthy diet, spending as little as I can. Husband often commends my efforts, saying he wouldn’t even know we’re on such a tight food budget because I keep him so well fed. It’s not without effort, but I consider it well worth it.


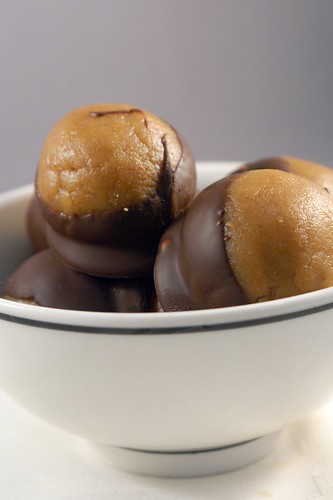
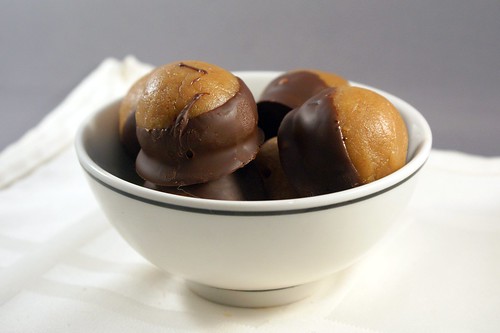
Now that we’ve shopped, let’s eat! These little bundles of joy combine three of my favorite flavors - chocolate, peanut butter, and bourbon. Each flavor really stands outs and brings its own personality to the party. The dark chocolate shell gives you that hit of rich cocoa right off the bat, and the bit of crunch is the perfect contrast to the soft, boozy, peanut buttery goodness in the middle. Oh the middle... I don’t know how to describe it, except to say that I really love the balance of ingredients. The cream cheese and graham crackers make it creamy yet substantive. I love the sweet yet salty compliment from the sugar, salt, and peanut butter. And the bourbon rounds everything out nicely, as bourbon always does. It really tastes like you’re eating a bourbon ball, but the peanut butter by no means plays second fiddle. It’s everything that makes Reese’s Peanut Butter Cups so great, but a thousand times tastier. No joke. The first time I made these was Halloween weekend - the one time of year Husband gets to eat his favorite store-bought candy. He actually jokingly chided me for ruining the moment for him, since compared to these peanut butter balls, the Reese’s just didn’t measure up. Sorry Husband. Next year I will steer clear of making these, so you can enjoy your Reese’s in peace.

Something tells me that’s not going to fly...

These make a great party dessert. Like, say, your Superbowl party next weekend. For instance. You can make them in advance, and they’ll even do better with a night in the fridge, where the flavors can introduce themselves to each other. They are easy to serve, whether plopped onto a plate or heaped in a bowl. They are finger-friendly, no utensils or plates needed, and I guarantee your friends will not be able to eat just one, so I doubt you’ll be dealing with leftovers. Plus, what is a better way to nosh during the second half than with chocolate, peanut butter, and bourbon?

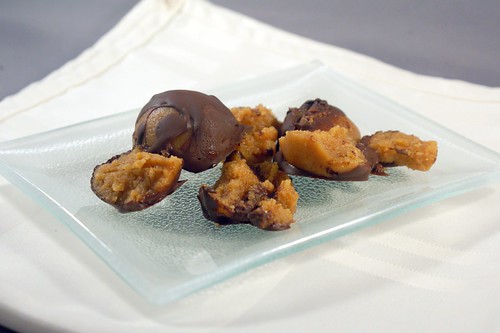
These balls come together wonderfully fast and easy right up until it’s time to coat them in chocolate. I won’t lie, that part was tricky. A total pain in the butt, even. There were casualties. Some balls just weren’t destined to make it through the molten swamp of chocolate to reach their resting place of my tupperware container. Where some balls managed to keep it together, others were made of lesser stuff and fell apart. My heart went out to them. But worry not, it doesn’t mean the balls you will inevitably lose will be ruined. I called those little mishaps “happy accidents” and promptly ate them before Husband could see what a failure I was. The things I eat do for ego’s-sake! It does mean that if you plan on a specific number, you’ll definitely want to make some extra. The first few will be the baker’s treat, and once you get the hang of it, you’ll be fine.

Happy Accident!

Besides my structural issues, I also struggled with what to call these. I couldn’t exactly walk around asking people if they wanted to try my balls, now could I? Chocolate covered pb bourbon balls is what they are. It’s descriptive. But it’s also cumbersome! See how I was too lazy to spell out peanut butter? The recipe I adapted these from were called buckeyes because they are reminiscent of the nuts that grow on the buckeye tree. Since I’m not familiar with buckeyes, and since I think that’s kind of lame, and since these have bourbon, and thus are way better, I think they deserve their own distinction. But they do kind of look like eyes, especially if you aim your skewer right through the center.

Chocolate covered peanut butter bourbon balls, you shall henceforth be known as Bourbon Blinders.

Is that stupid? It’s a little stupid. But don’t hate on my Blinders until you’ve tried one. Because then you won’t care what I call it, as long as you get to eat it. Mwhaha!

Are you planning any fun finger foods for the Superbowl next weekend? Have a better suggestion for what to call my balls? Any thrifty shopping tips my list is lacking? Send it all my way!


PS: I feel comfortable asking you to name my balls, knowing that I have just the edible kind at my disposal. Otherwise, I might be opening myself up for teasing. Thank goodness that’s not the case.

Bourbon Blinders
AKA: Chocolate Covered Peanut Butter Bourbon Balls
Adapted from Smitten Kitchen

makes about 2 dozen

1 oz. cream cheese (I used neufatel or lowfat), at room temperature
¾ cup smooth peanut butter
½ cup graham cracker crumbs
¼ tsp sea salt (or substitute kosher salt)
1 ½ cups powdered sugar
4 TB unsalted butter, melted
3 TB bourbon
1 tsp vanilla
8 oz. dark chocolate, chopped (I used 72% chocolate chips)

  1. In a stand mixer fitted with a paddle attachment, beat the cream cheese and peanut butter until they are well combined. Add the graham crackers and mix until combined. Add the butter, sugar, salt, bourbon, and vanilla and mix on low speed until the sugar is incorporated, then increase the speed to medium and mix until the mixture is uniform. 
  2. Line a sheet pan with parchment paper. Using a tablespoon or a 1TB scoop, shape the dough into balls and place them on the sheet pan, leaving enough space that they are not touching. Make sure you use some pressure to make them as dense as possible to avoid fall-aparts later. Place the sheet pan in the freezer for about 15 minutes so the balls will firm up. 
  3. Melt the chocolate in a double boiler. Using a toothpick or thin skewer (the thinner, the better), spear a ball and dip it in the chocolate, rolling it around so it is well coated, and place it back on the parchment. My method was inserting the toothpick into the side of the ball, dunking it in the chocolate at about a 45 degree angle, and swirling it one rotation, all the way around. The more quickly you work, the less time the ball will have to fall apart in the molten chocolate. 
  4. Repeat with the remaining balls, then chill them in the refrigerator to set up, about 30 minutes.

Friday, January 14, 2011

Roasted Vegetable Winter Soup


Last post I promised a healthy soup to help shed those extra pounds we tend to get as a result of all that sticky toffee pudding, gingerbread, and eggnog around the holidays, and I am quite the deliverer, if I do say so myself. And I do!

I gullibly keep recording shows on the Food Network promising healthy and light meals, excited that it’s finally the time of year when those celebrity chefs might just be cooking something I’d like to try. Then they pull out the lite mayo or top a plain, grilled chicken breast with cheese and pepperoni and call it pizza (and healthy pizza no less!), and I stop and delete the episode. Healthy does not mean diet! Diet food is flavorless, rubbery chicken with microwaved broccoli. Diet food is a punishment to teach yourself not to be such a pig the next holiday season. Diet food is stupid. Healthy eating is about thinking outside the deep fryer box and finding ways to prepare fresh foods in flavorful ways that make us want to eat them. It’s about shifting your habits to eat a different way. Instead of trying to take an unhealthy dish and removing everything that makes it taste good, just eat something that’s healthy to begin with. No brainer, right?

I learned early in my healthy eating transition that I like to eat. Actually, I love to eat. Sure, I’ve lessened my portions, but I used to eat on par with Husband and his roommates in college. I am not a 6’2” male, but I sure liked to eat like one. I still eat plenty because I knew for this to work, I had to let myself eat. Then I found vegetables. They’re such wonderful things. So full of flavor and texture and every good thing. There’s a reason that Weight Watchers puts vegetables at zero points, and that would be how totally nutrient rich are for being so low in calories. As Rachel Ray likes to say - if you eat healthy, you can eat more. A sentiment I always identified with. Just remember that eating too much stretches your stomach, which is a recipe for disaster later. Eat until you’re satisfied, not waddling. Be reasonable. 

One way I like to fill up my tummy without filling up my calorie bank is soup. Broth-based soups feel substantial because of their high water content, but still add a great amount of flavor. Toss in a healthy dose of vegetables and some form of lean protein and/or whole grains, and you’ve got yourself a meal you can sink a spoon into.


I love soup. I have always loved soup. It’s a love affair that started with my grandmother. She made a mean soup, and growing up a picky eater, I was always happy to go to her house knowing there would be a large pot of soup that had been sitting on the stove slow cooking all day and brimming with vegetables, barley, lentils, and meat (though I ate around that part). Her theory was that I just didn’t like to chew. I think I just like the infinite blend of flavors and the comforting feeling it brings. Warm liquids bring me joy. I love my sludgy coffee in the morning, my steamy afternoon tea, and a silky bowl of soup for dinner. I had a friend in college who didn’t like warm liquids of any kind. We no longer keep in touch.

I’m actually surprised I haven’t posted twenty soup recipes by now, but I guess they’re usually so flung together that I don’t really have a recipe prepared, or sometimes they’re so simple I would feel silly posting it.

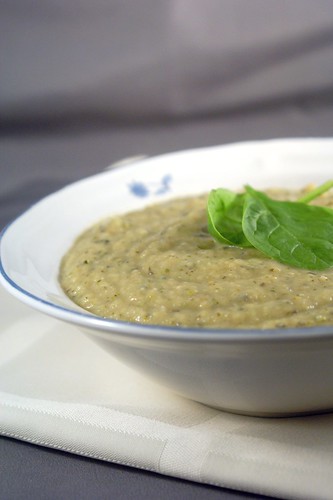
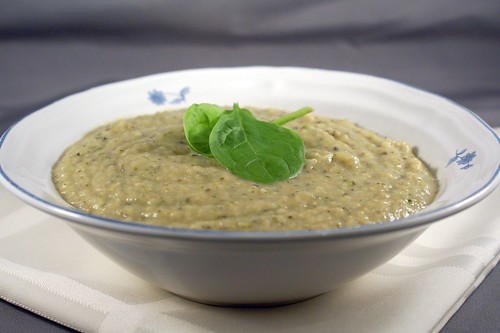
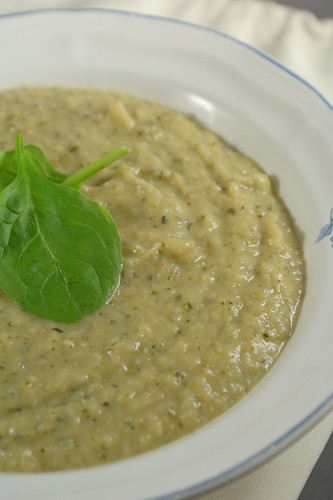
If you couldn't tell already, I might be a little obsessed with vegetables. I never feel like I eat enough of them, even though probably 75% of my diet is vegetables (if we don’t count breakfast because I eat zero for breakfast, and if we’re counting breakfast the percentage drops to like 45% because even if I ate nothing but vegetables for lunch and dinner, the most it could be is 66%, so let’s just not count it, m’kay?). I have this little trick with soups. It helps me with portion control and it’s a good way to get a few more leafy greens in my diet. Because I’m seriously lacking in that department, right? I’m talking about spinach. I line my soup bowl with a good helping of fresh baby spinach leaves (I always have some on hand from Trader Joe’s, they have those handy resealable bags), more if it’s a veggie-lite soup, less if it’s veggie-heavy. Then I add the soup until my piggy eyes see it reach the rim of the bowl. This is where it helps with the portion control. The fresh spinach takes up a lot of room in the bowl, so even though I can’t stop myself from filling the bowl, it’s not really full. Of soup anyway. Aw, what a trickster I am! After a few minutes in the microwave the soup is hot and the spinach is wilted, and magically (good ol’ water evaporation!) the level of soup in the bowl is no longer threatening to spill over the sides. It’s ok to be a piggy if you recognize it and trick yourself from letting it impede your health, right? Right. Plus, spinach is delicious and is always a yummy addition to whatever soup I’m enjoying, such as this roasted vegetable soup I made recently.

I am a master of the segue.
This soup was just a happy accident, brought together - like the plot of many a good novel - by a random string of circumstances. Zucchini and eggplant were on sale (seriously, how crazy has the zucchini crop been this year?). I had fresh thyme leftover from my Thanksgiving splurge. I happened to be drinking white wine that night. I wanted the soup creamier without using cream. But here’s the kicker - I was freezing my booty off and I wanted an excuse to turn on the oven. I may be too poor (err, cheap) to heat my house properly, but it encouraged me to roast my veggies before throwing them into the soup, and man did it make this one of the better soups I’ve ever made. 

Husband gobbled it all up in record time, and he's not even a soup person!  We no longer keep in touch.  

Roasting the vegetables caramelized the sugars, making the soup sweeter, richer, and more complex. Love it! And apparently eggplant pureed in soup is like liquid silk, it adds a lovely texture. Who knew?  The evaporated milk thickened the soup beautifully without all that pesky fat. I just need to be mindful that it’s concentrated milk, so 1 cup of evaporated milk is still a hefty amount of calories compared to a cup of milk. But a little goes a long way, so it's all good. Definitely a trick I'm going to remember.  Oh, and did I mention this soup is pretty darn quick? Definitely doable for a weeknight meal. Only about 30 minutes of total cook time, and since I used the broiler setting on the oven, I didn’t even have to wait forever for it to heat up. Win!

So to sum up the awesomeness of this soup, let’s count the ways:
  1. Healthy - fresh vegetables, stock, and lowfat milk 
  2. Fast - 45 minutes tops, depending on how long it takes you to chop
  3. Easy - mostly just chop, dump, or stir
  4. Delicious - eggplant = silky 
  5. Comforting - it’s cold everywhere right now 
  6. Why are you still reading this? Go make this soup! 

What healthy foods are you cooking up to stay warm?  Will you be bringing home your own bag of spinach from Trader Joe's?


Roasted Vegetable Winter Soup 

4 medium zucchini, roughly chopped
2 small eggplant, roughly chopped
2 medium onions, roughly sliced
5-6 cloves of garlic, minced
1 TB fresh thyme, minced
2 cups dry white wine
1 cup chicken broth (or vegetable broth)
1 12oz. can evaporated milk (I used 2%)
2 TB white wine vinegar
olive oil
salt and pepper

  1. Turn the oven on to broil (500 degrees). In a large roasting pan, toss the zucchini, eggplant, and onions with about 2 TB of olive oil, a pinch of salt, and a pinch of pepper. Roast the vegetables until they are soft and nicely browned, tossing every 5-7 minutes so they cook evenly. This will take about 20 minutes total. 
  2. When the vegetables are out of the oven heat 2 TB of olive oil in a dutch oven or soup pot over medium heat. Add the garlic and cook for a minute or two until it is softened and fragrant. Add the thyme and cook for another minute. Add the wine and bring the mixture to a simmer. Cook until it is reduced by half, then add the chicken broth and roasted vegetables. Bring the mixture back to a boil and simmer for about 10 minutes, until everything is softened and incorporated. 
  3. Turn off the heat and let the soup cool down a bit. Once cooled, puree with an immersion blender (or regular blender or food processor). Add the evaporated milk, as much as you prefer. I added the whole can for optimal creaminess, but a few tablespoons would have been plenty. Then add vinegar, and salt and pepper to taste.


Edit for SoupaPalooza 2012: Come join SoupaPalooza at TidyMom and Dine and Dish sponsored by KitchenAid, Red Star Yeast and Le Creuset

Saturday, January 8, 2011

Fig Einsteins - It's Fruit and Cookie!


A new year, a new start. A time to resolve oneself for the year to come. The difficulty of this past year, and the inevitable difficulty of this new year to come, is part of the reason for my month-long absence from posting. Reflecting back, it was truly the worst year of my life, and at the same time, in some ways, one of the best. I’ve grown and learned so much about myself. I’ve become a different person, a better person, and most importantly, more like the person I want to be. I try to focus on that and have faith that the rest will work itself out for the best. I resolve to keep growing and learning this year, to keep finding the bright sides and silver linings, and to continue to be thankful for all the great things in my life - my friends, my family, and my amazing husband. And also, to never go so long without posting again! Inexcusable.

You might think I’m done with the sappy bits, but I’m feeling very sentimental. Bare with me for another paragraph or two...

I asked my friend on January 1st if she had any New Year’s resolutions, and she responded something along the lines that she had been done with those years ago. I know it’s a bit like asking a husband if he’s buying flowers for his wife on Valentine’s Day. We feel like we should do it because society tells us to, but we grumble and curse the commercial holiday (with gym memberships being sold in place of flowers). While I think the traditional approach to New Year’s resolutions is tired and completely unmotivated, the original idea shouldn’t be sloughed aside. How often do we plan to start something and then put it off until later? We all have a little Scarlett O’Hara in us. A new year is nothing more than an excuse, a reason to finally convince yourself that later is here, and it’s time to start. It’s that push out the door that we need sometimes.

And I’m not talking about “the resolutioners”. The people who make a vague, empty promise to themselves because they feel like they have to. They resolve to “eat better”, and buy a stock of celery that goes untouched in the vegetable bin until the rot can no longer be tolerated. They resolve to “exercise more”, and go stand around their gym a time or two, mostly just taking up space on equipment other people are waiting to use. Don’t be a resolutioner! Make a real promise to yourself that you intend to keep. It doesn’t have to be big, or even related to your health. You could give your house that big scrub down you’ve been meaning to do since last spring, or even just one room. You could go through your DVR season pass list and clean out the shows that are no longer on the air (man, I need to do that). And yes, I supposed you could eat better and exercise more. But how will you eat better? When will you exercise more? Baby steps, people.  Husband has started to change how he eats for breakfast, hoping that eating more food, higher in protein, he’ll eat healthier and feel better throughout the day. I’ve seen spouses out walking their dog together, rather than just one or the other. Do something small, and when you feel great about doing it, do something else. Not because it’s New Years, but because there’s never a better time than now.  Today could be the day I finally frame my ketubah!

FYI:
That's a Jewish marriage contract.
It's been sitting unframed on my mantle in a plastic protector since I got married.
I've been married 4 years now.
It's sitting upside down.
I'm not really going to frame it today.


Ok, enough of this nonsense. Let’s talk food.  Now I know this is the time of year everyone dawns their halo and posts the uber-healthy meals.  I know I should be giving you a recipe for kale chips (which are amazing, by the way, and so flipping healthy), and telling you twelve easy steps for staying motivated at the gym (I really only have one trick - constantly telling myself "suck it up, pansy!").  But you know what?  That just ain't my style.  Plus, there's an entire year for that.  Next week when everyone is back to posting their recipes for brownies and fried chicken, I'll be posting a light and satisfying soup.  This week, I want to tell you about these cookies.


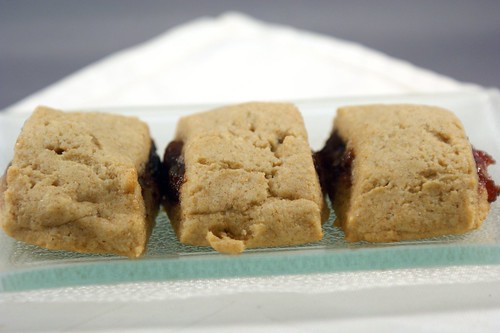
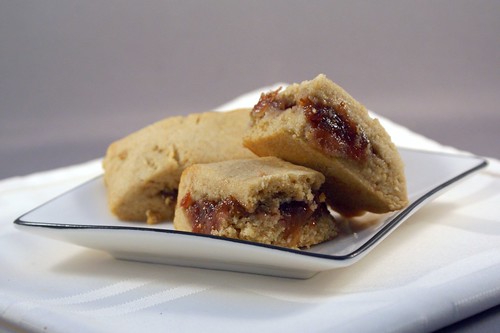
I may not have been posting the last few weeks, but I’ve certainly been eating. As anyone who reads my posts on Facebook can attest. I made these fig cookies awhile ago. I remember the day I made the first batch because it was the day that I discovered Urge Gastropub. A joint truly after my own heart. I went there for dinner with some very good friends, and I brought some of these cookies along to give to them. It’s always good to feed the ones who encourage you in the kitchen, right? I kept calling them Fig Newtons, but was dissatisfied with the name because, while anyone who watched ample tv in the late 80s/early 90s, as I did, can attest, Fig Newtons are fruit and cake. My cookies were most definitely fruit and cookie. My friend dubbed them Fig Einsteins, and so they have been called since.

A very fitting name, in my opinion, because these cookies are genius!  And so delicious - soft and chewy. The flavor was buttery and had a density from the whole wheat flour, yet the texture was still light and fluffy. They were so good that I made a second batch just a few days later. Because, like a good cookie should be, these were super fast to throw together. Minus making the jam of course. But the jam was so worth the effort.  It had the deep, rich, sweetness of figs, with a beautiful balance from the lemon.  Though the real hit for me was the brandy.  It lent a nice background flavor, and somehow worked its magic breaking down the figs to really bring out their sweetness.  I actually reduced the sugar in the recipe by at least half because the natural sugars brought out were so powerful.  A jam worthy of its own cookie, for sure.

If you aren't a fan of figs, or just can't find them, no worries.  These cookies are versatile!  Any jam would work, really. Even store-bought, if you must. But the deep sweetness from the figs works especially well with the richer flavor of the cookie. I could see blueberry jam also working quite well.  You'll just want to make sure it's a thick jam, otherwise it'll just run out of the cookie while it bakes.  If you're worried, you could always reduce it on the stove for a few minutes.

When people scoff at you for eating cookies, you can inform them that you're just fulfilling your New Years' resolution to eat more whole grains.  It's all about eating right, right?


Fig Einsteins
adapted from Cate’s World Kitchen

Makes about 2 dozen cookies

½ cup (1 stick) unsalted butter, room temperature
½ cup sugar
1 TB buttermilk (or substitute milk)
1 egg
1 tsp vanilla extract
1 TB bourbon (optional)
½ tsp salt
½ tsp baking soda
2 cups white whole wheat flour
2/3 cup fig jam* (recipe below)
  1. Preheat the oven to 350 F 
  2. In the bowl of a stand mixer, cream together the butter and sugar on medium speed until the mixture is light and fluffy. Turn the speed down to low and beat in the egg, milk, vanilla, and bourbon until well combined. Add the flour, baking soda, and salt, and stir just until combined. Divide the dough into even quarters, it will be quite sticky. 
  3. Working on a well floured surface, roll one quarter of dough into a log about 12 inches long. Using your fingers, pat the dough out into a rectangle about ⅛ inch, and 2 inches wide. Spread half the jam down the center of the dough. Press out another portion of dough into a rectangle of the same size, and place it on top of the dough with the filling. Seal the long edges of the dough together by pressing the two sides together, then cut crosswise into 1 inch lengths, until you have 12 cookies. 
  4. Repeat step 3 with the remaining dough and jam. 
  5. Place the cookies on a cookie sheet and bake for 15 minutes, until they just begin to brown. 
*Or whatever jam tickles your fancy.

Fig Brandy Freezer Jam
jam adapted from Bon Appetit

Makes about 6 cups

2 lemons
4 pounds fresh figs, stemmed and cut into 1/2-inch pieces (about 8-9 cups)
2 cups sugar (or more to taste)
3/4 cup brandy
½ tsp kosher salt
  1. Using a vegetable peeler, remove strips of peel from the lemons, careful not to get any pith. Cut the strips into tiny matchsticks. 
  2. Combine the lemon peel, figs, sugar, brandy, and salt in a large heavy pot. Let the mixture stand at room temperature for 1 hour, stirring occasionally. 
  3. Bring the mixture to boil over medium-high heat, stirring until the sugar dissolves. Reduce the heat to medium and continue to simmer until the jam thickens and reduces to about 6 cups, about 30-35 minutes, occasionally mashing the mixture with a potato masher. Remove the pot from the heat. When the mixture cools down a bit mix in the juice from one of the lemons, then taste it. If it’s too sweet, add more lemon juice, if it’s not sweet enough, add more sugar. 
  4. Ladle the mixture into freezer jam jars (or any freezer-safe container that tickles your fancy), leaving at least half an inch of room from the top of the container, and move to the refrigerator to set up overnight. The next day, move any jam to the freezer that you’re not planning to eat in the next week or so. 
Note: Cate has a fig filling recipe using dried figs. If you can’t locate fresh figs, that would be a good option.

Tuesday, December 7, 2010

Pumpkin Buttermilk Pie


Has it really been almost 2 weeks since Thanksgiving!? Where did last week go? Oh yeah, it was swallowed up by the ugly bug that’s been lazily kicking the crap out of my immune system and other bodily functions. Let’s just say...I wouldn’t recommend drinking the pink eye tears of a toddler. That’s a story for another time. 

Did you think the long hiatus between posts was because I was compiling a mass of Thanksgiving pictures? A collage of every dish and paragraphs upon paragraphs of wordy description? Sorry to disappoint, but I have a confession to make - I didn’t take any pictures during Thanksgiving. None. My camera battery is still sitting on the charger, currently residing under my feet. I don’t know who I am anymore! But that’s just what happens when you spend 2 days in the kitchen and 5 days entertaining family.

Ah family. My family. And our ridiculously stubborn adherence to superfluous traditions. I love that about us. A movie on Christmas day, preferably on a sci-fi or fantasy theme. It’s tradition! Mom reading the Polar Express in front of the fireplace on Christmas Eve. It’s tradition! Me squeezing behind the driver’s seat on any family outing, even though the passenger side has more legroom. It’s tradition! And of course, Thanksgiving comes with its own set of traditions. Starting, naturally, with the menu. Turkey, mashed potatoes, stuffing, cranberry sauce, and pumpkin pie are the musts. I remember the year my mom tried to get away with not serving mashed potatoes. My sister called a family holiday party foul and made them herself. I might have helped, but I was a lazy, moody teenager, so I probably didn’t. Sorry sis!

Sure, every family has dishes they love and want year after year. In my family, we actually have dishes a lot of us don’t like, but we make anyway. Like the cranberry sauce. My sister always takes a no-thank-you helping, so I knew she wasn’t a fan. But it wasn’t until this year that I realized my parents also aren’t cranberry sauce eaters. Yet it’s always on the table! Well, minus the year my mom had it in the nice serving bowl, sitting in the fridge, and forgot to take it out. Guess now I know why she didn’t miss it. Heh. I probably could have gotten away with not having any, but I figured it’d be way more fun to try and make a cranberry sauce everyone would actually enjoy. Not to mention...it’s tradition! I made a cranberry applesauce, hoping the natural sweetness from the apples would be a nice contrast to the tartness from the cranberries without the cloying sweetness of regular sugar. Along with a little fresh ginger to make it more savory and a healthy glug of Grand Marnier (ok, maybe two healthy glugs, after encouragement from my mom), it was a success. My sister had seconds!

I’m sure I’m blowing the minds of my family as they read this post. Can you believe I used to be a picky eater? There were several foods I didn’t like, and even more foods I probably would have liked fine, but still wouldn’t eat. For years I thought I didn’t like guacamole. Really my sister didn’t like it, and I had just taken her word for it. And now I’m talking about changing people’s minds about foods they don’t like! I’m blowing my own mind here.


The pumpkin pie at my Thanksgiving table has a bit of a history. My grandma, on my dad’s side, always brought the pumpkin pie. She wasn’t a baker (not that there’s anything wrong with that), so she would dump a can of Libby’s pumpkin pie filling into a store-bought crust, bake it, and bring it over with a can of reddi-wip. To me, that was pumpkin pie. It was good and all, but I didn’t exactly grow up with the impression that pumpkin was the be-all and end-all of pie flavorings. Turns out my mom doesn’t even like pumpkin pie. How did I never know these things before?!

This year I wanted to make a pumpkin pie from scratch. A good one. My first attempt was a bust. I don’t want to talk about it...except to say that I took issue with the massive amounts of heavy cream and sugar the recipe called for. Then I saw a recipe for a sweet potato buttermilk pie that used lowfat buttermilk instead of heavy cream, and folded in whipped up egg whites for a light and fluffy texture. I was intrigued! After my mom mentioned what she didn’t like about pumpkin pie was the puddingy texture, I thought this might be just the thing. So I swapped out the sweet potato for pumpkin, but kept just a little sweet potato in there for a flavor boost. Pumpkin can be a little on the bland side, ya know. I adjusted the seasonings, upped the sugar (sweet potatoes are sweeter than pumpkin, after all), and of course, I added booze! It’s not pumpkin [insert delicious baked good here] without bourbon, right? Another thing that turned me onto this recipe was blind-baking the crust first. No worries about a soupy pie or a soggy crust.

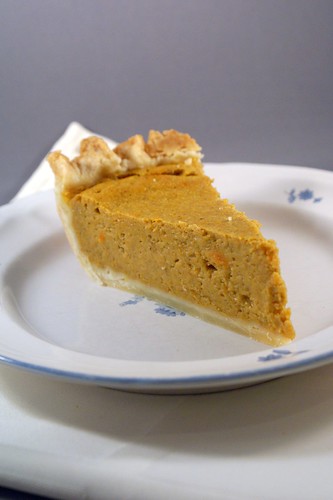
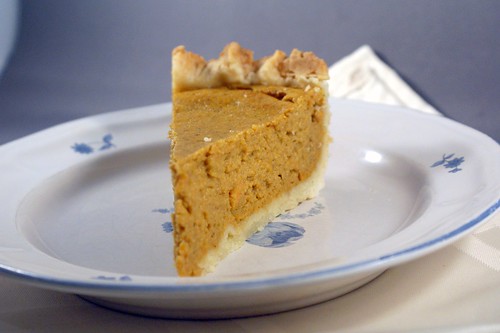
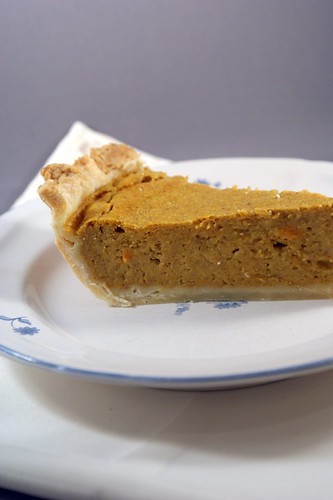
The resulting pie was a light, fluffy, spiced pumpkin cloud.  And still so silky smooth without the heaviness. The trick was definitely folding in the egg whites. It really kept the pie light. I was concerned the lightness of the texture and lack of fat would lose the pumpkin pie flavor, but the spices still came through beautifully. And the hint of sweet potato added a nice layer of sweetness. It seemed to be a success. It didn't last long, and as my mom put it, “Julie, I enjoyed my slice...and I don’t even like pumpkin pie.” Good enough for me! Into the archives this recipe goes.

But wait! I haven’t even mentioned the whipped cream! It was an afterthought. Spur of the moment. I bought heavy whipping cream, thinking I would just whip it up with a little sugar right before dessert. Nothing special, but better than the canned stuff. Well 4 glasses of wine and a big turkey dinner later I had the bright idea to whip that cream with maple syrup and a splash of bourbon instead...

Oh my word. 

That is all that can be said about this whipped cream. Nevermind the two pies and vanilla ice cream I had on the table for dessert. I wanted to just eat gobs and gobs of this whipped cream. Yeah. It was that good. It went great on the pie. I highly recommend you don’t skip it.


PS: If you're wondering why I have pictures of the pie when I said I didn't take any, it's because this was my test run.  It was a new recipe after all.  Better safe and full of pie than sorry, right?


Pumpkin Buttermilk Pie
adapted from Smitten Kitchen’s Sweet Potato Buttermilk Pie

½ cup mashed sweet potato (1 small potato, poked with fork and microwaved for 7 mins)
1 14oz can pumpkin puree
4 TB unsalted butter, melted
2 TB fresh lemon juice
½ tsp freshly grated nutmeg
1 tsp ground cinnamon
½ tsp ground ginger
¼ tsp ground cloves
¼ tsp ground cardamom
½ tsp kosher salt
3 large eggs, separated
½ cup sugar
¼ cup brown sugar
2 TB AP flour
3 TB bourbon
¾ cup buttermilk
1 pre-baked pie crust (recipe below)
maple bourbon whipped cream (recipe below)

  1. In a medium bowl, mix together the sweet potato and pumpkin puree. Add the butter, lemon juice, nutmeg, cinnamon, ginger, cloves, cardamom, and salt and mix thoroughly after each addition. 
  2. In a small bowl, beat the egg yolks lightly with a whisk for about 30 seconds. Add the sugar and beat until they’re a creamy light yellow color, about 2 minutes. Add the egg mixture to the pumpkin mixture and stir until the eggs are fully incorporated. Add the flour a little at a time, stirring after each addition until thoroughly incorporated. Add the buttermilk and bourbon and stir until incorporated. 
  3. In the bowl of an electric mixer, beat the egg whites to soft peaks in a clean, dry bowl. With a spatula, gently fold the egg whites, one-third at a time, into the sweet potato-buttermilk mixture until thoroughly combined. Pour the mixture into the pre-baked crust and bake on the middle rack of the oven set at 375 degrees until the center is firm and set, about 35 to 40 minutes. Cool the pie completely on a rack, then chill for at least 4 hours before serving. 

For the pie crust:
1 ¼ cups flour
1 ½ tsp sugar
½ tsp salt
½ cup (1 stick) unsalted butter
3 TB ice cold vodka (or substitute water)
ice cold water

  1. Cut the butter into small pieces (I do quarter tablespoons), and place in the freezer along with the vodka for about 30 minutes, or until it just starts to freeze. 
  2. In a small bowl whisk together the flour, sugar, and salt. Dump the mixture out onto a large cutting board or clean counter. Using a bench scraper (a rolling pin also works), work in the frozen butter by smooshing the flat side of the bench scraper into the flour, scooping and mixing it often. When the butter pieces are all flattened and well incorporated, use your fingers to break up any large pieces until they are pea-sized. Sprinkle the vodka over the dough and mix, then 1 TB at a time, add enough water until the dough just comes together, and all the flour is incorporated. Knead the dough into a ball and cover tightly in plastic wrap. Smoosh the dough flat into a hockey puck shape and refrigerate for 1 hour. 
  3. After the dough has chilled, preheat the oven to 325 degrees and place the dough on a well-floured cutting board or clean counter. Turning often, and using as much flour as you need to keep it from sticking, roll the dough into an even layer about ¼” thick, or until it is large enough to fit into your 9” pie plate with ½” overhanging. Move the dough to the pie plate and trim any excess dough, leaving that ½” overhang. Fold and pinch the edges of the dough around the pie plate so it’s nice and pretty. 
  4. Lay a sheet of aluminum foil over the dough and carefully on scatter pie weights (I use dried beans). Bake on the middle rack of your oven for 12 minutes. Remove the pie weights and the foil, prick the bottom of the crust with a fork, and bake for another 10 minutes. 

For the maple bourbon whipped cream:
1 cup heavy whipping cream
2 TB maple syrup
1 TB bourbon

  1. In a stand mixer, add the cream, maple syrup, and bourbon. Start the mixer at a low speed and work up to high to avoid splashing. Whip the mixture until it is thickened. Taste the whipped cream and add more cream, maple syrup, or bourbon according to your preference. If you’re shy, you might want to start with just a tsp or two of the bourbon. 

Tuesday, November 16, 2010

Lightened Up Green Bean Casserole


It will come as a surprise to no one when I tell you that I am a big fan of Thanksgiving. Besides being a holiday whose sole purpose is the celebrate food (let’s face it, that whole giving thanks concept is just an excuse to stuff our faces...and I’m okay with that), it’s one of only two holidays where my whole family generally congregates together - the other being our Passover seder, which I consider Thanksgiving for Jews (plus singing!). I love family congregation! Which is why I also never miss a wedding, graduation, or other fun family party.

Due to my current reduced circumstances, Husband and I decided to forgo travel this year and just stay at home. Thankfully our families are awesome - his parents (and their canine companion), my parents, and my sister, her husband and my nephew are all coming to town to celebrate with us. Yay! Also due to my reduced circumstances, I have a lot of alone time on my hands, and I spend a lot of it thinking about food. Okay, most of it.  As a result I’m not just excited for Turkey Day, I am Thanksgivingsessed! I had the menu all planned out a month ago. Actually, more like two. I have since also created an Excel spreadsheet that details ingredient totals, my shopping list, a to-do list for the week, and a full schedule for the day before and the day of. I may be crazy, but the first step is admitting you have a problem right? Anyway, I’m also playing it smart. I’m planning to tackle most of the cooking myself, so I have to make sure I have my game plan all worked out. How else would I have realized that while I'm baking two pies, I only have one pie plate?  No worries, the problem is already solved.  I do get flustered cooking on a schedule, but with everything planned to a T, how could anything go wrong? Yes, I know I just ensured that everything will go wrong. But between all the guests, there will be more than enough cooks in the kitchen to sort things out. I’m breezy!

Besides being in need of a fun project, our families have been so awesome and supportive this year, we’d really like to treat them a nice dinner. It’s the least we could do. So we’re going all out! A 16lb heritage turkey, free-range and organic of course, brined and roasted, and with all the fixins around the table: gravy, cranberry applesauce, grilled mashed potatoes, sourdough apple pecan stuffing (technically dressing since Husband is squeamish about bird germs), beets with a balsamic reduction, hashed Brussels sprouts, sweet potato rolls, and - as I mentioned - two kinds of pie for dessert. Apple and buttermilk pumpkin pie, with vanilla ice cream on the side. I’m sure I’ll be posting all about it after next week. Of course, a lot of those recipes aren’t mine (some are!), so I’ll post links at the bottom of this post in case someone is in need of ideas.  I can vouch for them all except the stuffing, though I'm sure it'll be delicious. And if those don't entice, I may have developed my own Thanksgiving side last weekend. Read on!

This isn't my first time hosting my family for Thanksgiving, but it is the first time since my big transformation. I wanted to keep all the familiar flavors, but put the Julie spin on them, so last weekend I tried out some recipes - roasted one of those cheap $5 turkeys from Vons and made gravy from pan drippings for the first time (killed it!). I also used it as an excuse to make some dishes that didn’t quite fit into my Thanksgiving menu.


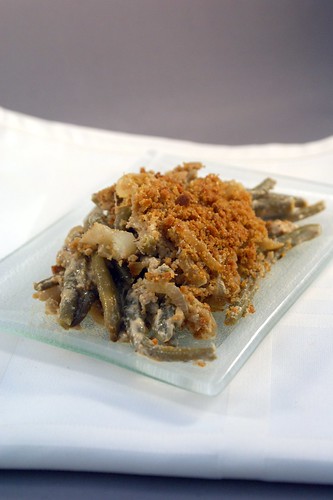
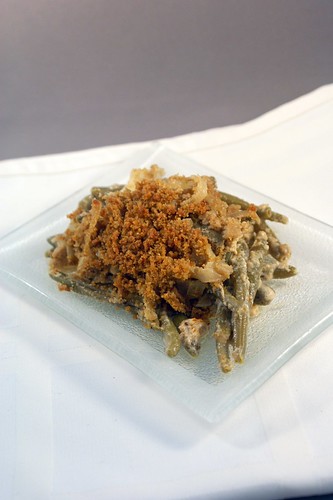
See, I had been toying with the idea of green bean casserole. Thanksgiving + Food Network = lots of mention of green bean casserole. I was thinking of the one traditionally made with condensed cream of mushroom soup and crispy fried onions on top. That dish doesn’t so much scream yummy deliciousness to me, more like heavy, preservative-induced stomachache. But the flavors of the casserole still appeal. Plump green beans in a creamy sauce with earthy mushrooms and fragrant herbs, topped with sweet onions and just a little crispy crunch for texture. Sounds good, right? Well I set about seeing if I could lighten the dish up and make it into something presentable. I don’t know if I accomplished presentable, but it sure was tasty. 

I started with frozen green beans - haricot verts from Trader Joe’s, actually. Then I created the mushroom cream sauce using evaporated milk. I hadn’t used evaporated milk before, and the stuff is just great. It’s just milk with some of the water evaporated out, so it’s already nice and thickened, but much lighter than using cream. I caramelized onions, since that’s my favorite way to eat them. But caramelized onions are soft and buttery, not crispy crunchy. No problem. After the onions caramelized, I added a little butter to the pan with some bread crumbs, and tossed everything together. I topped the green beans coated in the mushroom cream sauce with the onions and bread crumbs, and after it baked up, it came together juuuuust right. Plump green beans, creamy mushroom sauce, and sweet onions with a crunch. Mission accomplished!  Panko bread crumbs would probably  be even crunchier and better (I buy whole wheat panko), but I had some whole wheat bread to use up, so use whatever is easier for you.  Next time I might experiment with throwing some walnuts in as well, though I would probably catch flack from Husband, since he's really not a walnut fan.  It's terrible, I know.

I'm always fascinated by other families and their own traditions.  What are you doing for Thanksgiving?  Pot luck or solo hosting?  What's in the menu?  And finally, how delicious is Thanksgiving food?  Right?!


Green Bean Casserole

Makes about 18 servings

2 16oz bags of frozen green beans, thawed (or fresh and blanched)
16oz cremini mushrooms, sliced
1 12oz can evaporated milk
1 medium shallot, minced
5-6 garlic cloves, minced
2 tsp paprika
1 tsp ground black pepper
1/4 tsp cayenne pepper
1 TB dried thyme
1/2 tsp dried sage
1/2 tsp celery seeds (optional)
1 cup white wine
2 TB flour
4 TB unsalted butter, divided
2 medium onions, quartered and sliced
1 tsp white wine vinegar
1/2 to 3/4 cup whole wheat bread crumbs (~3 slices of bread) or panko bread crumbs
2TB olive oil
kosher salt to taste

  1. Preheat the oven to 375 degrees. You’ll also need a 9x13” baking dish. 
  2. In a medium skillet, heat 1TB olive oil over medium heat. Add the onions and a pinch of salt. Sweat the onions until their water is released, stirring often to prevent browning. Turn the heat down to medium-low and cook, stirring occasionally, until the onions turn golden brown and caramelize, about 45 minutes. 
  3. Meanwhile, in a large saute pan, heat 1TB olive oil over medium heat. Add the shallot and cook until soft, about 3 minutes. Add the garlic and cook for 1 minute. Add the mushrooms and a pinch of kosher salt, and cook until the mushrooms have given up their water and softened, about 7 minutes. Add the paprika, pepper, cayenne, thyme, sage, and celery seeds, mix everything together and cook for 1 minute. 
  4. Clear a space in the pan and add 2TB of butter. Once it melts, mix in the flour, and let the mixture cook for a minute or two to remove any raw flour flavor. Increase the heat to medium-high and add the wine to deglaze the pan, scraping up all the browned bits. Simmer the mixture until about half the wine has cooked out. Add the evaporated milk and stir to combine everything. Let the mixture simmer for about 3 minutes, until it has thickened a bit. 
  5. Turn off the heat and stir in the green beans, tossing until they are well coated in the mushroom mixture. Pour the green beans into your baking dish and set aside. 
  6. Once the onions have caramelized, add the white wine vinegar and toss to coat. Melt the remaining 2TB of butter, and when it has melted, add the bread crumbs and toss until the bread crumbs are well-coated with butter and evenly mixed with the onions. Spoon the bread crumb and onion mixture over the green beans in an even layer. Bake the casserole for about 45 minutes, or until the topping is a crunchy golden brown. 

Links for Thanksgiving dishes:
Cranberry applesauce
Sourdough apple pecan stuffing
Sweet potato rolls
Hashed Brussels sprouts

Wednesday, November 10, 2010

Pumpkin Spice Cake with Butterscotch Swiss Meringue Buttercream


One week before Halloween my adorable little nephew turned one year old. It was kind of a big deal for me. He is my only sister’s only child (thus far), and I absolutely love him to death. My sister threw a fun family party to celebrate, with a full compliment of party fixin’s - balloons, streamers, deviled eggs, and, of course, cake!

After we all met up in Reno a few months ago my sister gave me an assignment: come up with a recipe for my nephew’s first birthday cake. And I took it seriously. I didn’t want to let the little guy down! So I thought about flavors, researched recipes, and practiced a few test-runs to get things juuuuust right. And when I was confident in my creation, I handed the final, approved recipe over to my sis. Here are the results of her deft hand:


Way to decorate, sis!

Since the party was taking place so close to Halloween, my sister was thinking something with pumpkin. Pumpkin just so happens to be one of my favorite Fall flavors! I was looking forward to experimenting with recipes...just a tiny bit. There were just a few conditions. First, no chocolate. I guess the caffeine in cocoa isn’t great for the wee ones. Second, no lemon or banana cake. My sister isn’t a fan of lemon cake, and my mom is in the banana = ick camp. Such a shame on both counts, in my opinion. Finally, and most importantly, no cream cheese frosting. Sis doesn't do cream cheese frosting - it’s the tangy flavor. She hates it. She’s actually foregone eating cupcakes from her favorite local cupcakery because she unknowingly bought one with cream cheese frosting.

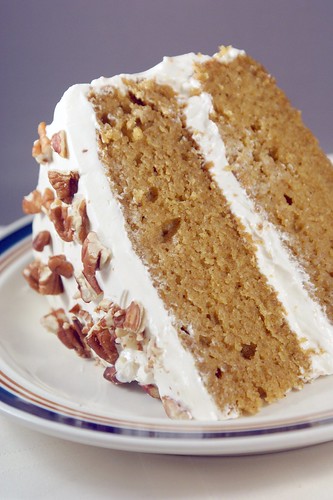
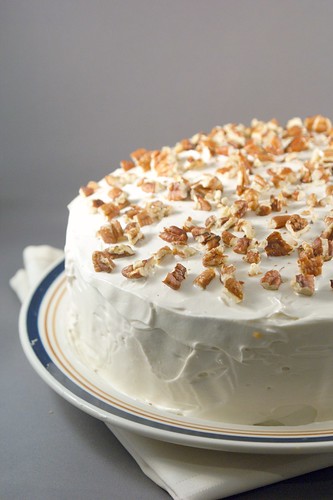
With these parameters in mind, I came up with a spiced-up pumpkin cake. Since the more traditional cream cheese frosting was off the table, I took inspiration from my favorite pumpkin cookies, and decided on a butterscotch buttercream. Pumpkin and butterscotch is a fantastic combination. Ever had it? You should. It’s yum. But butterscotch sauce is sweet. Super duper sweet. Husband says I’m just extra sensitive, but I thought my first butterscotch buttercream - a simple butter and powdered sugar mixture - was way too sweet. I didn’t see a way to reduce the sugar, so I just made some adjustments to help balance it. I added some acid. A little lemon juice really brightened up the flavor and gave the sweet somewhere to go. Also, I switched to a Swiss meringue buttercream. The light, fluffy texture did a good job of distributing the sweet on my palette, and was especially delicious paired with the warm spices of the cake.

The third and final test run I made a finished cake and brought it over to share with some lovely ladies I know. This cake here...

...was a big hit! Our host insisted on no leftovers, sent us home with every morsel of food, but when I asked her if she wanted the last slice of cake, she grinned sheepishly and nodded. With such approval I knew the recipe was ready for sisterly publication.

The day before the party my sister put her expert baking skills to action and whipped up my nephew’s birthday cake while I stood wringing my hands in the corner, prepared to die of shame should anything not turn out as expected. Even with a dozen other party provisions to prep, she made an awesome cake with an adorable smash cake of my nephew’s very own to match. She’s a rock star!


Whether for a special Fall occasion or just because cake is delicious, this cake is light and tender, very fragrant from the warm pumpkin spices, and so worth making! Sufficed to say I did not mind making - and subsequently eating - this cake three times.

Nephew's First Birthday Cake
(AKA: Pumpkin Spice Cake with Butterscotch Swiss Meringue Buttercream)

adapted from Martha Stewart

For the cake:
2 cups AP flour
1 tsp baking soda
1 tsp baking powder
1 tsp kosher salt
1 tsp ground cinnamon
1/2 tsp ground ginger
1/2 tsp ground nutmeg
1/4 tsp ground cloves
1/4 tsp ground allspice
1 cup sugar
1 cup dark brown sugar
1 cup (2 sticks) unsalted butter, melted and cooled
4 large eggs
1 can (15 ounces) pumpkin puree
1 tsp vanilla extract

  1. Preheat the oven to 350 degrees. Grease two 9-inch cake pans with baking spray, line the bottoms with parchment paper, then spray the parchment paper. 
  2. In a medium bowl, whisk together the flour, baking soda, baking powder, salt, cinnamon, ginger, nutmeg, cloves, and allspice. In a large bowl, whisk together the sugar, brown sugar, butter, eggs, pumpkin puree, and vanilla. Add the dry ingredients to the wet, and whisk until just incorporated and smooth. 
  3. Pour the batter evenly between the two prepared cake pans. Bake for 25-30 minutes, rotating the pans halfway through, until a cake tester (i.e. toothpick) inserted in the middle comes out clean. Transfer the cakes to a wire rack and cool completely. 

For the buttercream:
4 large egg whites
1 1/4 cup sugar
1 1/2 cups (3 sticks) unsalted butter, room temperature
2 tsp vanilla extract
pinch of sea salt
1TB lemon juice (or more to taste)
1/2 cup butterscotch sauce (see below)

(makes about 4 cups)

1/2 cup toasted pecans, chopped (to garnish the finished cake), optional

  1. In the bowl for your electric mixer (or a medium heatproof bowl if you’re using a hand mixer), combine the egg whites and sugar, and place the bowl over a small pot of gently simmering water. Whisking the mixture constantly until the sugar has fully dissolved, about 2-3 minutes. Rub a little between your fingers, and if there is no hint of a grainy texture, it’s done (or when it reaches 160 degrees in temperature). 
  2. Place the bowl in your mixer fitted with the whisk attachment, and set at high speed, beat the egg mixture until stiff peaks form. Continue beating until the eggs are fluffy and the mixture has cooled, about 5-6 minutes. Make sure the stiff peaks don’t become dry, you want them to stay glossy. 
  3. Switch to the paddle attachment and with the mixer on medium-low speed, add the butter 2 TB at a time, waiting until it is fully incorporated into the mixture before adding the next addition. If the buttercream begins in separate, turn the mixer up to medium-high speed and beat for a few minutes, until it is smooth again. Add the vanilla, salt, lemon juice, and butterscotch sauce (make sure it’s cool, you don’t want to melt your buttercream), and beat until incorporated. Again, if the mixture separates or thins out too much, beat on medium-high speed until it is light and fluffy again. Taste the buttercream and add more salt, lemon juice, or butterscotch if you think it’s needed. Reduce the mixer speed to low and beat for 2 minutes to eliminate any air bubbles. 
  4. Trim the tops of the cake layers so they are flat. Stack the first layer onto a cake plate and using a spatula, spread about 1/2 cup of buttercream in an even layer over the top. Place the second cake layer on top, making sure the two layers line up. Spread a very thin layer of the buttercream around the cake for a crumb layer. This will glue the crumbs to the cake, so they don't show through the light colored buttercream. Then apply a regular, thick layer of the buttercream, until the cake is evenly covered. Sprinkle the top with the toasted pecans and enjoy! 

For the butterscotch sauce:
1/2 cup (1 stick) unsalted butter
1/2 cup sugar
1/2 cup dark brown sugar
3/4 cup light corn syrup
1/2 tsp sea salt (or more to taste)
1/3 cup heavy cream
2 tsp vanilla

adapted from Martha Stewart
(makes about 1 1/2 cups)

  1. In a medium skillet, melt the butter over low heat. Add the sugar, brown sugar, corn syrup, and salt, and increase the heat to medium to bring the mixture to a boil. Let it cook for 2 minutes, then remove the pan from the heat and stir in the heavy cream and vanilla. Allow it to cool at room temperature. It will seem too thin at first, but don’t worry, it’ll thicken as it cools. 

Tuesday, November 2, 2010

Chipotle Maple Grilled Tempeh Tacos


I have a new love. It’s a bit controversial. I kept it quiet at first because people wouldn’t understand. See, me and tempeh? Yeah, we’re kind of a thing.

All joking aside, I am totally loving tempeh at the moment, and it is controversial...at least in my household. I’ve always counted my blessings that Husband likes everything when it comes to food. Everything. There are preparations he doesn’t prefer, but I’ve never come across an ingredient he just doesn't like. He’ll even do tofu if it’s prepared well. But he doesn’t like tempeh. I’ve done a few different cooking methods, vastly different flavor combos, and he hasn't liked any of them. He just won’t eat it. Tragic, right?!

I have a feeling that’s a common problem with tempeh. You either love it or...not so much. While not the case with Husband, I wonder how much of that not-liking is linked to ignorance of what tempeh is. It is not textured vegetable protein. It is not tofu. It is a soy-based vegetarian protein alternative, but you know what? So is edamame. Tempeh is made from soybeans that are fermented into a cake, and the tempeh I am familiar with also has other whole grains added, I believe for textural and flavor purposes - anything from millet, to brown rice, to barley. Yes, it’s true. This is total crunchy granola hippie food. But hippie food has been in forever now, so let’s give peace a chance, k? Anyway, when was the last time you heard about a tempeh recall due to contaminated soybeans?

Tempeh is also crazy kinds of good for you. It’s really high in protein and fiber, which fill you right up, but with much less calories and fat. Win win. It’s also made from fermented soybeans. There’s a lot of controversy out there right now about soy and whether it is ultimately beneficial or harmful to our health. Every study says something different, depending on which industry is behind the funding, but I recently read an article that was very interesting. It separated fermented soy products from non-fermented soy products, saying they most likely affect the body differently. Fermented soy products like tamari, miso, and tempeh are good for you and have all sorts of lovely health benefits having to do, I believe, with the bacteria used to ferment the products. Non-fermented soy products, like tofu and soy milk are actually the leftovers from fermented soy products - the result of an effort to avoid waste - and are supposedly more questionable upon regular consumption. I have no idea if it’s true, but it’s interesting, no?

And most importantly, tempeh is delicious! It has a lot more flavor and texture than tofu - like if a block of tofu and a veggie burger had a love child.  It has a nutty, meaty flavor, and a firm, chewy texture. Chewy like whole grains, not chewy like octopus, just to be clear. I've noticed that each brand of tempeh is a little different. I prefer the Trader Joe’s brand. It has millet and brown rice, and a nice mild flavor that takes on sauces very well. I’ve also seen other brands at Jimbo’s, Sprouts, and Henry's.  They're probably about the same, but I can't say for sure, since I've never tried them.  When it comes to prep, you can treat tempeh just like extra extra firm tofu.  Cut it into slices or cubes, or cut it in half and treat it like a veggie burger.  Marinate some flavor in before, or dunk it in sauce later.

Not helping its image, tempeh is generally sold with the questionable-looking fake meat products like tofurkey and fakin’ bacon. To make matter worse, I’ve actually seen tempeh that has been pre-seasoned to taste like various meat products. Bleck! Make sure what you’re picking up is just regular unflavored tempeh.


Tempeh is a very versatile food. I’ve seared it, drizzled orange-maple sauce, I’ve sauteed it in spicy peanut sauce, and now I’ve grilled it in chipotle maple sauce. It all works...deliciously! I used one of the famous Stonewall Kitchen sauces to add in flavor this time. Since it was a chipotle maple grille sauce, I figured grilling would be the appropriate cooking method. And, man oh man, is grilled tempeh delicious. That smoky charred flavor was totally addictive. I kept eating pieces off the grill, and these yummy tacos almost didn’t happen!

Speaking of yummy tacos, these tacos were...um...yummy! The fixin’s are, of course, optional and up to you, but I like my tacos with cabbage, guacamole, and some fresh pico de gallo. The sauce was a good compliment and the flavor came through really well.  It was sweet, though not cloying, and I actually did get a bit of heat from the chipotle.  I would definitely use this sauce again, I think it may even have been my fav.  With the fresh vegetables and acid from the lime, it ended up being even more delicious than the bits I ate off the grill.  I'm so glad I restrained myself.  Oh, and those tortillas?  Got them at Sprouts.  They contain 4 ingredients: masa, lime, salt, and water.  No icky preservatives or crazy additives.  I love 'em.

I hope whatever preparation you choose to employ, you will give tempeh a chance. It’s entirely possible you won’t like it, as Husband doesn't.  But on the other hand, you may discover a new food that is not only very tasty, but also seriously good for you and economical to boot! Have you ever tried tempeh? On which side do you fall?

Chipotle Maple Grilled Tempeh Tacos

Makes about 8-10 tacos

2 8oz packages of tempeh, cut into 1/2” strips
1 cup Stonewall Kitchen Maple Chipotle Grille Sauce
5-6 large tomatoes, chopped
1 medium yellow onion, finely chopped
1/2 cup cilantro, finely chopped
1-2 limes
1/2 head green cabbage, finely shredded
2 ripe avocados
salt and pepper to taste
corn tortillas
  1. In a bowl or tupperware, combine the tempeh and grille sauce, making sure the tempeh is well-covered. Cover the container and let it marinate for at least an hour. When you are ready to grill, let the tempeh come to room temperature. 
  2. Preheat your grill to medium-high heat and lube it up with some oil. Add the tempeh in an even layer, and let it cook undisturbed for 3-5 minutes, until it gets some good grill marks. Flip all the pieces over and grill for another 3-5 minutes. Brush some of the leftover marinade sauce on the cooked sides, and flip the pieces over again. Grill for a minute or two to caramelize the sauce a bit. Brush more sauce on the upturned side, and flip one last time to cook for, that’s right, one more minute. Remove the tempeh from the grill and let it cool down while you prepare the rest of your taco components. 
  3. To make the pico de gallo, mix the tomato, onion, and cilantro in a small bowl. Sprinkle with a pinch of kosher salt and pepper. Squeeze the juice from a lime over the mixture (if it’s a very juicy lime, you might want to start with just half), and stir to combine everything. Taste the salsa, and adjust the seasoning.  To make the guacamole, scoop the avocado flesh into a bowl, and add the juice from half a lime and a pinch of kosher salt and pepper. Mash the mixture and adjust the seasoning to taste. 
  4. To build the tacos, place a big pinch of cabbage on a tortilla. Add about 3 slices of tempeh, and top with guacamole, pico de gallo, and a healthy squeeze of lime juice. Enjoy!